Home Blog Page 400

vEveresting: You Can Do It!

vEveresting: You Can Do It!

Mt. Everest: 29,029’ (8,848m) of awe-inspiring, difficult, adventurous, dangerous climbing… some people have looked at Everest and thought climbing it is necessary. Others call those people crazy! 

Well, call me crazy but I did it. No, I didn’t fly to Nepal and climb the actual mountain. I’m not a former pro athlete or extraordinarily gifted human, nor am I an adventure/adrenaline junky looking for a fix. I’m just a 50-year-old son of God who has a family, a job, a dog, a bicycle, and I landed myself in the Everesting Hall of Fame. And you can too!

The Backstory

Why would I do such a thing? Well, a friend of mine from work invited a bunch of work friends to ride from one side of the USA to the other in an effort to raise money for cancer research. I was excited to be invited by him to do it, only I hadn’t ridden a bike in years. When I was a Boy Scout our troop had ridden from Chico, California up to the north shore of Lake Tahoe (roughly 100 miles). It took us 2 days to ride up but only one day to ride down. I thought I would never do anything that extreme again.

In 2016 I bought my first road bike, a Razik Vortex. It’s a custom frame that I’ll bet you have never seen in person. (My friend Ryun is one of the co-founders of the company and I’m proud to own one of his bikes.) In 2017 I got a new job in Dallas, Texas and moved my family to where the wind never stops and temperatures reach 70 degrees in January. I joined the Shawnee Trails Cycling Club (2018 Bicycle Club of the Year) and learned how to ride in a group.

Then in 2018 I did finally participate in the company bike ride, Boise ID to Salt Lake City UT. We went on to raise over $1 million dollars for The V Foundation that year!

2019 was when cycling really took off for me. I averaged 5 rides and 100 miles per week. My uncle had shown me his Wahoo Kickr and Climb setup, and introduced me to Zwift. As a video game junkie growing up, I couldn’t wait to get set up, so I begged my wife for an early anniversary/birthday/Christmas present and bought myself a Kickr.

On January 2, 2019, I took my first Zwift ride. 356 days later, I rode my bike up the height of Mt Everest.

Everesting is described as fiendishly simple, yet brutally hard. Ride hill repeats on any hill anywhere in the world (or on Zwift) in a single activity until you climb the equivalent height of Mt. Everest. The concept was created by Hells 500, who also control the induction into the Hall of Fame. Everesting.cc contains the rules to follow. Once you are inducted you are worthy to wear the Grey Stripe kit. I can’t wait to get mine.

I don’t know how many have tried and failed, but just over 4,500 Everesters have succeeded and only 360 have been done on Zwift.  I chose to do my first vEveresting (virtual Everesting) on Zwift versus IRL to test my stamina, feed and hydration strategies, and my resolve to actually complete the challenge.  I didn’t raise money for any charity, but many do, and I wish I would have.  I will next time!

Warwick Petschack, a friend of mine in Australia, inspired me while I rode with him as his sherpa on the Alpe du Zwift (ADZ) in Watopia while he completed his vEveresting. After he completed it and was inducted into the Hall of Fame he actually followed up with me and offered to share his planning spreadsheet with me so I could plan my own attempt. He was relentless in his help, encouragement, and patience with me as I peppered him with questions. Without him I don’t know if I would have done it.  Thanks, Wazza.
Ready to go

My Ride

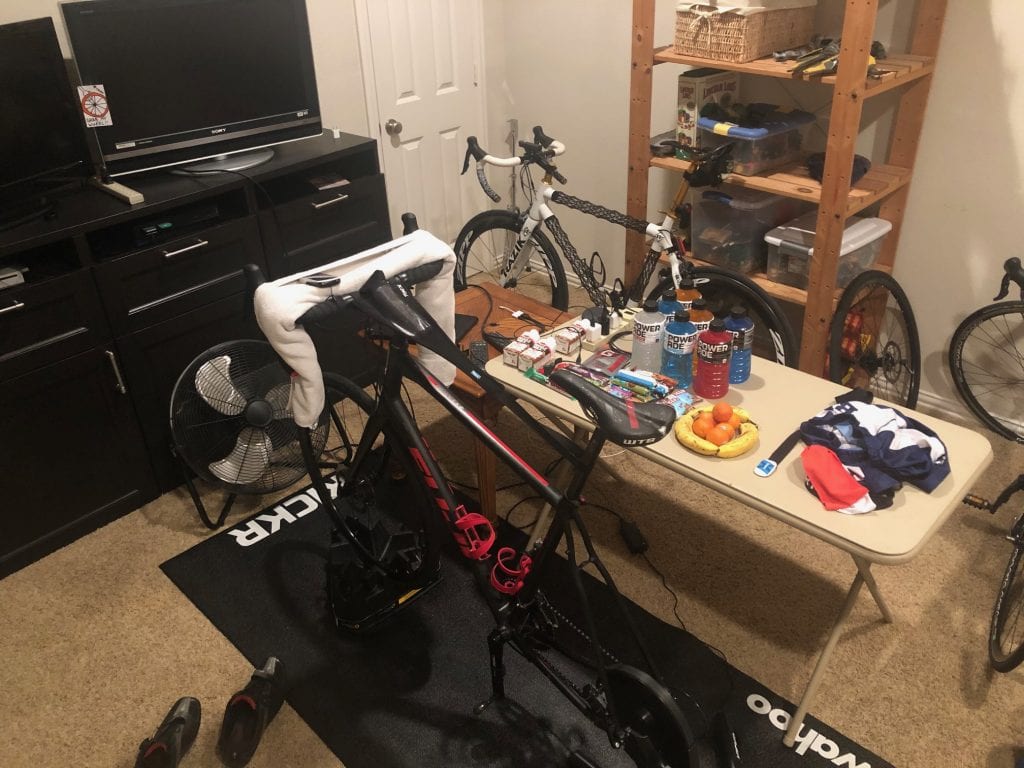
Christmas Eve Eve, the day before the ride I collected all my food/hydration items, charged all of my batteries, stripped down and weighed myself and then calibrated my trainer. The weigh in: 195lbs (88.5kg). My height, static for the last 30 years: 6’5” (196 cm). Yes, I’m tall and thin… but not too thin because I love ice cream and it was Christmas Eve for heaven’s sake so I was enjoying my wife’s wonderful cooking. At 6:30 pm I told my family I was headed to bed, I turned on a couple of fans for white noise and set my alarm for 12:30am.
The journey begins!

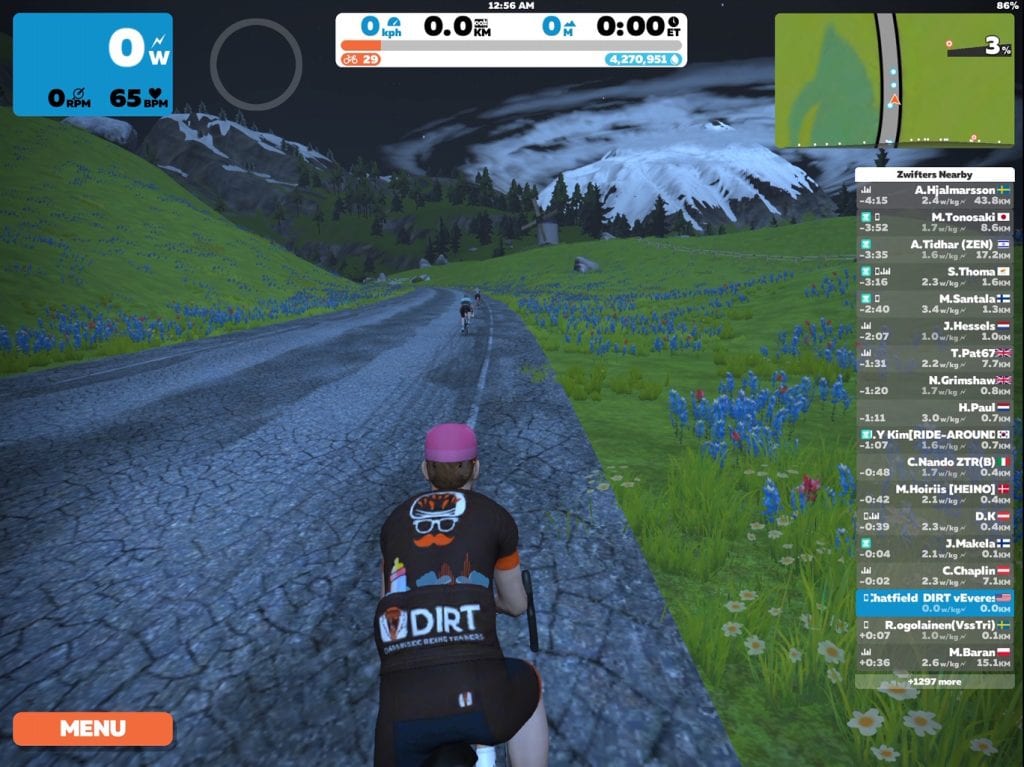
Christmas Eve morning, the alarm went off and I went to the kitchen, ate a bowl of oatmeal and headed upstairs to change into my first kit. 12:57am I started riding the Road to Sky route on Watopia. I stayed in Zone 2 with an average heart rate of 120 and max of 135.  I averaged 175-200 watts on the climbs and just under 17 hours total time with 8.5 times up the ADZ, and a little more for luck.

I took this virtual selfie at Dutch Corner #7 with just over 9000m of climbing. I had vEverested!
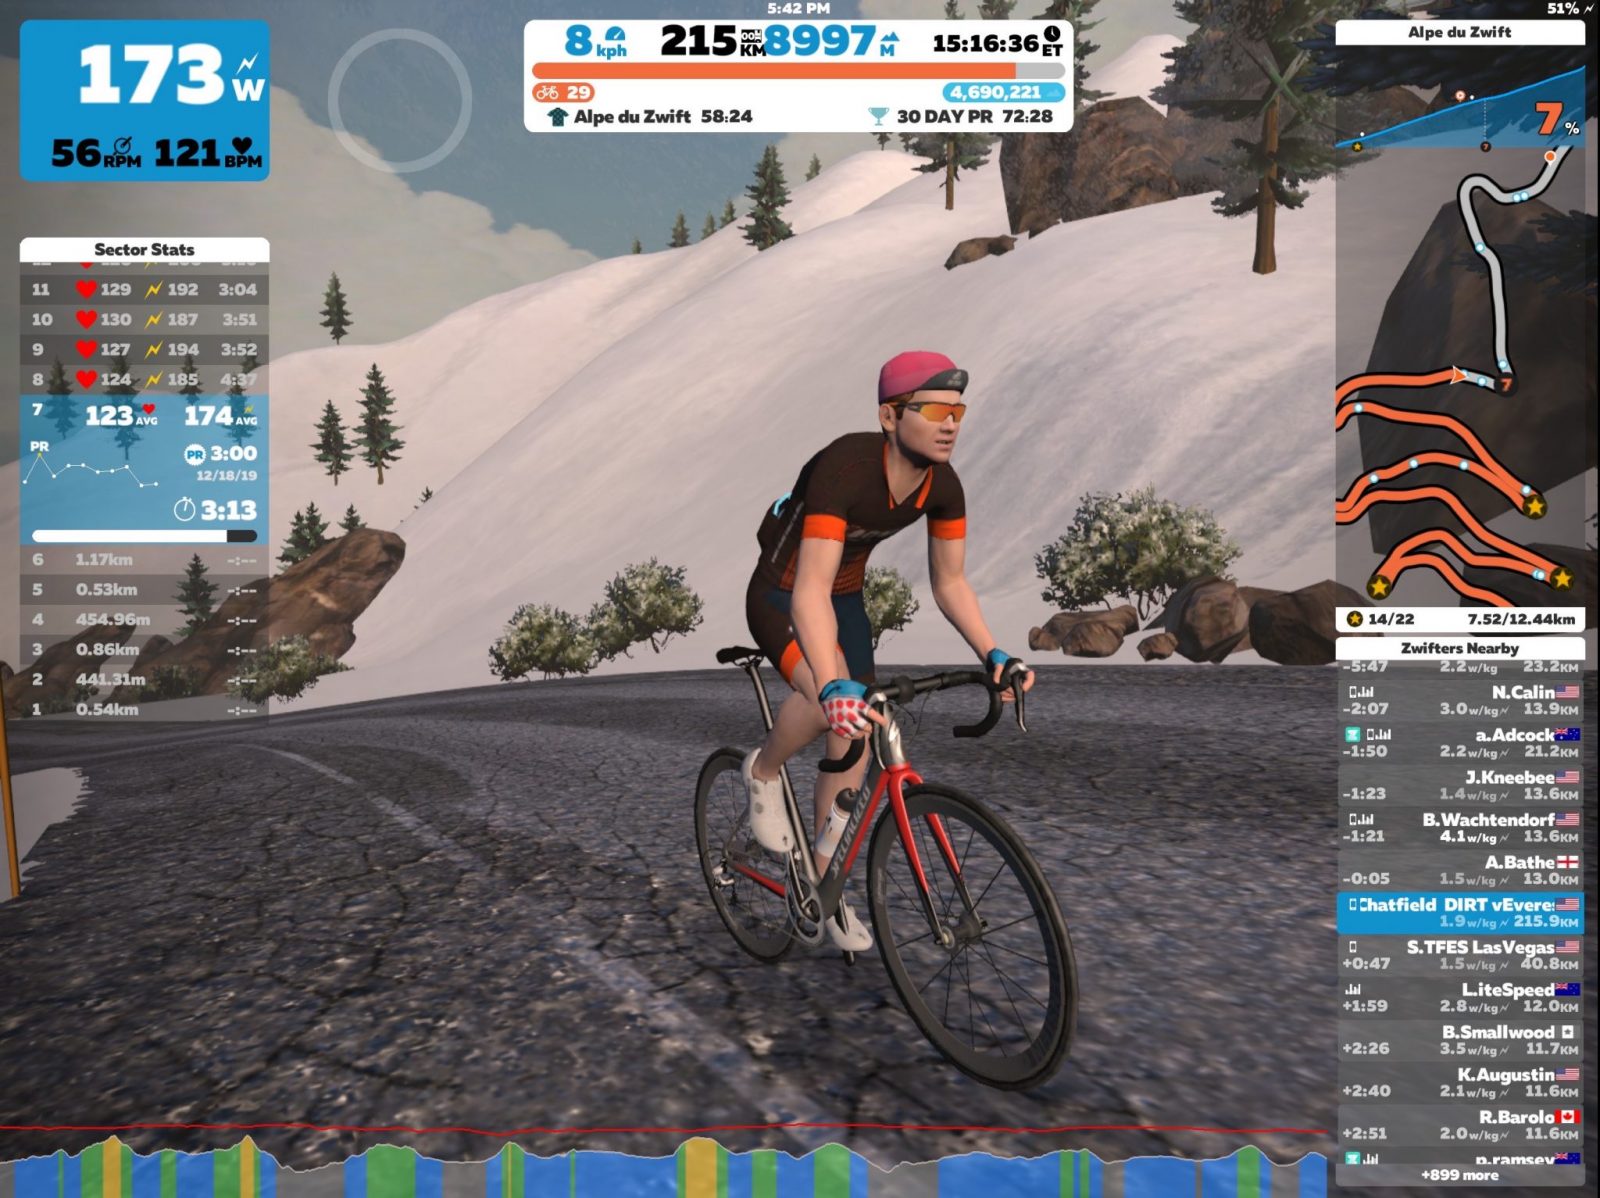
But that makes it sound so easy. It wasn’t!

What a ride. 134 miles in 15:17:34 of actual ride time, that means my butt was on the seat (or I was standing) for a long, long, long time. A normal butt isn’t used to that, and since my wife tells me that I have no butt, it seemed impossible.

Strategy 1: get off the bike while descending ADZ
Strategy 2: change kits after each third ascent.
Strategy 3: chamois cream!

I chose to start in the dark so I could hopefully have family support at the finish. This meant that the first 4 ascents I was on my own with no pit crew for support.  I turned on my favorite playlist and hit the hill with a measured effort that I could sustain for hours. I planned a bidon of water for each ascent as well as 30-50 carbs per hour. Real foods early in the ride and gels and sugary drinks for later in the ride. 

vEveresters add the tag “vEveresting” to their Zwift profile name which means anyone that sees it knows you are vEveresting and many will ride with you, congratulate you, give you ride ons, or just encourage you to keep going. These wonderful sherpas made it a much more enjoyable experience, especially during the 6th and 7th ascents when it was difficult to want to keep riding and my butt was telling me that I was crazy to push on. A quick shower and kit change between ascents 6 and 7, another application of chamois cream, and I was ready to continue.
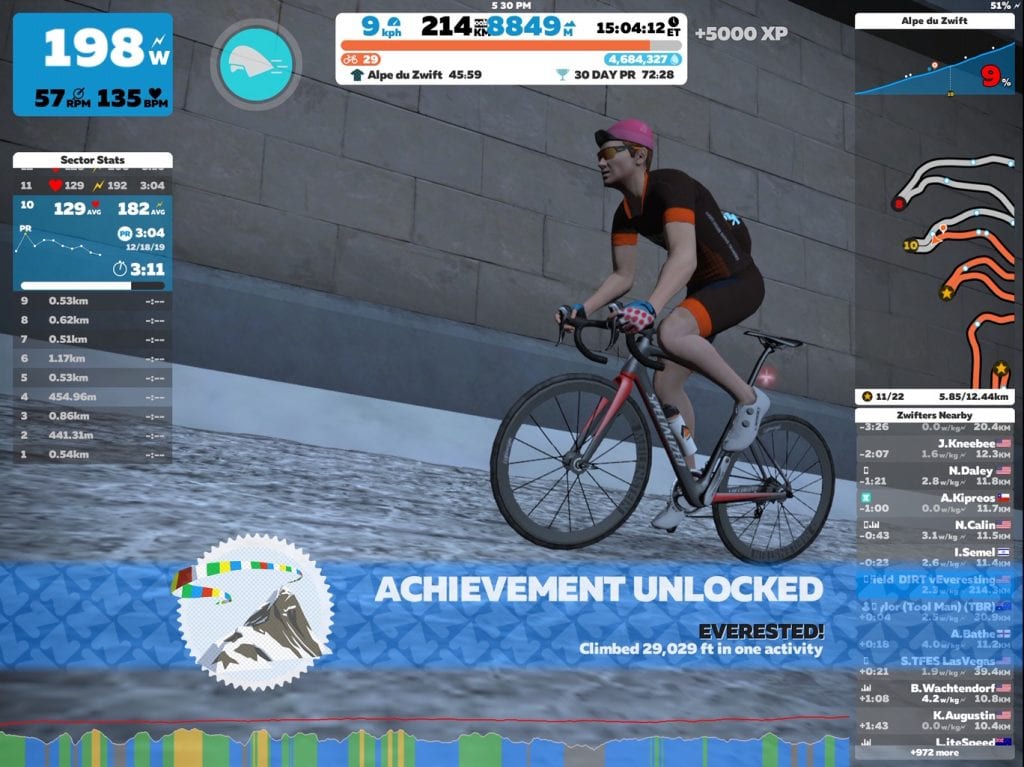
Christmas Eve was wearing on and my family was missing me, so I asked my wife to record video of my Zwift arrival at 8848m to which my exclamation of “YESSSSSS!” was well received. I didn’t stop there though. I knew that I needed to ride some more to ensure that I had enough climbing to get me into the Hall of Fame, so I rode on to 9006m and then stopped. I then went downstairs and we watched White Christmas as a family while eating chicken wings and drinking egg nog. Merry Christmas to me!
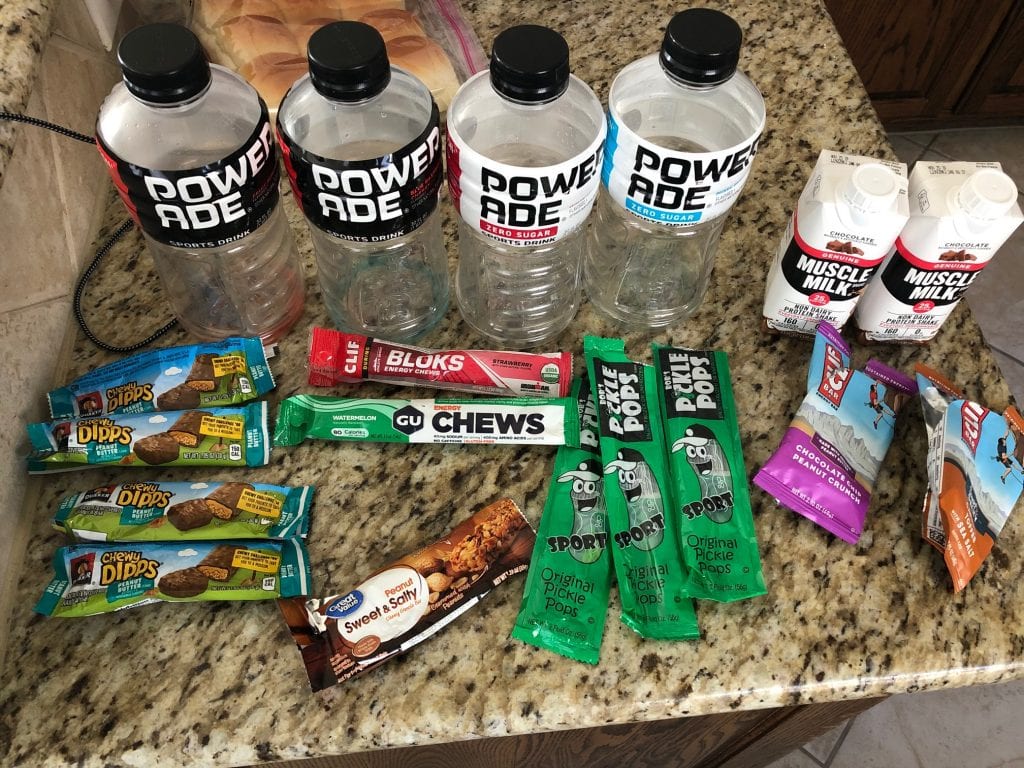
Fuel for the fight

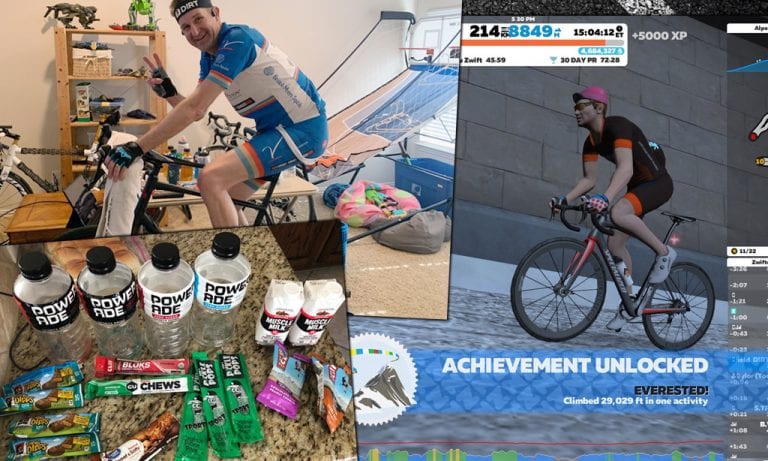
In total, I ate 2 Clif Bars, 5 granola bars, 3 mandarin oranges, 3 bananas, 1 omelet (thanks dear), 1 Clif Bloks, 1 Gu Chews, 2 Powerade Zeros, 2 Powerade regulars, 2 Muscle Milks and 3 Bob’s Pickle Pops (when my legs started to cramp).
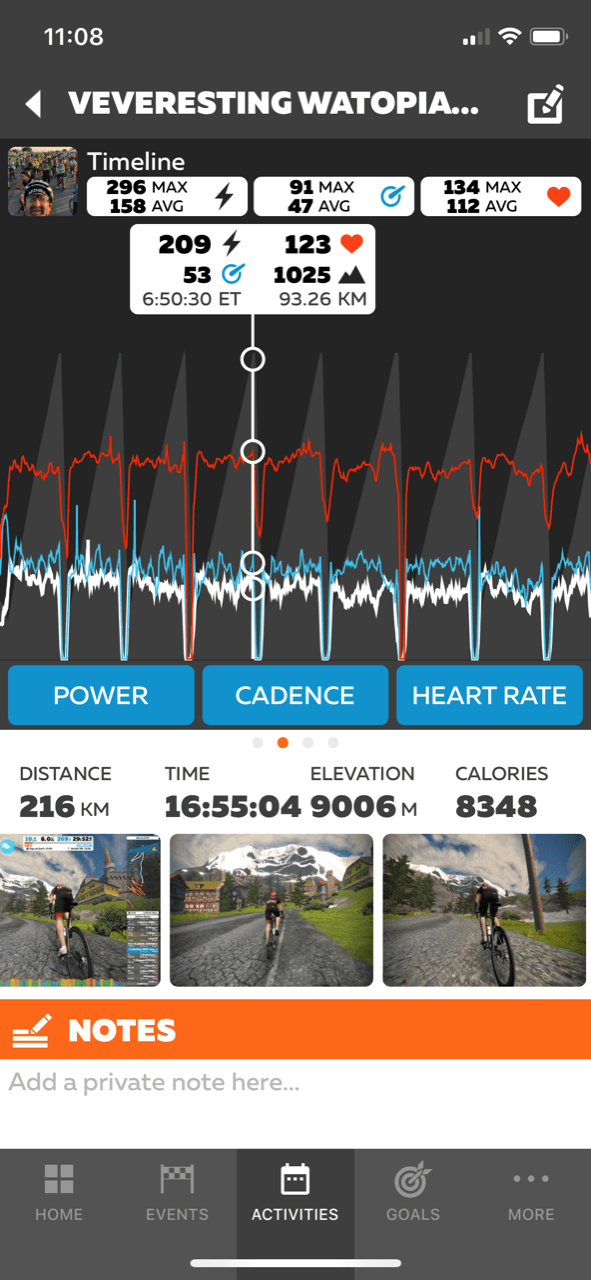
Activity screenshot

Everesting Support

If you are interested in knowing more about Everesting, there are a couple of great FaceBook groups to help you plan. Hells 500 hosts the Official Everesting Discussion Group which includes many helpful posts.  The Zwift vEveresting Planning, Tips & Coordination group, created by Howie Snyder, has great info and their group is vEveresting up the ADZ on Leap Day 2/29/2020. There is also a definitive guide to Everesting posted by Sir Guy Litespeed which is very helpful for either indoors or IRL.

If you are interested, there are other individuals and groups planning their vEverestings and Everestings and I encourage you to join them or choose your own crazy goal for 2020. Make it spectacular, worth working hard for, and go do it! 

Future Plans

As for me, I’m planning my first IRL Everesting for this summer in Utah, USA, where there are some of the most beautiful mountains I have ever seen. I will be raising money for The V Foundation and cancer research. 

Want to join me IRL?
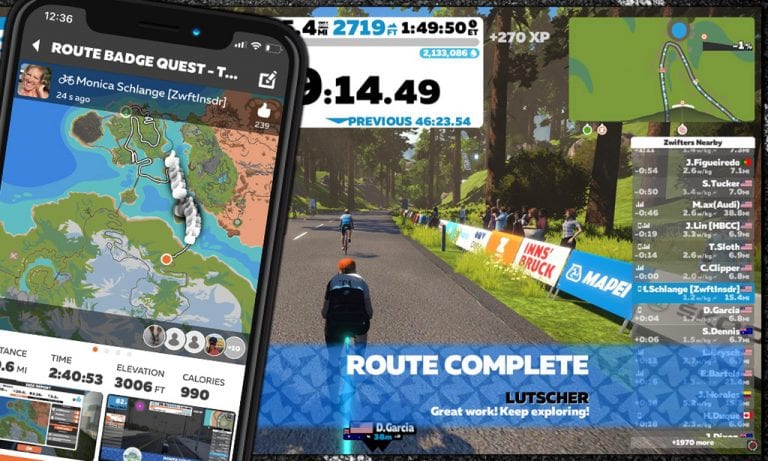

Couch to Route Hero, Week 3 Done

Couch to Route Hero, Week 3 Done

Editor’s note: Monica is undertaking the “Couch to Route Hero” challenge of riding all 67 “free-ridable” Zwift routes (and getting all the badges) in 11 weeks. Each week she shares her story of the previous week’s struggles and accomplishments. Follow along on her journey, take the challenge yourself, and be sure to give her a Ride On if you see her on course!


Looking at the schedule for this week was daunting. But I took it one day at a time. As each difficult ride ended I realized more and more that I’m the most amazing cyclist in the world! 

The difficulty of this plan ramped up very quickly. Last week included four days of mild riding, with one day that had a 3 bidon route in it. THIS week was a 3 bidon, a mild ride, a 3 bidon, a mild ride, and then my first 4 bidon! My legs and my heart can’t understand what’s happening to them right now.

How the Week Played Out

I added 7 more badges to my stash! 23 down, 44 to go. I’m getting there! 

This week I rode 98.12 miles, climbed 8,360 feet, with 7 hours and 52 minutes in the saddle. In about 12 weeks this quest ends with the PRL Full route. Oddly enough, this week’s entire effort looks similar to that one final PRL Full ride. Lord, have mercy! 

Routes I completed in week 3:

Lutscher

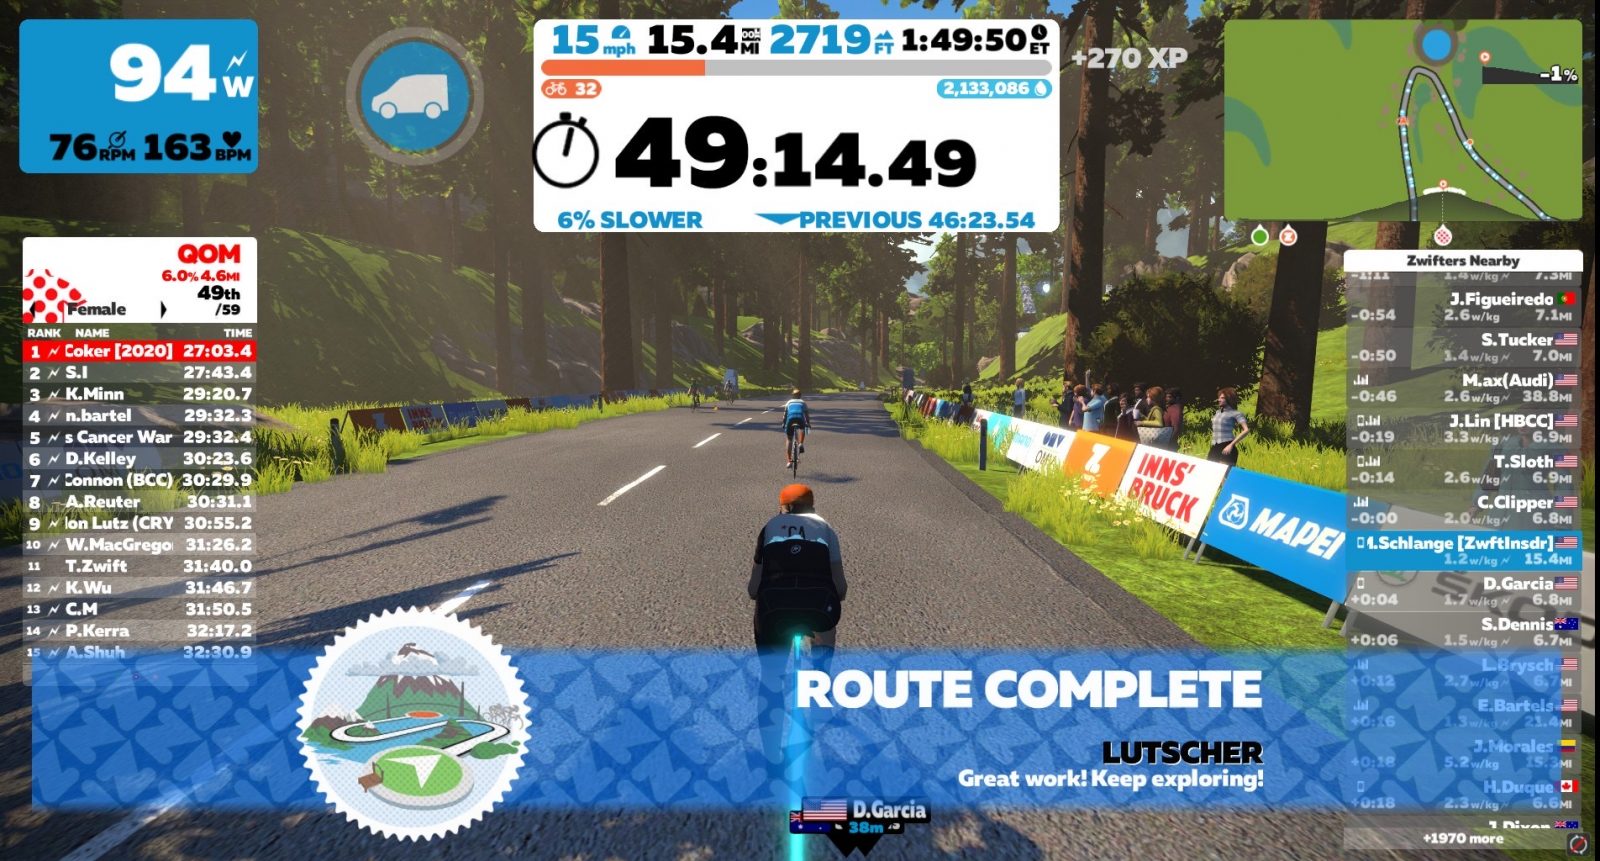
Lutscher has got to be some cruel joke someone at Zwift HQ is playing on all of us. The lead-in to the segment is a climb to the top of the ~1400′ Innsbruck KOM. which means to finish the route you end up climbing the KOM a second time! “We get it ZHQ! You have all the power!”

The ride started out painful enough… climb, climb, climb. I hoped to entertain myself and maybe others too so sent a message to those on the mountain with me. “Anyone else feel like it’s going to be your resolve that gets you up this mountain more than your legs?” Two guys agreed. And from there it was a conversation of encouraging each other up the climb. Or distracting each other. Either way, it worked! What a way to start the week! 

I DID get Ride Ons!

Is there anybody out there?

For my four bidon route I decided Watopia’s Three Sisters would do. About 3 miles into my ride I realized I hadn’t received a single Ride On. Strange! I did some poking around to make sure nothing was wrong on my end of things. And then I remembered… I’d noticed this had happened once the week before. My Ride Ons didn’t show up until the end of my ride.

I didn’t really know how much I enjoyed giving AND receiving them until it was a big fat zero. Especially on a long ride! This may seem silly, but oftentimes I’ll say the name of the person who gave me the ride on, and/or will salute and then push myself just a bit more. So riding without them was sad. AND I wasn’t getting extra Drops from them either! “Add this to the list of changes that need to be made, ZHQ. Remove lead-in for Lutscher, and let Monica see her Ride Ons during her rides. kthxbye.”

As I rode up the Epic KOM in Watopia another rider reached out asking what route badge I had picked for the day. He was doing the same one! It was fun to keep in contact. At times I’d even watch his ride as he was much faster than I. It was entertaining! 

When my ride was over I checked the saved activity in the Companion app. I had received over 200 Ride Ons!!! I knew I was well-loved! 

How about you?

Which routes did you do? Did you make any new friends during them? Did you find out you’re ALSO the most amazing cyclist in the world? I know I’m not the only one standing at the top of this, the world’s largest podium!


How the Race Was Lost: the Dreaded ANT+ Drop (TDZ Stage 5)

43

How the Race Was Lost: the Dreaded ANT+ Drop (TDZ Stage 5)

Continuing my theme of racing each stage of Tour de Zwift, this morning I tackled stage 5: 2 laps of New York’s Gotham Grind.

According to ZwiftPower, this was my 300th Zwift race. Thinking back, I’ve found many ways to lose races over the years: lack of course knowledge, poor fitness, strategic mistakes, getting dropped on climbs. It’s fair to say the vast majority of my losses can be pinned on myself!

Today’s loss, though, was of a different sort. A bit like suffering a mechanical in an outdoor race. But I’m getting ahead of myself…

The Warmup

The race began at 6:11am, so I set my alarm for 5:10. Rolled out of bed, grabbed my kit, then headed upstairs for my typical pre-race ritual: a piece of caffeine gum and some PR lotion on the legs. Hopped on early and got a nice 30-minute, ~10-mile warmup in on Tempus Fugit.

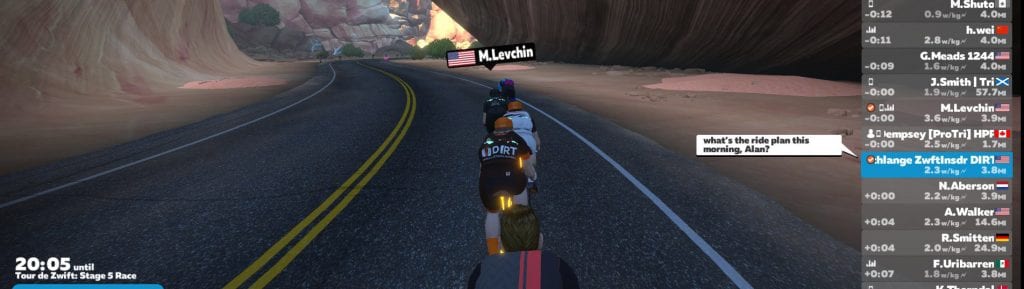
My buddy Alan Dempsey (a pro triathlete and coach from Canada) dropped in and rode with me a bit. He was beginning a 3-hour effort at 55% of FTP. I was about to do an 11-mile race! Two very different training plans.

The Start

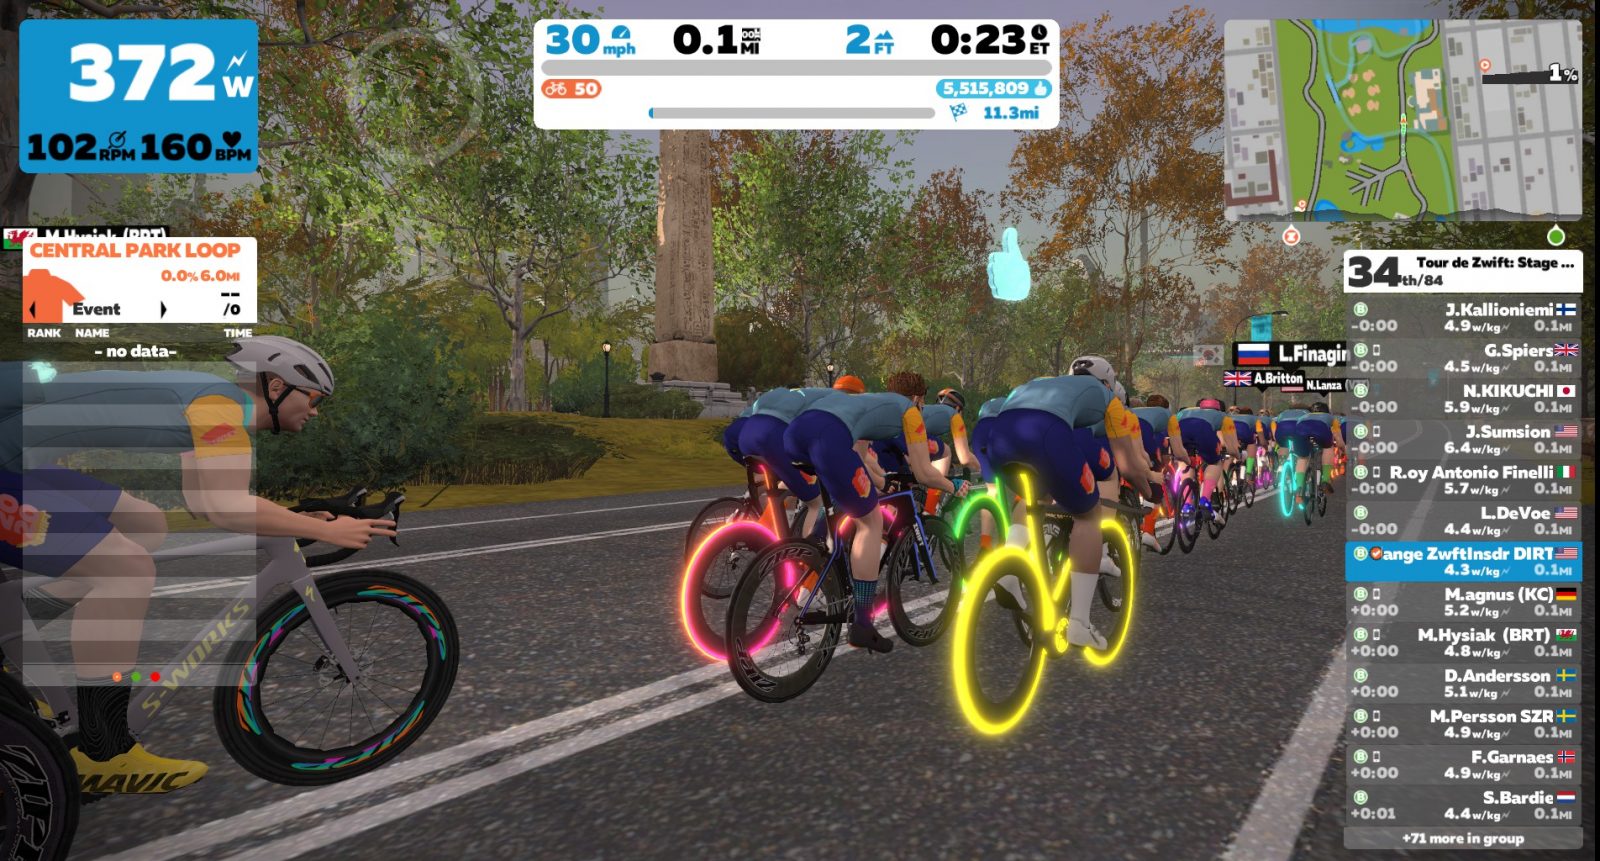
The race started hard and fast, and I averaged 340 watts for the first 2 minutes to stay with the front group. There were definitely some strong riders pushing the pace! We flew around Central Park, barely slowing up the rises. And there are lots of rises on this course. Gotham Grind has no long or steep climbs, but it’s full of 1-3% ups and downs. This makes for a tough race, since you’re never able to rest for any significant amount of time.

Holding on for the fast start

I knew at this pace no breakaway was going to get away early and stick, so I just sat in the draft and made sure no gaps opened up ahead when the group strung out up the inclines. The effort was hard, but doable: I knew I could hang with the front until the finish. But I still had to do the work to get there.

The Middle

After the first lap, our starting group of 84 was down to 36. And while there were definitely a few sandbaggers in the mix who were pushing the group’s speeds a bit, it wasn’t anything like stage 1 where I couldn’t even hold on to the “Super B” efforts of the Zinners.

The Dreaded Drop

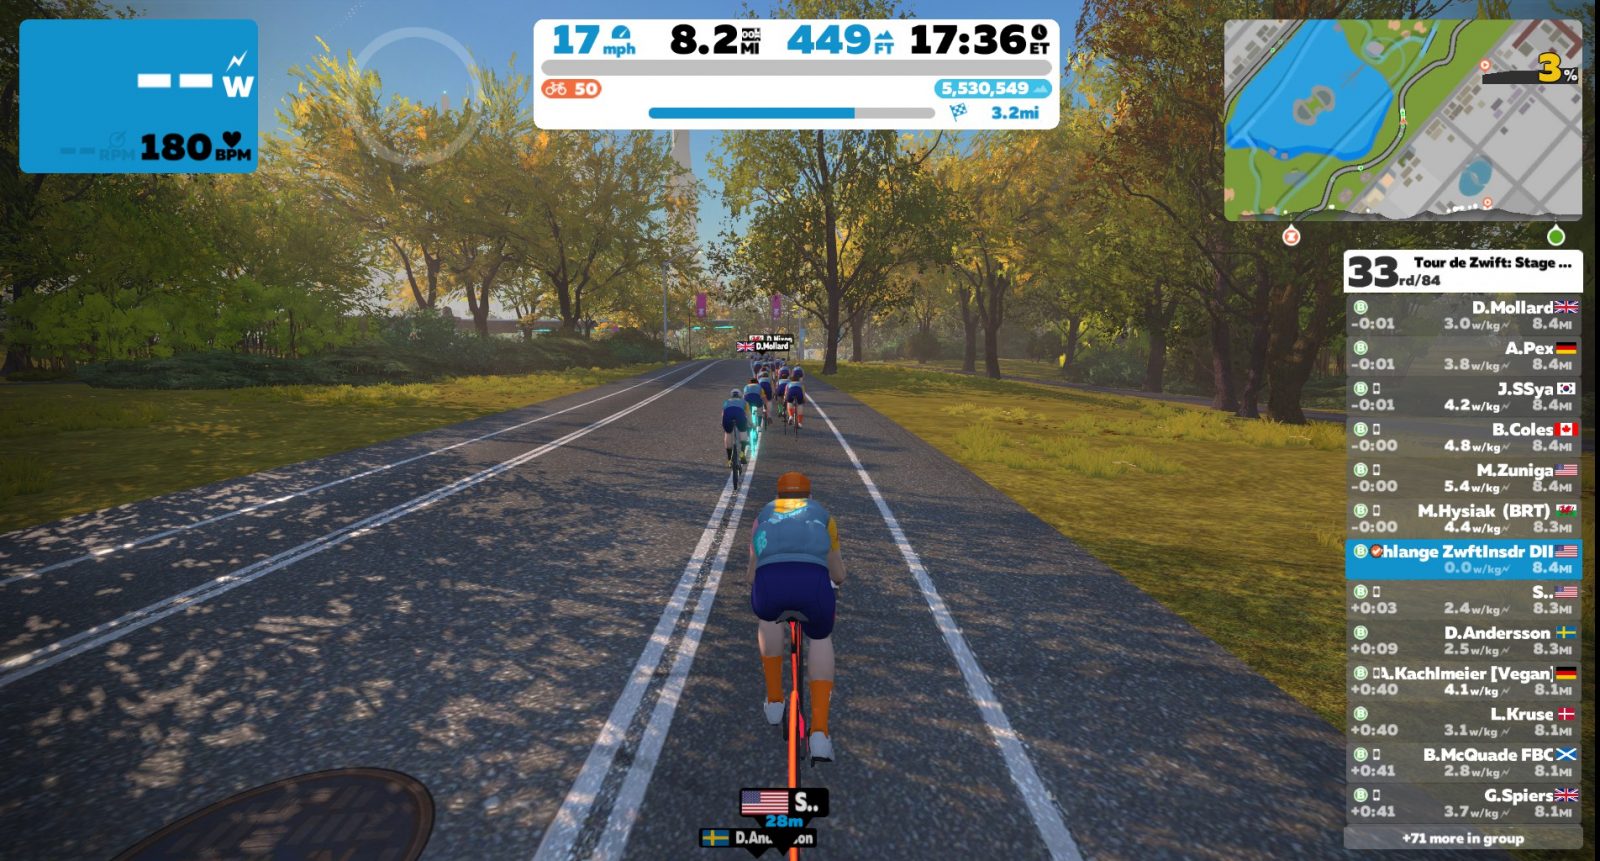
With 3.2 miles to go, we were pinning it up a 3% drag on the back half of the main loop. I was already rehearsing in my head how I was going to work the finish without a powerup. Then disaster struck!

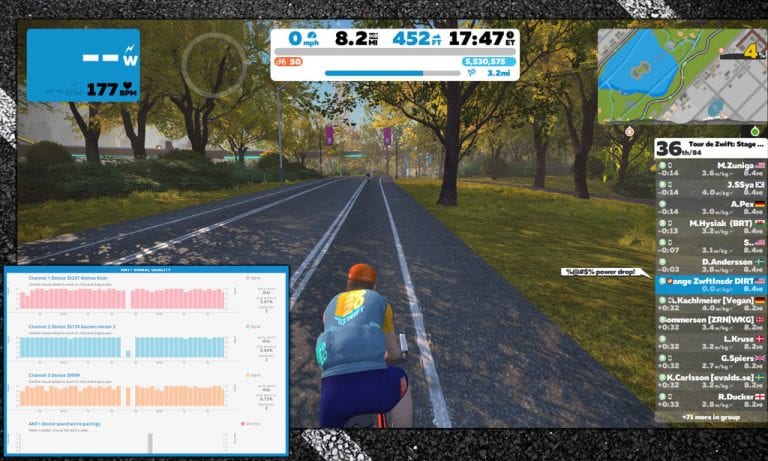
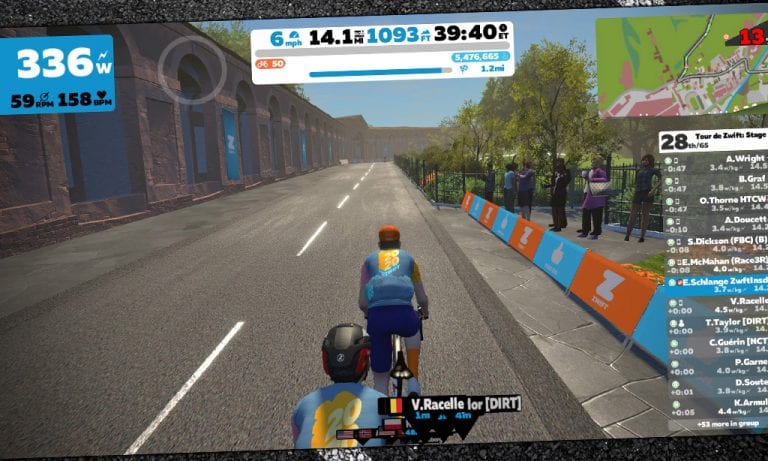
Here’s a screenshot from the precise moment I realized my race was over:

Coasting to a stop

The wireless ANT+ connection to my power source (Garmin Vector pedals) had dropped, and it wasn’t just a quick blip: it was gone for several seconds. My rider stopped pedaling and coasted to a stop. By the time the connection returned, the front of the race was 30 seconds up the road.

I’m not sure there’s anything more mentally debilitating than a connection drop in a Zwift race. I’ve only had this happen in one other race, as far as I can recall. And it’s just so hard to keep pushing when you know your race is lost and your connection may very well drop again.

The next group was a minute back, and I thought perhaps I’d be able to stay ahead of them to the finish. So I buckled down and tried to push, but now the same wattage I’d been holding in the front group seemed impossibly high! Isn’t the brain and its connection to our body such a crazy thing?

The Finish

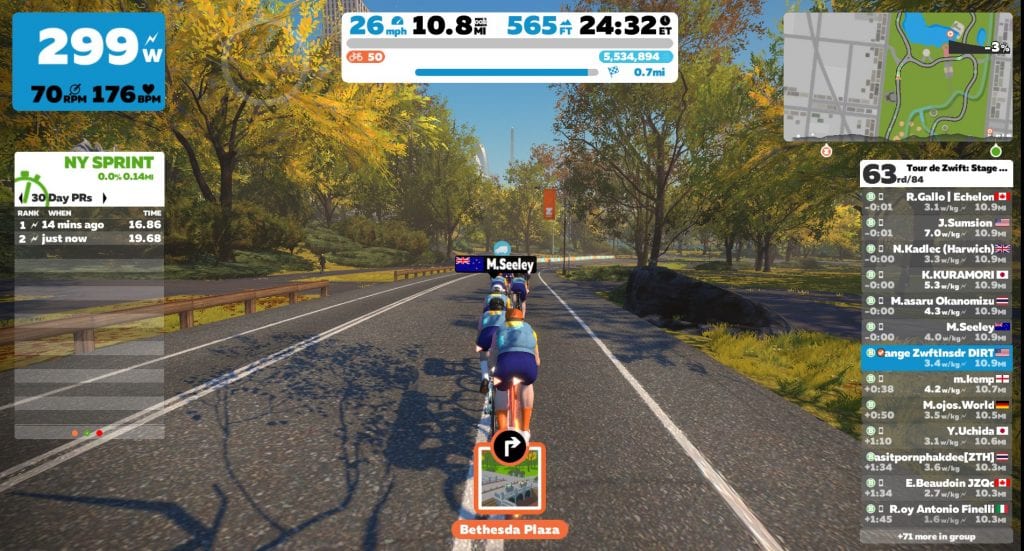
The group behind caught me with .7 miles left, and I grabbed onto their wheels. 63rd place! I hoped I could just hang with the group, maybe get a decent powerup through the sprint banner just up the road, then gain a few places in the final sprint.

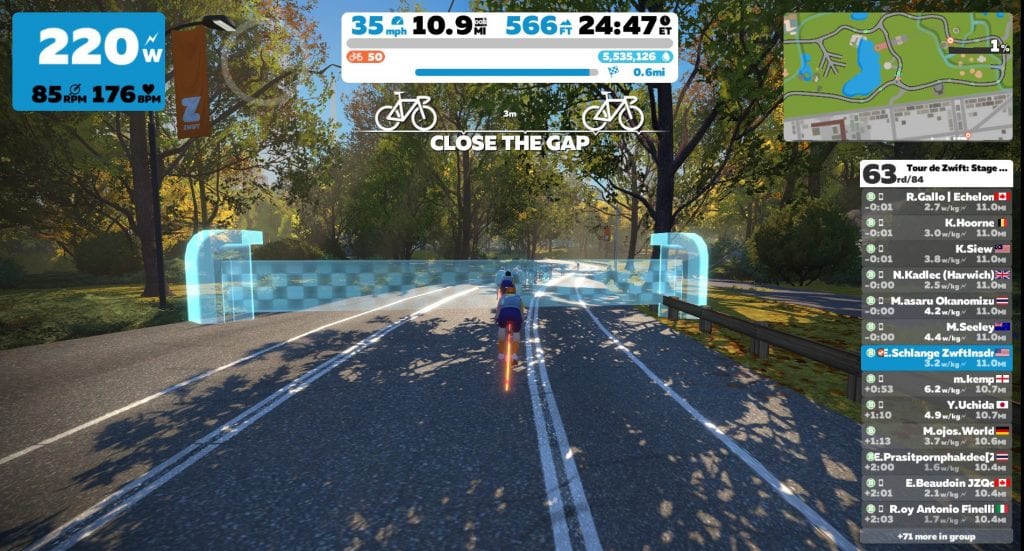
Unfortunately, the anger of the Zwift gods hadn’t been satiated by my power drop. Once again I received an XP bonus through the arch – that’s all I’d received this entire race! Then as we turned right onto the road which connects us to the other side of the loop, I saw something really strange – a finish line, in the wrong place!

Did someone lose a finish banner? It didn’t belong to this race!

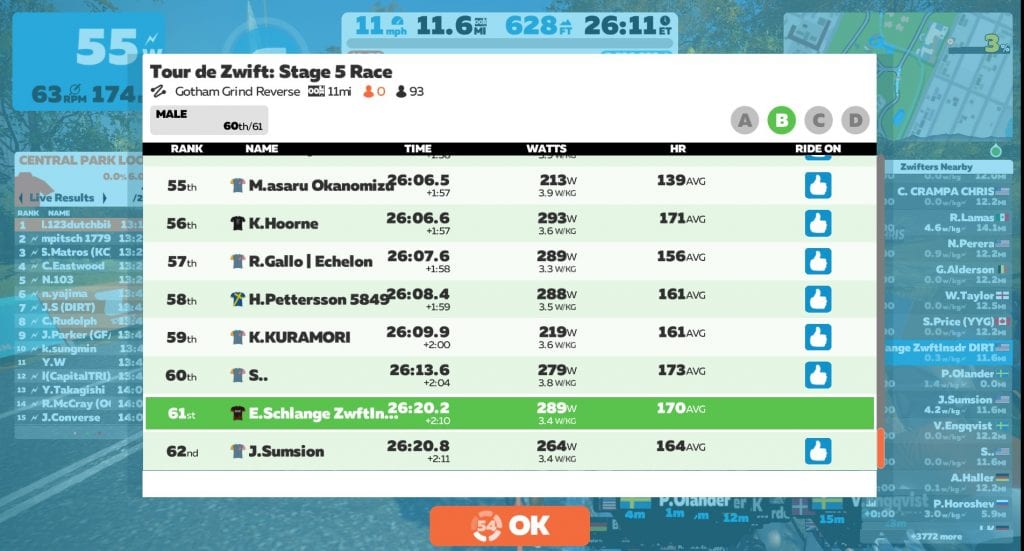
We flew through this banner and kept charging toward the real finish. I couldn’t even hold onto the group with my paltry weak-willed wattage, finishing 61st overall, 44th on ZwiftPower.

See my ride on Strava >
See race results on ZwiftPower >

Watch the Race

Magnus B is a German rider with the Kirchmair e-Cycling team. He was in my race and recorded the whole event, including his win in the final sprint! If you’re curious what it takes to come out on top in a race of this sort, watch his stream below. You’ll even see my power drop at 20:20:

Takeaways

My only takeaway from this race is that I need to get this ANT+ issue sorted. I hate the idea of going into a race unsure of whether my power will drop at some random point.

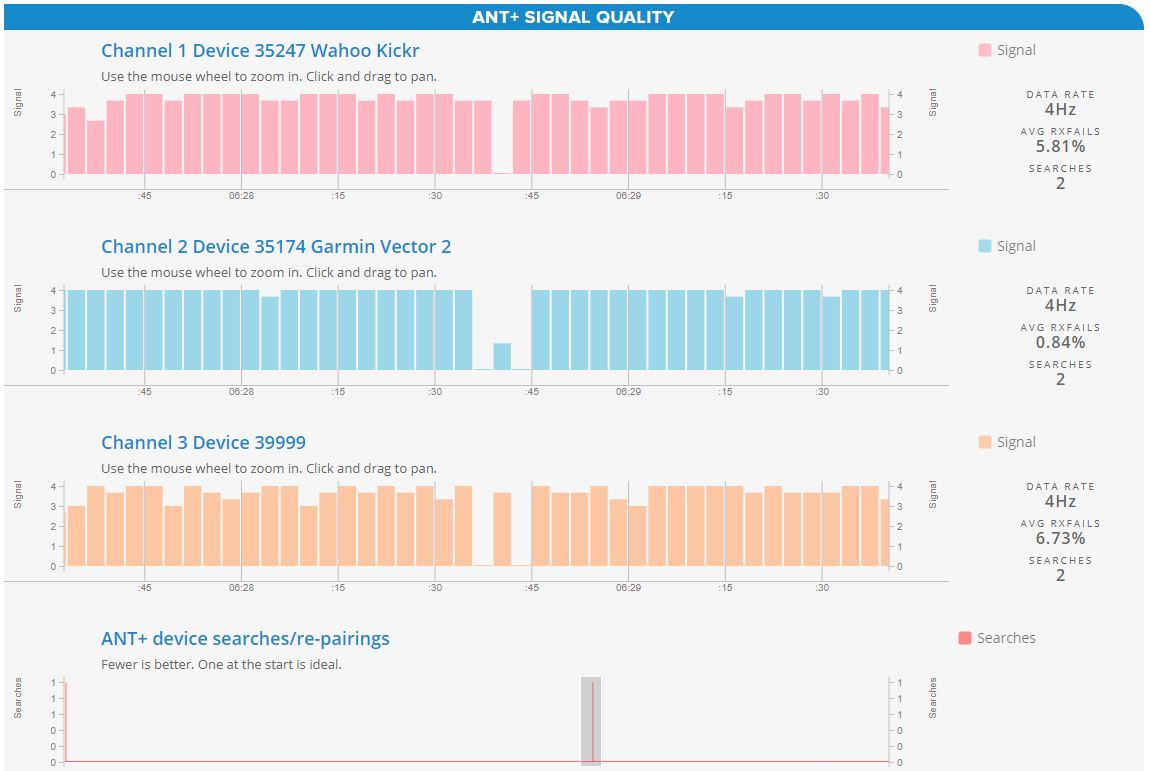
You would think, of all people, the guy who runs Zwift Insider should be able to get his Zwift setup sorted. But nope! Ever since we moved house in late summer, I’ve had ANT+ issues here and there. Some have been my own doing, like my ANT+ drop during the Le Col metric century caused by having two ANT+ dongles plugged in. But mostly, what happens is I’ll get a complete ANT+ signal drop for a few seconds, as shown by uploading my log file to Zwiftalizer. Here’s what today’s drop looks like:

My current theory is 2.4gHz wifi interference from neighbors, so I’m going to give Bluetooth connections a go and see how that works. I’m also in the market for a new set of power pedals, as I think my Garmin’s are perhaps on their way out.

If you’re having ANT+ dropout issues, check out this post for tips.

What About You?

Have you ever lost a race due to a signal drop or some other “Zwift mechanical”? Have you raced stage 5 yet? Share your experiences below!


How the Race Was Lost: Power to Weight (Bologna, TdZ Stage 4)

42

How the Race Was Lost: Power to Weight (Bologna, TdZ Stage 4)

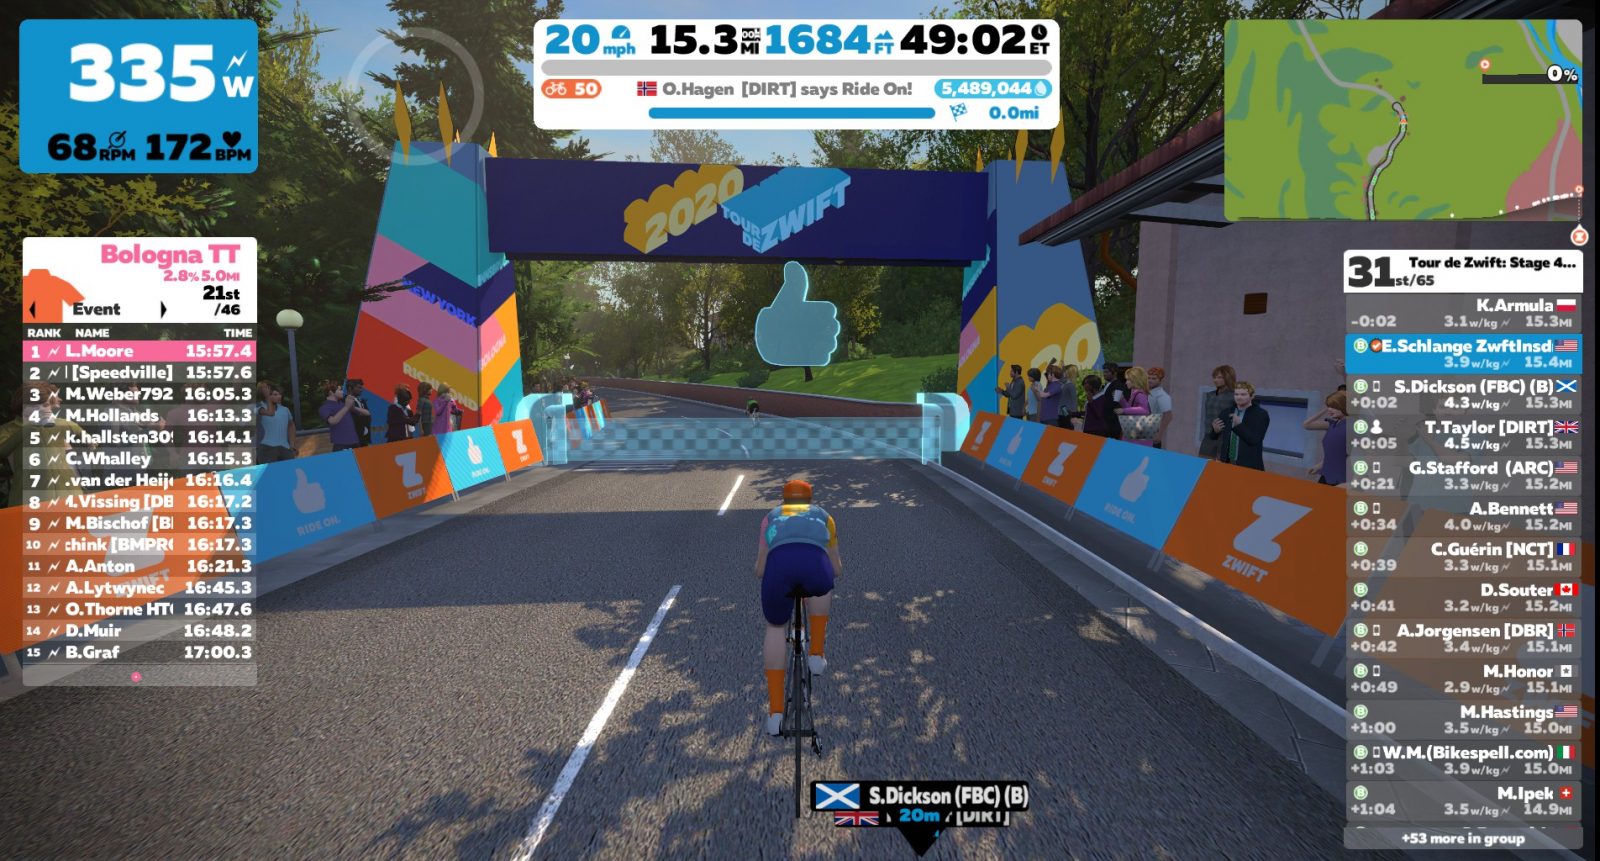
Since I’ve set a goal of racing each stage of Tour de Zwift 2020, I knew the Bologna TT route was looming. And I wasn’t happy about it.

Bologna, if you aren’t familiar, is a short course with a painful ending. The first 6km is flat, the final 2km is a steep climb (9.6% average). As a bigger rider who can hold decent wattage, I knew the flat part would be a breeze. The climb? Not so much. I’ve raced here before, and I was under no illusions as to what the final result would be. (Spoiler alert: it certainly wouldn’t include me anywhere near the podium.)

Despite this, I was looking forward to another chance to push myself to the limit and see where I landed in the rankings. My goal, based entirely on rough guesswork: finish in the top 50%. Let’s go!

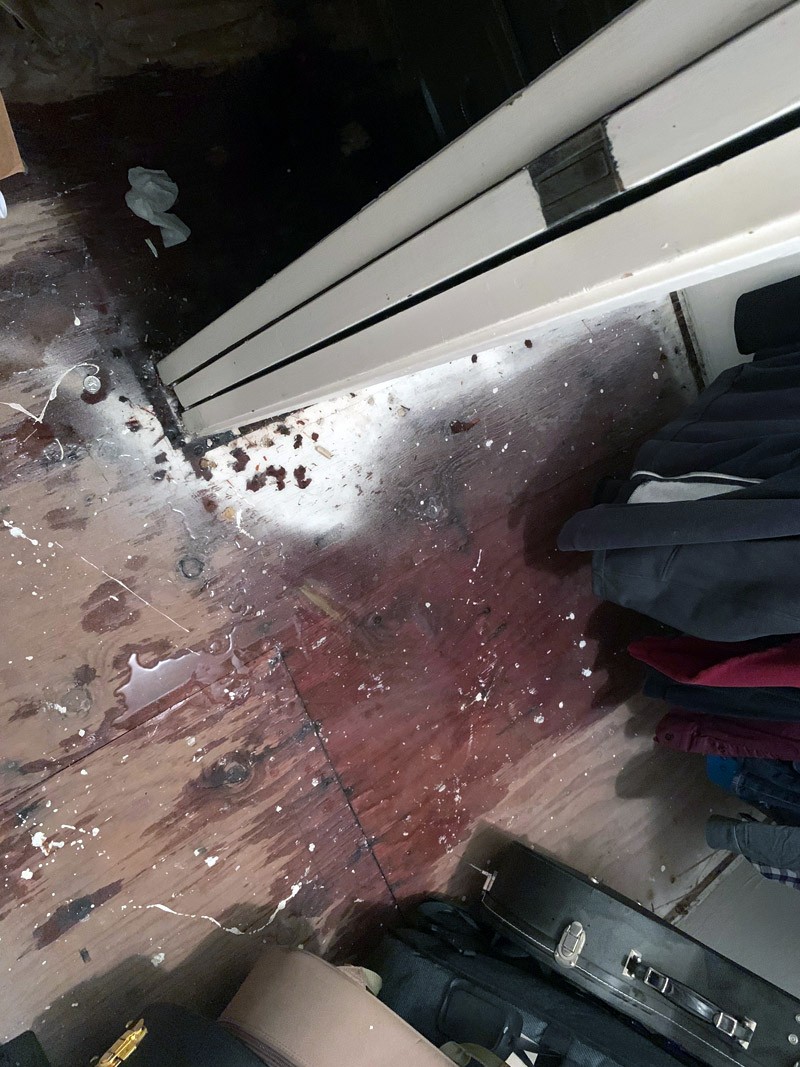
Standing water in the closet. Never a good sign.

Waking to Drama

I rolled out of bed at 5am, wanting to give myself plenty of time for a warmup before the race at 6:10am. Using my iPhone flashlight I walked into the closet where I’ve been storing my cycling kits since we moved to our new house. But when I stepped in to grab a pair of bibs, I was greeted by an unwelcome sensation: cold water on my bare feet.

What the… !?

There was standing water on the bare plywood of the closet. (This closet is in our unused master bedroom, the last portion of our house that is officially still under construction)

I quickly did the math in my head. How bad of a man would I be if I grabbed my kit and went upstairs anyway? The answer came back: a very bad man. A very, very bad man.

So I got to work (wearing only briefs, mind you) moving all the clothes and banjos out of the closet for safekeeping. Then I toweled off the floor and turned on an extra Zwifting fan to get air moving so things would dry out. Once that was done it was time to get dressed and starting looking around for the water source: outside, inside, under the sink… where was it coming from?

I couldn’t find the source. And water wasn’t pouring out from anywhere. It could wait another 60-90 minutes. Let’s race!

Warmup

I’d have to hustle to get a warmup in, so I went through my typical pre-race ritual quickly: a piece of caffeine gum and some PR lotion on the legs. Actually, scratch that: I went with two pieces of caffeine gum. Because this was already starting to feel like a long day. I got in a 20-minute, ~7-mile warmup on Tempus Fugit before heading to the start pens.

Bike Choice

Many Zwifters have asked what the best bike frame and wheel setup is for the Bologna TT course. It’s an interesting question without an obvious answer, thanks to the way the course lays out.

If you’re talking about an actual time trial (no drafting), the most aero TT bike and wheelsets are your best choice, because the gains made over the first 6km are more than the seconds lost to a lighter bike up the 2km climb. Additionally, many races on this course are two laps – up to the top of the climb, down to the start, then back up to the top of the climb. In this scenario, aero wins much more so, since you have a steep descent (where aero performs better) and even more flat ground between the two climbs.

The climbing rig

But what if you’re in a drafting race? That’s where things aren’t as clear. Because if you’re sitting in with the pack and staying out of the wind, the gains from having a slightly more aero setup are reduced. But when everything splits apart on the climb, you’ll want the lightest possible setup.

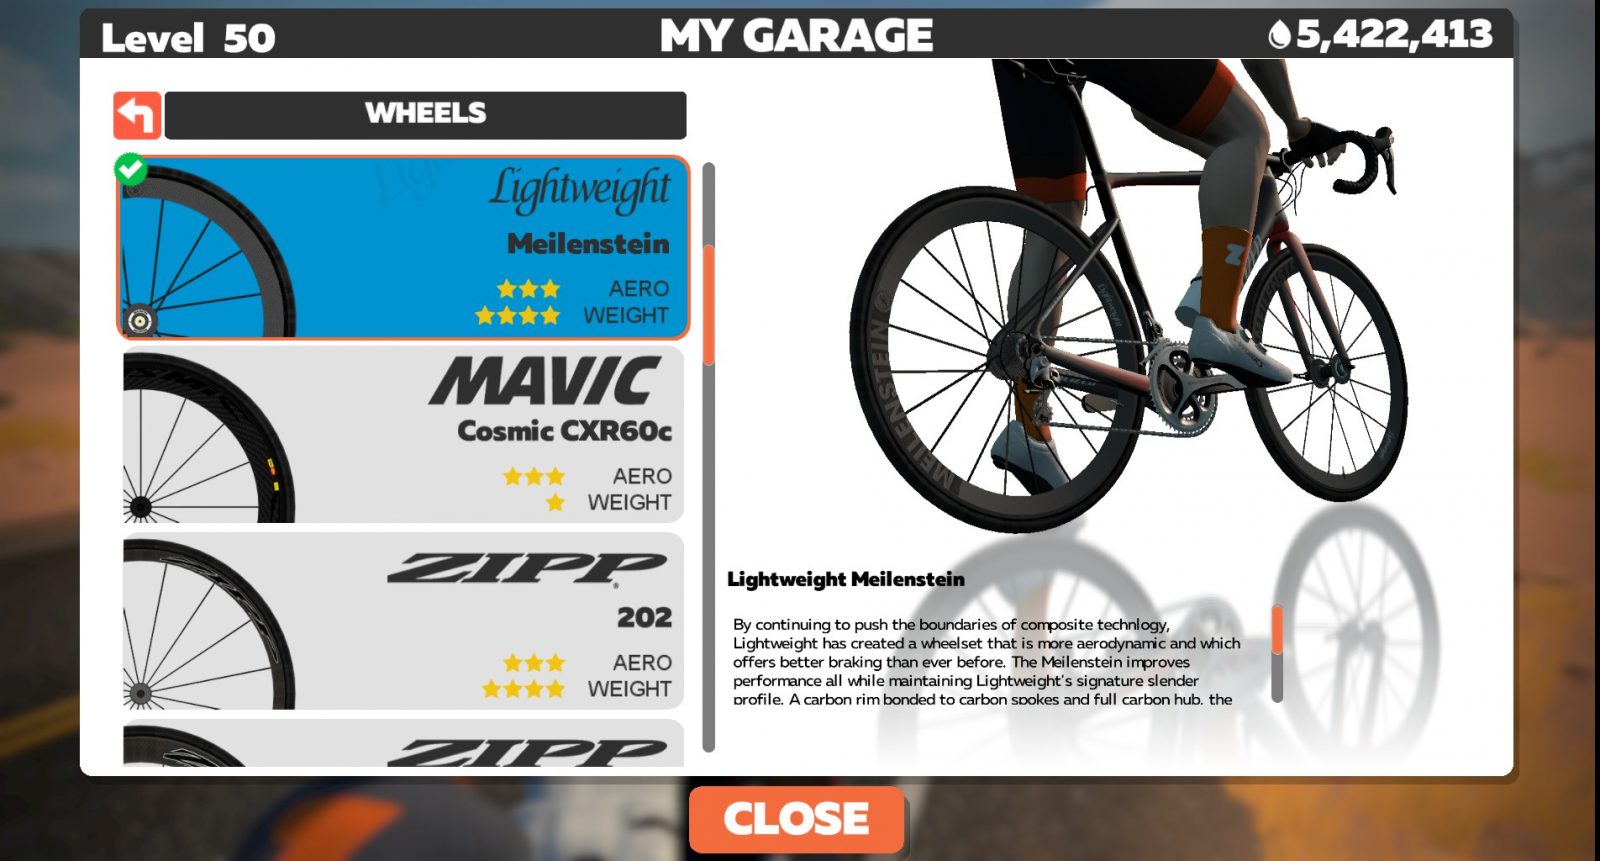
So I went with the Specialized Tarmac Pro frame and Lightweight Meilenstein wheels. It’s the best climbing setup currently on Zwift, and the same setup that posts the best time up the Alpe.

Of course, even with the best climbing bike on Zwift, I wouldn’t be able to hide. This race would come down to watts per kilo and my butt would surely be handed to me on a silver platter. But I still wanted any advantage I could get up that tough climb!

The Start

The start was quite tame – perhaps the easiest Zwift race kickoff I’ve experienced in recent memory. Everyone was conserving for the climb. I only averaged 306 watts in the first minute, and 282 watts over the entire flat portion before the climb began.

In the front group heading into the first climb

The starting pack of 65 was quickly reduced to 35 by the time we hit the first climb. So I’d made it to the climb in the front group–but how many riders were going to catch me from behind? I was about to find out.

First Climb

The Bologna climb breaks up into three sections for me. First you’ve got the beginning stretch which is fairly steady and steep, ending as you turn left through the brick archway. Then there’s a crazy and steep hairpin which places you on a long, steep straightaway–the steepest part of the climb. Then it’s through another arch to the right and the road gets less steep for the final portion.

I quickly slid to the back of the front group as the climb began, then watched as the chasing group closed the gap behind. Finishing in the top 50% was beginning to feel like an impossible dream – but I kept pushing.

This is no time, to chat, Mr. Doucett

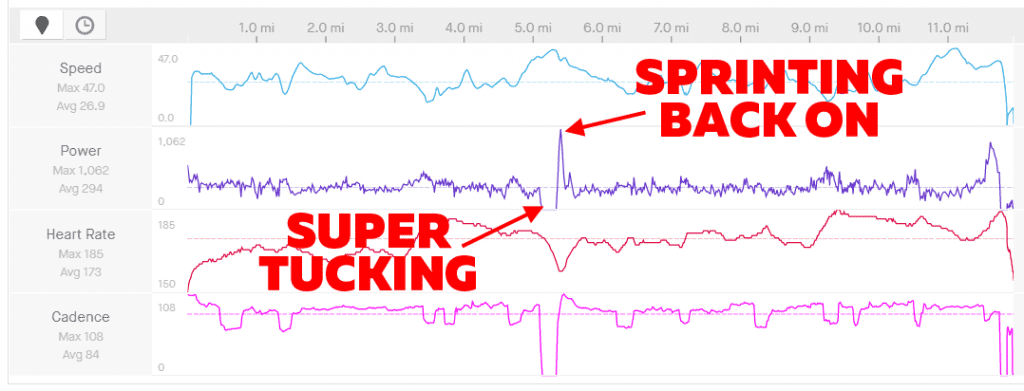
I was able to hold my position around 30th place all the way to the top, averaging 310 watts. Not a great average – perhaps my legs were a bit tired, or I was distracted by my wet closet. Regardless, once the climb was done it was time to supertuck to the bottom.

On some descents, pedaling will get you going faster than the supertuck. But steady, steep descents like Bologna are perfect for the aero tuck, and my legs were happy for the short break.

Wheeee!!!

The Middle

When I got to the bottom there were two riders ~15 seconds ahead, and several just 5 seconds behind. I eased up so I could join the riders behind, knowing they would be catching me soon enough, and we would probably have the firepower to catch the riders up the road.

My strategy at this point was to conserve energy for the final climb. Pushing big watts to tow my group up to the next pack on the flats wouldn’t gain me nearly as much time as those watts would up the climb (read “How to Pace Your Best Bologna TT Race” for more on this). So I sat in with my group, and we gobbled up a few riders as we completed the trip back to the start line, turned around, and rode back to the base of the climb.

I only averaged 231 watts on this flat section, making it barely even a zone 3 effort. But that was fine, because we were gaining places, I was recovering, and now it was time for that final climb!

Starting the second climb

Second Climb (and Finish)

The front of my small group of five riders was 28th place going into the final climb. I needed to finish 32nd or better if I wanted to hit my goal of a top 50% ranking. On top of that, a few riders from the group 15 seconds back were pouring on the watts per kilo as we hit the climb. I knew this would be a fight to the finish!

I tried to keep my breathing even, alternating sitting and standing efforts. (I love the muscle and saddle relief from standing, but it also elevates my heart rate a bit.) When the road turned especially steep on the hairpin heading into the second section I stood and hammered extra hard, because it’s through these steepest portions where extra watts matter most.

In the end, I finished solo, with riders a few seconds ahead and behind. Zwift’s results show me at 31st place–just barely making it under the 50% line. My second climb’s power was just slightly lower than the first climb, 306 watts vs 310.

Also, ZwiftPower, where I usually finish higher in the results than what Zwift shows, bit me in the butt this time around. Out of 36 finishers, I was 20th. So much for 50%!

See my ride on Strava >
See race results on ZwiftPower >

Power to Weight

This race is a perfect example of rider weight affecting speed in cycling. I’m on the larger side when compared to the population of serious cyclists (84kg), so climbs are where I struggle. I’ve got the muscle to hang with pretty strong riders on flat roads, but when the tarmac tilts up, physics kick in. Power to weight ratio becomes more important the steeper the climb gets, so on a steep KOM like Bologna, my ability to hold 3.7w/kg (like I did in the first climb) is going to lose handily to a B rider who can hold 4w/kg or more.

For more on this topic, read “How Rider Weight Affects Speed On Zwift” >

Takeaways

Here are my takeaways from this morning:

  • Lightweight bike is definitely the way to go: I think my bike choice was perfect. A more aero bike wouldn’t have moved me any further up the rankings on the flats, and it would have slowed me down on the climb.
  • Fewer cookies: if I want to be competitive in any sort of hilly races, I need to increase my power to weight ratio. I can maybe do that by training more (building power), but that’s been a real challenge in the past. The easier solution, I think, is dropping some excess weight. It’s definitely time to shed ~10 pounds.
  • Finish the job: if I’d finished moving the clothes out of the closet before the ride, I would have seen that the leak was coming from behind the wall. Pinhole leak in the copper pipe. Plumber friend fixed it a couple of hours later.

What About You?

Did you race TdZ stage 4? What bike setup did you use, and how did it go? Share below!


February Zwift Fondo Details

21

February Zwift Fondo Details

Zwift has just released the schedule of events for February’s big fondo. With thousands of riders turning out, these “fun races” are always popular as we push ourselves to complete long courses together. Plus, you unlock a jersey when you complete the ride!

Schedule

  • Feb 8: 11PM PST/7AM GMT (Feb 9)
  • Feb 9: 1AM PST/9AM GMT
  • Feb 9: 6AM PST/2PM GMT
  • Feb 9: 9AM PST/5PM GMT
  • Feb 9: 11AM PST/7PM GMT

See all upcoming Fondo Series events >

Is this a Race?

Officially, no. For some riders, just completing the ride is accomplishment enough. But many riders will treat the event as a race, and only the strongest riders will be able to stay near the front of each event.

As Zwift says, in the end “It’s all about doing your best and trying to finish the toughest routes in Watopia.”

Routes

Zwift Fondo events have three categories (A, B, and C) which are open to all riders. These categories don’t refer to rider strength or speed–they refer to route length. Pick the category corresponding to the length of route you’d like to ride.

For February, the group and routes are (click for route details):

A: Gran Fondo - 97.2km (60.4 miles), 1148m (3766′)

B: Medio Fondo - 72.6km (45.1 miles), 981m (3219′)

C: Bambino Fondo - 52.1km (32.4 miles), 553m (1814′)

Kit Unlocks

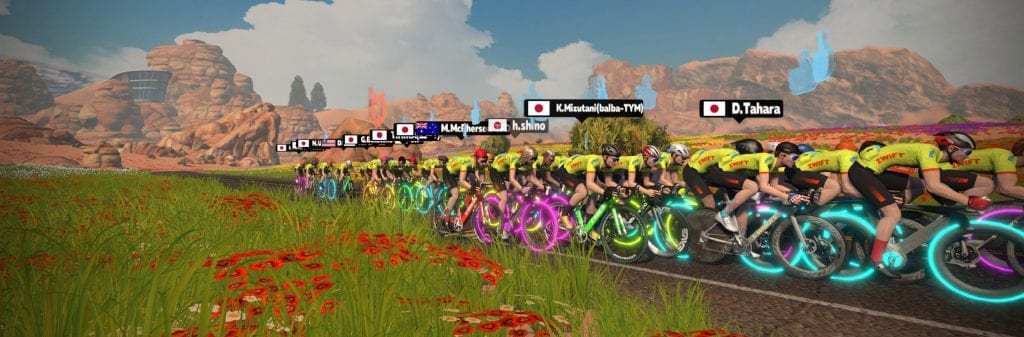
This is a 3-month series, and each month’s fondo has its own unique kit unlock. These kits are exclusive, meaning they will never be available anywhere else in game. A true badge of honor! Here’s a shot of February’s kit:

Is this a Race?

Officially, no. For some riders, just completing the ride is accomplishment enough. But many riders will treat the event as a race, and only the strongest riders will be able to stay near the front of each event.

As Zwift says, in the end “It’s all about doing your best and trying to finish the toughest routes in Watopia.”


Andre Greipel on Sprinting and Managing Nerves (Zwift PowerUp Cycling Podcast #43)

0

Andre Greipel on Sprinting and Managing Nerves (Zwift PowerUp Cycling Podcast #43)

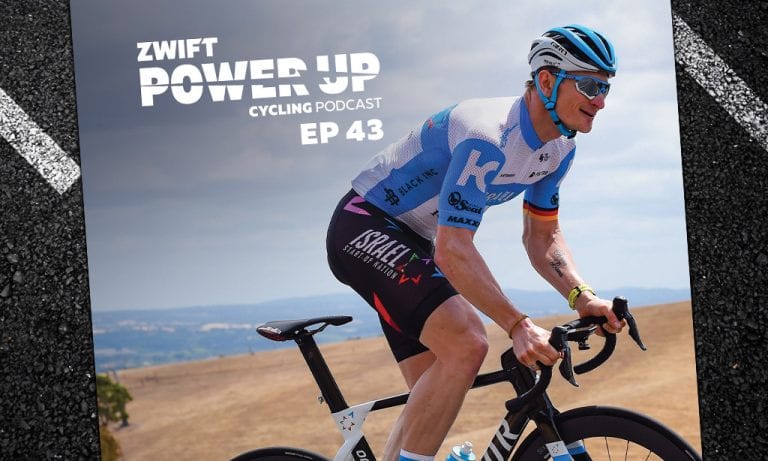
Matt, Kristin, and Kev reconvene for the first podcast of 2020, featuring a chat between Greg and 22x Grand Tour Stage Winner Andre Greipel! Sprinting is of course discussed, plus the chat turns to managing your nerves and the usual talk around the latest goings-on in the world of cycling and Zwift!


About the Podcast

The Zwift PowerUp Cycling Podcast features host Matt Rowe (Rowe & King), with regular co-hosts Greg Henderson (Coach Hendy) and Kev Poulton (Powerhouse Cycling). The hosts share tips on how road races can get faster in-game and outdoors.


Saving Watts In the Draft: Climbs vs Descents vs Flats

28

Saving Watts In the Draft: Climbs vs Descents vs Flats

Cyclists know that staying in the draft saves watts. It’s been tested outdoors, and it’s been tested on Zwift. This knowledge is important to understand and put into practice because bike racing is all about conserving energy so you have it when you need it. Drafting is the #1 way a cyclist conserves energy while remaining in contention for the win.

But how many watts do you save in the draft – and does that change based on whether you’re on a climb, a descent, or a flat road? We decided to to run a few tests in the Zwift Insider Lab to get some hard numbers.

About the Test

For our test we had two riders: Rider 1 pulling on the front, and Rider 2 drafting behind Rider 1. Both riders were 75kg in weight, 183cm tall, and riding Zwift Aero bike frames with Zwift 50mm wheelsets.

We took these riders over the Watopia Hilly KOM segments (forward and reverse) with Rider 1 pulling at 330 watts for one test, then 270 watts for the other. We also took them on Ocean Boulevard for a flat test at the same wattage. Rider 1’s job was to hold the wheel using as few watts as possible.

These tests were made with other Zwifters on the road, and required constant adjustment of Rider 2’s wattage to properly hold the wheel. This means the test results aren’t perfect. But they’re still certainly useful!

Our test bots, hard at work

Drafting Up Climbs

On the Hilly KOM Forward climb:

  • drafting a rider holding 330 watts requires 320 watts – a 3.1% savings
  • drafting a rider holding 270 watts requires 264 watts – a 2.3% savings

On the Hilly KOM Reverse climb:

  • drafting a rider holding 330 watts requires 292 watts – an 11.6% savings
  • drafting a rider holding 270 watts requires 244 watts – a 9.7% savings

The steeper the climb, the slower the speed. The slower the speed, the less effect drafting has since drafting is all about reducing wind resistance and wind resistance isn’t an issue at slow speeds. So we see on these climbs there is certainly some savings in the draft, but it’s not nearly as significant as we’ll see on flat roads or descents.

The savings is greater on the reverse climb because that climb isn’t as steep as the forward climb. Therefore, speeds are faster on the reverse KOM, and drafting has a greater effect.

Similarly, the savings are greater when drafting the 330-watt rider compared to the 270-watt rider, because speeds are faster behind the 330-watt rider, so drafting has a greater effect.

Drafting On Descents

On the Hilly KOM Forward descent:

  • drafting a rider holding 330 watts requires 207 watts – a 37.3% savings
  • drafting a rider holding 270 watts requires 145 watts – a 46.3% savings

On the Hilly KOM Reverse descent:

  • drafting a rider holding 330 watts requires 227 watts – a 31.3% savings
  • drafting a rider holding 270 watts requires 222 watts – a 17.8% savings

Descents are much faster than climbs, and the main thing slowing riders down on a descent is air resistance. Drafting greatly reduces air resistance, so riders in a draft on a descent can sit in with very low watts even when the rider ahead is hammering.

The steeper the descent, the greater the savings from the draft. So we see the steeper forward descent gives us a greater savings than the reverse descent.

And just like on the climbs, the savings will be greater when drafting the 330-watt rider compared to the 270-watt rider, because speeds are faster behind the 330-watt rider, so drafting has a greater effect. We don’t see that exactly in the results above, because holding the wheel over changing gradients was difficult in our tests!

Drafting On Flat Roads

On Ocean Boulevard:

  • drafting a rider holding 330 watts requires 241 watts – a 27% savings
  • drafting a rider holding 270 watts requires 208 watts – a 23% savings

We would expect the power savings on flats to fall somewhere in between the savings we saw on the climbs and the descents, and that is indeed the case (apart from the hilly KOM reverse data at 270 watts which is probably just a testing error – like we said, these tests weren’t perfect!)

Here we see once again that riders achieve greater savings when drafting a more powerful rider because speeds are higher, so drafting has a greater effect.

Takeaways

There are several useful takeaways from these test results:

  1. Descents provide a wonderful opportunity to recover, if you play it smart. Stay out of the wind, surf the wheels, and apply just the power needed to stay in the pack. Of course, there’s always the supertuck as well, but that is best used on longer, steeper descents.
  2. Drafting is a significant factor on shallow climbs like the hilly KOM reverse. So play it smart and stay on a wheel unless you’re attacking.
  3. The faster you’re traveling, the bigger that “wattage window” is where you’ll stay with the rider you’re following. That’s why our descent test results were a bit messy. (The “wattage window” is the minimum and maximum wattage you can hold and without being dropped or dropping the rider you’re trying to follow.) This means you can potentially waste a lot of watts by hammering too hard–so play with it, ease up, and see how little you can work to hold the wheel on descents and even flatter roads. With practice, you’ll get a feel for it.
  4. If you think this savings is impressive, consider this: the draft effect is even stronger in larger groups on Zwift! This is difficult to test (requiring many computers, Zwift accounts, etc) but we know there is a stronger draft behind 4 riders than behind 1.

Your Thoughts

Do these results make sense to you? Got questions, or additional takeaways from the data? Share below!


8 Ways to Earn More XP and Level Up Faster on Zwift

XP (experience) points are what get you to higher levels in Zwift, and higher levels mean access to more virtual equipment and roads. Our calculations show that a rider can typically expect to earn 500-700XP per hour.

But are there ways Zwifters can earn XP faster? Of course there are! Here are 8 strategies for boosting your XP earnings.

#1: Ride New Routes

The first time you complete an official Zwift route you’ll earn the badge for that route, which includes an XP bonus of approximately 20XP per kilometer of route length. Assuming you’re riding around 35kph, that’s a bonus of 700XP per hour if you’re just riding new routes. This means you’re effectively doubling your XP earnings when you’re riding a new route!

If you tally up the XP bonuses from riding every route on Zwift (as of January 25) you get 91,807. That’s a whole lotta XP!

#2: Ride a TT Bike

If you’re on a time trial frame, you won’t receive speed-boosting powerups when you ride through arches. Instead, you’ll receive either the 10XP or 250XP. Every time!

Combine the TT bike with a short route that includes one or more lap banners and you’ll accumulate XP extra fast. Here are some suggested routes, sorted in order from frequent banners to least:

#3: Ride Flat Routes

XP is based purely on distance (30XP per mile, or 20XP per kilometer), so you’ll accumulate it faster if you keep your speed as high as possible.

#4: Use Metric, Not Imperial

You receive 20XP per kilometer and 30XP per mile, but a kilometer is not 2/3 of a mile – it’s less than that. (1km = 0.62 miles). So you’ll accumulate XP 7% faster if you use metric units instead of imperial. Change this under Menu>Settings in game.

Note: Zwift’s September 27, 2023 update largely removed the metric advantage.

#5: Participate In Group Rides

The faster you go, the faster you’ll earn XP. Participate in group rides to enjoy the increased speeds of the group draft, and watch that XP add up!

#6: Hack Your Workout

We’ve already written about this thoroughly in “How Zwift Calculates XP for Cycling Workouts“. That post includes some hacks to maximize XP earnings via workouts including changing interval length, doing workouts up the Alpe then free-riding down, and using workouts for your easy rides since you’ll likely earn more XP than free-riding.

An additional bonus related to doing workouts up the Alpe: the spinner at the top awards XP if it lands on a prize you’ve already received. Including 1000XP if it lands on the Lightweight Meilenstein wheels!

#7: Enjoy the Downhills

Any cyclist worth their chamois knows you don’t end a ride at the top of the hill–you earned that descent, so enjoy it! But it’s worth mentioning here: if your ride would have ended atop a hill, go ahead and take that descent: you’ll earn XP for the distance with little or no extra work.

The “Just scrape it (You hit 800 watts)” hidden achievement badge

#8: Earn Achievement Badges

There are lots of achievement badges in game. Many are visible under Menu>Badges, but there’s a whole list of hidden achievements as well. Every one of those achievements includes an XP bonus, so grab those badges!

Combining Strategies

For the ultimate in high-XP riding, combine two or more of the strategies above. Perhaps choose a group ride on a route you haven’t yet completed. And of course, use metric measurements while you’re at it!

The achievement badges for multiple Volcano Circuit laps earn a big XP boost – you get bonuses for 5, 10, and 25 laps. The 25 lap bonus is 1000XP! Why not do a ride that gets all three, along with the 100km badge. Then keep going and get the 100 mile badge while you’re at it! Do it on a TT bike and you’ll be racking up XP points each time you ride through the lap banner.

What About You?

Got more tips for earning XP? Share them below!

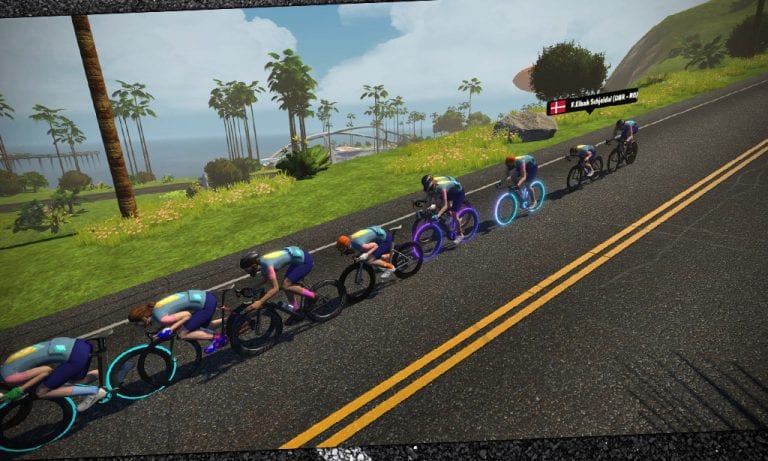
How the Race Was Lost: Chubby Supertucker (Tour de Zwift Stage 3)

24

How the Race Was Lost: Chubby Supertucker (Tour de Zwift Stage 3)

Yesterday was the last day for stage 3 of Tour de Zwift, so I needed to get a race in. Two laps of Watopia Hilly Reverse–this would be interesting! I knew from racing it in the past that I should be able to hang onto the front of the race, but thanks to the reverse KOM I also know it would take everything I had.

Since this was TdZ I knew I could plan on a larger field, a shorter race, and at least a handful of sandbaggers pushing the group pace. Even though I’ve raced this route many times, those races were usually four laps long. Two laps meant the pace would be furious and I would need to push harder to stay in contention. Was I ready? I was about to find out!

Warmup

The race began at 6:11am, so I set my alarm for 5:15. Rolled out of bed, grabbed my kit, then headed upstairs for my typical pre-race ritual: a piece of caffeine gum and some PR lotion on the legs. Hopped on early and got a nice 30-minute, ~10-mile warmup in on Tempus Fugit.

The Start

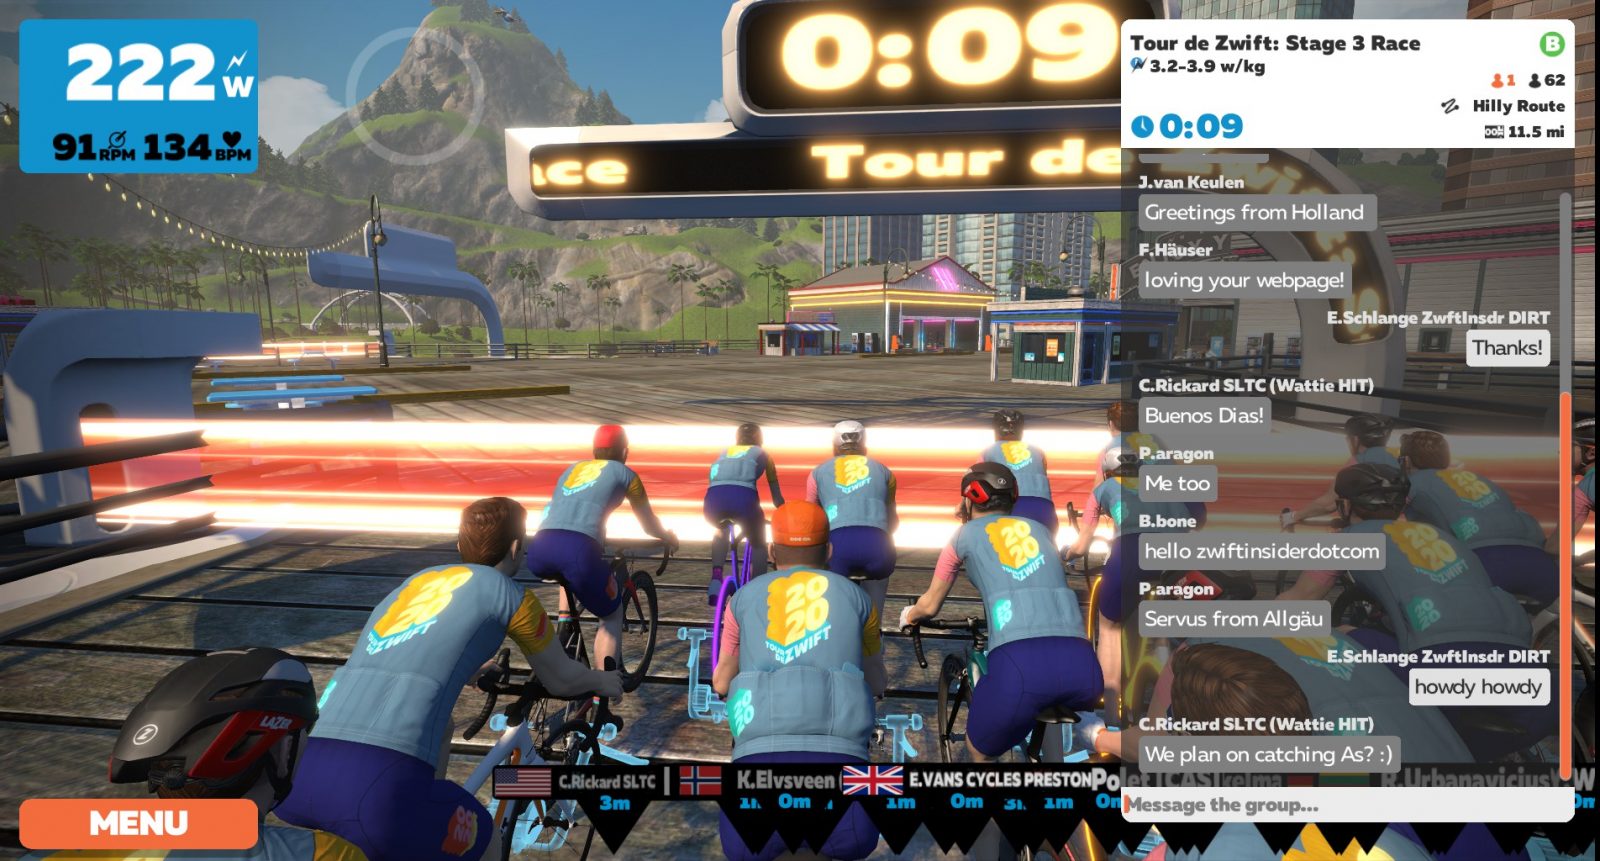
The start wasn’t too bad, around 340 watts for the first 2 minutes kept me in the front group. We had 61 riders at the start, and I think many of them knew that the real action would come on the KOM. I just sat in the pack, conserving as much energy as possible, know the KOM would require me to push it to the limit.

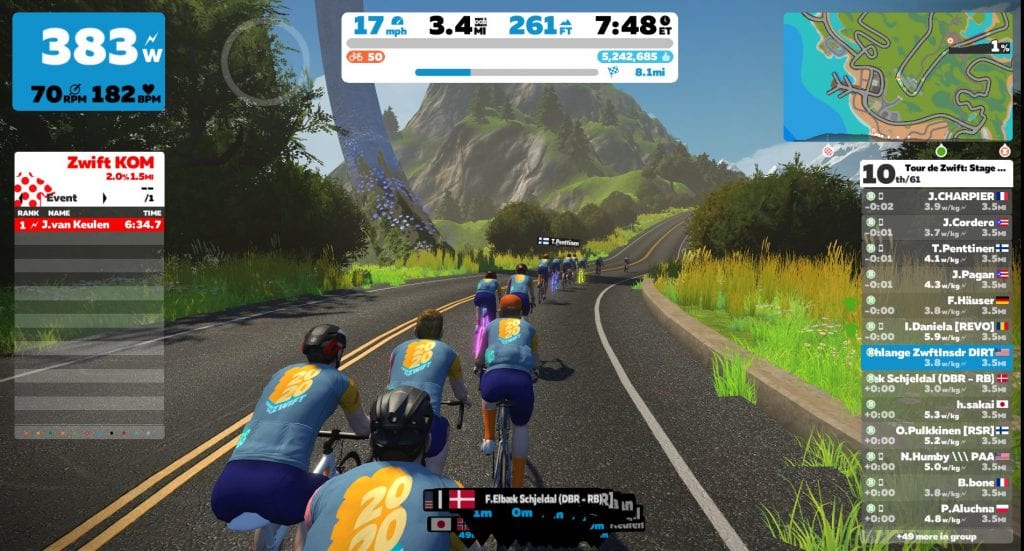
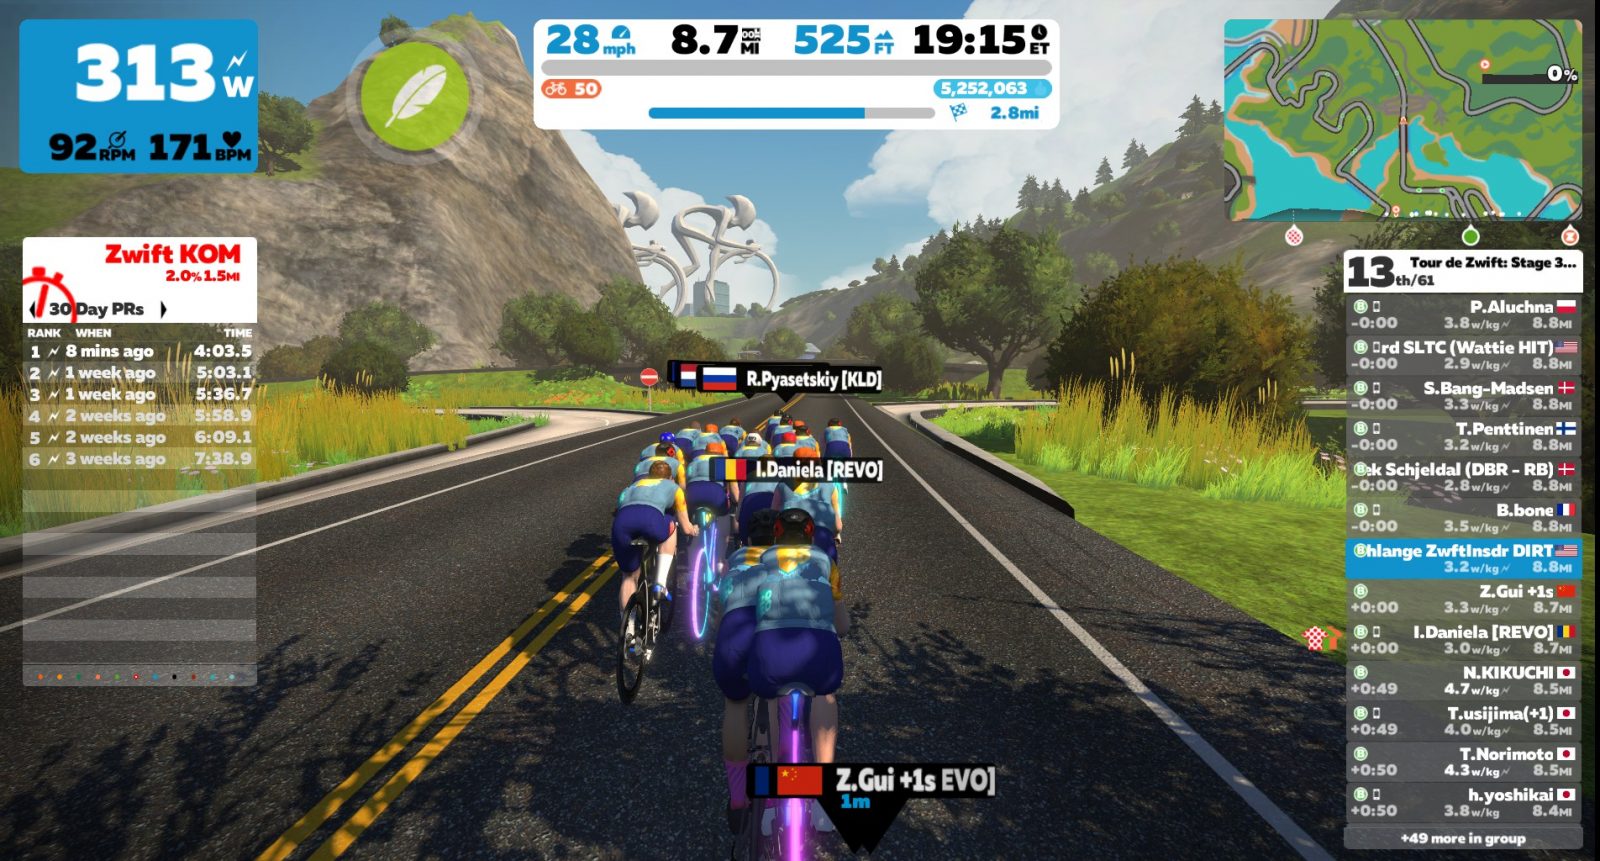
As we approached Hank’s Gas Station (the beginning of the reverse KOM), I made sure I wasn’t too far back in the group. I didn’t want to get caught off the back if a big gap opened up! So I stayed within a few wheels of the front, and when the road got steep heading into the right-hand turn I activated my feather powerup (yes, the powerup gods had smiled upon me), stood up, and hammered.

Still in touch with the front after the first section of the KOM

I was sitting 10th wheel as we crested the first portion of the KOM, and that was a good place to be, provided I could keep the power up enough to join the riders up ahead. If I ran out of juice a gap would quickly form, and I’d be dropped. So I pushed hard to stay in contact with the riders ahead, and when we grouped up after the second uphill push I was still in the front pack. KOM #1: survived!

Wearing the Same Kit

Can I register a complaint? I don’t like wearing the same kit as everyone else – especially in a race. In a social ride I don’t prefer it, but I can accept it. But in a race, I need to be able to tell riders apart. That’s pretty much impossible when we’re all wearing the same kit.

There may be certain riders I want to “mark”–to follow if they attack, because I know they’re strong enough to stay away. There may be other riders who I know are sandbagging, and I don’t need to chase them at all. Lastly, I’ve got teammates in almost every race on Zwift – but if we can’t see our team kit, it’s pretty hard to work together!

Everyone knows we’re in a TdZ event. We don’t need the kit to remind us! Zwift: please let us wear our own stuff for the race events, just like the top racers at the TdZ Pro-Am races are doing.

Back to the story…

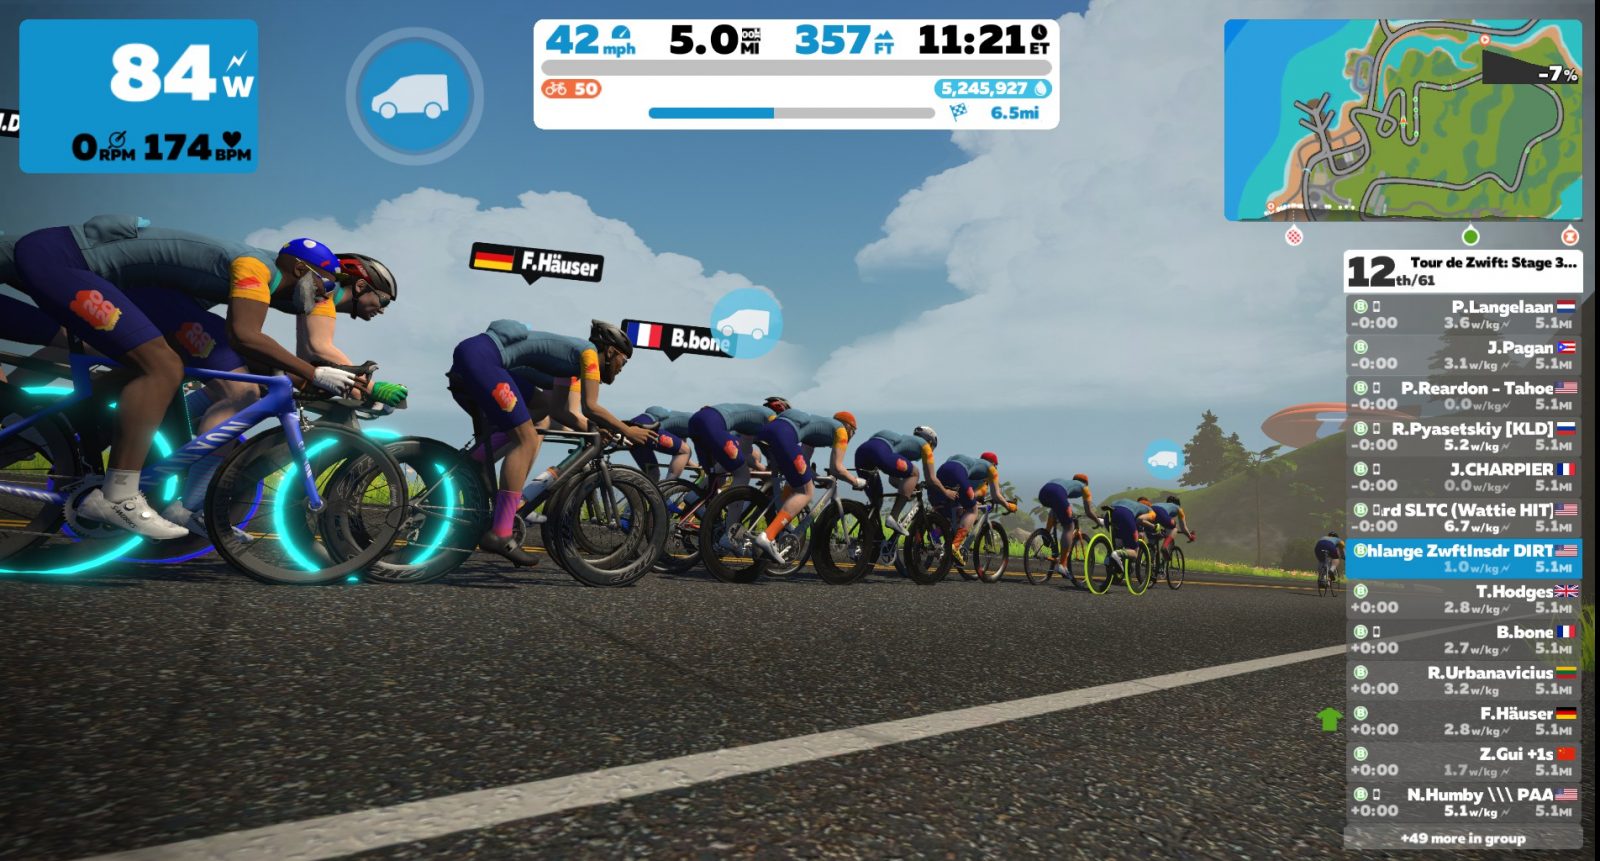
Descending from the KOM, lap 1

The Middle

After cresting the KOM, I knew I could hold on until at least the second KOM. Things got a little loosey-goosey supertucking down the descent: I waited too long to start pedaling again. The group whizzed past me and I had to hammer for about 10 seconds to get back in the draft.

Classic supertuck mistake. That’s the thing with the Zwift supertuck: it works great, until it doesn’t! You’ve got to stay alert, because when you pop out of the tuck you slow down quickly. Typically I start pedaling a few seconds before I know I’ll come out of the tuck, so Zwift is seeing my power when I need it.

zPower Fliers

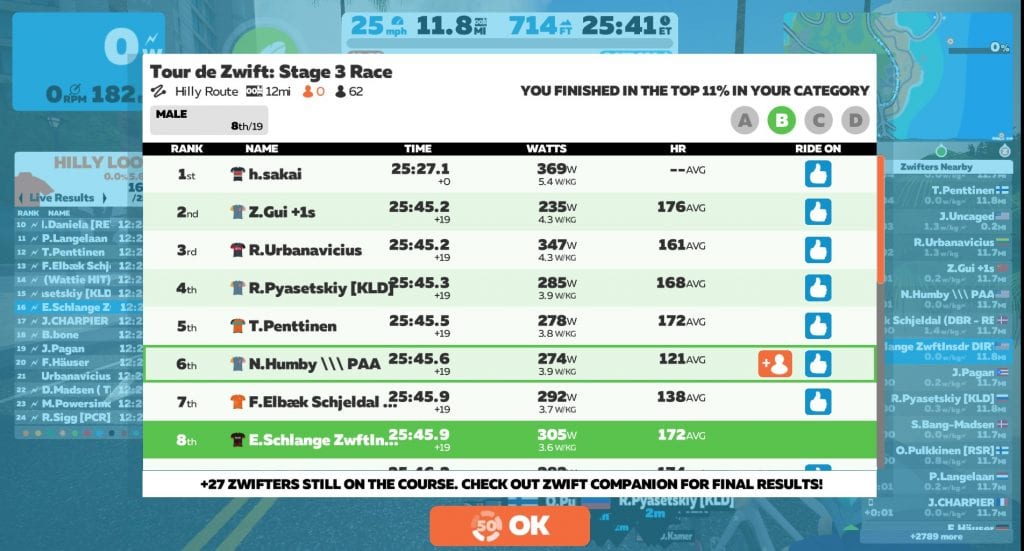
As we went through the start/finish banner at the end of lap one, one of the riders asked: “flier?” He was referring to one “Hiroaki Sakai”, a Japanese rider who had been off the front since the start of the KOM. “Yes” was my typed reply. No way Hiroaki was holding B category wattage.

The group basically ignored the flier after this exchange, which I was happy about. He would go on to “win” the race by 18 seconds with an average of 369 watts (5.4w/kg). I didn’t notice until the race was over that he was on virtual power (aka “zPower”) along with one other rider who kept attacking off the front. Not surprisingly, neither rider was registered on ZwiftPower.

Heading into the second and final KOM. Feather at the ready!

The Finish

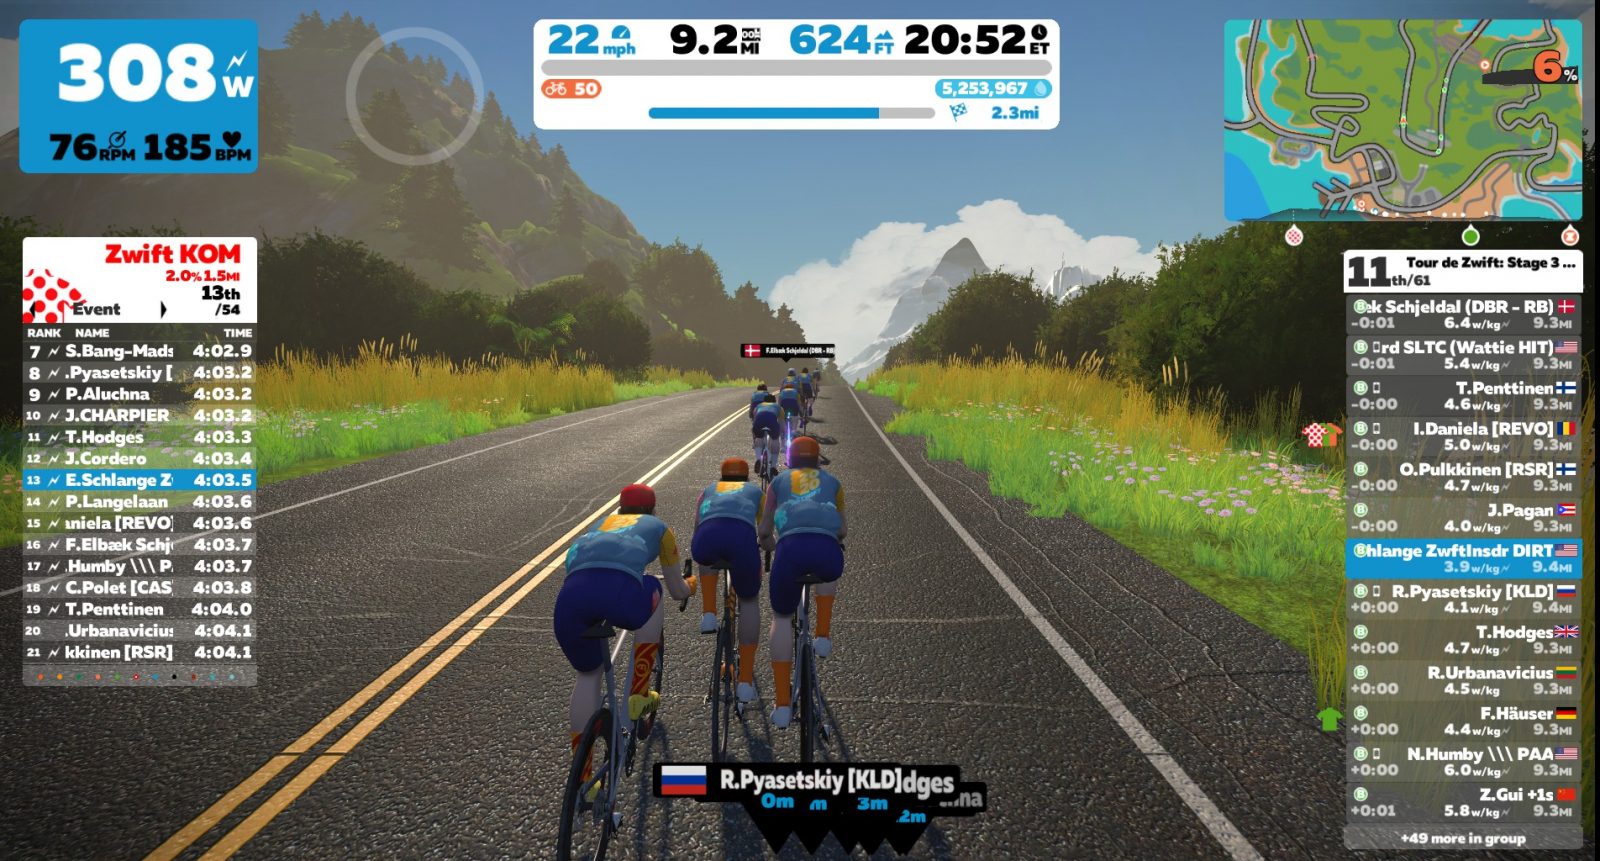
Through the second lap’s sprint banner I received another feather powerup. Hurray! I knew I’d need all the help I could get, as the strong climbers typically hammer extra hard on the final climb of the race, hoping to drop sprinters like me.

There were 15 left from the original 61 riders. I attacked the KOM the same way as I did the first lap, deploying my powerup on the steepest section. I found myself mid-pack in a strung-out peloton, and gaps were opening up all around. This was a dangerous situation, and if I didn’t keep going hard I would lose the group.

The problem was, I was on the rivet, feeling like I was going to hurl. Have you been there? This is where you have to be strong mentally as well as physically. When everything screams “ease up and give up” it’s the mind that enables you to push just a little bit more.

And that’s what I did! I stayed in contact, and as we crested the KOM I took a deep breath, prayed for a good powerup, and tried to recover as much as possible before the final sprint.

Unfortunately, I’d used up all my powerup mojo and the gods only gave me a 10XP bonus. $#%@ XP bonuses!

As we entered downtown Watopia I kept a wary eye on the pack, watching for a rider to begin sprinting. My plan was to follow the first sprint and hold that wheel with the hopes of coming around once they tired.

The first rider went, I shifted up and got out of the saddle, and went all in. But I didn’t have much left, apparently. Even though the sprint only lasted ~10 seconds, I didn’t have the power to get my nose into the glorious wind at the front. I crossed the line in 8th place, which would become 6th place on ZwiftPower thanks to 3 unregistered riders finishing before me.

See my ride on Strava >
See race results on ZwiftPower >

Lose Weight or Race Flats?

Here’s something interesting in the results above: my w/kg (3.6) were lower than anyone else in the list. In fact, the next rider at 3.6 w/kg or less was in 35th place!

This doesn’t necessarily mean that I rode this race super-efficiently: you can see my wattage was not the lowest.

What does this tell me? It tells me I’m chubbier than all the top riders in this race! Here are the weights of the riders who finished ahead of me: 68kg, 54kg, 80kg, 73kg, 73kg, 70kg, 79kg. And I’m the 84kg monster barely hanging on up the climbs!

I could be proud that I was able to hang on – I guess that’s something. But really what these numbers always make me ponder is whether I should slim down and climb better, or just keep being an “overmuscled cyclist”. I like cookies, so the jury’s still out.

Takeaways

Here are my lessons from this race:

  • When I feel like I can’t go any harder, I’ve still got more. Push and hold that wheel.
  • I need to lose weight. Or maybe I don’t?
  • Gotta be careful supertucking.

What About You?

Did you race TdZ stage 3? How did it go? Share below!


Weekly Zwift Racing and Special Guest Matt Gardiner – Never Going Pro Podcast #10

Weekly Zwift Racing and Special Guest Matt Gardiner – Never Going Pro Podcast #10

This episode’s discussion is around making the impossible possible. Can a rider race every week on Zwift year-round and continually building fitness over time?

Our special guest this week is Matt Gardiner from Team Indoor Specialist. He’s also the fastest accountant on Zwift!

About the Podcast

Never Going Pro is a new podcast about riding bikes, being parents… and trying super hard at both. Hosted by Shayne Gaffney, Ken Nowell, and Chris Gorney. See all episodes on Soundcloud. Also available on Sticher and iTunes.