Between Efforts, Episode 2: What Makes Zwift Good, Frustrating, and Still Worth Riding?
In this episode of Between Efforts, I talk with Eric Schlange, the founder of Zwift Insider, about the platform, the community and the future of virtual cycling.
We dig into how Zwift Insider grew from a useful side project into the most trusted resource in the Zwift world, what it takes to keep up with constant platform changes, and where Zwift might be heading in 2026 and beyond.
We also talk about racing, the Rouvy acquisition, MyWhoosh, AI summaries affecting creators, Zwift Community Live in Mallorca, and why virtual cycling has become much more than just riding indoors.
This weekend’s notable events include training rides for the annual Mt. Fuji Hill Climb event, plus some popular races/group rides and a running kit unlock event! See our picks below…
Once again, we’re featuring a popular ride from the newish ZABI squad. It’s a 120-minute banded ride on London’s The PRL Half route, which is 69.7km long with 1013m of elevation. The banded group may not quite finish the route in 2 hours, but you can continue on to finish on the Classique and earn the route badge if you’d like!
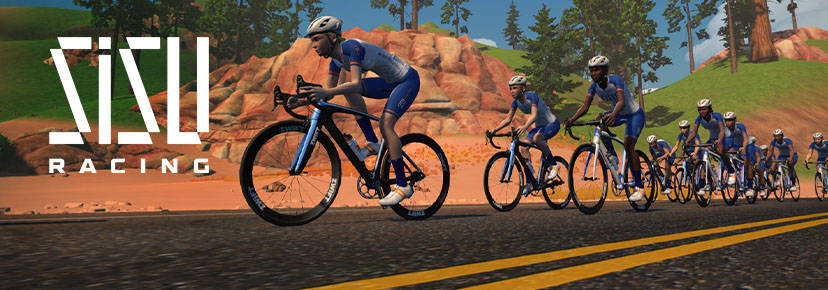
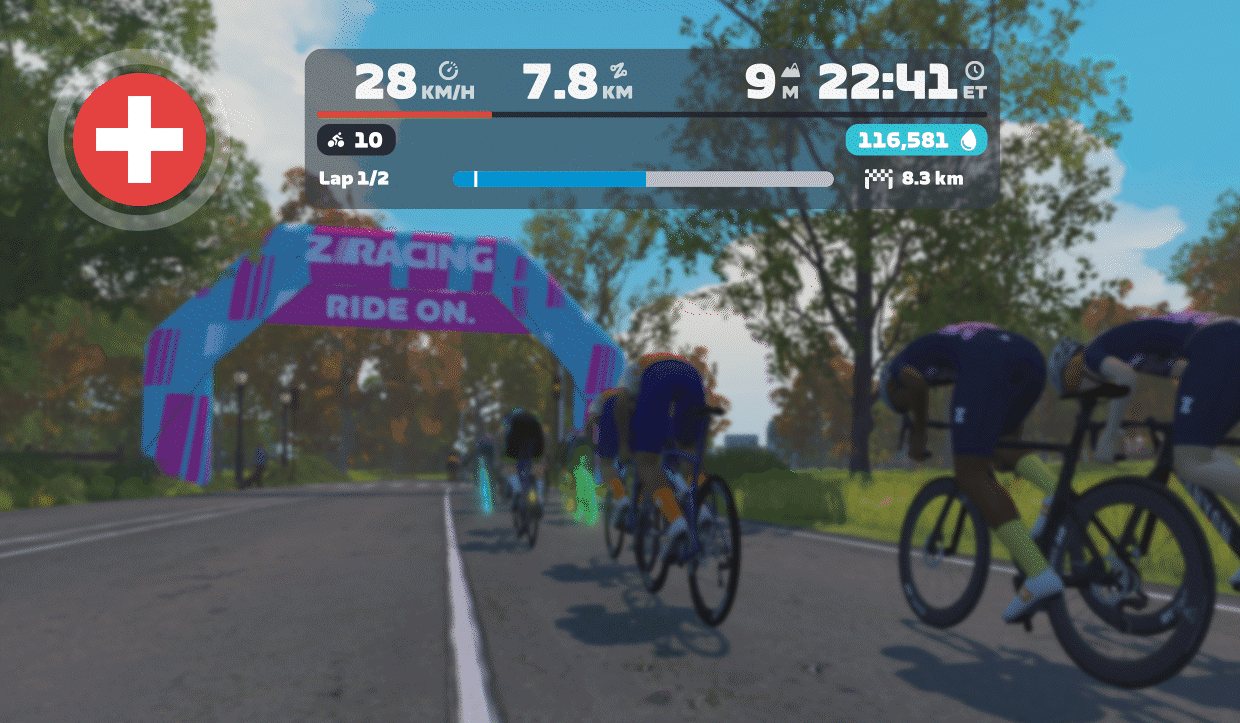
SISU’s 7-stage Pinkki race series runs across the 3 weeks of the men’s Giro d’Italia, and riders are taking on Stage 7 this Saturday! This stage is on Watopia’s Dust in the Wind (52.5km, 583m), and there are several event times to accommodate everyone’s schedules.
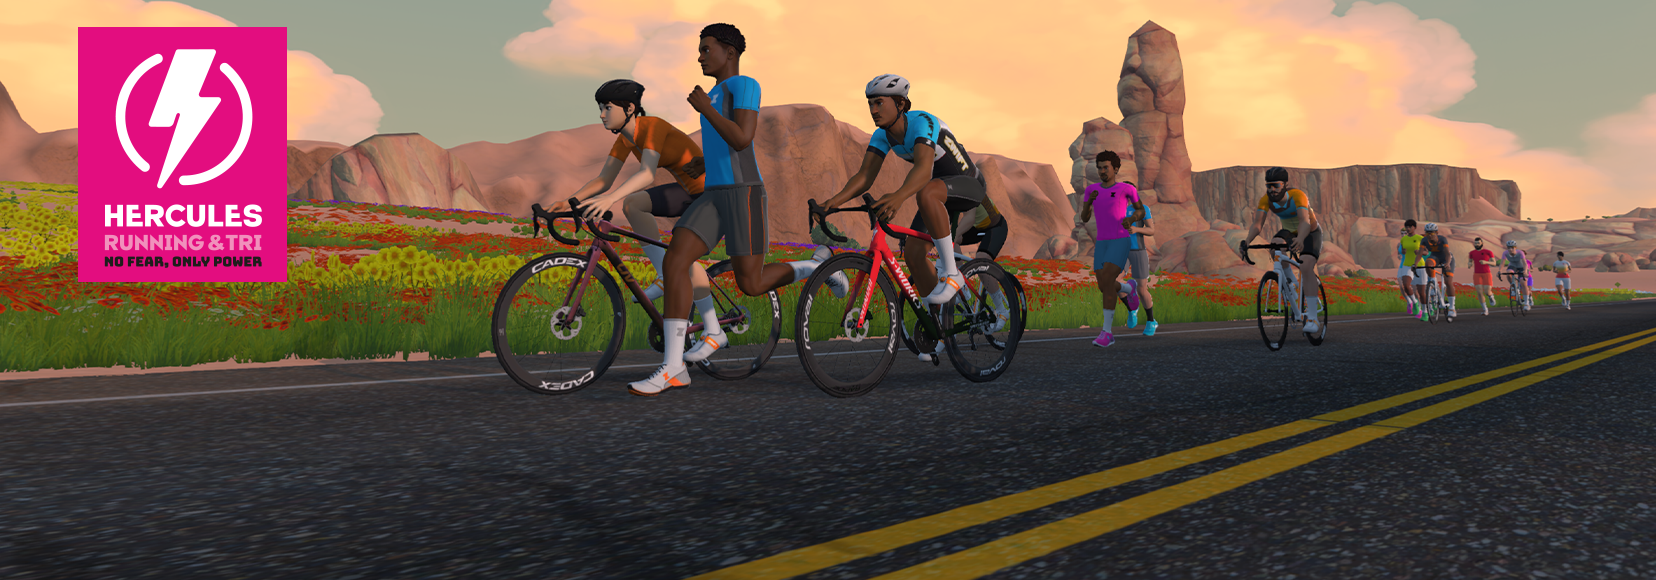
The Hercules Running & Tri club is finally getting their kit in game, and this weekend they’re hosting 3 kit unlock run events of differing lengths: 15, 30, and 45 minutes. Hercules says the virtual pink and black running club vest is “a symbol of power, unity, and fearless spirit.” See the IRL version here.
Want to accumulate lots of miles quickly? Join this popular group ride, which puts everyone on the fastest TT bike in game (Cadex Tri with DT Swiss disc wheels) with drafting enabled. It’s 100km, but it’ll be a fast 100km!
Riders are on Tempus Fugit – the flattest route on Zwift! Four different pace groups are offered, released so the faster groups catch the slower groups over time.
Bike upgrading hack: on rides with forced bikes, whatever bike you’re on when you join the event is the bike that accumulates the distance/elevation/time. So, for example, you could accumulate lots of distance toward a gravel bike upgrade while riding the Cadex Tri in this event.
We choose each weekend’s Notable Events based on a variety of factors including:
Is the event unique/innovative in some way?
Are celebrities (pro riders, etc) attending/leading?
Are signup counts already high, meaning the event is extra-popular?
Does the ride include desirable unlocks or prizes?
Does the event appeal to ladies on Zwift? (We like to support this under-represented group!)
Is it for a good cause?
Is it just plain crazy (extra long races, world record attempts, etc)?
Is it a long-running, popular weekly event with a dedicated leader who deserves a shout out?
In the end, we want to call attention to events that are extra-special and therefore extra-appealing to Zwifters. If you think your event qualifies, comment below with a link/details and we may just include it in an upcoming post!
For the first time in a while, the Zwift Play controllers have received a new feature update. In this week’s top video, learn all about what this firmware update delivers!
We’ve also selected videos about one rider’s first Zwift race, a comparison of Zwift and Rouvy’s Alpe d’Huez, the Quick Fire 30 challenge, and heat training.
Zwift PLAY Controller Firmware 2.0.1 // Now With Bonded Bluetooth!
Shane Miller, GPLama, explains the latest firmware update for the Zwift Play controllers and shares why this update is important.
Nearly last?! – My first ever Zwift Race
Sub-elite runner Cole Running tackles his first-ever Zwift race. Watch as he documents this grueling experience!
Zwift vs Rouvy | Which Platform Nails Alpe d’Huez?
Both Rouvy and Zwift offer a version of the iconic Alpe d’Huez. In this video, Lake District Cyclist compares the two offerings.
Fastest Zwift XP Method? Quick Fire 30 Explained
Titanium Ben shares tips and tricks on how to optimize XP earnings with the new “Quick Fire 30” challenge.
I Tried Heat Training for 10 Days, Did My FTP Explode?
Liam Shaw shares how heat training has changed his training and performance on the bike.
Got a Great Zwift Video?
Share the link below and we may feature it in an upcoming post!
This week, Zwift released a firmware update for their Play controllers – the original Zwift controllers, which were launched in June 2023 and discontinued in September 2025.
The update will be welcome to Apple TV users in particular, as it combines the two controllers into a single Bluetooth connection. The update essentially brings the Play controllers in line with the latest Click v2 and Zwift Ride controllers’ capabilities, meaning the Play should soon be able to work with KICKR CORE v2 and JetBlack Victory sensor bridging, and should soon be supported in Rouvy.
Shane covers it all in his excellent video:
Updating Your Firmware
Updating your Play firmware is easy. First, make sure they aren’t connected to a Zwift game session, since Companion can’t connect and update them if they’re active in game.
Then, from the Companion app, tap the homescreen firmware update notice or go to More>Equipment. The steps then look like this:
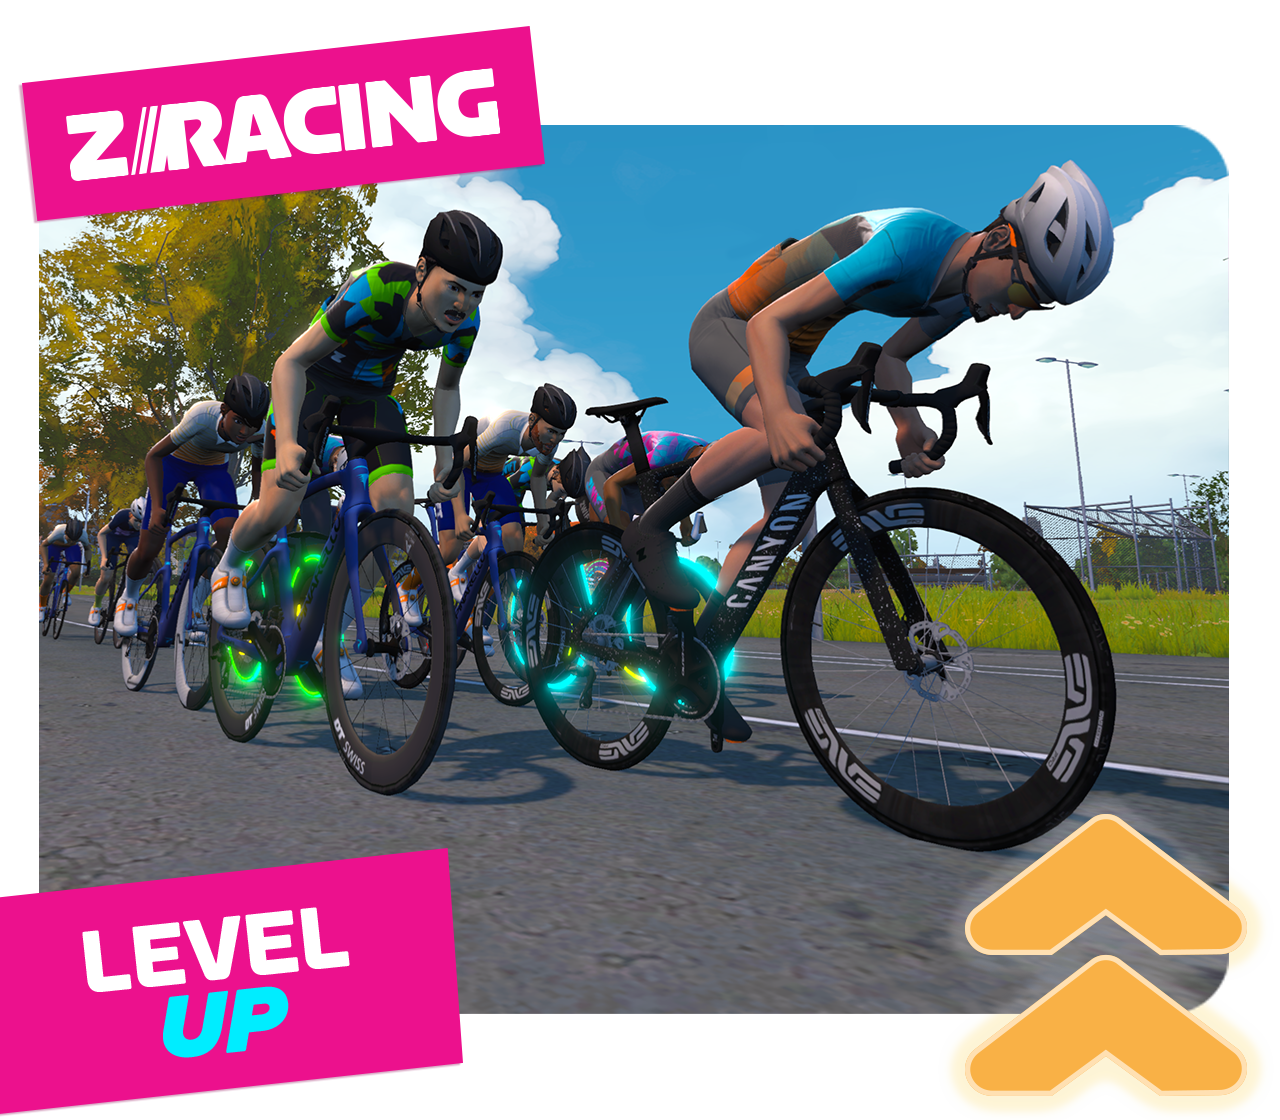
Zwift’s “ZRacing” is the platform’s most popular ongoing race series, and in June, riders are taking on courses with lots of banners so we can earn lots of bonus XP!Read on for details…
Bonus XP
This month’s races are all about bonus XP.
You’ll earn a chunk of XP for each stage you complete, plus every banner you ride through will deliver either a 10 XP bonus or (33% of the time) the big 250 XP bonus! 2000 XP is available as stage bonuses:
Your GC ranking is based on your best finishing time for each stage, and you can race stages more than once to try for a better time.
Your Racing Profile
Zwift launched the new “Racing Profile Page” last month at zwift.com. This brings all your Zwift race results together in one place, making it easier to track performance, racing score changes, etc. Your profile is available at zwift.com/racing/me.
Category Options
Zwift schedules three different flavors of ZRacing events in order to encourage “Fairer, more competitive racing for everyone.” They each use different racing score ranges for categorization and are titled Advanced, Range 1, and Range 2. Click banners below to see upcoming events for each:
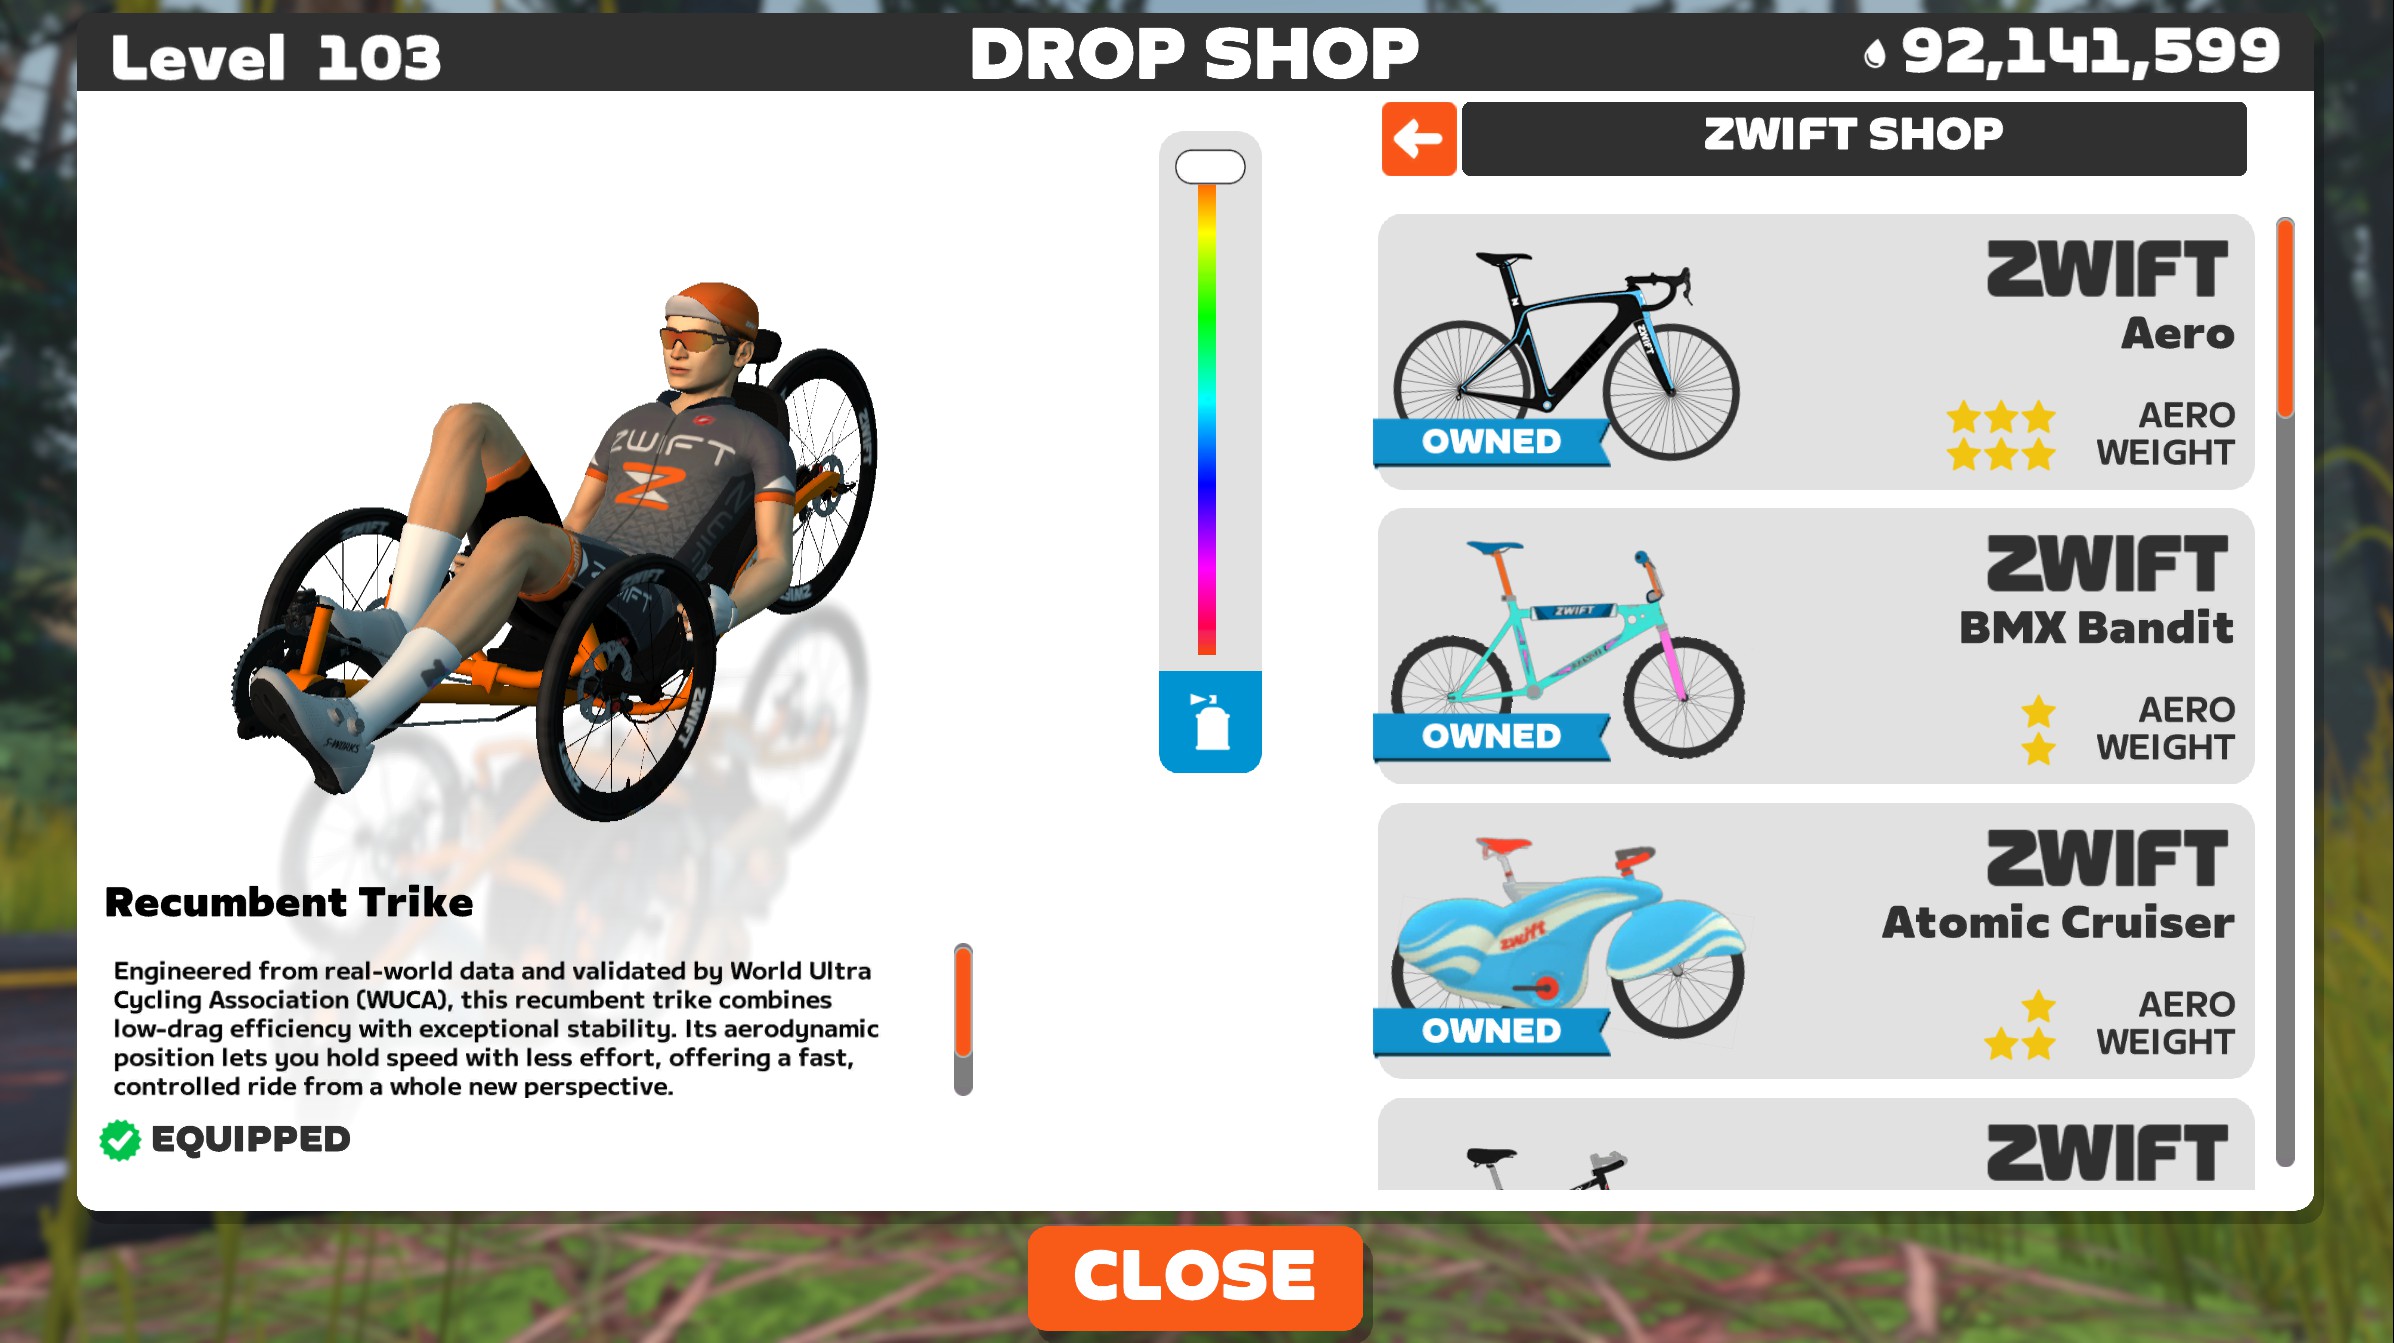
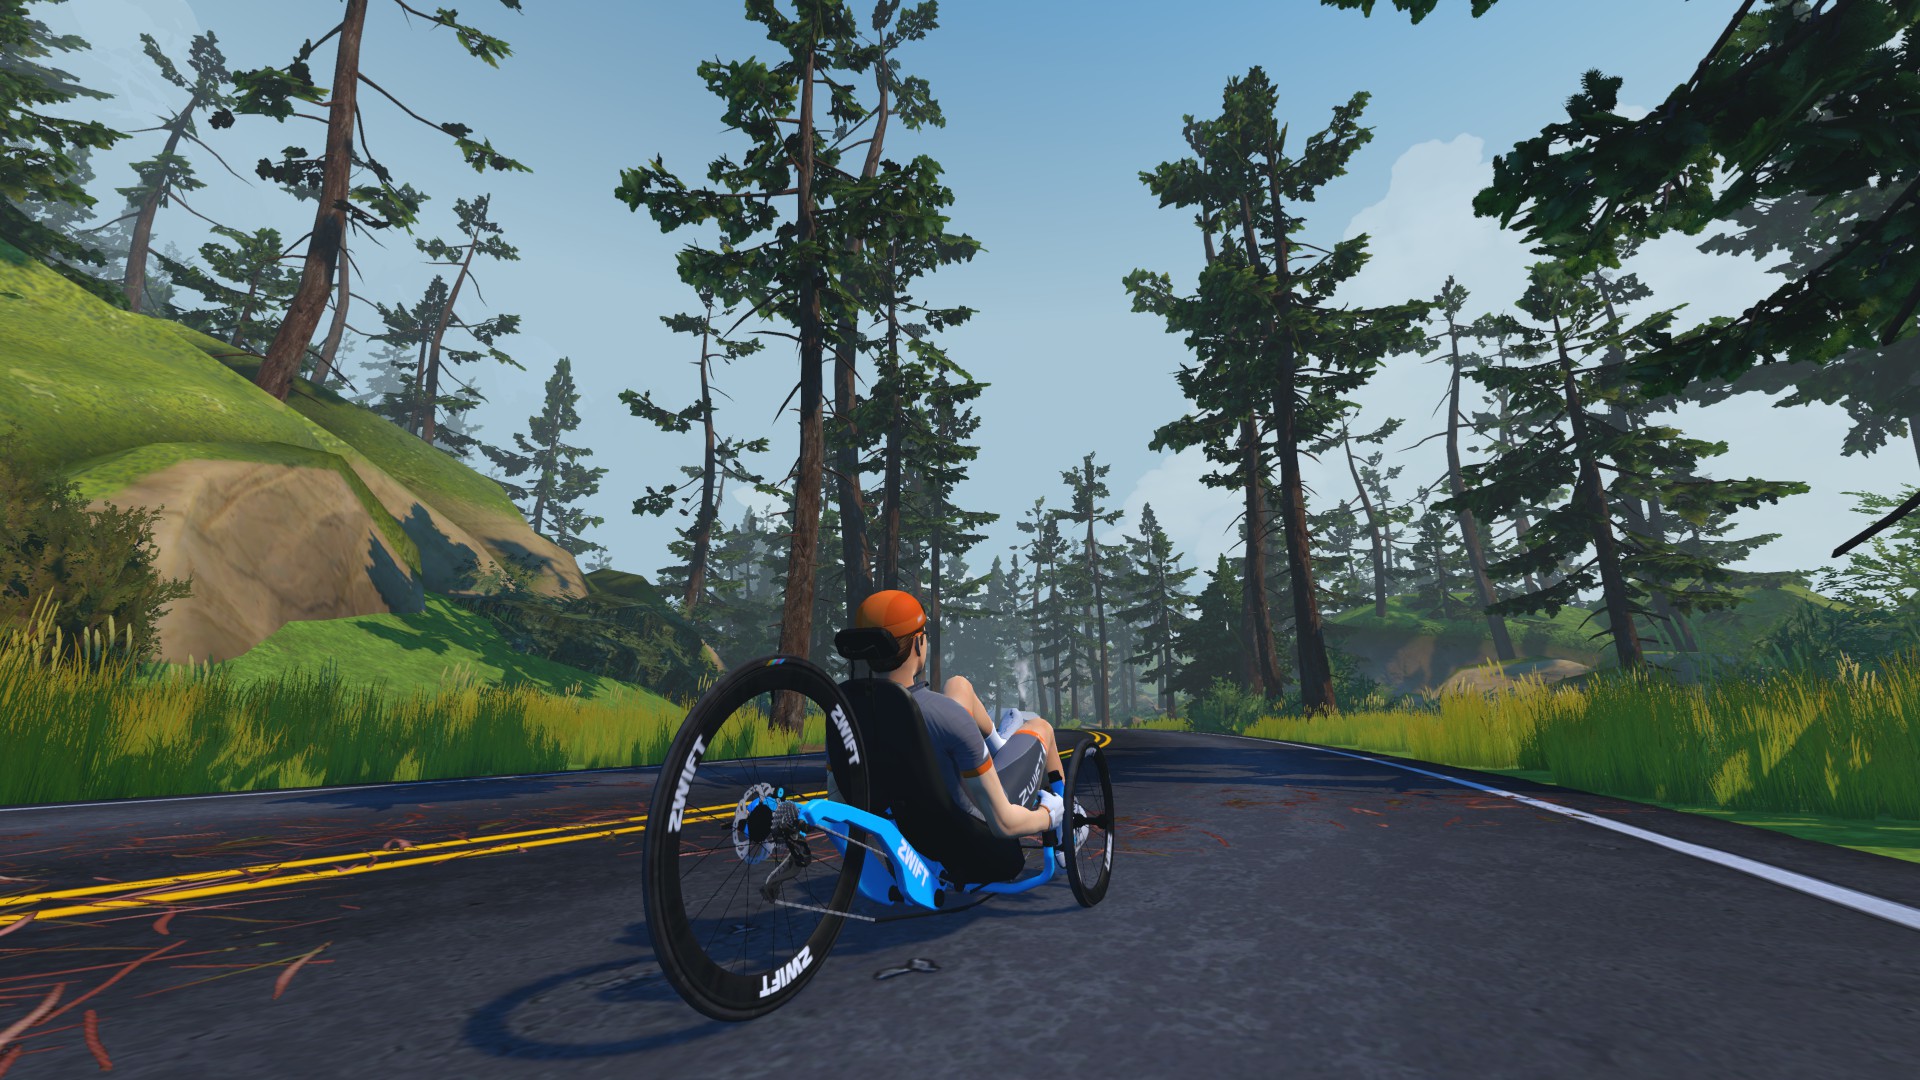
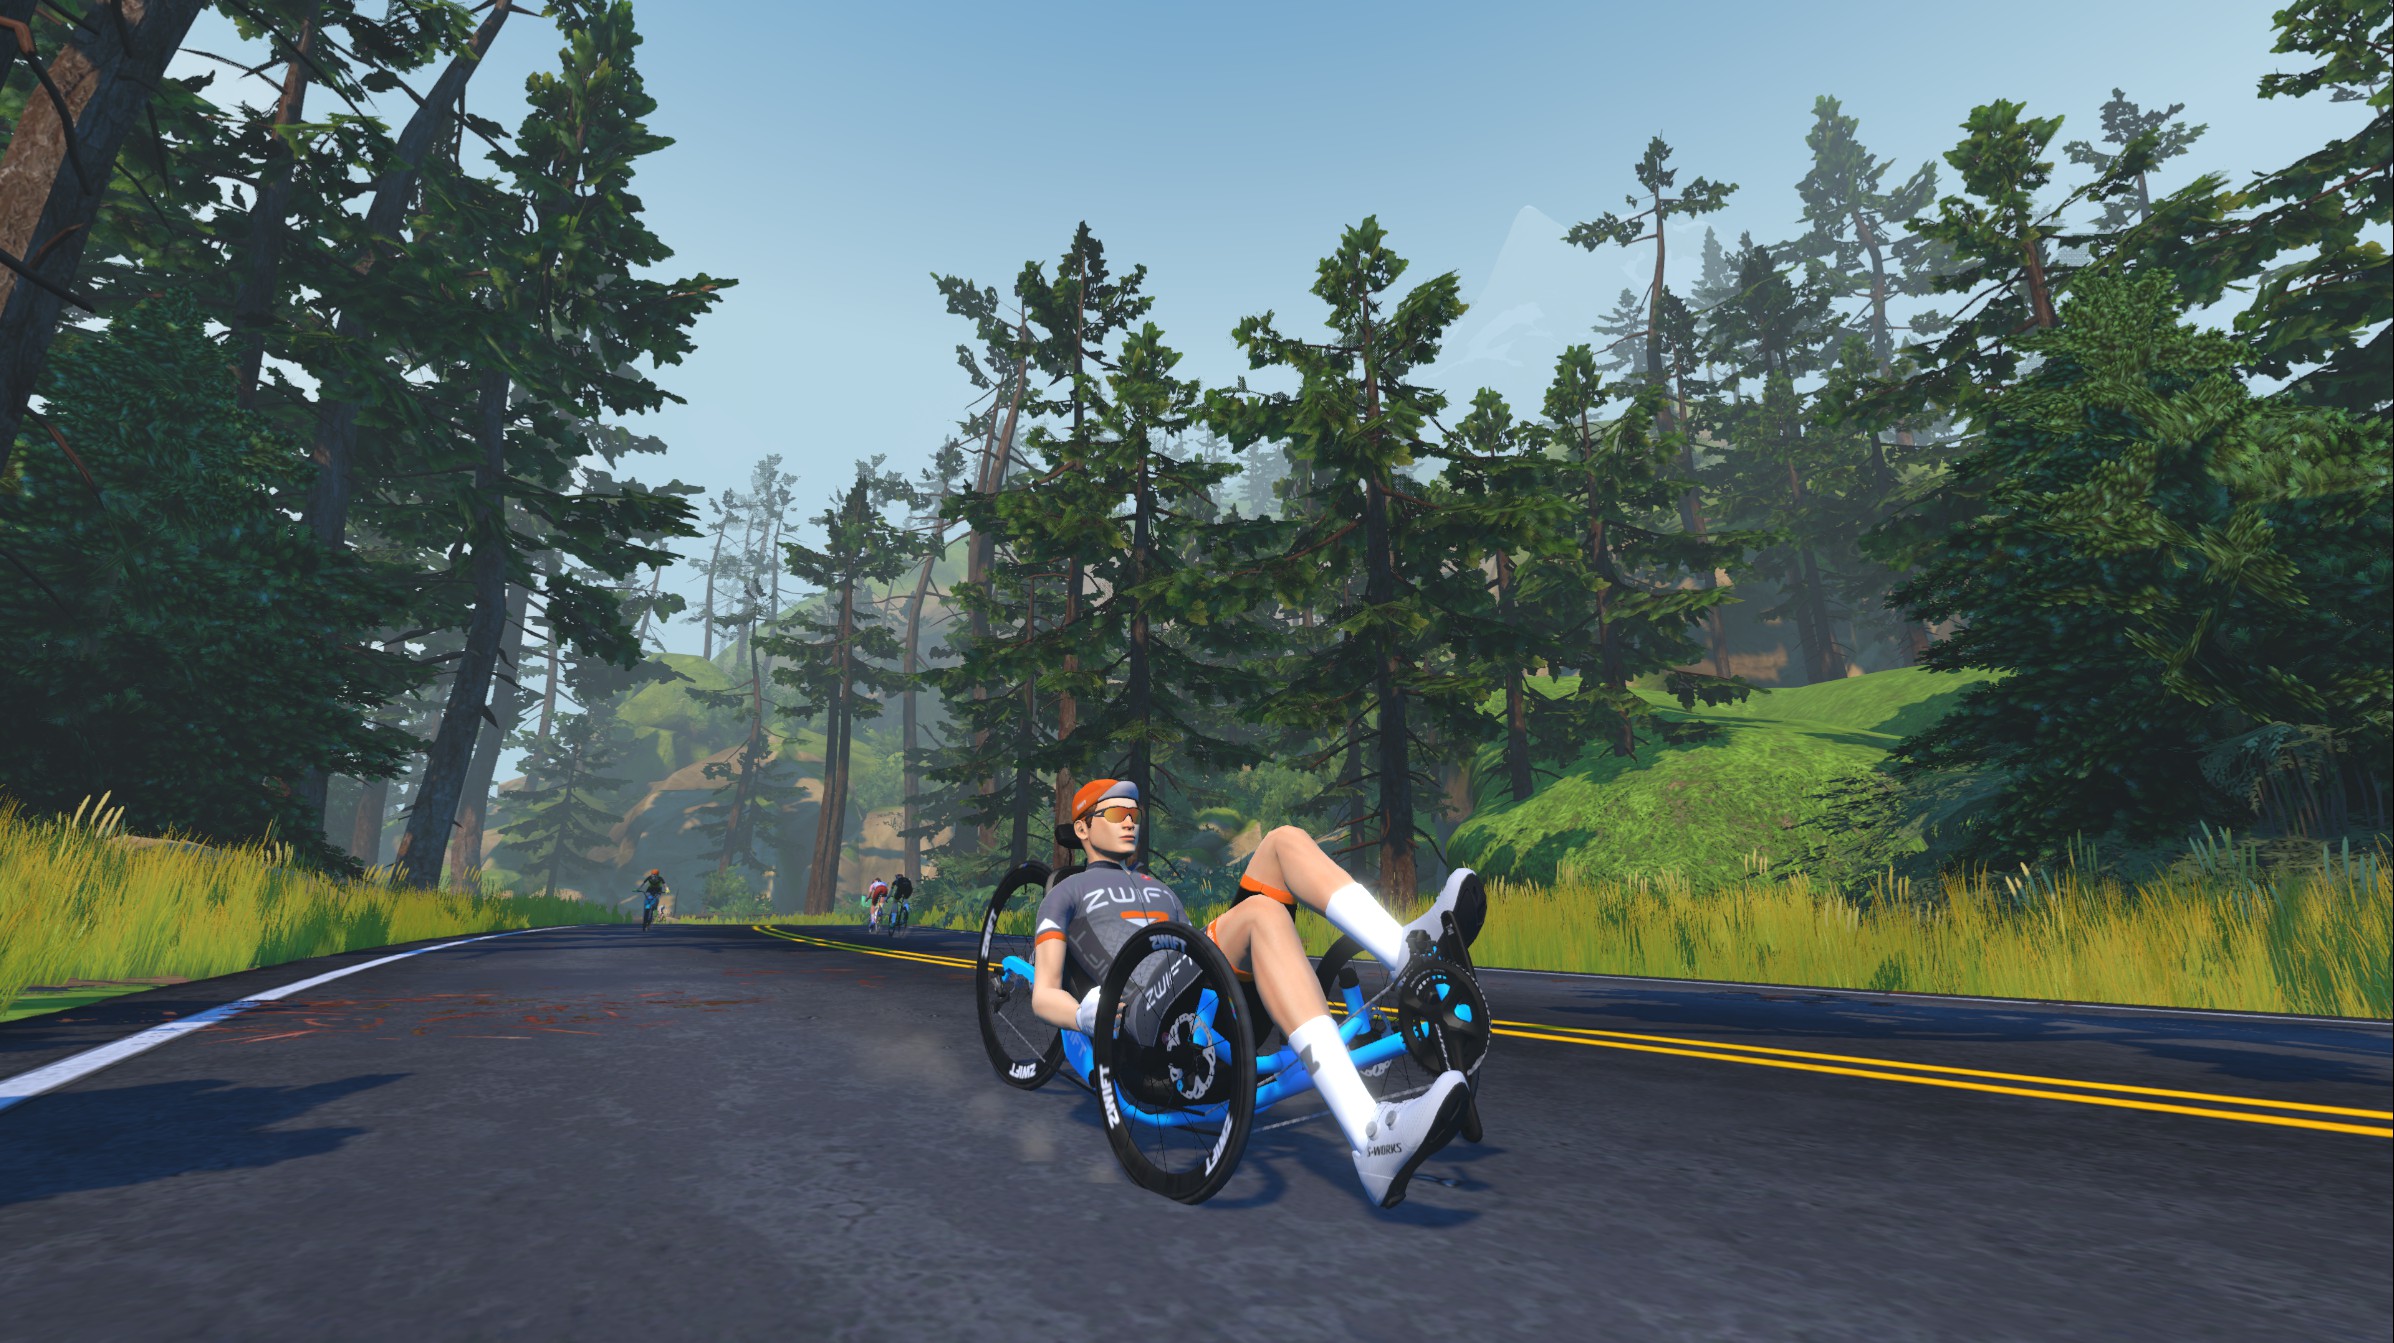
Zwift version 1.114 begins its phased rollout today. The update adds a new recumbent trike to everyone’s garage, plus three configurable fields to show split/interval averages. See details below…
New Zwift Recumbent Trike
Zwift says: “A new Zwift Recumbent Trike is available in everyone’s Garage. Engineered from real-world data and validated by World Ultra Cycling Association (WUCA), this recumbent trike combines low-drag efficiency with exceptional stability. Its aerodynamic position lets you hold speed with less effort, offering a fast, controlled ride from a whole new perspective.”
The trike is rated 1 star for weight and 4 stars for aero, just like Zwift’s Handcycle. It’s actually less aero than the Handcycle, but lighter weight. We’ll publish a complete post on its performance soon.
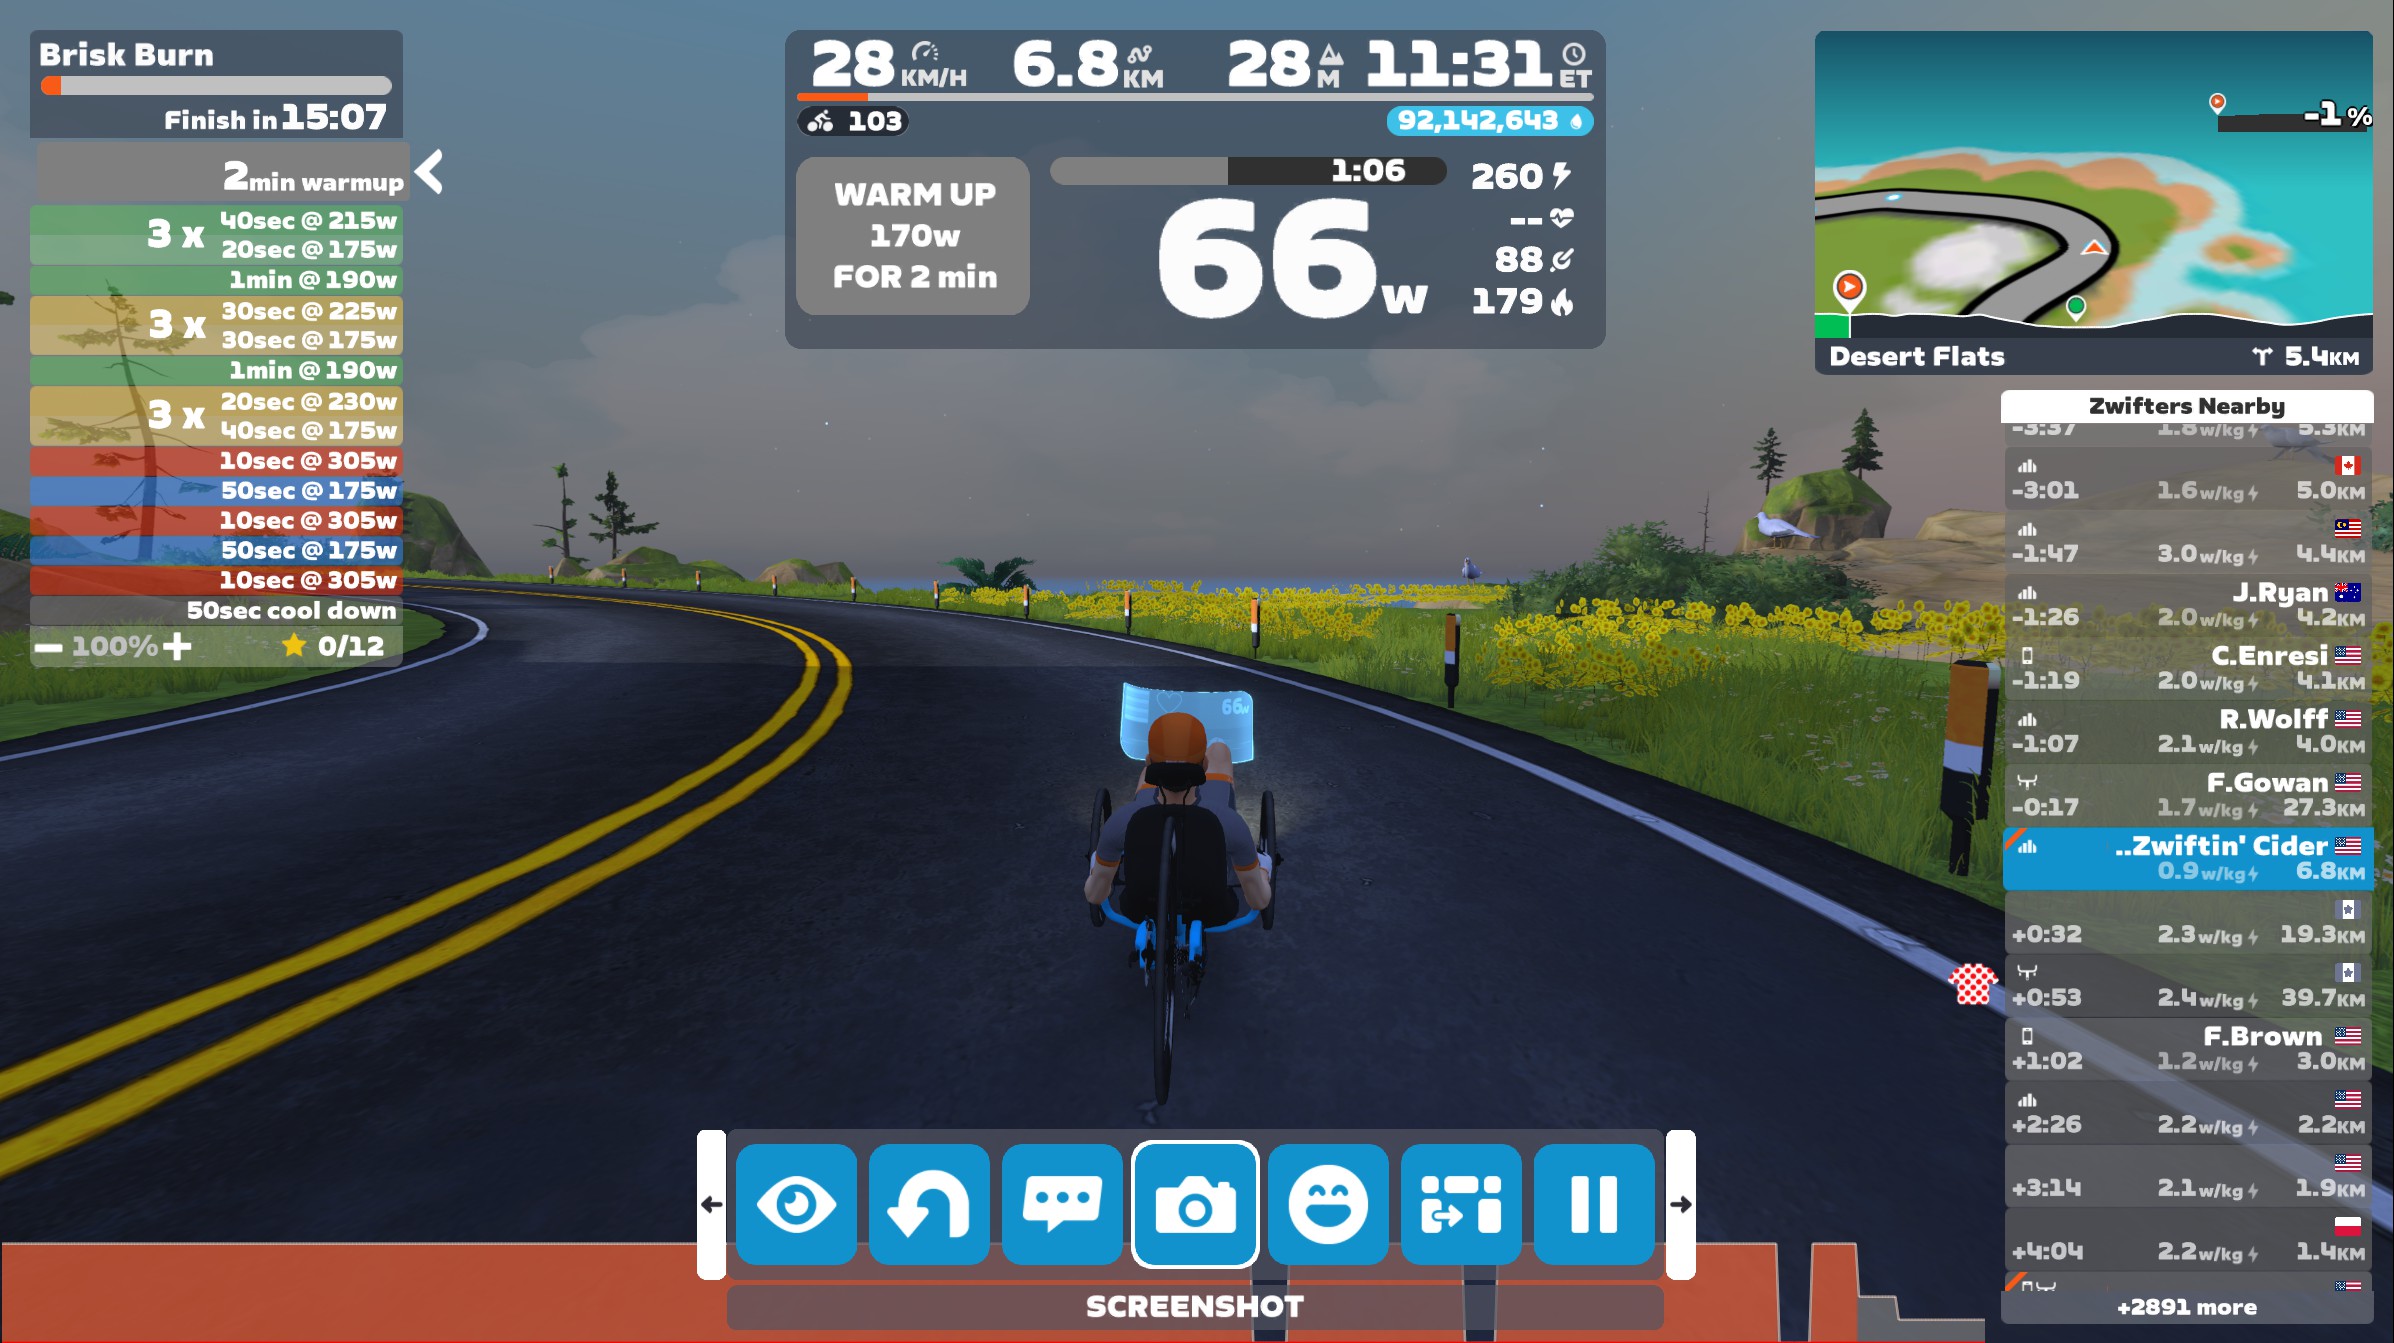
Split Average Power/Cadence/HR Added To HUD
The previous update added customizable fields to the workout HUD, but Zwifters were requesting the ability to see averages for the current interval instead of averages across the entire workout.
Today’s update brings that capability to the game, with split average power, heart rate, and cadence now available as HUD fields. These show your averages for your current split when not in a workout or the current interval when in a structured workout.
Configure these fields by going to Settings>HUD and selecting “Workouts” at the top. This lets you modify the setup for the HUD that only shows during structured workouts:
There are now 16 available HUD metrics:
Cadence (RPM)
Average Power
Heart Rate (BPM)
Energy Burned (CAL)
Power to Weight (W/kg)
Kilojoules (KJ)
Stress Points (SP)
Core Temperature (Deg)
Heat Stress Index (HSI)
Weighted Power (WP)
Power Balance (L/R)
Average W/kg
Average Speed
Split Average Power
Split Average Heart Rate
Split Average Cadence
If you do choose to display a split average in your HUD, be aware that there is nothing in the UI that makes it clear these are split averages vs full-ride averages. We recommend showing only split averages or full ride averages, but not both, since the fields look the same.
Release Notes
Zwift supplied the following additional release notes (our added notes are in italics):
Fixed an issue that could potentially cause Zwifters to lose bike upgrade progress after teleporting.
Fixed an issue that could potentially cause workout text to overflow the HUD in French, Italian, and Spanish languages.
Fixed an issue that could cause workout cadence goals to disappear while a workout was paused.
Fixed an issue that could cause the 3rd-person camera view to zoom in after switching bike frames.
Fixed an issue that could cause the 3rd-person camera to zoom in when equipping the handcycle.
Fixed an issue that could cause Coffee Stops to not be available in private meetups with the “Keep everyone together” setting enabled.
Fixed an issue that could cause the crankset to be invisible on the Specialized Tarmac SL8 frame.
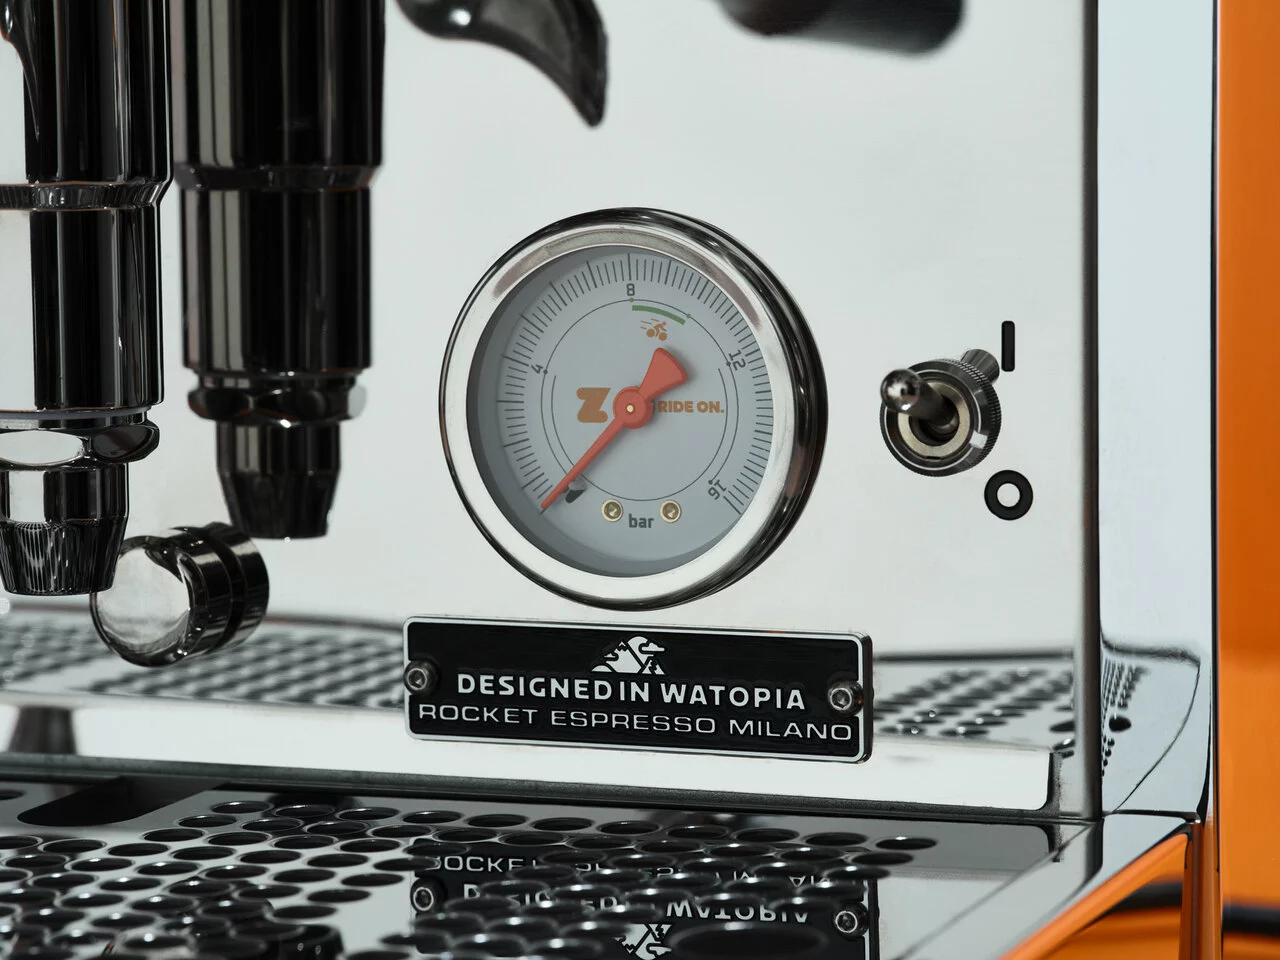
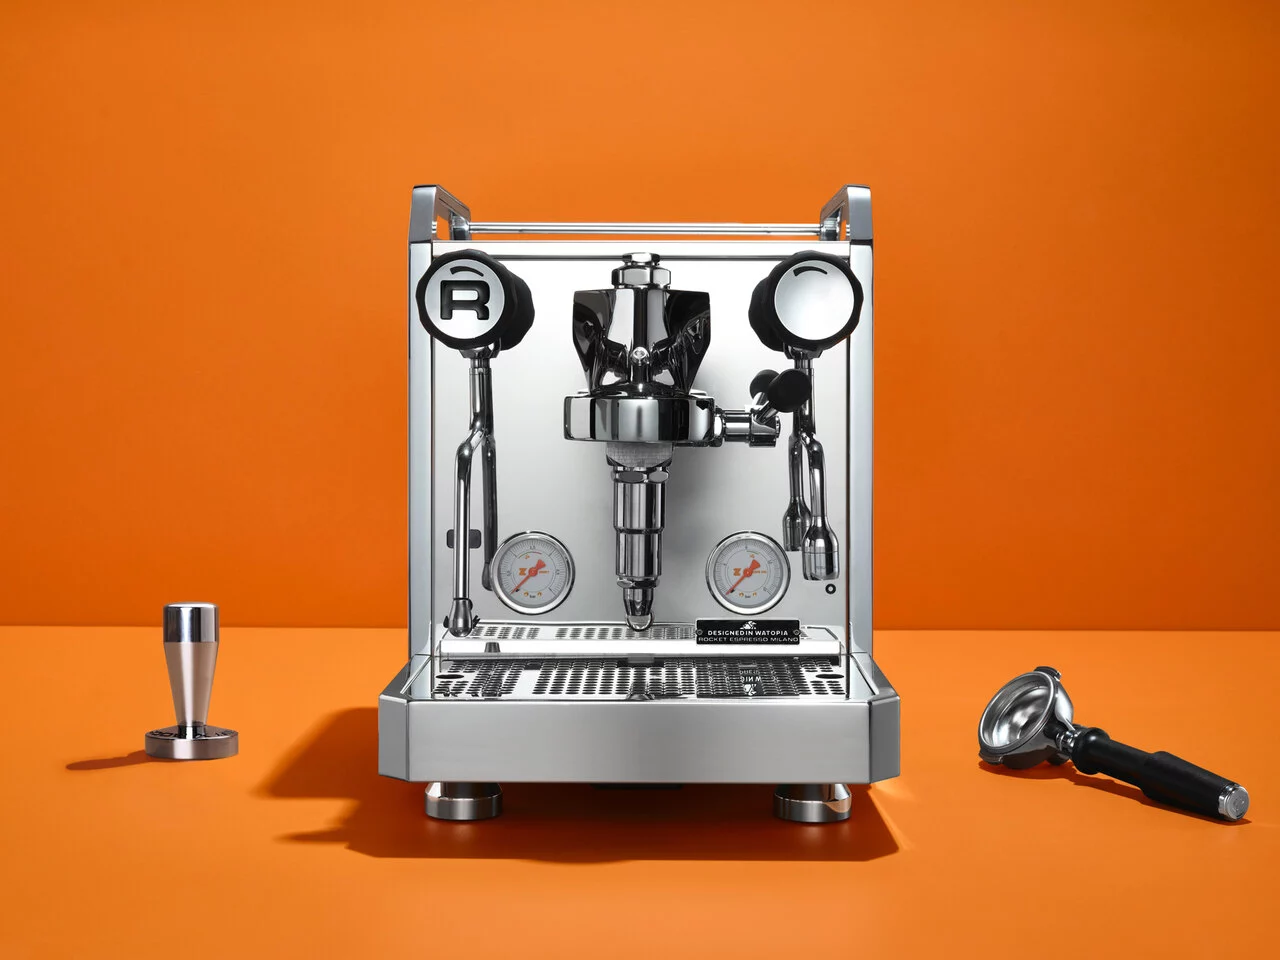
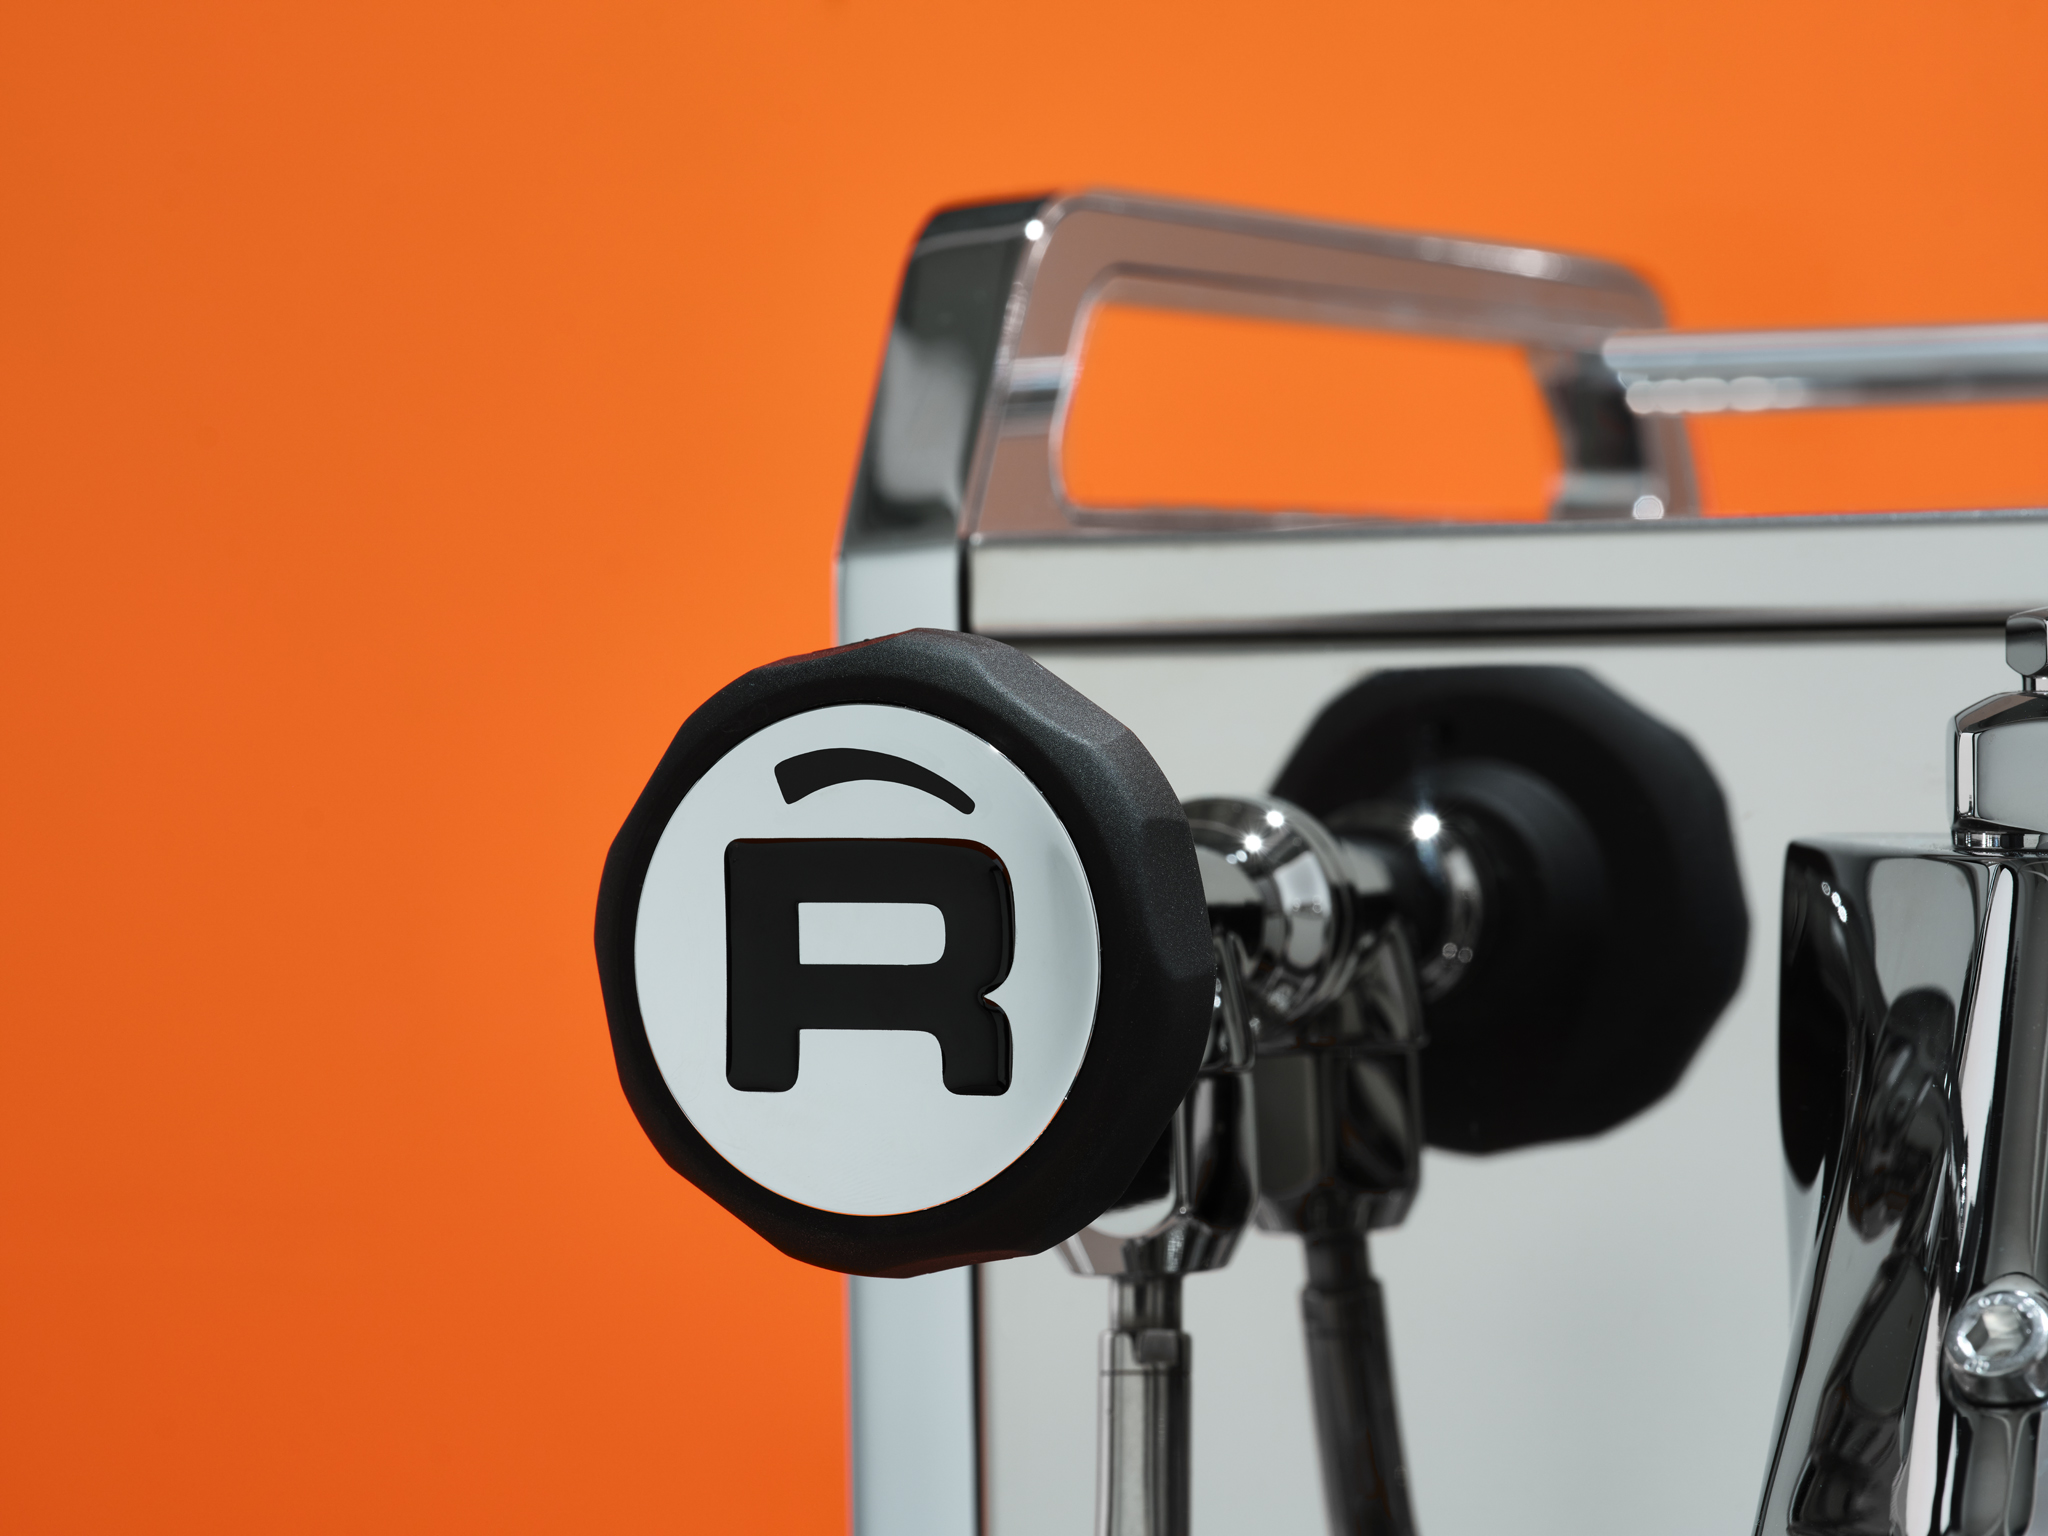
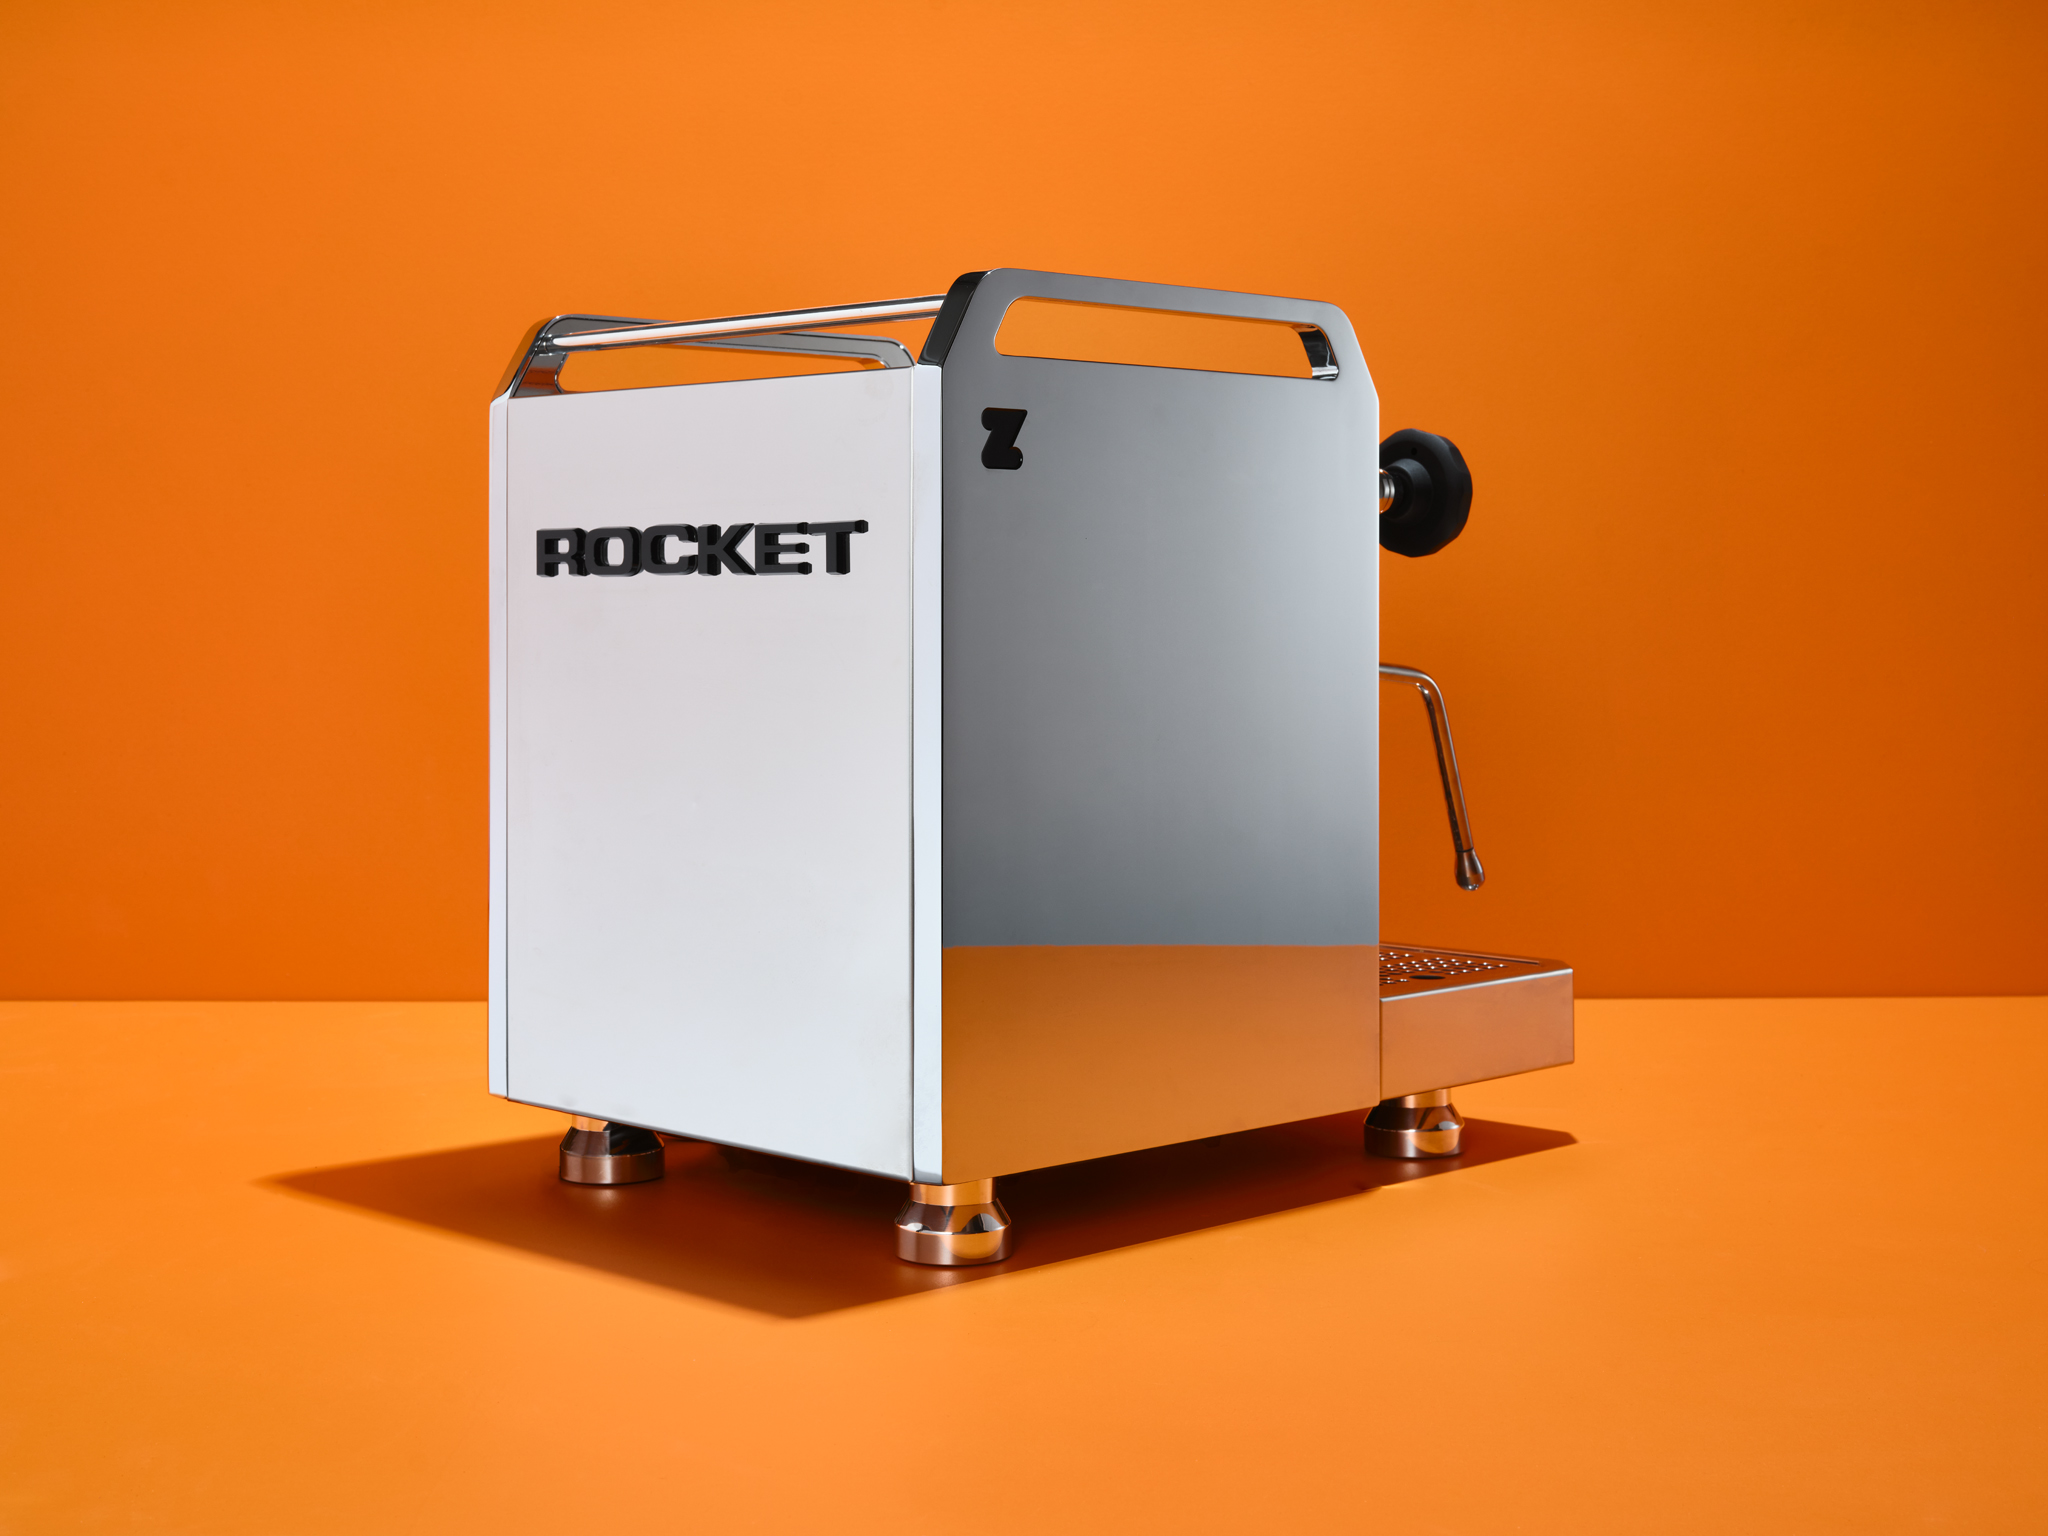
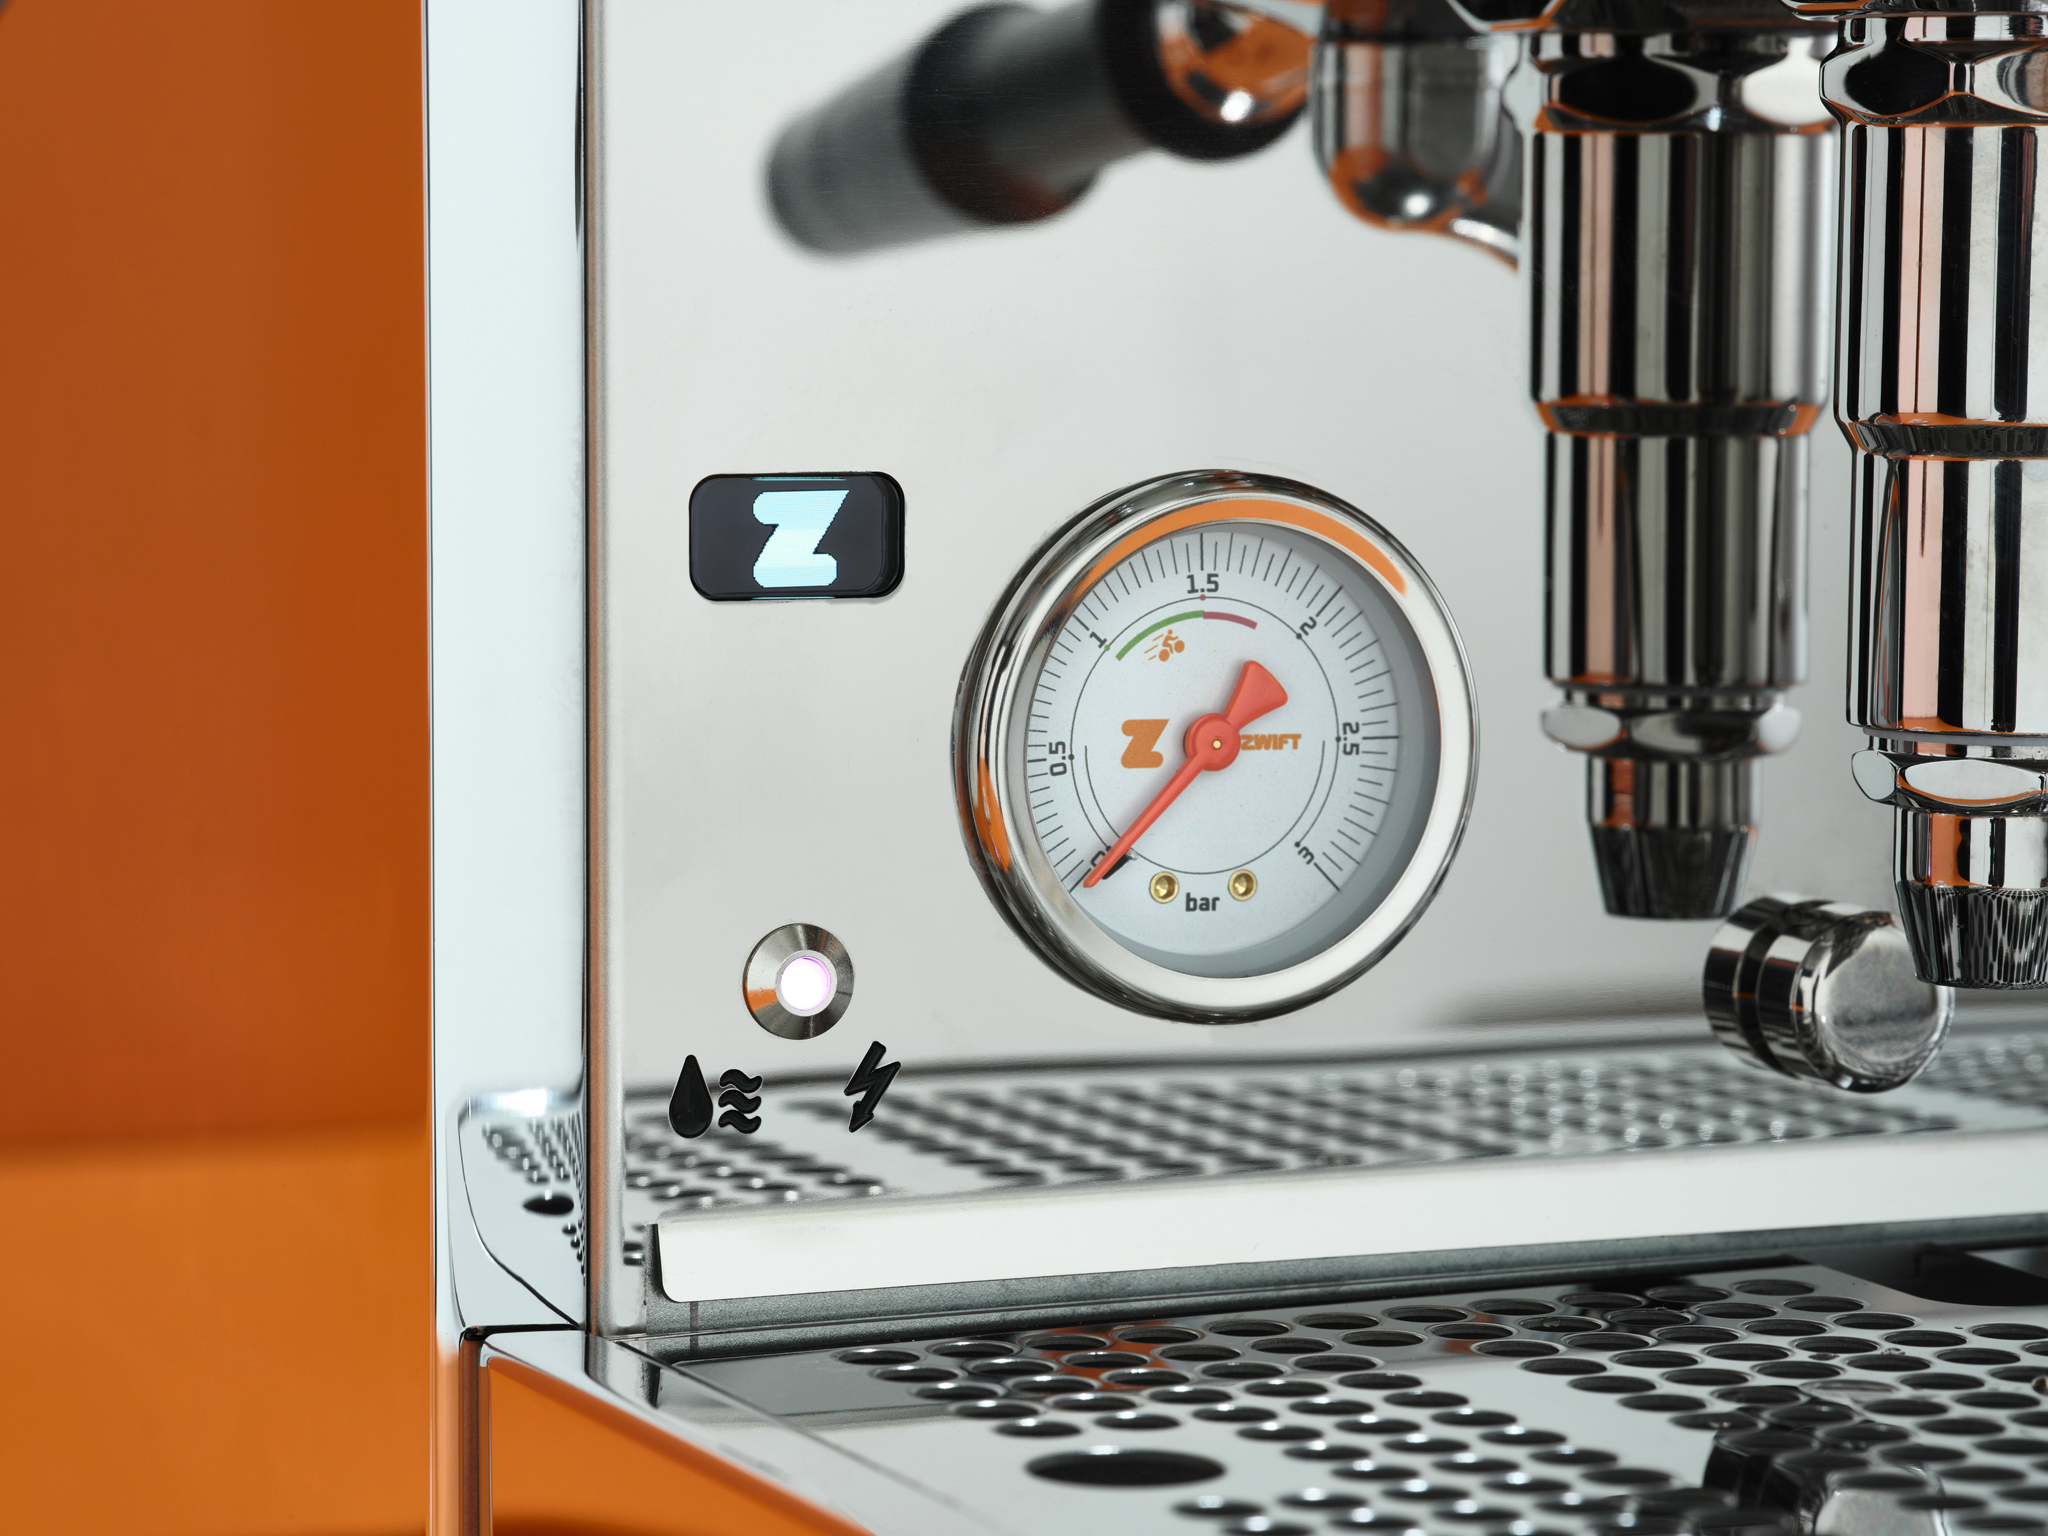
Mozzafiato Fast Zwift Edition Announced by Rocket Espresso
One fun “upgrade” I experienced at Zwift Community Live in Mallorca this past March was the addition of quality espresso. While ZCL 2025 offered unremarkable coffee made by resort staff, 2026 took it up several levels with trained baristas pulling shots on top-of-the-line Rocket Espresso machines.
At the event, Rocket Espresso announced the upcoming release of a beautiful Zwift-branded machine. And today, those machines are officially on sale! Here’s the press release:
Rocket Espresso and Zwift have teamed up to launch a limited-edition collaboration that blends the precision of Italian engineering with the high-octane energy of the world’s biggest digital cycling community.
At its heart, the Mozzafiato Fast delivers the renowned Rocket Espresso experience, refined, powerful, and consistent. With its beautiful stainless-steel exterior, this machine is unmistakably a Rocket Espresso, designed to look stunning in any home. This special edition brings subtle Zwift DNA into every detail. Discreet ‘Big Zee’ logos are seamlessly integrated into the machine’s design, while striking orange gauge needles add a signature burst of energy and an unmistakable nod to speed and momentum.
The Mozzafiato FAST (meaning “Breathtaking”) is designed to keep pace with your busiest training blocks. Featuring a new rapid-heating system, this machine is ready to pull a pro-grade shot almost as fast as you can click “Join Ride.” Whether you’re prepping for a social ride in Watopia or in need of a pre-work pickup, the Mozzafiato FAST ensures you’re never waiting on your caffeine.
Available from today, the Rocket Espresso x Zwift Mozzafiato FAST is strictly limited to 200 units – once they’re gone, they’re gone.
After discovering the joy of a quality espresso made at home, I went down the third-wave coffee rabbit hole. I’m still there. Looking to upgrade my home setup, I’ve had my eye on Rocket Espresso machines for a while, because they combine what I love about espresso (Italian design, cycling roots) with commercial performance.
(The first such machine I ever used, in fact, was when Monica and I stayed a few days at Zwiftcast creator Simon Schofield’s Girona home. Simon, being a man of impeccable taste, has owned not one, but two quality Rocket Espresso machines.)
I’m working on securing a Mozzafiato Fast Zwift Edition for Zwift Insider’s home office, with an upgraded grinder to boot. Because it just feels like the right thing to do.
If I manage to get one, I’ll pull a whole lotta shots, then post a full review. Stay tuned…
What do you think?
I’ll just say this now, to ward off the comments: Rocket Espresso machines are premium products, and their premium pricing won’t work for everyone. Like other Zwift collabs, it’s a high-end, limited product with correspondingly high-end, limited appeal.
With that said, if you love Zwift and fine coffee as I do, this may be your new favorite kitchen appliance/Italian art piece. Share your thoughts below…
Last week’s third running of the new VO2sday Micro Races went well… at least for some of you. Me? I didn’t have the legs. But I’m hoping to come back strong this week.
This week, we’re doing time-based races for the first time ever. We’re also heading to Scotland for a new set of routes, with categories tweaked a bit. Read on for details…
Time-Based Races!
Changing these from distance-based races to time-based has been feeling more and more like the only way to go, since distance-based racing creates a situation where the strongest riders complete the course quickly (often under 4 minutes) while lower categories may take 5+ minutes. This leads to an unpredictable workout and inconsistent recovery times.
This week, I’m taking the plunge and just doing it. Special thanks to James Bailey at ZHQ for helping to make this happen!
All VO2sday events for May 26 will be 4 minutes long, regardless of your category or how hard you ride. The goal? Ride further than your competitors!
Important note: Because these are time-based races, the only meaningful race results you’ll see this week are on the finishing screen that pops up at the end of each race, and the race results in Companion or at zwift.com. ZwiftPower will not display results properly.
We won’t have a 5-race GC competition this week, because we don’t have a way to combine rider distances from each race and show them on a leaderboard (ZwiftPower doesn’t support this). The good news is, I’m working with Nathan Guerra and his brilliant team over at Leadout Sports to make it happen. This week we’ll be testing it in the background – hopefully next week it’ll be live!
Compound Score Category Adjustments
I’ve tweaked the CS-based categories a bit further this week, to reduce the C and B groups and enlarge A and D. Here are the new categories:
The VO2sday Micro Races are nothing like your typical Zwift scratch race. Here’s how these races are distinctly structured to be engaging and fun while delivering a proper VO2 max session:
5 races in less than an hour – that’s 5 hard VO2 max intervals.
Very short efforts: Each race is very short, only 4 minutes, just like a good VO2 max interval.
Recovery time: Races are 10 minutes apart, so a 4-minute race leaves you with 6 minutes of recovery before the next interval.
Mix of courses: Each week’s race courses feature a mix of flat, climb, rolling, and even downhill parcours. Riders with lots of pure watts have the advantage in some races, while riders with strong w/kg have the advantage in others.
Compound Score categories: Since results will be driven by your power numbers, riders will be categorized based on compound score, not Zwift Racing Score. This takes into account your 5-minute power and body weight.
Mass start: While riders are broken into categories for results, these are mass-start events with all categories starting together, so everyone has riders ahead to chase. (Remember, the goal is to push as hard as you can for the duration of the race, not to sit in the pack and conserve so you can sprint to victory in the last 15 seconds!)
Drafting is disabled, so these are effectively time trials. (Yes, you’ll want a fast TT setup.) Hopefully this forces you out of the “sit in then sprint” mindset, and into “hold steady high power for the duration” mode.
Questions or comments?
I’d love to hear your feedback after you’ve completed the latest set of VO2sday races. Share it below, along with any questions or comments you’ve got beforehand!
Welcome to the second episode of our new podcast. First: from Dave, Shane, and me, thanks for all the feedback on Episode 1! We’ve taken it on board, and will continue to dial things in moving forward.
Now, on to today’s show…
Shane just returned from the massive China Cycle show in Shanghai, and what he saw about the global indoor cycling market may not be what you’d expect. We have a quick chat about China and its influence on the world of indoor cycling.
From there: Zwift’s new levels are out in the wild — how is the community actually receiving them? Tim Searle already broke the code, but who are the highest-level Zwifters today, and how confident are we that the highest-mileage accounts are clean?
That question leads naturally into MyWhoosh’s in-home anti-doping program. A Zwift competitor putting real money behind eSports integrity. What does it signal, and does it put pressure on Zwift?
Then the crew goes deep on Zwift’s AI-driven Next Up feature — including a quiet but telling recent development powered by some guy named Alan at Zwift HQ. Have our AI overlords already taken over Zwift support to silence dissent? Is Zwift trying to become something more than an indoor riding platform, and is that the right move?
Moving on, we tackle a subject that’s been a burr in our saddles for years: Zwift workout innovation – or the lack thereof. Eric’s new VO2sday Micro Races are a unique, community-built format designed to deliver structured training stimulus through an engaging and competitive race. The first event drew 371 riders, which says something. So why isn’t Zwift doing this themselves? Shane jumps on his soapbox to make the case for terrain-based ERG mode and deliver a verdict on the recent workout HUD customization updates.
Finally: Zwift’s Rouvy acquisition dust is settling. The forums have had their say. We read the room.
Find us wherever you get your podcasts. Leave a review if the show is landing for you. Word of mouth is how independent podcasts grow.
Listen On:
Meet the Team
Dave Towle: The voice of American cycling, having called some of the biggest races in the country for decades. Now bringing that same sharp eye to the indoor cycling world.
Shane Miller (GPLama): Based in Australia, Shane is one of the most followed and trusted cycling tech reviewers in the world. If it connects to a trainer or measures a watt, Shane has tested it.
Eric Schlange: Founder of Zwift Insider, the internet’s most comprehensive and reliable resource for Zwift routes, updates, and platform intelligence. The guy who actually reads every release note.
Share Your Thoughts!
This is just the first episode of what we hope is a long-running and useful community Zwift podcast. Share your thoughts below. We’re listening!


 Released")