Zwift Game News: 2nd Guest World Option, Delayed UI Update
Zwift has just rolled out a major change to the game. They’ve also announced a major change in plans! Clearly both bits of news are driven by the unprecedented level of users on the platform. Here are the details…
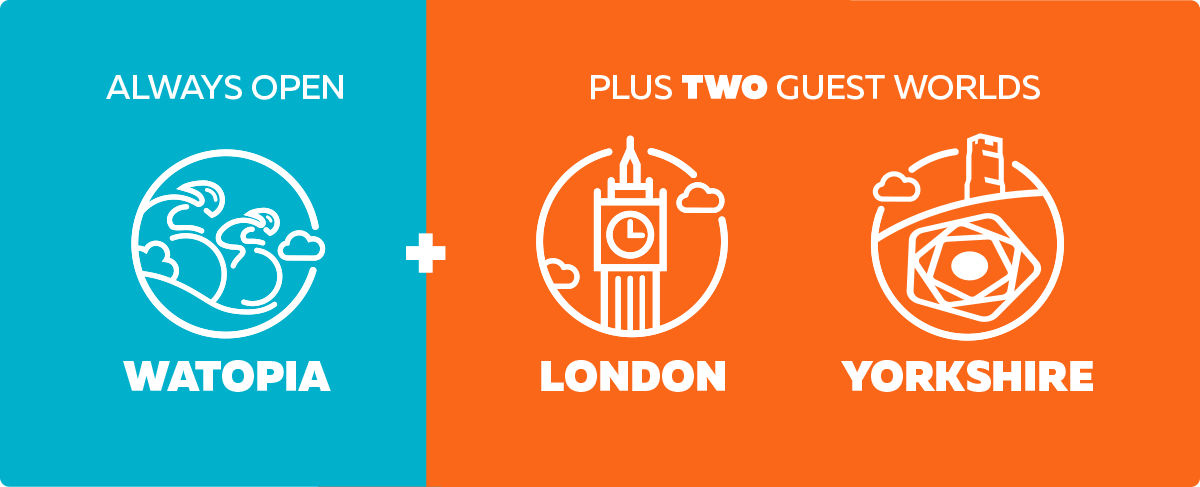
Three World Options
A game update is now rolling out which enables a third world option, giving Zwifters easy access to Watopia plus two scheduled guest maps each day.
Previously we only had access to Watopia and one guest map, but with traffic levels so high, it makes good sense to open up another world so maps don’t feel crowded.
This is great news. And it’s a positive signal that Zwift is hearing what the community is saying, and trying to act on it quickly. In fact, Zwift says this new feature was “Implemented as a direct result of feedback from the ever-growing community,” That’s nice to see!
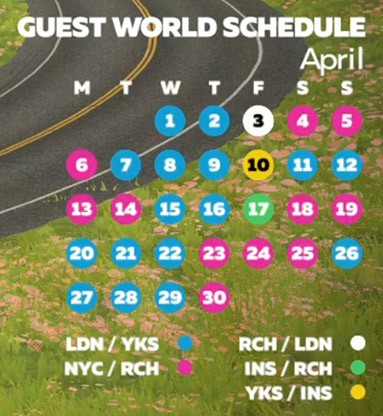
The guest worlds will rotate in pairs, which can be seen on the in-game calendar. London + Yorkshire, NYC + Richmond, Richmond + London, Innsbruck + Richmond, and Yorkshire + Innsbruck.
Note: the 2 guest worlds update will be available on all platforms in the coming days. IOS and AppleTV will probably take the longest to get the update, as app updates must be approved by Apple before release.
UI Refresh Delayed
Zwift also sent out this bit of news:
First, the good news is that the new UI for AppleTV is finished. However, we have made the tough decision to hold the launch until later in the year.
With the increase in usage we’ve seen on the platform in recent weeks, we know that Zwifters are relying on us more than ever. Our priority is ensuring the platform remains stable and our teams are able to best support the community. Postponing our update ensures we can better manage and help all members enjoy their Zwift experience through WFH and quarantine measures.
The teams are continuing to work as normal on new game features, new roads and of course, more event experiences.
A bit disappointing? Yes. Understandable? Also yes.
We’ve been eagerly anticipating the release of Zwift’s refreshed user interface. But we don’t want it at the cost of a degraded experience for Zwifters during a time when the world needs Zwift more than ever. So it sounds like ZwiftHQ is making a wise choice. And it’s good to hear that things are still moving ahead with new game features and new roads. We all love new roads!
Your Thoughts
What do you think of these two bits of news? Chime in below!
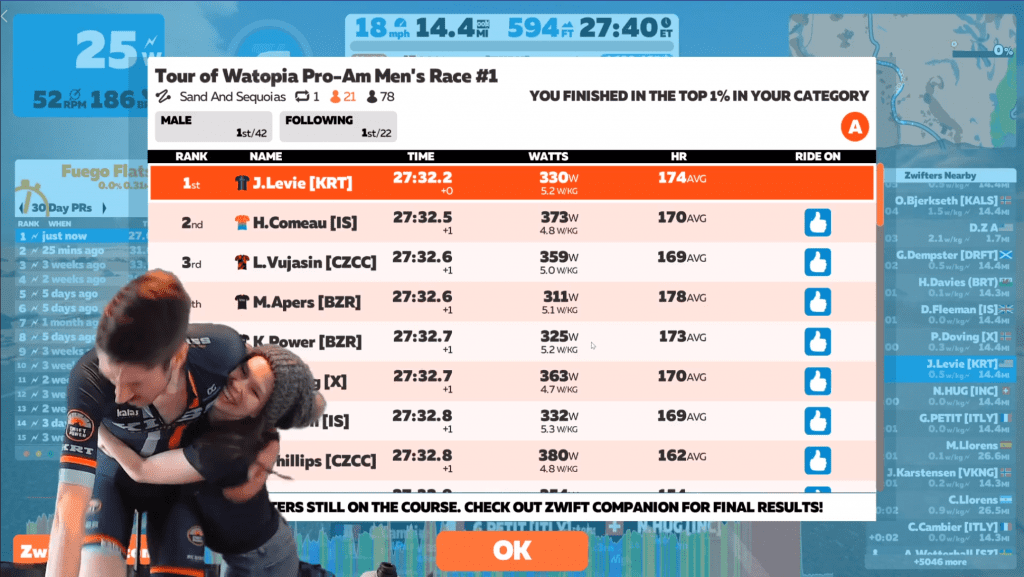
Interview with Tour of Watopia Pro-Am Series Winner Jonathon Levie
After some hard-fought battles the Tour of Watopia 2020 Pro-Am invitational series is all wrapped up. This was a points-based race series organized by Zwift, featuring a mix of the world’s top pro and community indoor teams.
While many expected the men’s winner to come from one of the more heavily-stacked teams, Zwift community fixture Jonathon Levie of ZwiftHype fame pulled off the victory. Let’s hear from our yellow jersey winner and get more insight into what it takes to come out on top in a race series of this caliber.
ZI: First question: you just won the big Tour of Watopia Pro-Am series! Congratulations. What does it feel like?
JL: Unbelievable! There’s such a strong lineup of riders invited to these events that I wasn’t expecting this!
Are you a celebrity in game now?
After I won Stage 1, I had a flood of notifications from new followers on the Companion app!
Tell me about your background in cycling and Zwift. How did you get to where you are today?
Before Zwift, I had a pretty regimented training schedule, with some weeks up to 25 hours. When we found Zwift early 2017, my wife Katie and I were both instantly hooked. We actually bought AC so we could stay inside when the weather was nice!
This was an invitational race series. When did you get the invite, and did you begin training specifically for the series after that? What did your preparation look like?
The invitations are always a surprise, and so training for these events is very different than a typical race schedule. We need to maintain top fitness throughout the year to be successful.
You ride for KISS Racing Team (KRT). I think it’s fair to say that most people didn’t expect the winner to come from KRT when you were going up against “pro” teams like Canyon ZCC and Indoor Specialist. Was that intimidating at all? How did you approach that strategically?
We’ve had success in the past through Tim Cartwright, so I’m trying to live up to those past achievements he set for our team.
What’s convenient with Zwift racing is we have the ability to see data history for other riders, know where we stand performance-wise, and plan around that. However, it’s not all about putting out big numbers. As you can see through watching the pro riders that join our events, there’s a certain Zwift craft that needs to be learned to succeed here.
Absolutely. There’s a lot more to Zwift racing than pure power! What sort of skills/knowledge (outside of pure fitness) did you find most useful in these races?
Learning to draft is key! I’d recommend hopping into an event the uses #doubledraft to see how important this is. There’s a weekly series I’ve been doing that combines all categories together and utilizes this double-draft setting. In that race, the B’s, and some C’s, can make it all the way to the sprint finish with our front A group. The double draft is so strong, they can even work together to pull A+ riders back that are trying to break away!
Most Zwift races use normal drafting settings, but what you learn through doing double-draft events can be applied. It’s interesting to see these pro riders work their way to the front of the pack and take monster pulls, as they’re just providing draft to the resting pack. At best, their pulls will shed a few weaker riders that were already on the edge of dropping.
When it comes to drafting at the front, if you’re overlapping wheels with the person who’s pulling the pack, then you’re also putting your nose in the wind. The best time to push is when the road tilts up, but even uphill there’s a draft, and you’re also a carrot to chase. Learning how to surf the pack is key to making to the sprint, and double draft events emphasize this.
This was a points-based series, not just a series of scratch races. Points were available mid-race at sprint and KOM markers, as well as at the finish line. How did this change your approach to each event?
With the points structure, it’s a very animated race. Normally we don’t see breakaways, so this format expands a single race into a handful of back-to-back mini-races. Saving everything for the end doesn’t pay off, you have to dig deep and recover quickly to come out on top.
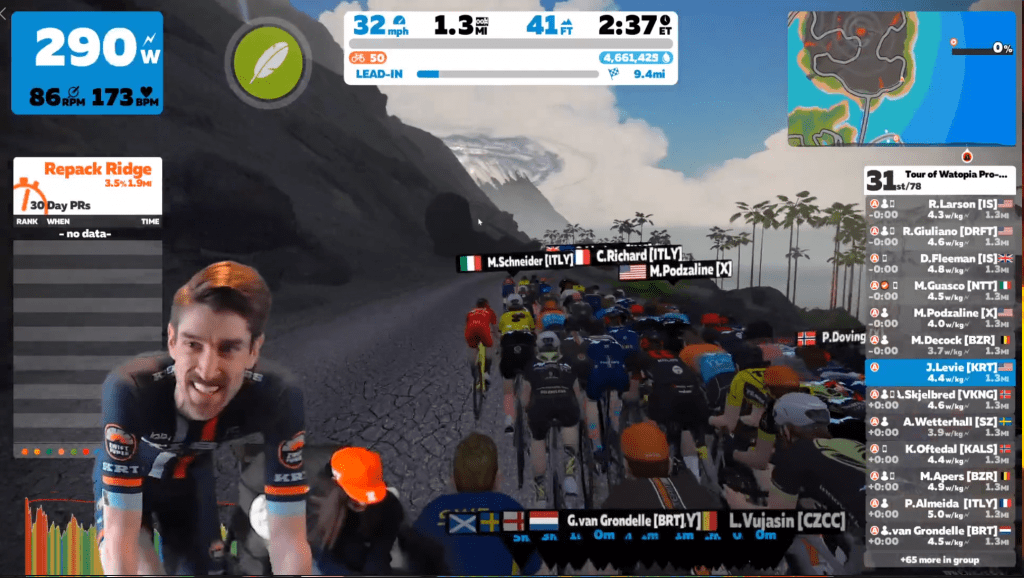
Jonathon riding away from the field in the final sprint of the men’s first ToW race
Because of your high placings in this series, I’m sure you got to work with ZADA to verify that your power numbers were accurate. What was that experience like?
With ZADA, it’s exciting to get confirmation that you’re doing everything correctly, but we actually don’t find out their results until they are posted for everyone. I assume if something was off, they’d continue to work with you to solve the issue, as they want riders to continue to race.
As I don’t have much outdoor data from the past 12 months, just some social rides with the wife, I did a series of tests for ZADA between stage 1 and 2 for verification. Actually, I ended up injured from it, so stage 2 and 3 I tried my best to hang on to my lead. In the future I’ll briefly head outdoors for some prominent KOMs, so I won’t need to do last-minute verification testing.
That’s a good lesson for anyone racing in these top-tier races, and one I’ve heard from ZADA themselves. Have your power numbers on file and ready to provide to ZADA before they ask for them!
You got to wear the yellow jersey for the last two races, as series leader. Do you get to keep it? Were there any other prizes (cash, smart trainers, in-game kits) associated with the series?
From what I heard on the broadcast it’s mine to wear around, so keep your eyes out for some happy yellow pixels riding around Watopia.
Shoot, I actually had to repeat all of our Men’s Pro-Am stages to unlock the sweet Tour de Watopia jersey, since our races don’t count towards completion, and that’s really what I was aiming for. But yeah, there was also money, which I found out after Stage 1.
A congratulatory hug from wife Katie after his race 1 win
What do you have planned next in terms of bike racing?
Actually, the month before our Tour de Watopia race I did my first vEverest. It was 11 hours and 2 minutes. TWO minutes. It could have been 10 hours 2 minutes, or 12 hours and 2 minutes, but either way I want to chip those two minutes off.
The payoff is the ability to eat non-stop throughout the whole day, and I’d like to fit that in before the next invitational race announcement.
Anything else you’d like to add or share?
My team was very supportive, and we worked together to make it happen. We needed a minimum number of riders capable of committing to the time slots, so we brought in B riders who put themselves out there live. Their goal was to hang on as long as possible out of the pens, which was about a minute.
For the jungle event, one of our B riders had a goal of making it to the front of our MTB pack on the paved section, so he chose a road bike and sprinted through the group, barely making it up there and actually nabbing some camera time. As soon as we hit the dirt though, the rolling resistance difference made it appear as though he pulled a parachute, but he had his own victory.
Congrats on your win, Jonathon. See you out on course!
Cyclists. We sure like our kits. Sometimes we wear the same kit as a group, to show unity. Other times we wear a unique kit to stand out from the crowd and show a little personality.
Due to this wardrobe fixation, one common question asked by Zwifters is, “How do I get my club’s kit into Zwift?” This question is being asked even more lately, with so many cycling clubs hopping on Zwift to hold club events. It’s only logical that these groups would want to wear the same in-game kit as they do outdoors.
Unfortunately, that’s probably not going to happen for your club. At least, not anytime soon. And not in the way you may envision.
How Zwift Kits Work Now
Currently, the only way to get an in-game custom kit is to convince ZwiftHQ to devote an artist’s time to making it happen. According to Wes Salmon in this week’s Zwiftcast, creating the kit artwork is a painstaking process. Artists receive the artwork in standard format such as PDF, then have to re-create it in-game, “pixel by pixel” as Salmon put it. The process takes hours.
Obviously, this isn’t a scalable model. As Wes said, Zwift could dedicate 5 artists full-time to the task and keep up with demand… or those artists could be working on new roads and features.
We see several new kits show up each month, and these are almost all created to support a major event (Tour of Watopia, for example) or pro teams who are participating in official events. Some kits are created to support ongoing group rides such as AHDR, but those rides have to have a proven track record of high attendance and quality leadership before HQ will put the resources into creating a kit.
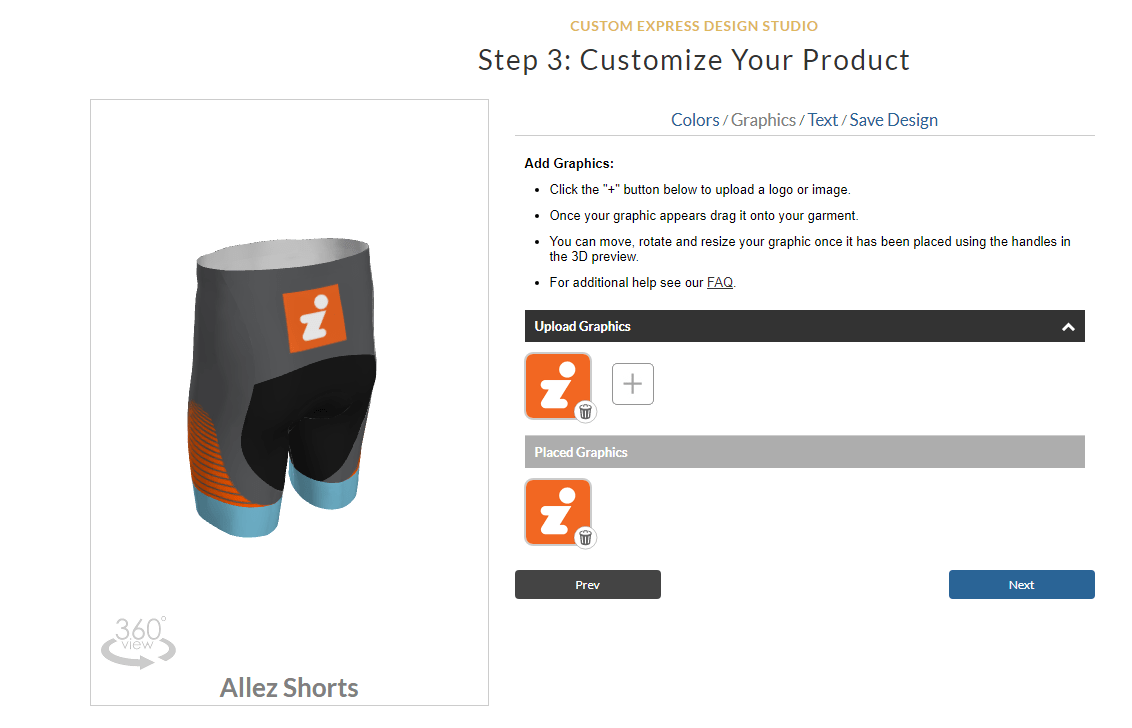
How will this work exactly? Again, listening to Salmon’s recent interview, it sounds like Zwift’s intention is to build some sort of “Kit Creator” for club admins.
This would need to be a simple, template-driven tool similar to the web apps used by custom kit manufacturers like Voler. These tools have you start by selecting from a group of templates for each piece of clothing. Then you select color options for particular sections of each piece, then you upload and place your logos. Here’s a screenshot of Voler’s tool:
Screenshot from Voler’s online 3D kit designer
When will we see this tool? Zwift isn’t stating any timelines, and I’m sure their much bigger priority with Clubs is getting some sort of event editing and creation tools in place. But once event editing is done, I’d bet good money that the “Kit Creator” will be the next big Clubs feature.
One thing is certain: when it rolls out we’ll see an explosion of new and unique kits. Teams are going to love it!
Wrapping It Up
Unless you’re a World Tour or Conti pro team officially participating in key Zwift events or an established cycling brand partnering with Zwift, I wouldn’t even waste my time contacting Zwift to inquire about getting my kit in-game. It’s just not going to happen right now, because their priorities are (rightly) elsewhere.
If you’re a local cycling club who wants everyone to dress alike, your best bet is to pick from the big list of available kits and encourage your members to wear that kit.
Eventually, Zwift will provide a pathway to creating a custom Club kit. And when that happens, we’ll all have a blast rocking our clubs’ custom looks!
UPDATE: Zwift sent out the following email on April 3rd:
Haute Route Watopia is underway and it’s seen a stacked field taking to the start line. To improve your experience we’re in the process of making immediate changes to create an even better Haute Route Watopia for you!
With the events proving so popular, a small number of you might be running into technical limitations/difficulties on your device. If your ride didn’t upload, we recommend following these steps.
Didn’t complete Stage 1 and still want the kit? You’re in luck, as the only stage required to unlock the kit is Stage 3.
We don’t want anyone to miss out on the chance to win the epic prize of entry to an in-real-life Haute Route, so we’re happy to announce that we have another prize draw which we will send you an email to enter on Monday!
We’ve responded to the high demand for more event times by adding several more for every stage. We’ve also added a second category to all events. These D and E categories are identical but will help us stagger rider start times and smooth the load on the servers. Check out all the upcoming events!
Zwift has announced an event in partnership with Haute Route which is being billed as “the world’s most challenging virtual 3-day stage event.” It’s Haute Route Watopia, and it’s going to push riders to the limit as they take on tough routes three days in a row, culminating in The Pretzel!
Open to all Zwifters worldwide, this free event will be the most accessible Haute Route to date. And in terms of participation numbers, it will certainly be the largest Haute Route ever! Haute Route Director Julie Royer says, “The virtual world opens up entirely new possibilities never seen before. Haute Route Watopia will allow more people from around the world to experience the thrill of an Haute Route event.”
Haute Route has made a name for itself by creating challenging three and seven-day events in some of the world’s most iconic cycling destinations. Their events are essentially fully-supported stage races for passionate yet amateur cyclists. Some riders race the events, others seek to only challenge themselves, while others just want to enjoy the scenery. Some do all three!
Velo News says, “Haute Route events are at, or near, the pinnacle—for every pedal stroke on every stage—at offering the pro experience, both on and off the bike.”
Test Yourself
In true Haute Route style, this is designed to be a challenging stage event. Zwift CEO Eric Min says, “I’ve looked at the route, and it’s certainly going to be a huge challenge. However, I always like to test myself, and I certainly look forward to taking part.”
There will be no make-up days – stages must be completed back to back.
Event Support
Haute Route events are reputed to be the best-supported amateur cycling events in the world, and according to Zwift’s press release, “Haute Route Watopia will be no exception.” Event participants can expect the following:
A rider’s handbook
A complete training program to help you perform at your peak for the event itself
An exclusive in-game Haute Route kit for all entrants
During the event itself, a general classification allowing all entrants to track their performance across all three stages (see it here on ZwiftPower)
Additional prizes and unlocks for all finishers (see below)
Stage Details
Over the course of three stages, participants will ride a total of 145km (90.2 miles) with 3,373m (11,070′) of climbing. These are double draft events.
Here are the routes for each stage (click for details):
Stage 1: Three Sisters (47.8km/29.7 miles, 879m/2883')
Stage 2: Tour of Fire and Ice (25km/15.6 miles, 1161m/3812') + lead-in
Stage 3: The Pretzel (72.2km/44.9 miles, 1333m/4375')
Prizes and Unlocks
Zwifters who complete all three stages will unlock the exclusive virtual Haute Route finishers kit by Le Col to wear with pride in the game. In addition, finishers of all three stages will be entered into a prize drawing to win either entry to a 3-day Haute Route event or a Le Col Haute Route cycling kit!
Leading up to the big weekend, a group workout series has been put in place to help us train for the race.
The Haute Route Workout Series includes eight workouts that take place over six weeks. Join any event to wear and unlock the official Haute Route kit. See the event page for a workout series schedule >
Ride with Pros Events
Zwift + Haute Route are also hosting a handful of Ride with Pro events, where the group will be joined by a pro rider. Complete any Ride With Pro event to unlock the official Haute Route socks and cap to complete your look.
IRONMAN® has rolled out their “IRONMAN Virtual Club” platform, and this weekend is their first event: the IRONMAN VR1. Here’s a look at how this virtual competition works, and how to best complete it on Zwift.
How IRONMAN Virtual Racing Works
The IRONMAN Virtual Club is designed to let you “Train, compete, and celebrate your achievements with a global community of fellow athletes no matter where you are.” Once you join the Virtual Club you can sign up for different events and compete with other athletes around the globe as you complete workouts on your own time, using the platform and devices of your choice.
A good comparison here is Strava Challenges, which riders or runners compete across a particular date range for a total distance or elevation goal. IRONMAN Virtual Club events are similar, although they span fewer days and may combine a mix of running and riding. Just like a Strava Challenge, you’ll receive a badge upon completing the IRONMAN event.
Once you link your fitness tracking app (Strava, Garmin Connect, etc) to your Virtual Club account and register for an event, your activities begin counting toward that event.
IRONMAN VR1: The First Virtual IRONMAN Race
Tomorrow is the start of IRONMAN VR1 – a virtual race in which competitors must run 5km, bike 90km, and run 21km between 6pm GMT on Friday, April 3 and 11:59pm GMT on April 5.
These events could be completed outdoors. They could also be completed indoors on virtual platforms including (of course) Zwift!
Signing Up
Without going into intricate detail, here’s the signup process to join IRONMAN VR1:
Connect your tracking app(s) to that account (Strava, Garmin Connect, etc)
Register for IRONMAN VR1 through the “Register Now” link on the VR1 homepage. This will get you a bib number.
Return to the VR1 Homepage and click “Sign Up” to enter your bib number and join that event.
Note: registration is free, although the system is clearly set up in a way that would allow IRONMAN to charge for future events. Over 5100 athletes are registered for VR1 at the time of this post.
Tackling IRONMAN VR1 On Zwift
If you’re wanting to complete any part of VR1 on Zwift, make sure your Strava account (or whatever fitness app you’ve linked to your IRONMAN Virtual Club account) is connected to your Zwift account. This can be done at my.zwift.com under My Profile>Connections.
To finish IRONMAN VR1 you need to complete two runs and one ride:
Run 5km
Ride 90km
Run 21km
It appears the order of the activities doesn’t matter – you could do the ride first then both runs, etc. They just need to be done between 6pm GMT on Friday, April 3 and 11:59pm GMT on April 5.
There isn’t much strategy involved with the running portion, beyond standard running strategy! But let’s talk about the ride. Or more specifically: how do you turn in your fastest 90km ride on Zwift?
Choosing the Best Zwift Route
Your fastest time will be found riding on the flattest virtual tarmac. Zwift’s flattest routes are:
There are other flattish routes on Zwift which would be decently fast, but these are the flattest and fastest.
Event Selection
Boost your speed even more by joining a draft-enabled Zwift event (or even better, a double drafting event) on a flat course with other riders of similar ability. This gives you the benefit of a strong group draft, giving you the same speed with ~30% less power.
Zwift’s own event search tools don’t let you filter rides based on length, hilliness, or drafting setup. We recommend ZwiftHacks’ or ZwiftPower’s event search tools for the job.
Example: from ZwiftPower’s homepage click “Filter”, then choose “Flat”. This brings up all the flatter rides. You can filter additionally by length, double draft, and more.
IMPORTANT: if you choose to do this 90km ride in an event, and your event is less than 90km, you will have to keep riding once the event ends, to complete the 90km distance in one activity. So plan for that! Whatever you ride before the event won’t count, since it is uploaded automatically by Zwift as a separate effort.
Bike and Wheel Selection
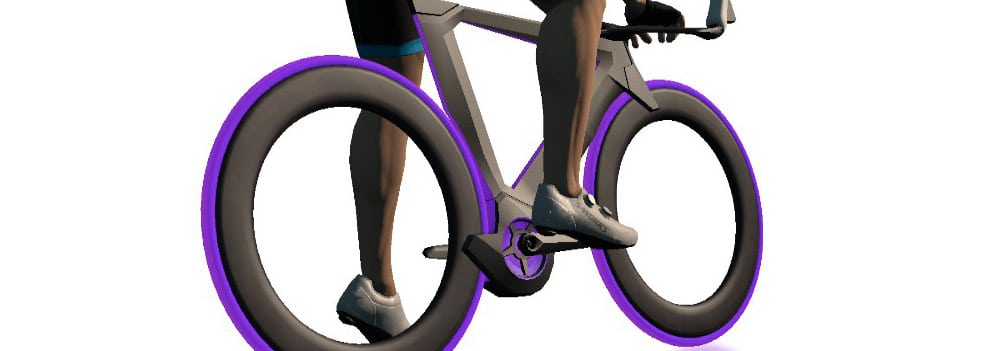
The Tron bike: not a bad choice!
Since your effort will be on a flat route, choose the most aero in-game bike and wheels you’ve got. Unless you’re riding this as a TT (see below), you’ll want a frame from our fastest frames list (see frame ranking charts for a complete comparison).
If you’re a purist and want to ride the event on a time trial bike (which doesn’t draft other riders), just pick the best frame you can get from our fastest TT frames list (see TT frame ranking charts for a complete comparison).
Free Riding: TT or Drafting?
If you’re not riding this as an event, you’ll probably wonder: what’s faster in a free ride: a TT bike or a standard road bike that lets you draft?
The answer is: it depends. It depends on how many other riders are on the road!
Luckily, with the crazy numbers we’re seeing on Zwift lately, you can rest assured that riding a standard road bike will give you the fastest time, because you’ll be able to get a lot of drafting done on flat routes.
Exact Distance
IRONMAN’s instructions say “… make sure that you complete the exact distances specified, as your ranking is determined by your time and distance recorded on your GPS tracking device.”
As confirmed by double-checking with IRONMAN support, your ranking will be based on your overall activity time, even if your activity is well over the required distance. This seems a bit odd – it would make more sense to take the time from your initial 90km if your activity is longer than 90km. But according to support, they don’t have that ability. Therefore, you should make sure your ride is at least 90km long, but not much longer!
Questions or Comments?
Share below! And if you complete IRONMAN VR1, please share your experience!
How the Race Was Lost: Crit City Double Draft With Friends
DIRT teammate Shawn McAfee and I had been talking about getting into a race together for a while, and we finally found a race that worked for both of us. Tuesday night: the Midweek Criterium Race. 18 laps of Crit City’s Downtown Dolphin.
Shawn (a B racer like myself, but ranked significantly higher) wanted to race the A’s, but I didn’t like the idea of a long 18-lapper with A racers. “Are you sure you don’t want to do B’s and have some fun trading off attacks?” I asked. “OK, I’m convinced,” he quickly answered. Apparently he wasn’t too thrilled about trying to hang with the A’s, either.
Then we invited the rest of the team. That’s when things got interesting.
Double Draft and Tactics
We thought it would be fun to introduce some mayhem into the race, via good old-fashioned team tactics. At first we thought just attacking off the front in ones and twos would be a good way to whittle down the field and make others burn matches – then we realized this event used double draft mode.
If you’re not familiar with it, double draft mode is a significantly stronger draft effect than Zwift’s “standard” draft. Zwift racers know double draft makes it very difficult to get away from the pack. This is because double draft boosts the overall pack speed by 1-2 miles per hour as riders on the front continuously churn between hammering in the wind and recovering in the big draft.
In a double draft race, unless you’re able to break away from the group with at least several riders, you probably won’t stay away. This changes your tactics.
Eventually we had 9 DIRT riders signed up for the race. We agreed to hop into the team Discord server for voice comms. This was going to be fun!
The Warmup
My legs would be well-rested heading into Tuesday, and I wanted to get some miles in and make sure it was a big training day. So Tuesday morning I put in around 30 easy miles on Zwift, with a few sprints as leg openers. Since the race was 9 hours later I figured this wouldn’t negatively impact my performance much (if at all). Who knows, it might even prep my legs a bit for a hard effort!
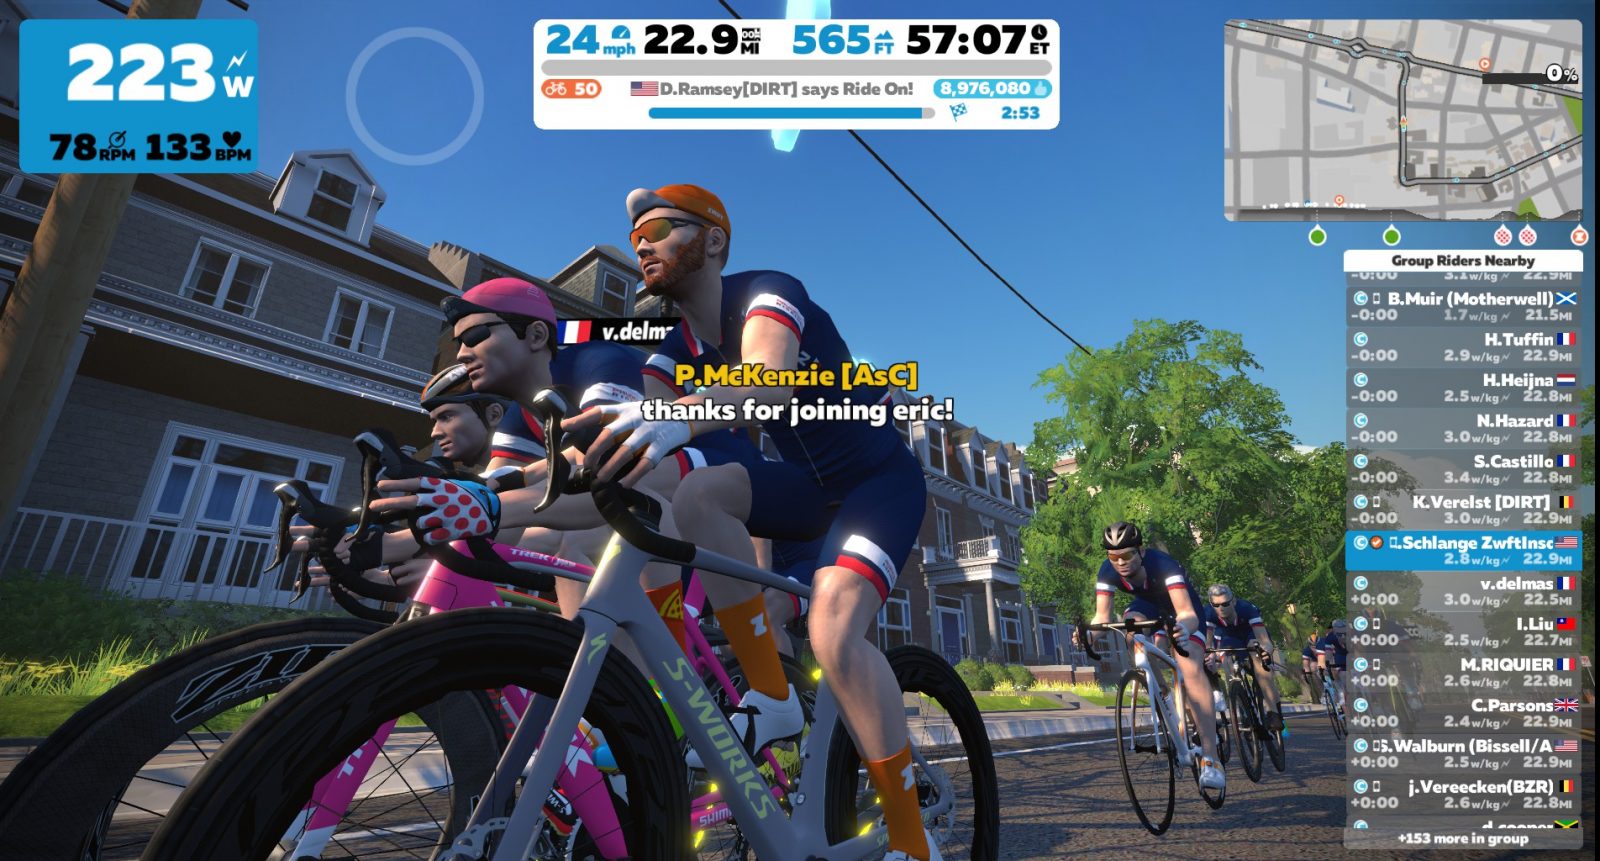
Riding with the Ascenders team Tuesday morning
After the morning ride I made sure to recover properly: replacing my carbs, hydrating throughout the day, and stretching my legs. Everything felt good.
I wrapped up my workday a bit early, and 30 minutes before the race I was on my regular Tempus Fugit warmup routine. I had already chewed my caffeine gum and applied the PR lotion to my legs, so my pre-race ritual was completed. I was really stoked to race as a team, knowing it adds an entirely new dimension to the race experience!
The Start
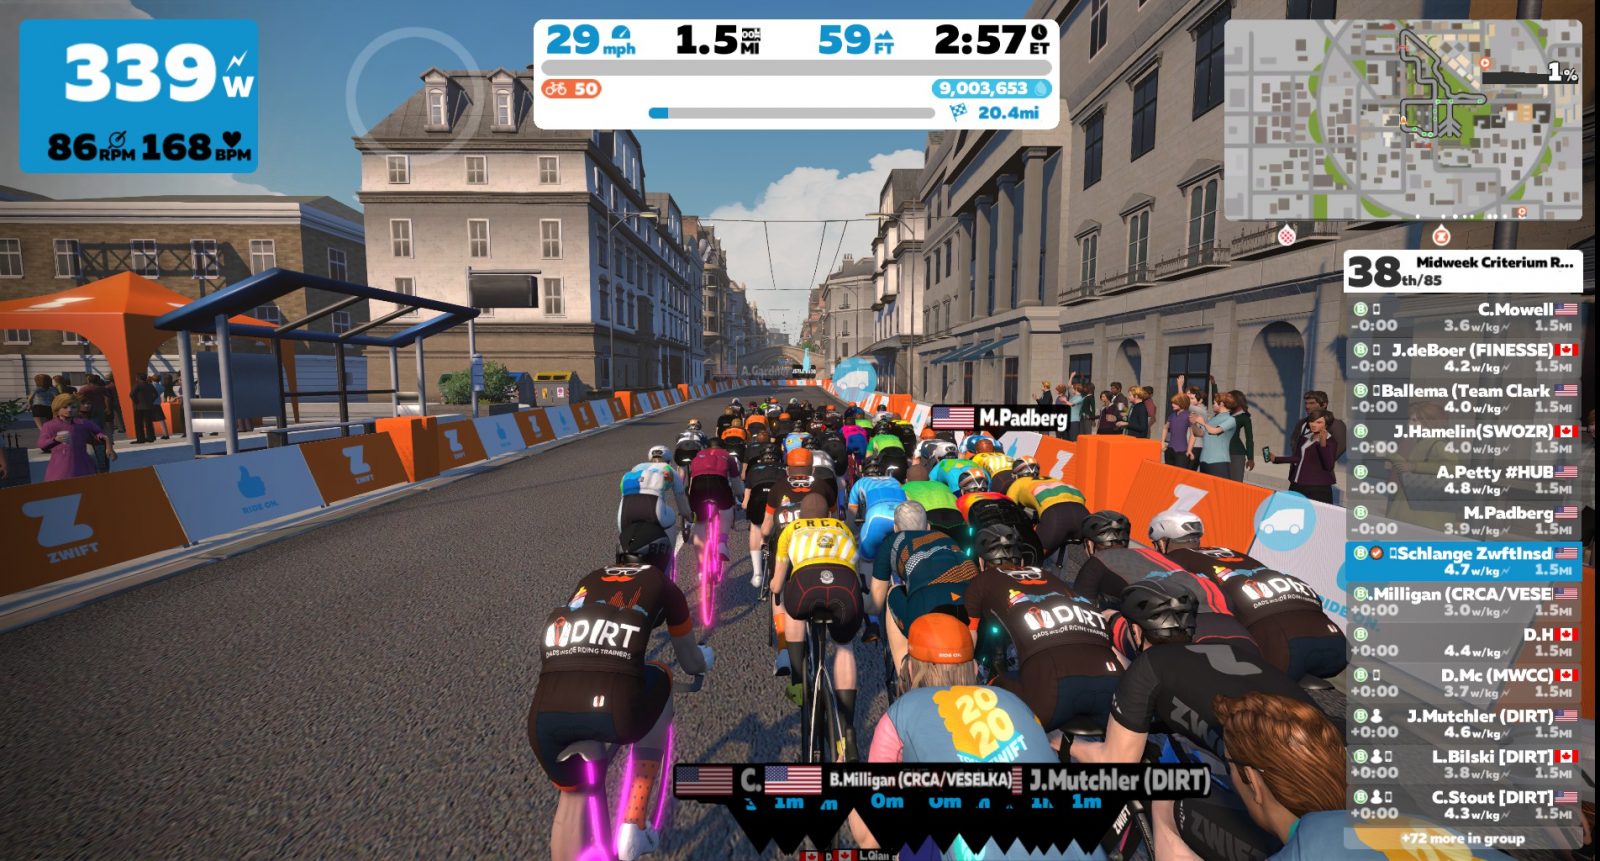
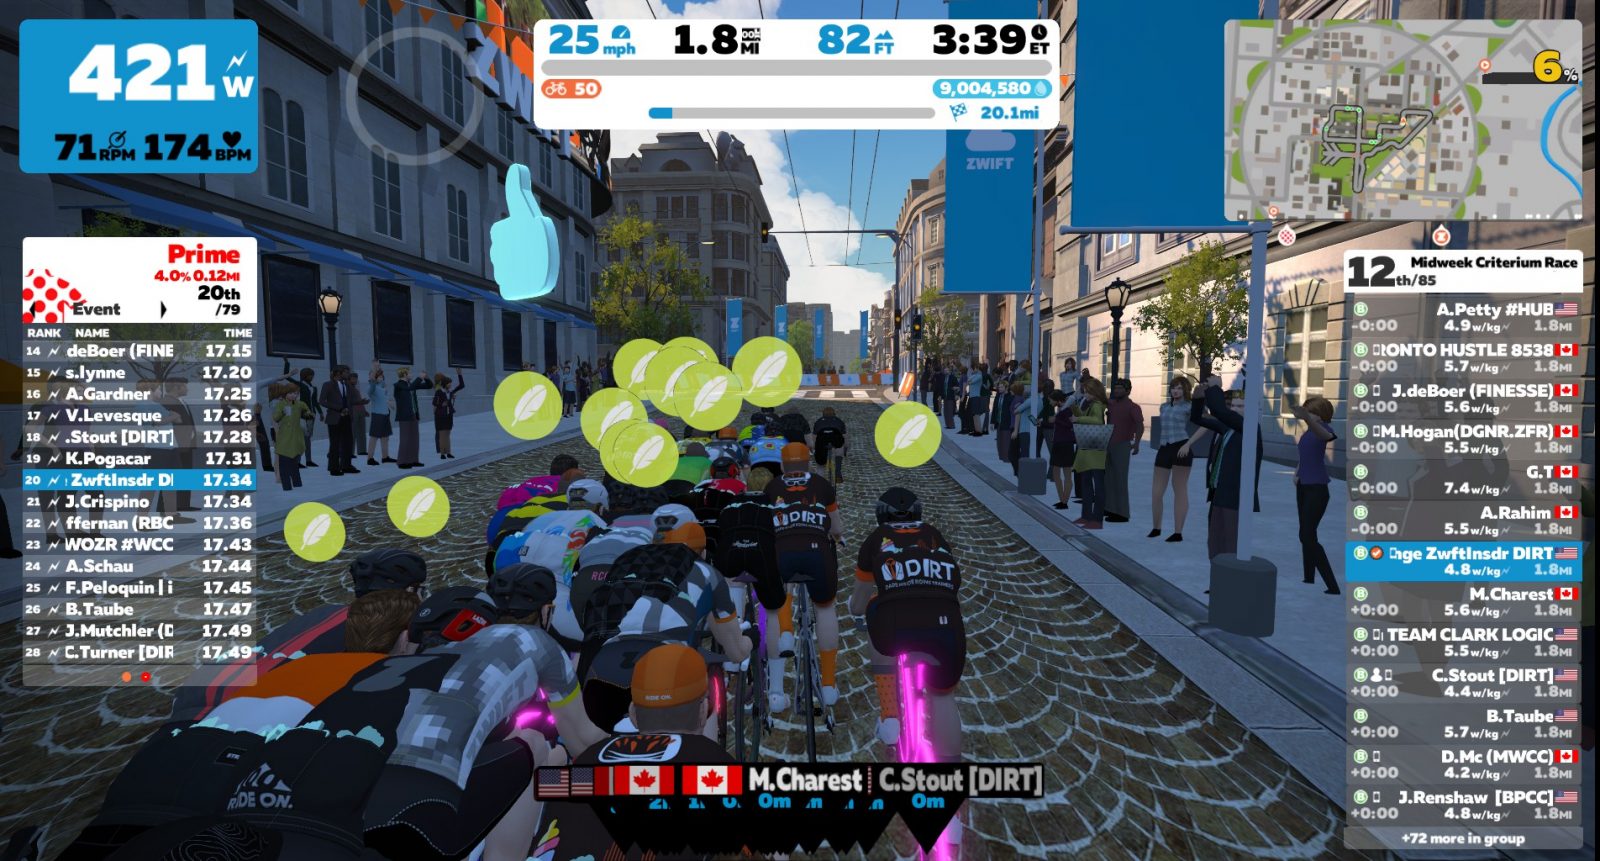
The start of the race wasn’t any different than other Crit City starts. The first lap was a hard effort as the initial selection was made – I averaged 347 watts as we completed the first lap at 35.9mph. 2:01 – a new PR for me!
The second lap was easier, then we settled into a rhythm: hammer up the prime climb, keep the power over the top, then recover on the descent and through the lap banner. Maintain a good position, and don’t get gapped on that prime climb!
Once things settled down the initial group of 85 was whittled down to 45. Now it was time to talk team tactics.
See the feathers fly!
The Middle
Teammate Jason Muchler made a few solo attacks off the front, happy to play the sacrificial lamb because he was riding one-armed with a shoulder injury and knew he wouldn’t factor in the sprint finish. Each time he told us he was attacking we would be sure to stay off the front of the group, forcing other riders to pull us back to him.
Unfortunately, the effects of his attacks were blunted by the high pack speed and ease of sitting in the double draft. Attacking as a team was the only way we would have an effect on the race, given the large pack size and double draft mode. The question was, when to attack?
As we hashed it out on Discord it was clear that most of the team wasn’t feeling especially strong. There wasn’t a lot of confidence in an early attack being able to stick, but we did think that an attack or two before the finish would be a good way to drop a few riders and soften the legs of some of those who would be in the final mix.
Our first attack was decided: on the 11th lap, we worked our way to a good position near the front of the pack as we hit the bricks of the prime kicker. Then just as we neared the top of the short climb we went all-in to break away from the main group.
Off the front in a team breakaway
Only five of us had the legs to make the attack, which meant we didn’t stand much of a chance against the 40 riders behind. But we hammered all the way through to the lap banner anyway.
DIRT teammate Pete Butler had joined the Discord chat even though he wasn’t in the race – he was our directeur sportif, giving us tips about other riders, encouraging our hard efforts, and advising us on strategy. He was great!
Our breakaway only stayed away for less than a lap, but we dropped a few riders and made others work a bit harder. Now what?
The End
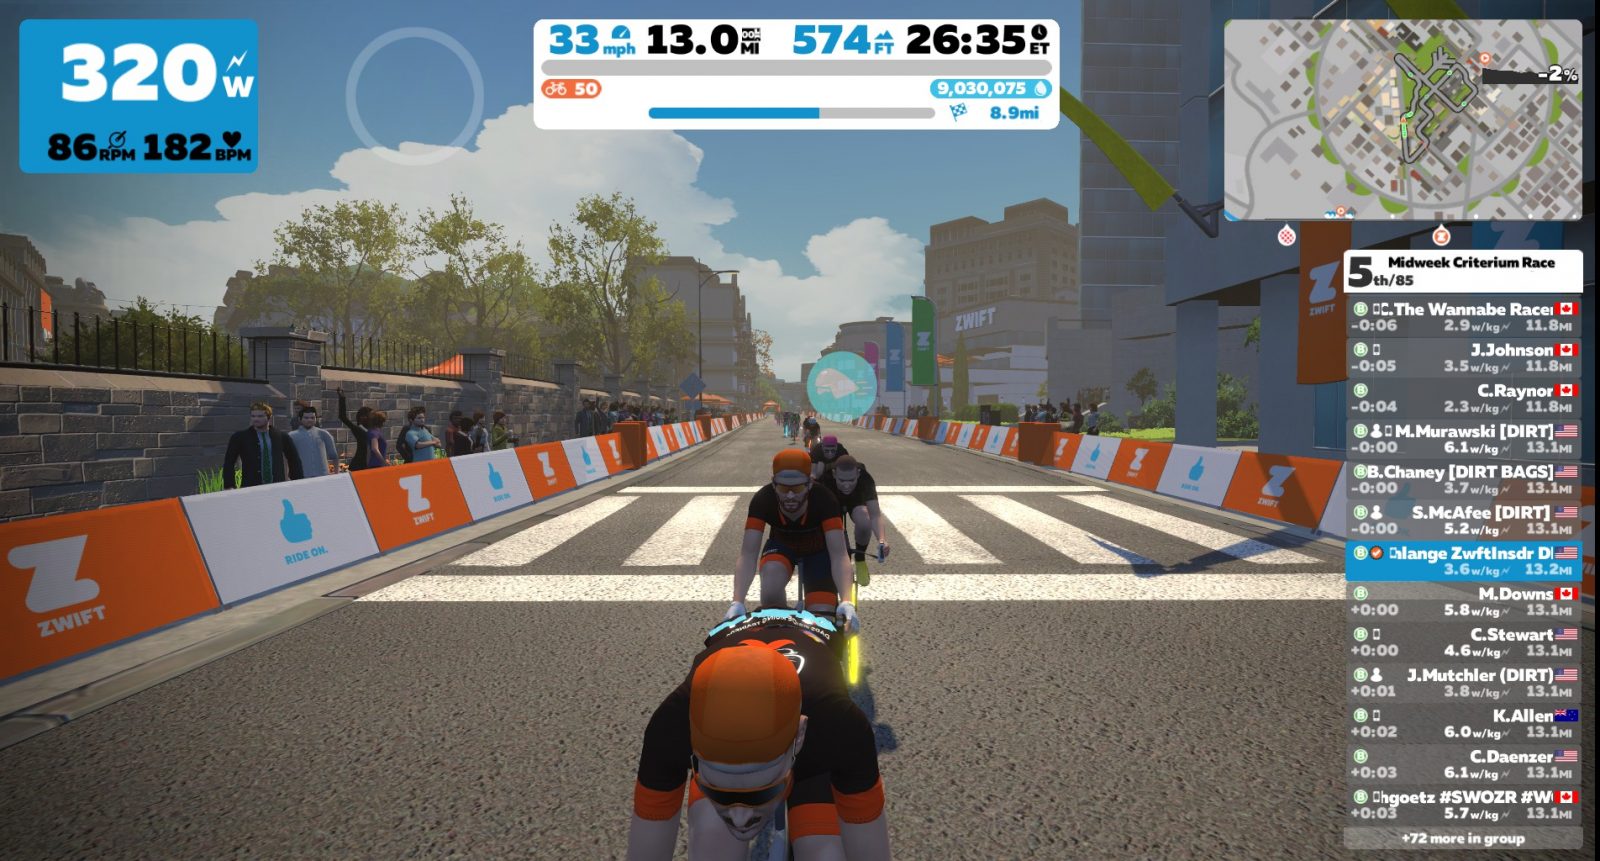
Given the frenetic pace and size of the pack, we didn’t fancy the idea of another group attack. Instead, we decided to go for a leadout train effort on the final lap. We would try to save those who had a chance at a strong sprint finish for the final meters, which meant other DIRT dudes would need to lead out.
This is classic cycling teamwork: the leadout train. In outdoor races with a flat finish you’ll see teammates assemble in a “train” near the end of the race. The idea is that your team’s sprinter sits in, following the train’s wheel as each rider in front puts in a good hard pull before pulling off and letting the next rider do the same. This progressively lifts the speed of the team’s train until the final rider pulls off and your sprinter is “delivered” to go all-in for the finish.
It’s a challenge of timing and fitness, not to mention pack positioning and handling skills as multiple teams jostle for position.
Leadout trains happen on Zwift as well, but they’re a bit… messier. DIRT’s finish in this race was a good example. A couple guys agreed to do the initial pull from the top of the prime kicker. The rest of us (whoever had the legs to hold on) would go with them, sitting in the wheels then unleashing a well-timed sprint and powerup for ultimate DIRT glory!
That was the plan, anyway. My buddy Shawn put in a great pull and got off the front. I was on his tail, but so were a few other non-DIRT riders. We descended the twisties at lightning speed, and before I knew it the sprint was upon us! I waited too long to activate my aero powerup and really hammer, and I ended up finishing in 5th. 4th on ZwiftPower.
Overall our DIRT team had a decent result, although we just missed taking the win. 3 of the top 5 in ZwiftPower were DIRT riders, with the best result coming from Jeff Beltramini in 2nd. Congrats to winner Matthew Downs!
Shawn recorded and live-streamed the race. Watch it below (you’ll hear me on Discord):
Takeaways
A few takeaways from this race:
I like PowerUps. Especially in Crit City. Having done races here with and without them, I really appreciate the strategic element they bring. And I enjoy being able to use them at just the right time to provide just a little bit of relief or to boost my attacks.
Teamwork is a blast. Probably 95% of the races I’ve done have just been solo efforts, because I’m too lazy/busy to organize anything. But the team dynamic totally changes the race for everyone, and it can give teammates who wouldn’t otherwise get a good result a real feeling of accomplishment if they’re able to fill a role in the team’s strategy. I want to be in more races like this.
Timing is everything. I still need to work on my Crit City sprint timing. I should have attacked this finish more aggressively, following the wheels ahead a bit closer and gone all-in a bit sooner. Perhaps hindsight is just 20/20 – or perhaps I need to get a better sense of timing.
Double Draft is fast.My previous best times on this route were set in 8-lap races where power numbers were even higher, yet those times were 5-10 seconds slower than today’s race. Like I said earlier: double draft boosts pack speeds by 1-2mph.
What About You?
Have you been able to work together with teammates in a race? What did you do, and how did it work out? Share some stories below!
We also have another honoured guest, Brad Sohner, the genius behind the funny and uplifting Tour de Quarantine, which now has a Zwifter in the mix.
Elsewhere the Zwiftcasters range across the very busy period on Zwift, with a few changes that come under the “let’s be nice to noobs” category, plus the turbo trainer famine and why rowing won’t be coming to Zwift anytime soon.
And of course, the podcasters make room for discussion of Peak Zwift. It seems we have a winner 😉
The Zwift Classics race series debuted in July 2019 as a simple set of monthly invitational races for 5-member men and women’s teams. Zwift has just announced the Classics series for 2020, and it has expanded in scope to include the entire racing community in the fun.
These races are sure to be hugely popular – here are the details!
Race Format
Similar to what we’ve seen with Tour de Zwift and Tour of Watopia, a Pro/Am Invitational race will be held (and live-streamed) the day before each race opens up to the full Zwift community. Watch how the world’s top Zwift racers take on the course, then tackle it yourself!
Women can join the women’s only races, or hop into the mixed race. Be sure to enter the correct category for your abilities! Here are the FTP watts per kilo breakpoints for each category:
Mixed (Men & Women) Race Categories
A: 4+ w/kg
B: 3.2-3.99 w/kg
C: 2.5-3.19 w/kg
D: 1-2.49 w/kg
Women’s Race Categories
A: 3.8+ w/kg
B: 3.2-3.79 w/kg
C: 2.5-3.19 w/kg
D: 1-2.49 w/kg
Race Results on ZwiftPower
Final race results for this series will be managed by ZwiftPower, meaning those riding below their proper category will be removed from race results.
If you aren’t already signed up for ZwiftPower – why aren’t you? It’s where all the final race results live for Zwift racing. Get to it!
See the “Getting Set up” portion of our “How to Race on Zwift” post for details on getting set up on ZwiftPower.
Race PowerUps
All five race-specific PowerUps will be enabled. Use them wisely to conserve energy and boost your attacks!
Route: London Loop, 1 lap Distance: 14.9 km (9.2 miles), Elevation Gain: 220m (722′) Pro-Am Race (Men): April 9 at 7pm BST – watch on YouTube Community Races: April 10-13
Trofeo Bologna
Route: Bologna TT, 1 lap (pen to KOM finish) Distance: 8km (5 miles), Elevation Gain: 230m (757′) Pro-Am Race (Women): April 13 at 7pm BST – watch on YouTube Community Races: April 14-17
Richmond Challenge
Route: Richmond 2015 UCI Worlds, 1 lap Distance: 16.3km (10.1 miles), Elevation Gain: 142m (467′) Pro-Am Race (Men): April 17 at 7pm BST – watch on YouTube Community Races: April 18-21
Watopia Cup
Route: Jungle Circuit, 2 laps Distance: 21.4km (13.3 miles), Elevation Gain: 167m (548′) Pro-Am Race (Women): April 21 at 7pm BST – watch on YouTube Community Races: April 22-25
Crit City Slam
Route: Downtown Dolphin, 8 laps Distance: 15.5km (9.6 miles), Elevation Gain: 64m (209′) Pro-Am Race (Men): April 25 at 7pm BST – watch on YouTube Community Races: April 26-29
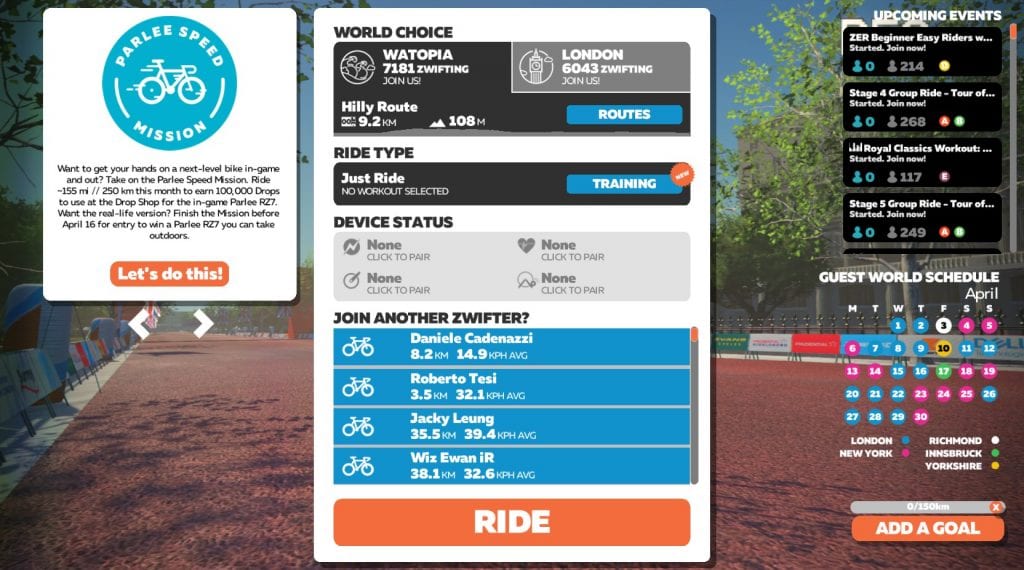
Zwift has just rolled out the newest in-game mission for cyclists: the Parlee Speed Mission! Here are the details…
How to Enter
To get started, click “Let’s do this” on the Parlee Speed Mission box in your startup screen. Accept the terms and conditions, and you’re ready to go! The start screen box will show mission progress as you save each ride.
Completing the Mission
To finish this mission, you must enter the mission then ride a total of 250km (155 miles) before April 16th. You can do it all in one ride if you’re an animal, or spread it across as many rides as you’d like!
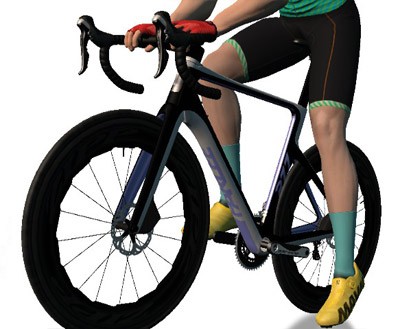
In-game Parlee RZ7
Mission Prizes
Upon completing the mission you will receive a 100,000 Drops bonus, which you can use to purchase the new Parlee RZ7 bike in-game if you’d like. Or use it to buy something else!
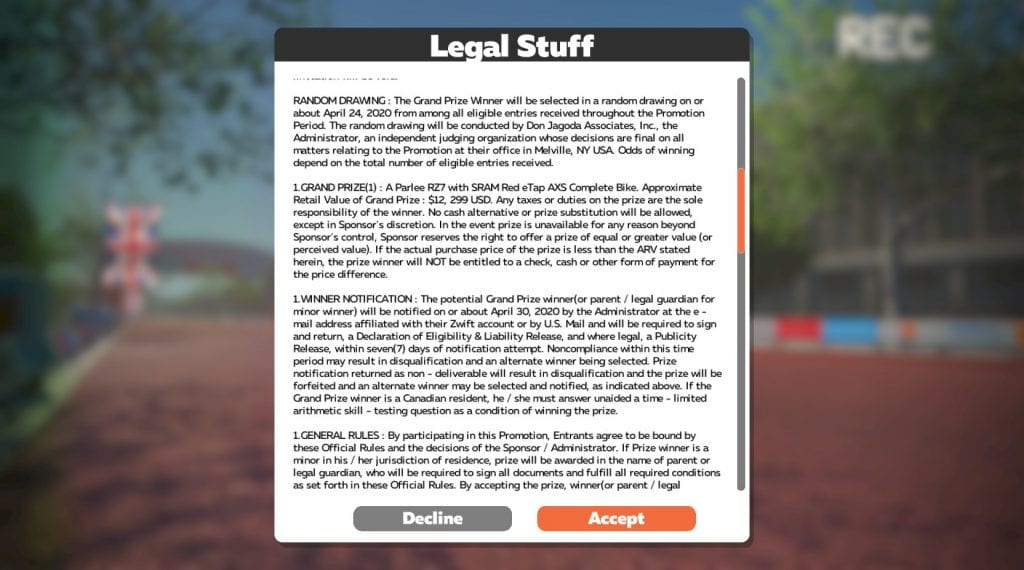
Everyone who completes the mission will be entered to win a real-life Parlee RZ7 bike with SRAM Red eTap AXS (approximate retail value $12,999USD). Nice!
(representative image only, actual prize bike may differ)
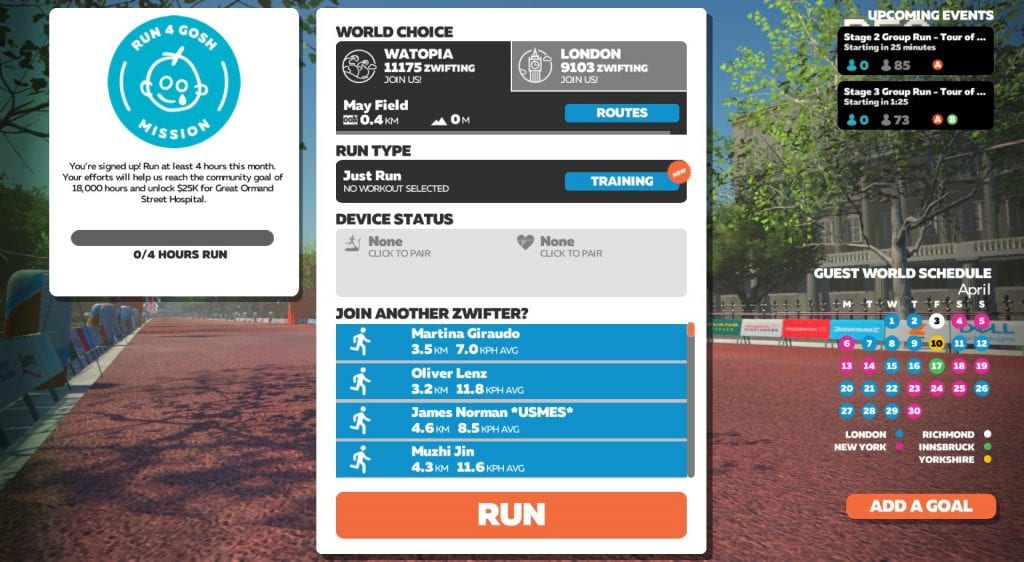
Zwift has just rolled out its April mission for runners, and it’s all about pushing ourselves to help others. Here are the details!
Getting Started
To sign up for the mission, click “Let’s do this” on the Run 4 GOSH box on your startup screen. Once you do that, the box will change to a progress meter:
Completing the Mission
To complete the mission, run at least 4 hours this month (April). The goal is for the community to run at least 18,000 hours this month, at which point Zwift will unlock a $25,000 donation to GOSH. How cool is that? Get fit, have fun, help others.
About GOSH
Every day, 619 children and young people from across the UK arrive at Great Ormond Street Hospital (GOSH) for life-changing treatments. At GOSH doctors and nurses battle the most complex illnesses, and the brightest minds come together to achieve pioneering medical breakthroughs.
This is the second time Zwifters have collaborated to help fund a donation for GOSH. The first time was back in November 2019 during the Team Ramsay Ride with Reason week.