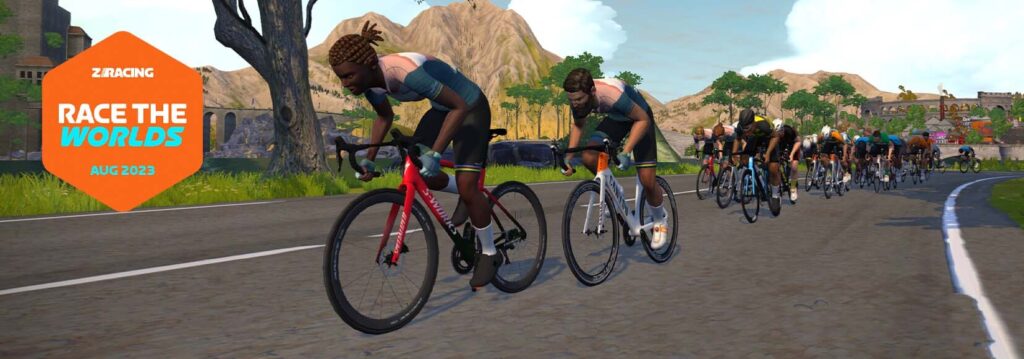
“Race the Worlds” ZRacing August 2023 Series Details
Zwift’s “ZRacing” has developed into a popular monthly race series, and August’s event details have just been shared. Titled “Race the Worlds,” the events are held on Zwift’s newest map (Scotland), where the IRL UCI “Super Worlds” happens in August (read all about it).
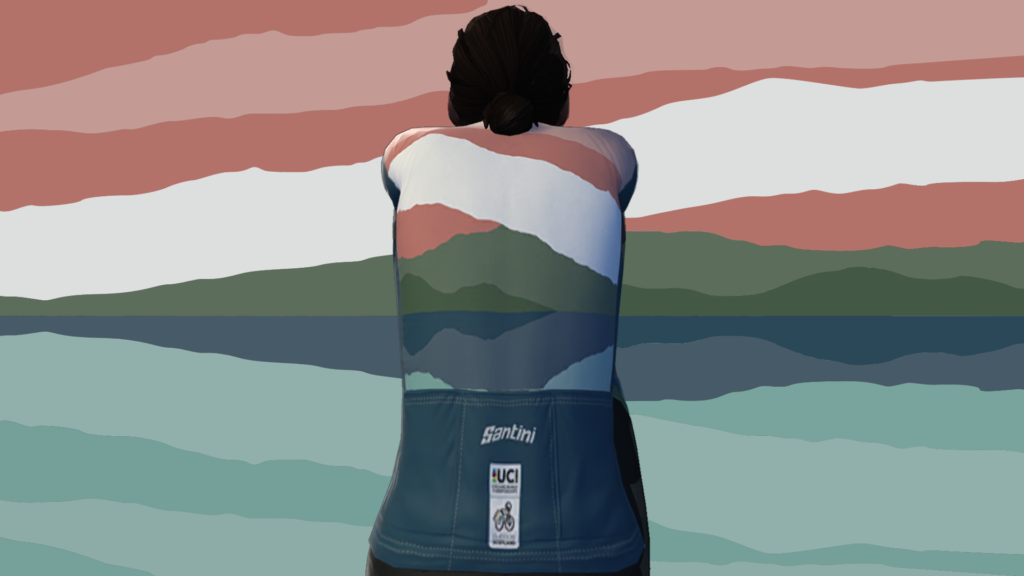
Zwift has created a “UCI rainbow-stripes-inspired in-game kit” which can be unlocked by finishing all five stages of this “Race the Worlds” Zwift Racing Series.
You can also unlock the same kit by riding all four stages of the Zwift Ride Series “Podium Rides.”.
Racing Score
Zwift recently rolled out their Racing Score metric. At this time, the only scored races on Zwift are these ZRacing events.
The ZRacing series consists of monthly sets of weekly races. Each race is scheduled for seven days (beginning 1:10am UTC on Monday and running through to the next Sunday). Timeslots are consistent week to week and month to month.
Races are scheduled ~15 times each day, so there are plenty of available times to find a race.
Each monthly set of races has a time-based GC (general classification) tracking riders’ best finishing times for each week’s race. The overall winners in each category for the month will be the riders with the lowest overall time for that month’s set of races.
With over 100 weekly timeslots available, riders can race each week’s event multiple times and try to better their finishing time. Tip: the fastest times usually come from the largest race fields!
Note: you must use a heart rate monitor and be on a smart trainer, smart bike, or power meter to show up in ZwiftPower results for this series.
Each month’s series has a unique achievement badge, which you can unlock by finishing every stage for the month. There are no makeup events, so if you miss a stage, you miss out!
One and Done
Zwift has planned these events to deliver a solid 1-hour workout, so each race should only take around 1 hour to complete, including your warmup and cooldown.
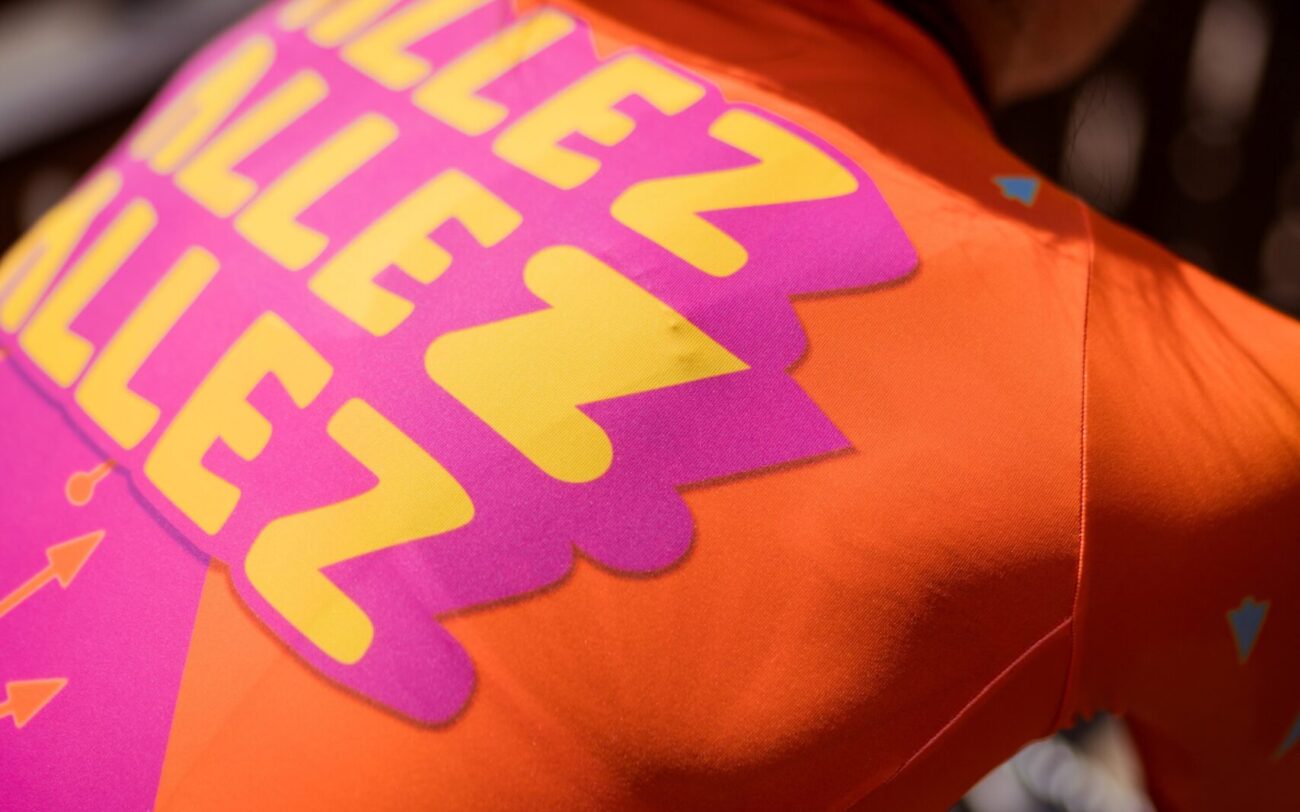
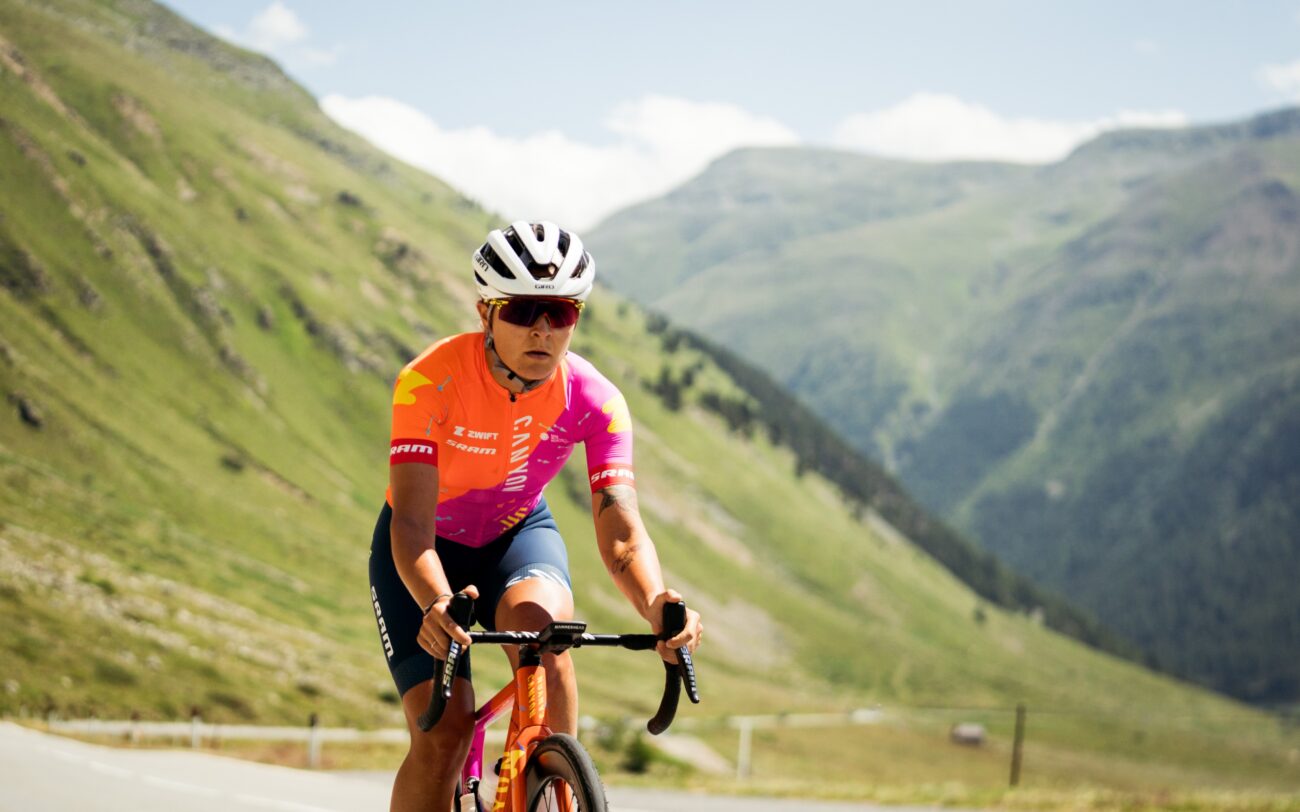
If you watch much women’s road racing, you no doubt noticed that CANYON//SRAM changed to a radical new kit for the Tour de France Femmes avec Zwift currently underway:
The CANYON//SRAM team has teamed up with Zwift (one of the team’s sponsors) to roll out a special set of events where you can unlock this virtual kit in Zwift, and even ride with special guests on particular rides. Four time slots are scheduled daily through Monday, July 31st.
All of the unlock rides are open-paced and take place on France’s R.G.V. route. Each ride is just 30 minutes long, but you must finish the ride to unlock the kit!
Heat Training with CORE on Zwift, Part 1: the Heat Ramp Test
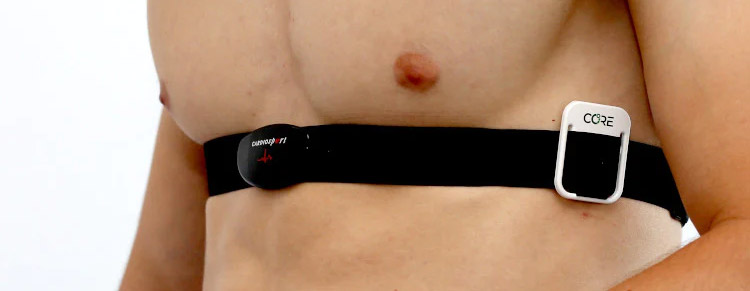
This kicks off a series of posts detailing my heat training journey with CORE, a wearable, non-invasive core body temperature sensor. You can learn all about the CORE product on their excellent website at corebodytemp.com.
In future posts, I’ll cover topics including:
Introduction to the CORE product and parent company
Setting up the CORE sensor
Why train with body temperature?
Heat training with CORE
Zwift integration wish list
But today, we’ll start the series where heat training begins: with a Heat Ramp Test.
CORE simply clips onto your HRM’s chest strap. You may also stick it directly on your skin.
Purpose of the Test
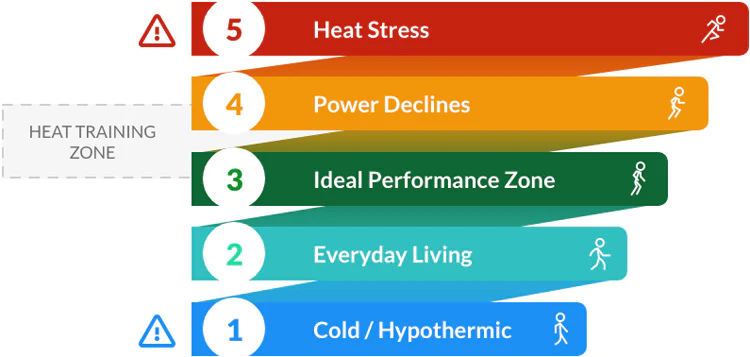
The Heat Ramp Test, like an FTP test, is undertaken to determine training zones. But while an FTP test gives you power zones for structured training, the Heat Ramp Test gives you a core body temperature zone for Heat Training.
The result of the Heat Ramp Test is a single core body temperature from which your Heat Training Zone can be derived. Now you can do Heat Training Training workouts, which are just rides where you stay within that Heat Training Zone for 45-60 minutes.
Begin at 50% FTP and slowly increase to 80% FTP (target) over 20 minutes.
5 min 50% FTP
5 min 60% FTP
5 min 70% FTP
5 min 80% FTP
I set this up as a custom ERG workout on Zwift, but I made the final interval 60 minutes long since I wanted to remain in Erg mode for the duration of the test in order to have fine-grained control of my power output.
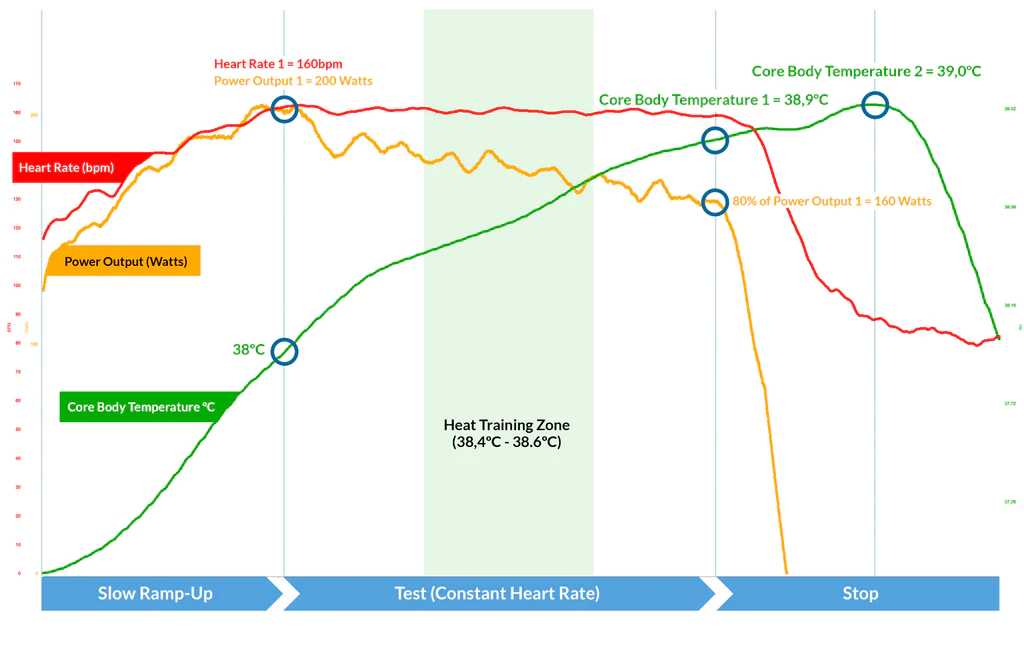
Step 2: First Checkpoint 38ºC / 100.4ºF
The moment core body temperature reaches 38ºC / 100.4ºF, take note of your current heart rate (Heart Rate 1) and power output (Power Output 1 – it’ll probably be 80% of your FTP).
The test has now started in earnest. Moving forward, your goal is to maintain your current heart rate while keeping a steady cadence. Power will necessarily drop over time in order for this to happen.
On Zwift, if you’ve set up the test as an ERG workout, simply adjust the FTP bias to decrease your power in order to maintain your heart rate.
Step 3: Second Checkpoint
Stop pushing when:
your power output drops 20% below the power output you hit in Step 2 or
when it becomes too difficult to pedal or you feel unwell.
Note your Core Body Temperature (Core Body Temperature 1). This is the key takeaway from the test, so don’t miss it!
Step 4: Stop
Stop riding, or simply spin easy. You can turn on a fan or other cooling if you’d like, but whatever you do make sure it’s repeatable for future ramp tests.
Your core temperature will probably continue to rise for the next 10-15 minutes. Take note of the highest temperature it reaches (Core Body Temperature 2). This is just for your own reference to track improvement in the future.
Here’s a sample graph that shows the data from a successful Heat Ramp Test:
Calculating Your Heat Training Zone
The Heat Training Zone is calculated from the Core Body Temperature 1 value from the Heat Ramp Test:
Celcius calculation
Fahrenheit calculation
Core Body Temperature 1 minus 0.5ºC to minus 0.3ºC = Heat Training Zone
Core Body Temperature 1 minus 0.9ºF to minus 0.5ºF = Heat Training Zone
My Heat Ramp Test
Here’s a video of me undertaking the Heat Ramp Test in order to kick off my Heat Training with CORE. (This is a simple custom workout I created in Zwift – download it here.)
The test wasn’t as miserable as I thought it would be. I didn’t have to push huge power numbers to get my core temperature up where it needed to go – it was more a matter of holding steady power and cadence while my internal temperature moved to the targets set by the test.
The entire test took me 37 minutes to complete this time, but that number may be different next time. This was done in my office/pain cave where the ambient temperature started around 25ºC (77ºF) and, per the protocol, I had no fans or air movement from open windows, A/C, etc.
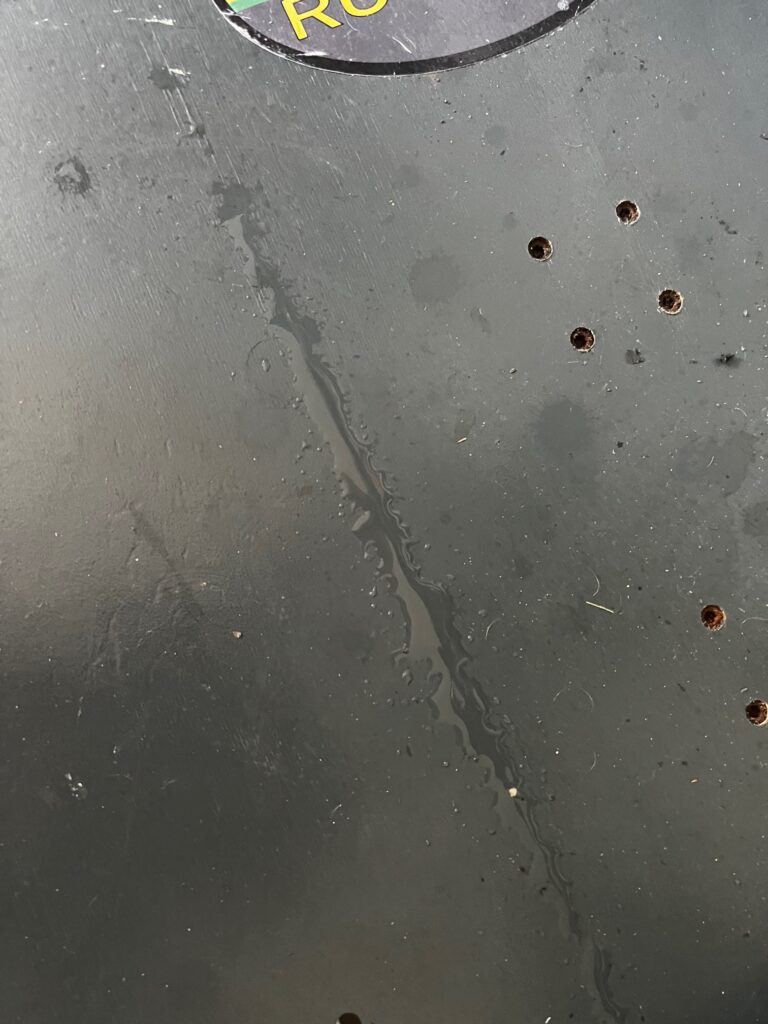
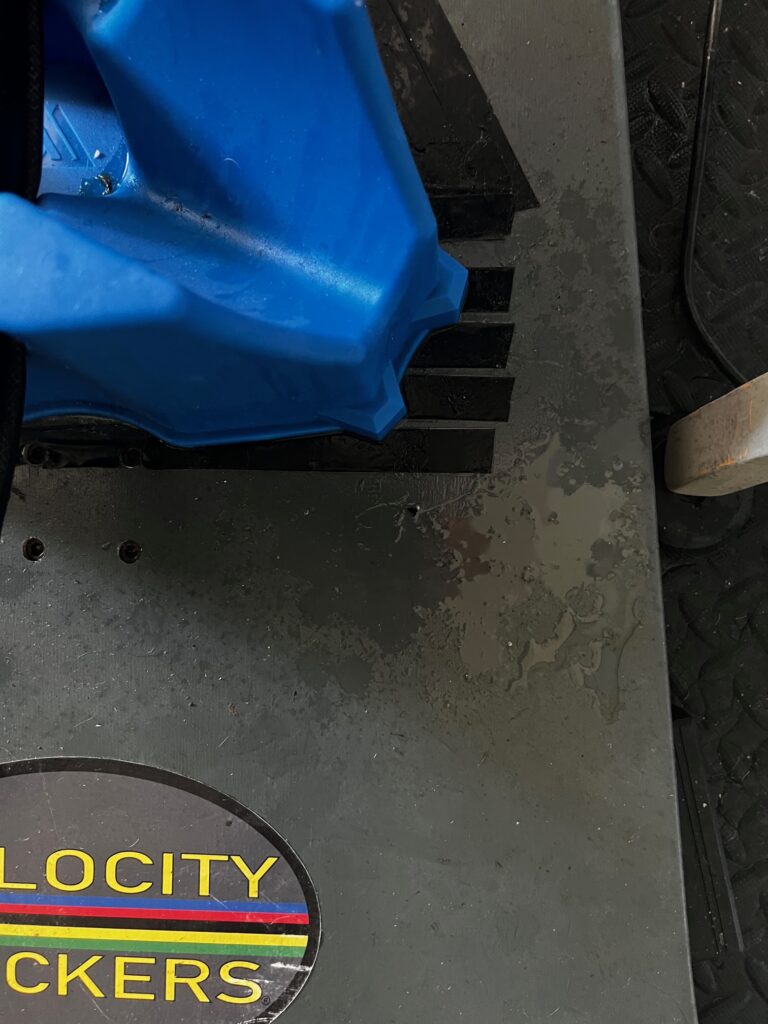
While my muscles didn’t burn and my breathing wasn’t labored, there was a lot of sweat involved – more than I usually see in a hard Zwift session. This makes sense, of course, because when I’m going hard on Zwift I’m also running a fan while maintaining a pleasant room temperature and humidity level.
The telltale “sweat stripe” beneath one footSweat from one arm/hand
My Heat Ramp Test delivered a result of 38.5ºC, giving me a Heat Training Zone of 38.0-38.2ºC (100.4ºF-100.8ºF).
Here’s a full chart of my test data, including the cooldown period (mouse over the lines for details):
What’s Next?
Next I’ll begin Heat Training in earnest. This will involve multiple weekly rides where I stay within my Heat Training Zone of 38.0-38.2ºC for 45-60 minutes. I’ll endeavor to Heat Train on a nearly daily basis for 2-4 weeks, per CORE’s advice.
Watch for upcoming posts where I’ll dig into Heat Training with CORE, and feel free to post your comments and questions below!
Wattbike Update: Dual-Channel Bluetooth and Zwift Play Compatibility
In a recent post, Wattbike announced beta firmware supporting dual-channel Bluetooth. They also addressed concerns over Wattbike handlebar compatibility with Zwift Play controllers. Let’s dive into the details!
Dual-Channel Bluetooth
Dual-channel Bluetooth means the Wattbike can connect to two devices via Bluetooth at once, instead of just one. The most common use case for dual-channel Bluetooth on Wattbike would be connecting to the Wattbike Hub app running on your phone or tablet, while also connecting the bike to software like Zwift.
Wattbike Hub includes a library of training plans, workouts, climbs, pedal stroke analysis, and virtual gearing customization. The basic version is free, while the paid version provides access to a larger library of workouts.
With dual-channel Bluetooth, riders could do things like:
Analyze pedaling technique live on Wattbike Hub while riding Zwift
Ride a Wattbike Hub workout while powering your avatar in Zwift
(Of course, you could do these things previously, as long as you were connecting to Zwift using ANT+ instead of Bluetooth.)
To install the beta firmware, update your Wattbike Hub to version 6.2.0 and click on ‘Use Beta Firmware’ in the ‘Preferences’ menu. Follow the on-screen prompts to connect your Wattbike Atom and update the firmware (full guide here). Once the update is complete, you can connect two devices via Bluetooth.
Warning: some users are complaining that the beta firmware breaks gradient simulation in Zwift (see comments below). Install at your own risk, and realize you may need to go back to the working firmware if you have issues.
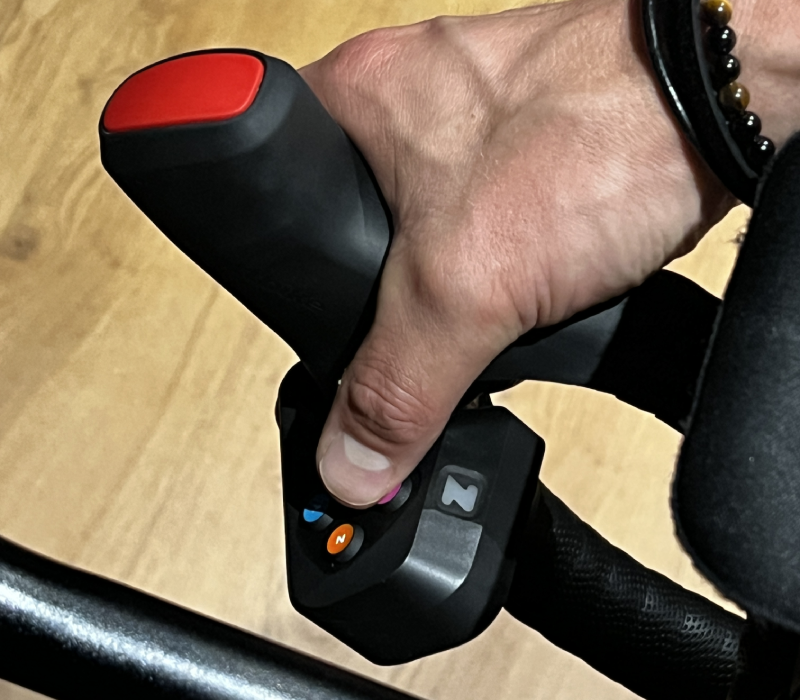
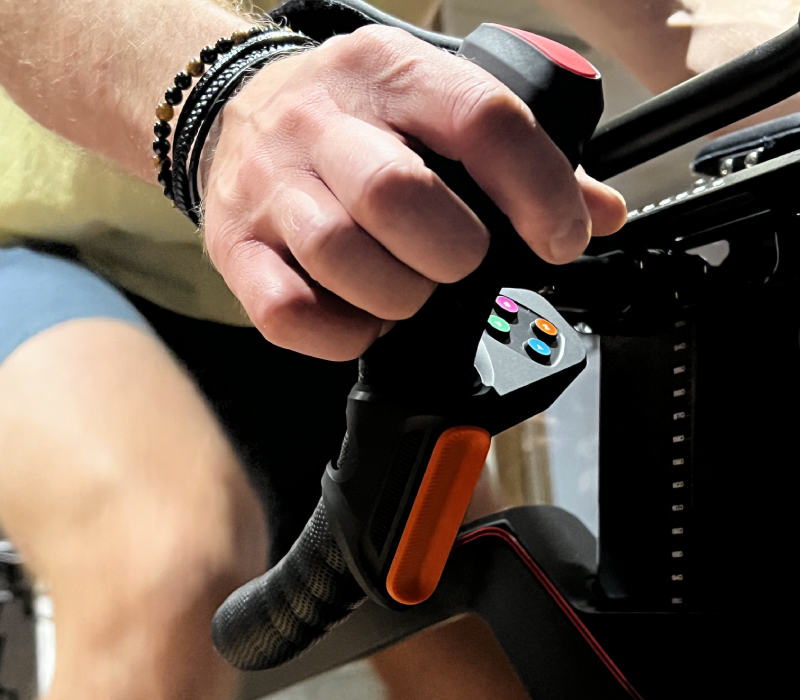
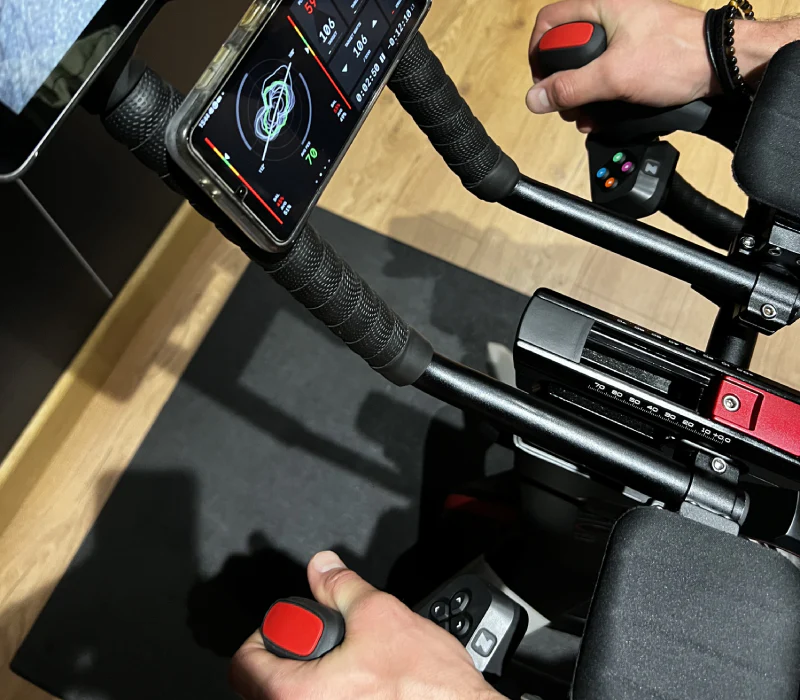
Wattbike says to install the Play controllers by placing them under the brake hoods as high up as you can, without covering the shifters.
In our chats with Wattbike owners, they’ve said the Play controllers fit decently well, although the button pads are tilted forward a bit more than would be preferred. One recommendation is to modify the included shims, cutting them shorter so they can be placed beneath only the lower portion of each controllers, tilting the entire assembly so the button pads are flatter.
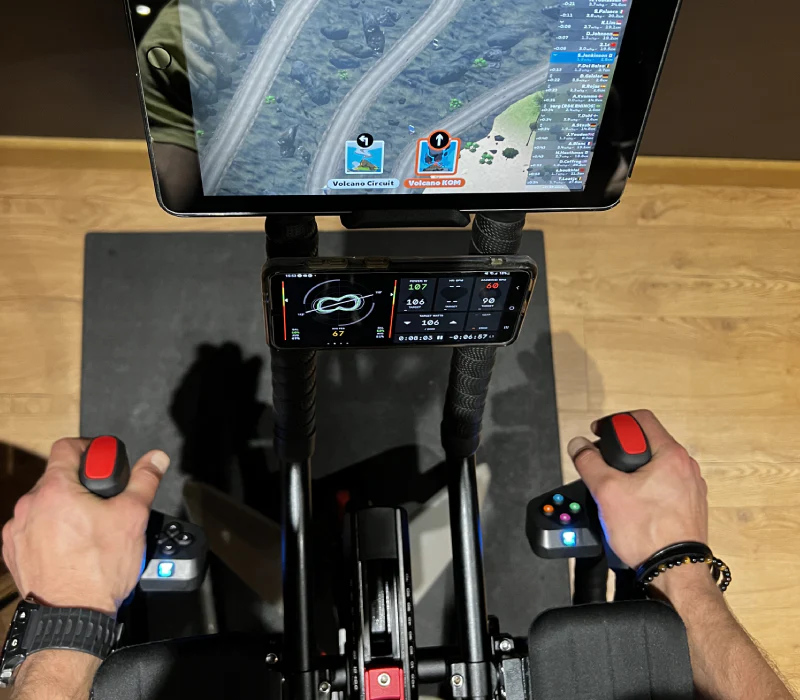
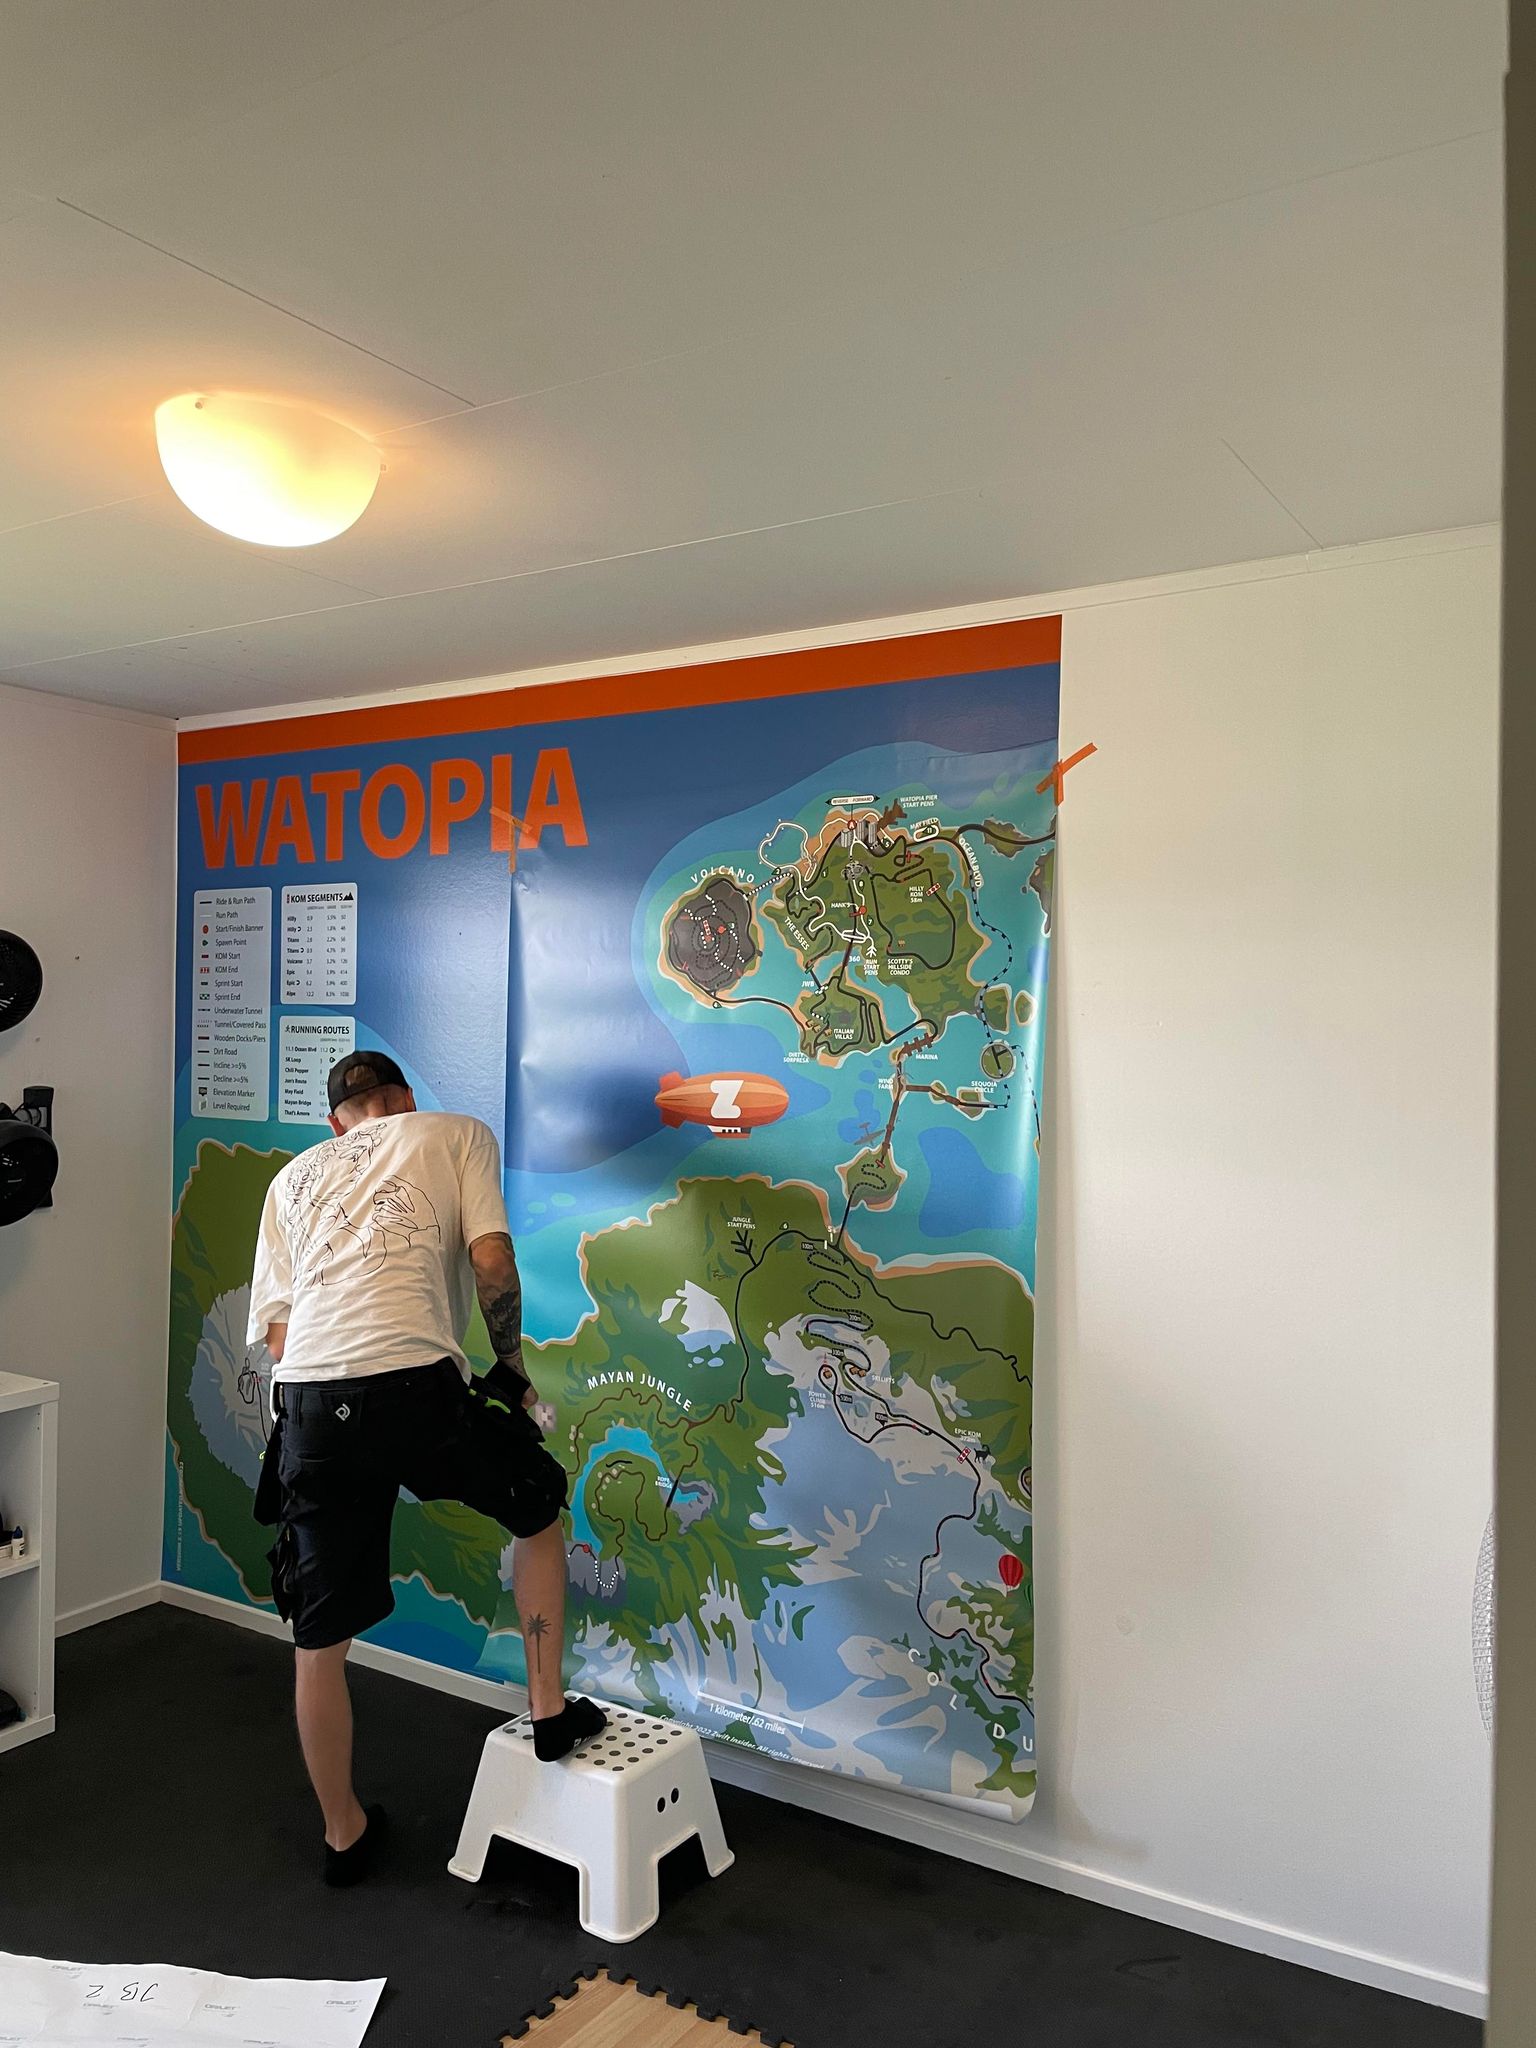
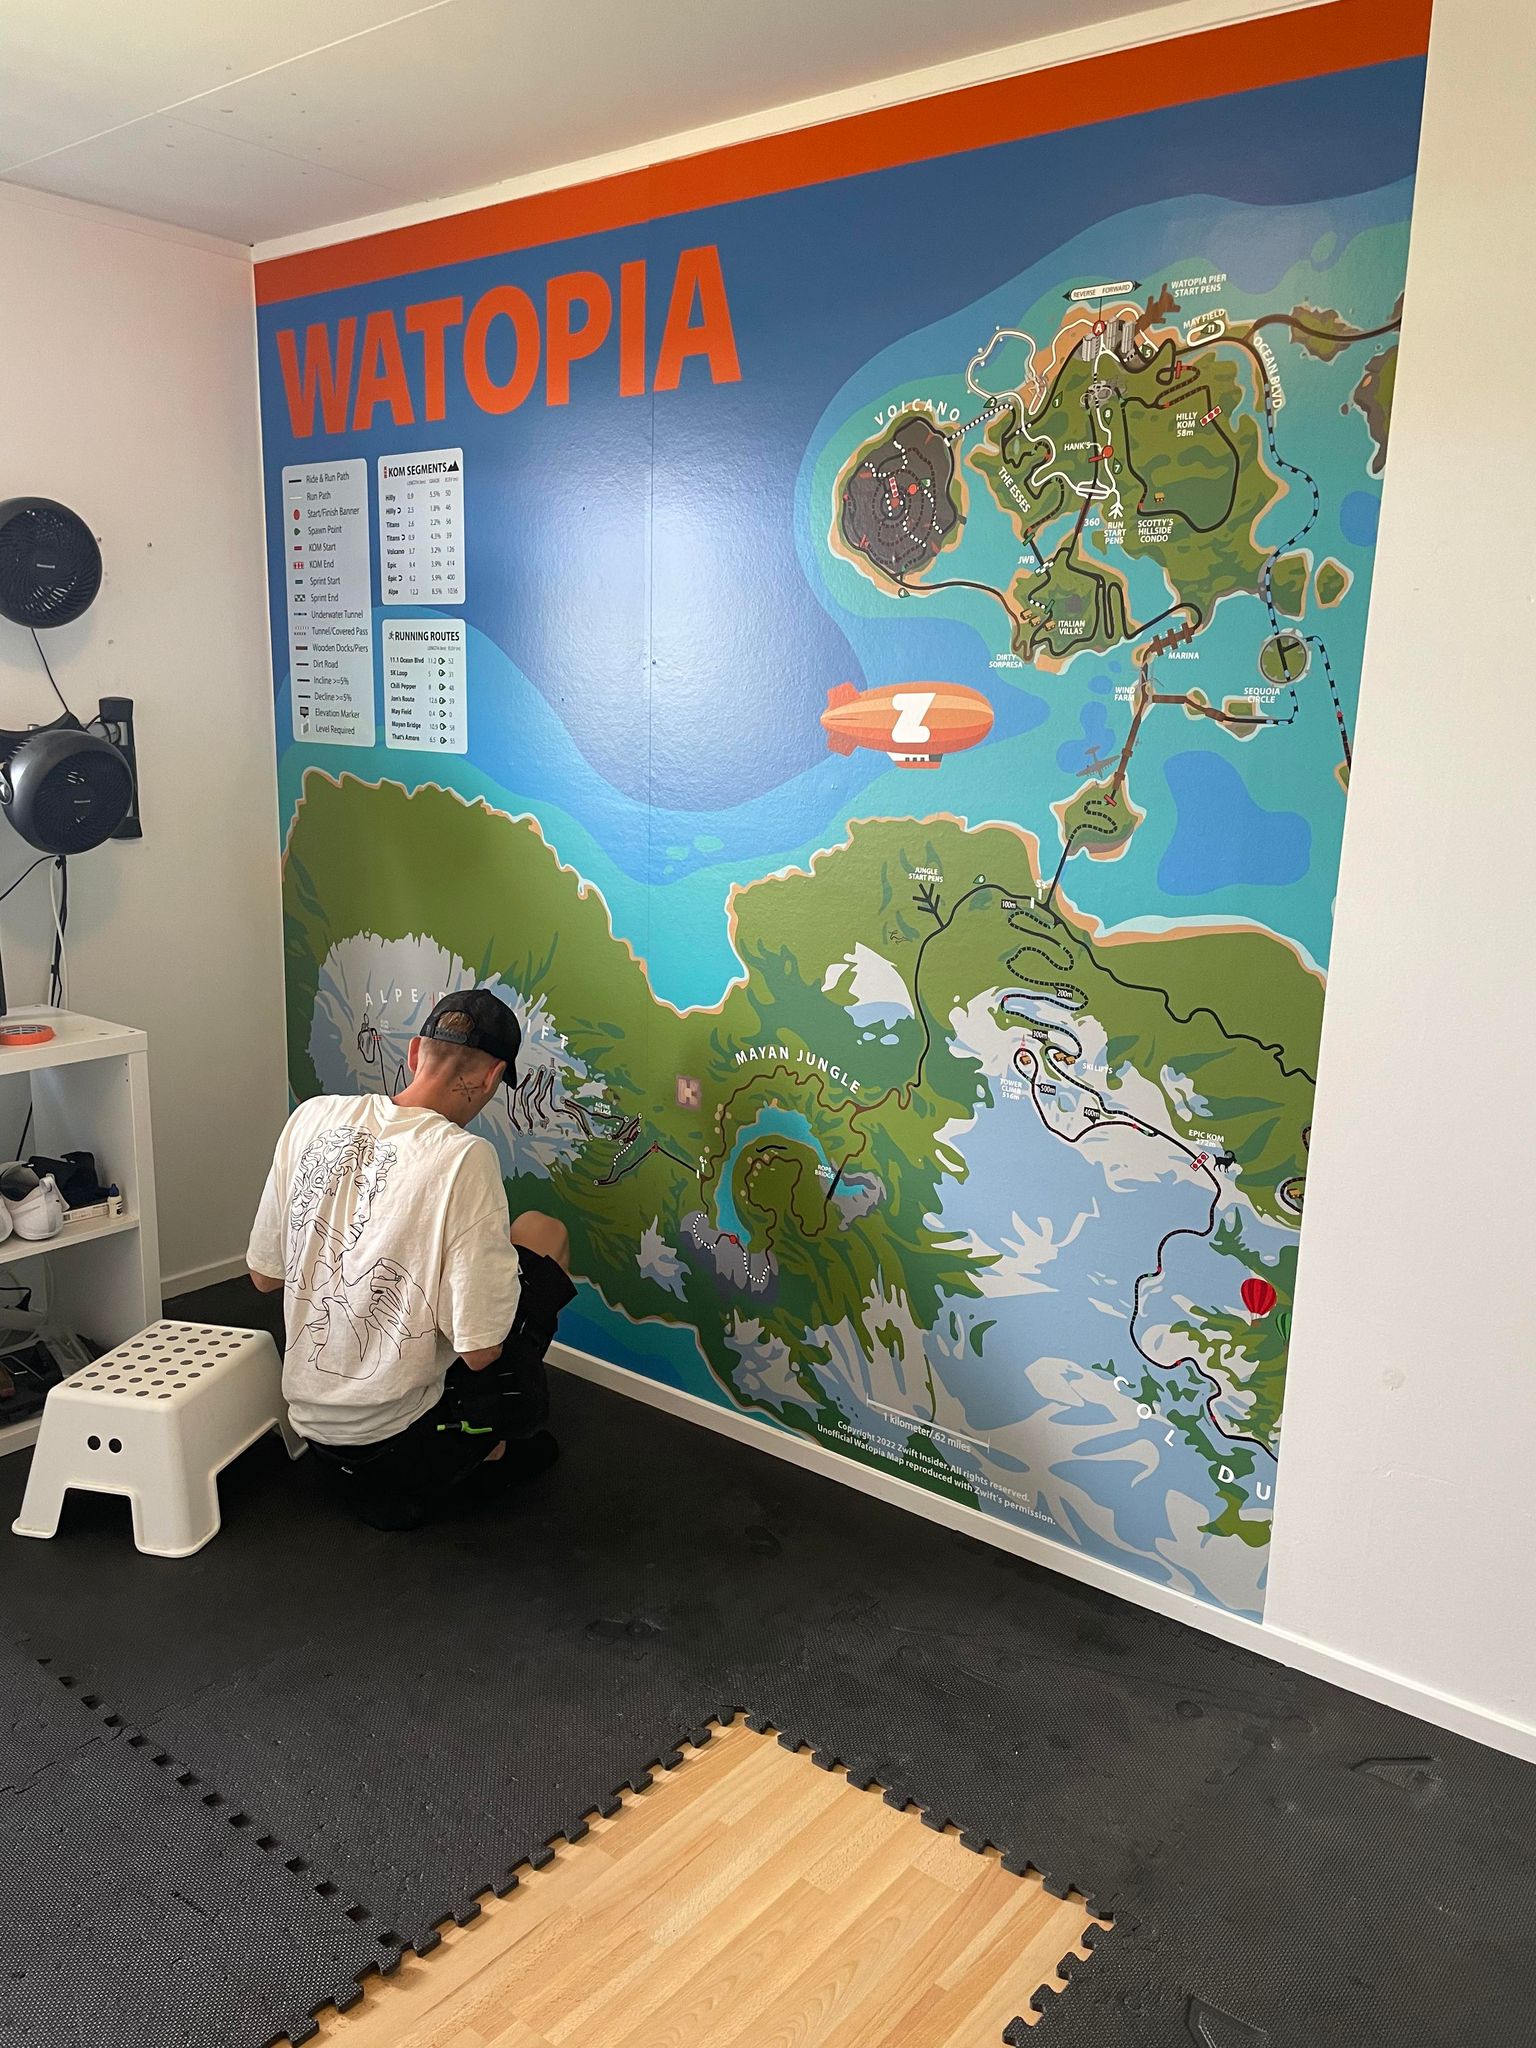
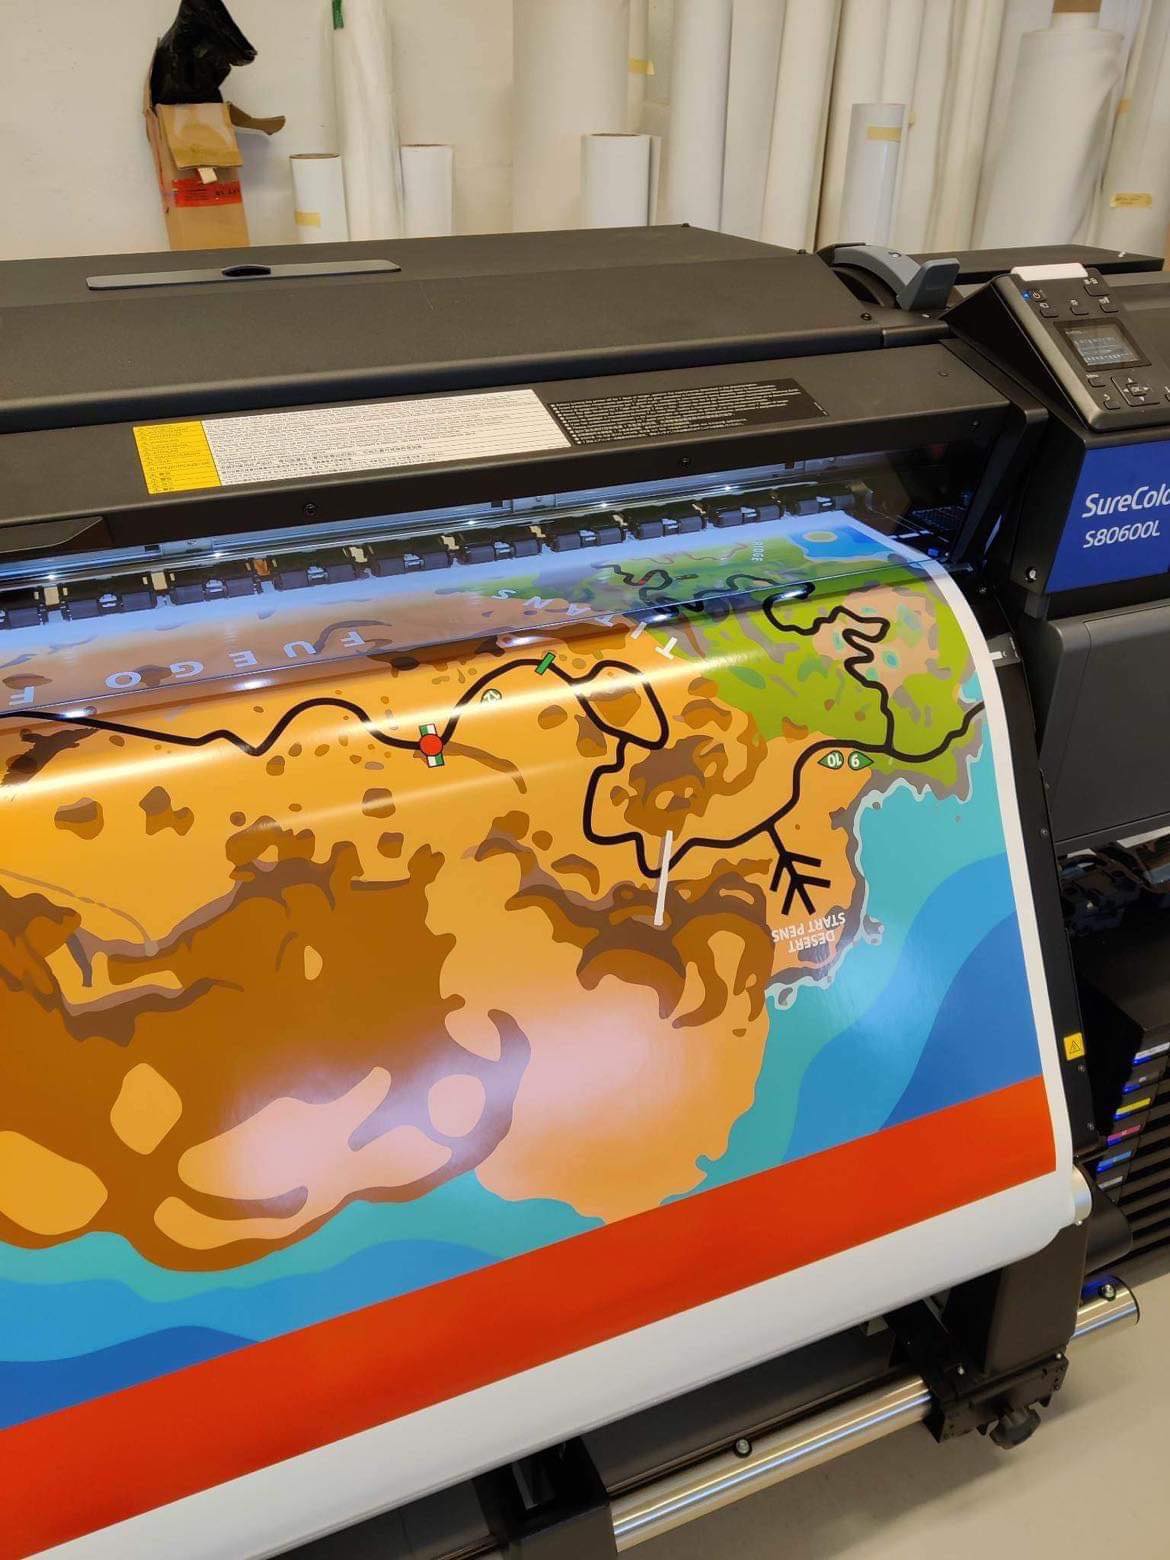
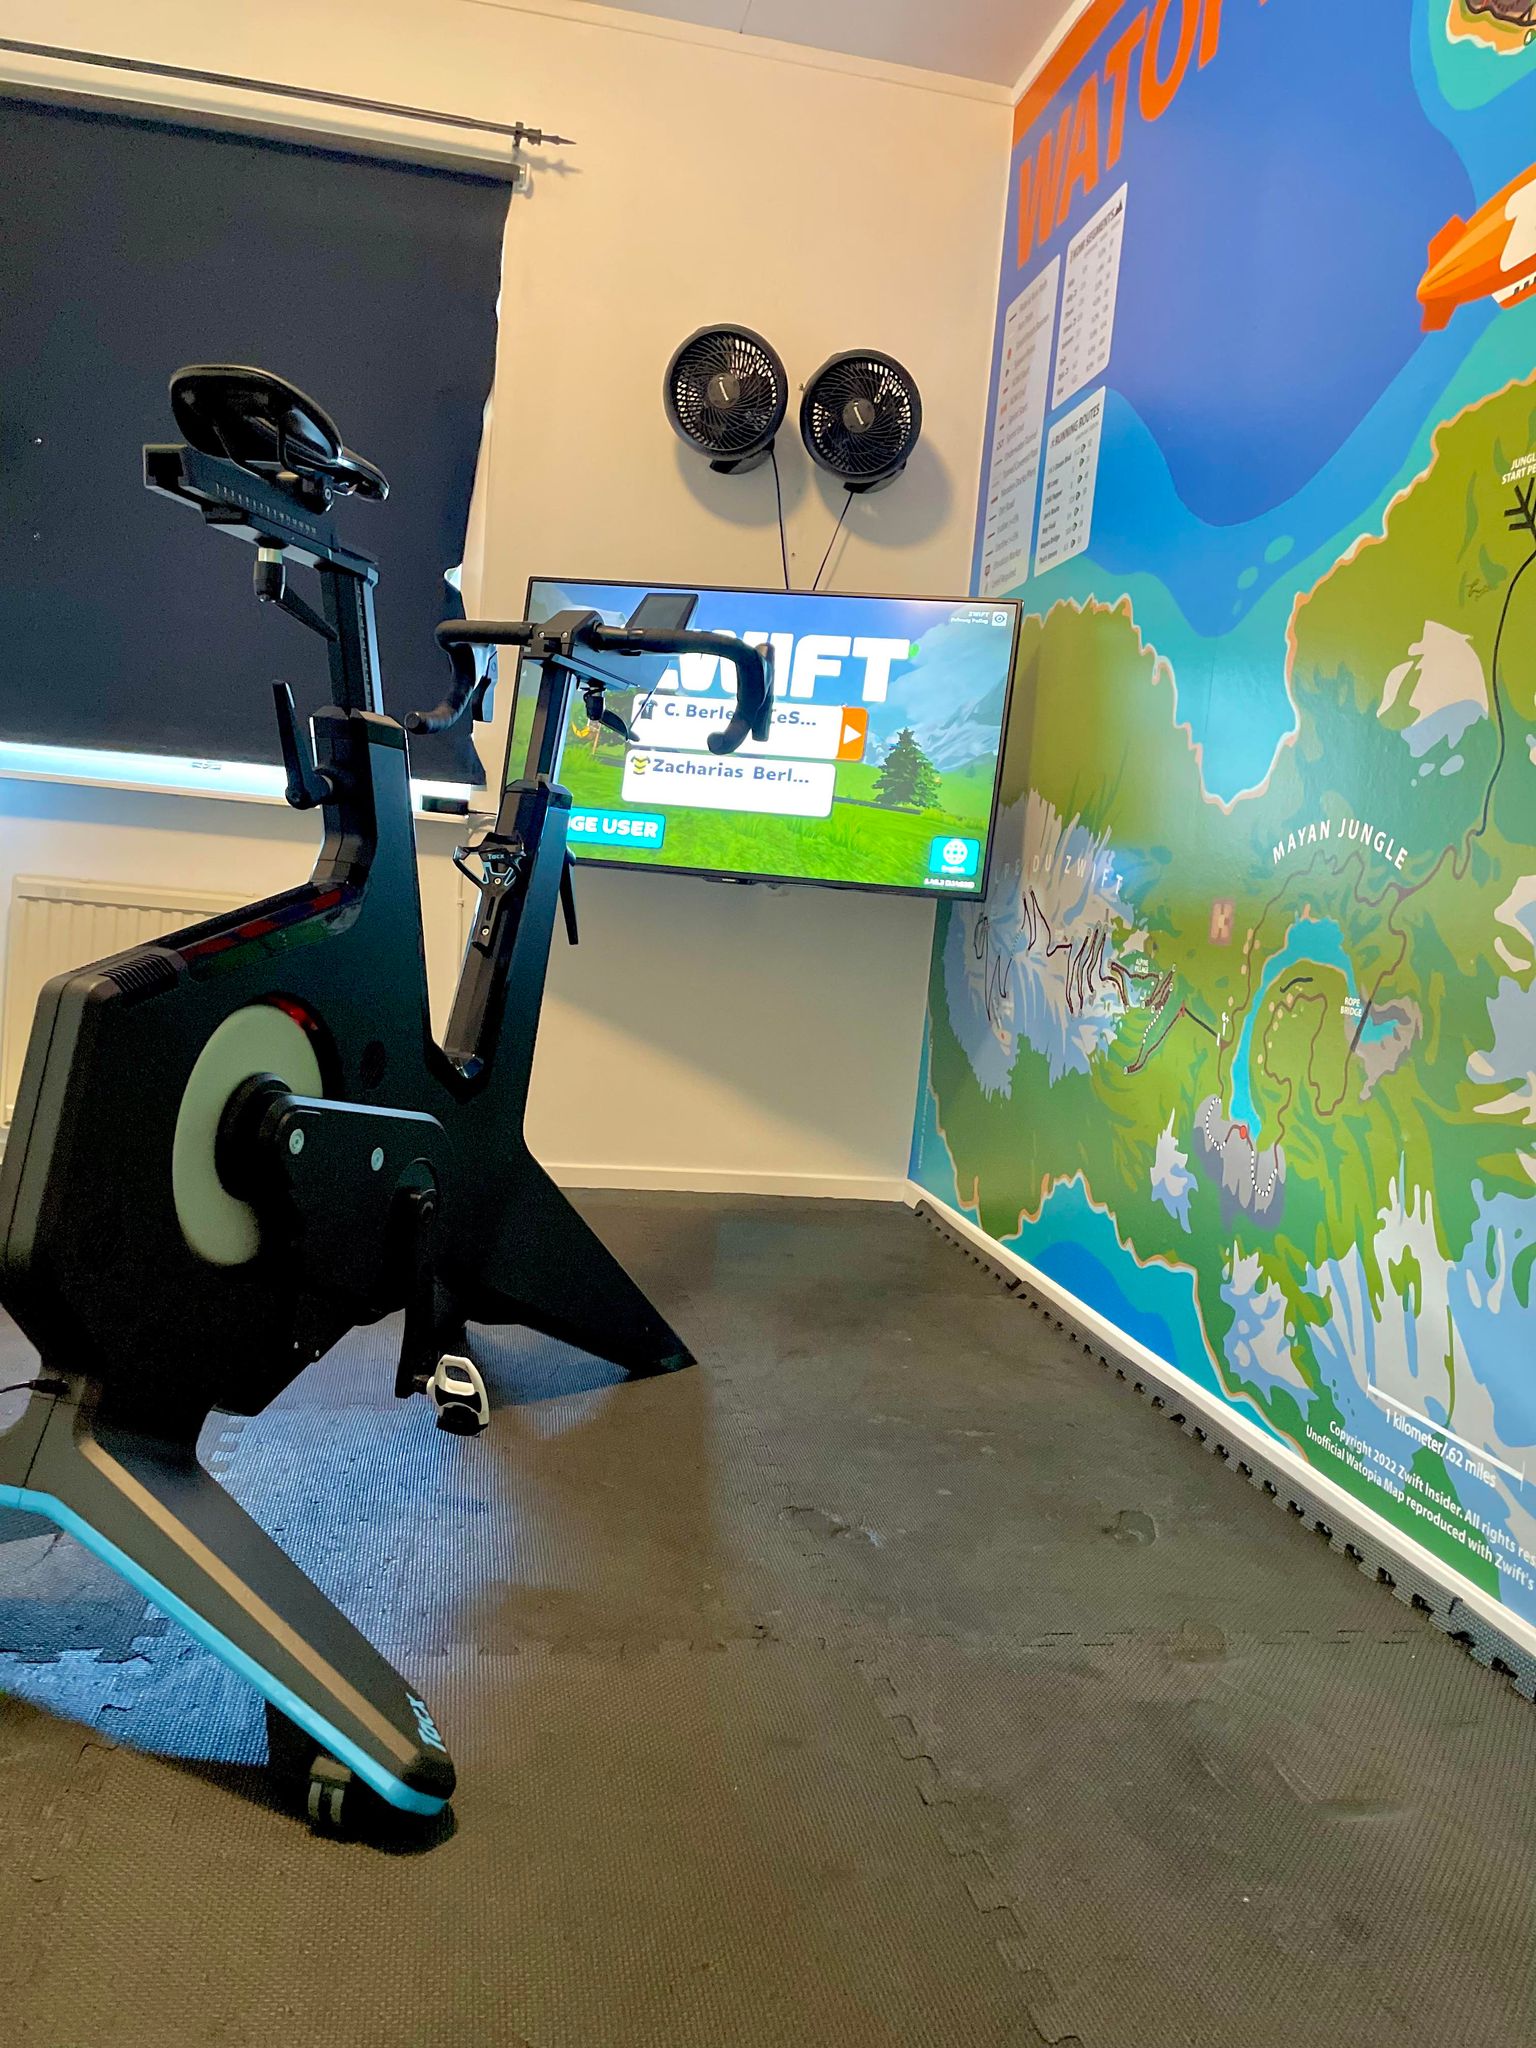
Zwifter Carl-Johan Berletin recently sent over a few photos of his pain cave renovation, which includes (to my knowledge) the largest-ever Watopia map installation!
We chatted back and forth and he shared more images of his setup, as well as details about himself as a rider. Read it all below.
Tell me more about yourself as a Zwifter…
I’m 39 years old and live in Sweden. I started mountain biking in the summer of 2016, then bought my first trainer (Tacx Flow roller) in 2017 to complement winter training, and to see why some people were so hyped about Zwift.
In the beginning I just did the basic stuff – free riding or structured workouts. It was good but still only a complement to the MTB training. 2019 I upgraded to a Tacx Flux direct-drive trainer. That made Zwift feel quite smooth, but it was still just for winter workouts.
In 2021 I made a big investment in a Tacx Neo 2T and started to grow interested in racing! Joined the group Swedish Zwift Riders and started talking to other Zwifters, slowing getting more and more interested in the latest in Zwift and racing.
In 2022 I joined the race team SZR Swedish Zwift Racers with Martin Björgvik as captain. Then and there I was hooked. Discord forum. Chat every day. TTT race every Thursday, ZRL on Tuesdays. Midweek race. Tiny Races. By the end of 2022 I bought the Tacx Neo bike and a 50” TV. I dedicated a whole guest room to be a “pain cave”. I was a full-blown Zwifter.
This spring I took the next step in racing, trying to get even better! And was lucky to join Jon Werme and Robin Andersson’s team eSRT (in my thoughts the best Zwift race team in the world). So now, even when it’s low season in Sweden for Zwift, I race up to 6 days a week.
You’ve had quite a progression as a Zwifter, starting by just dipping a toe in. But now you’re fully submerged! I know the feeling…
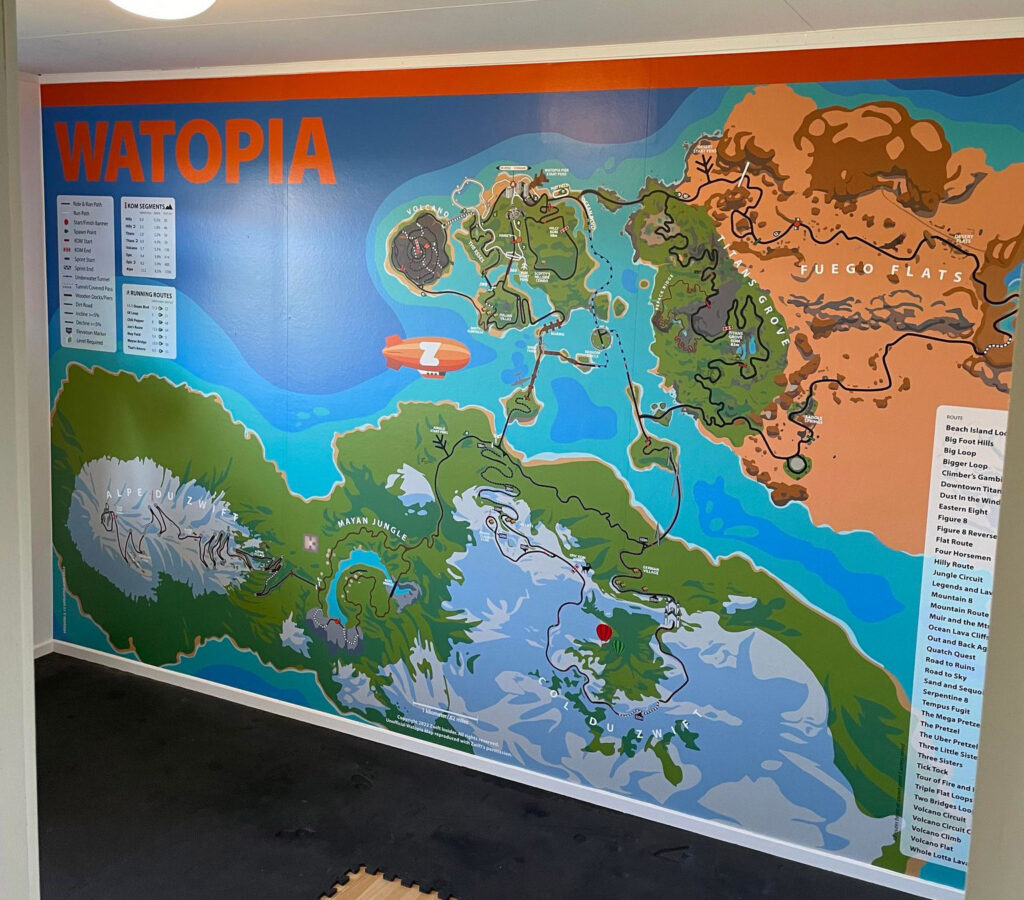
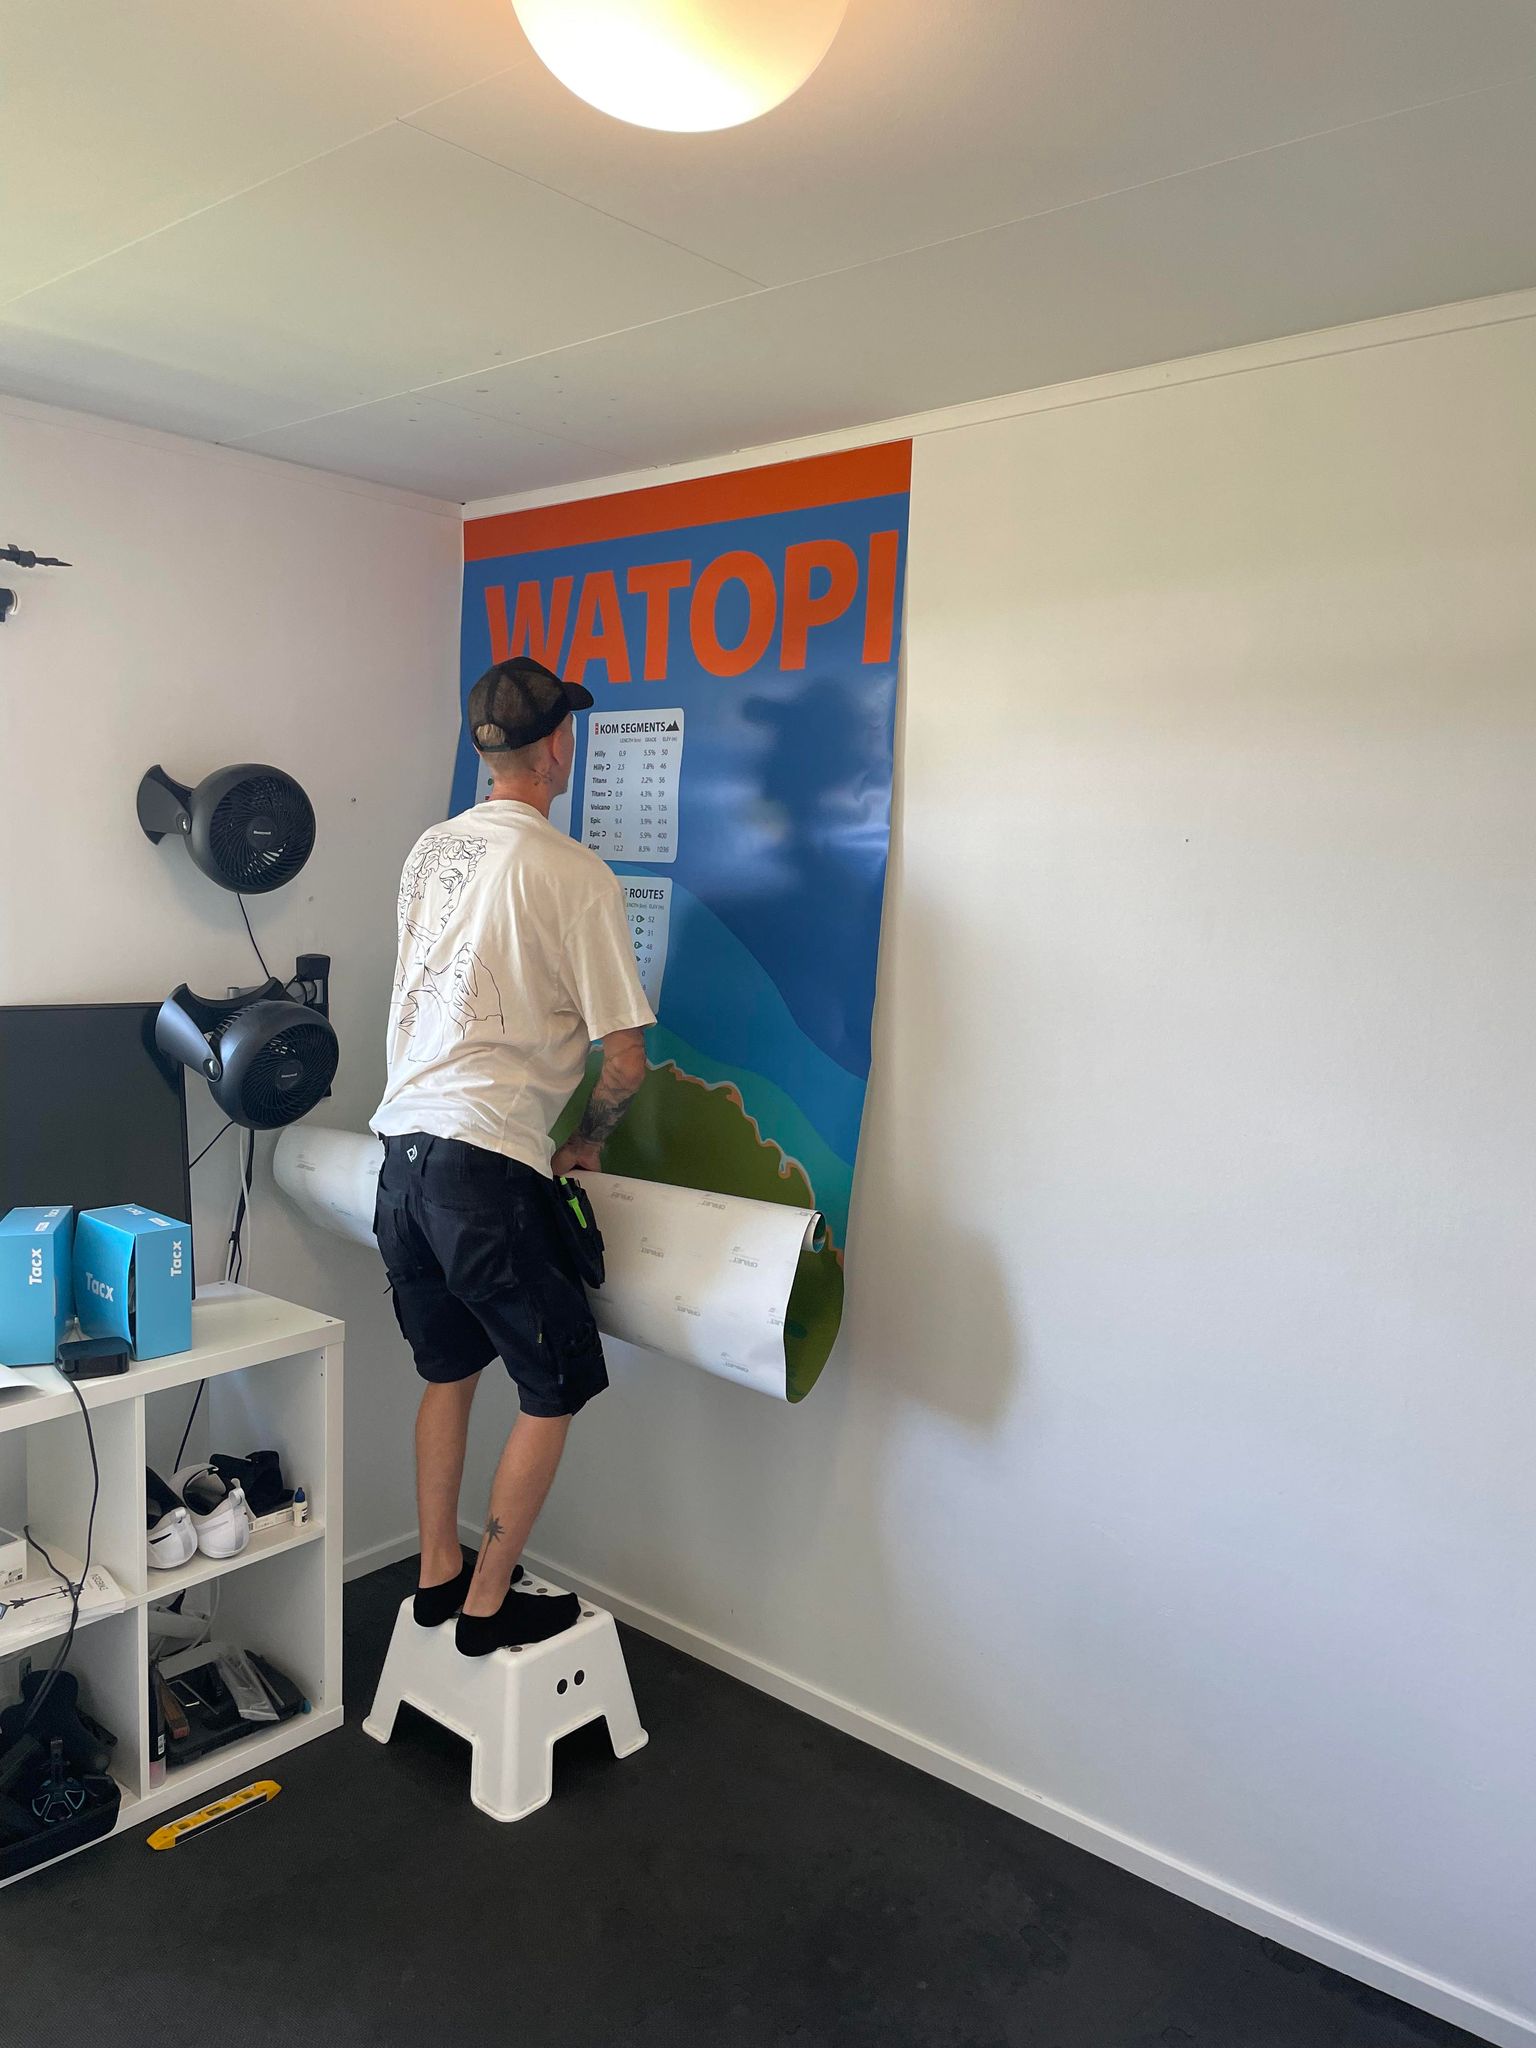
That Watopia map wall is absolutely epic, just slightly larger than the ones we sell. 😉 I love seeing the map I designed displayed on such a huge scale. What’s the actual size of the wall poster, and who did the printing for you?
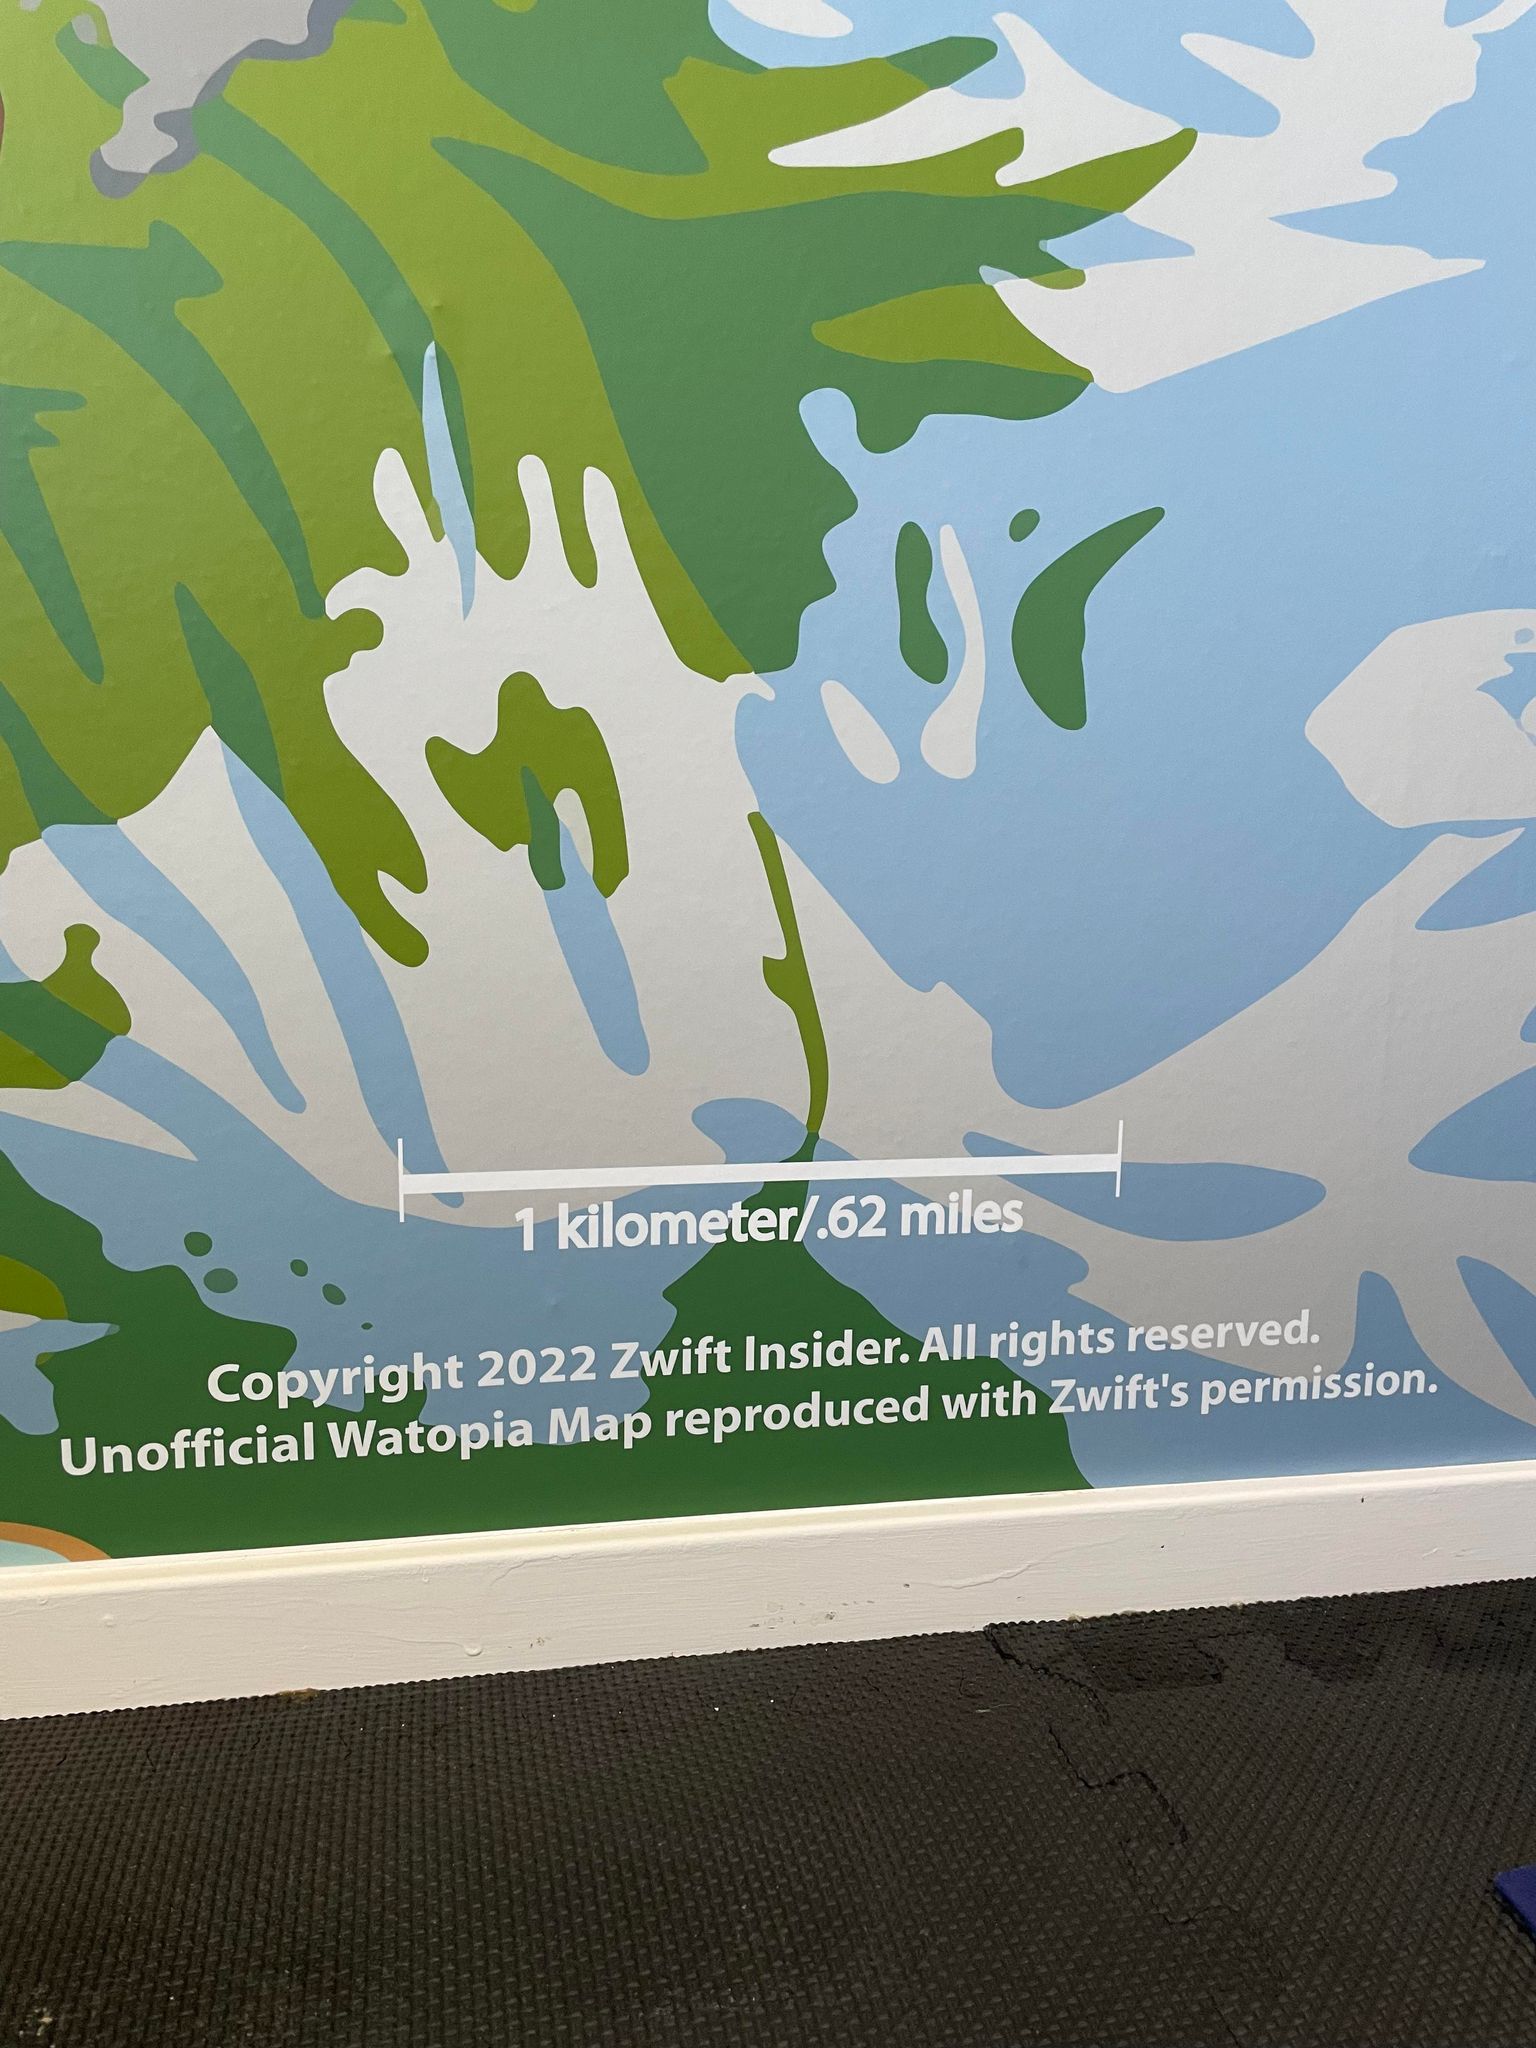
The actual size is 385×230 cm (12.6’x7.5′). The company that did it is a local advertising firm that my brother works, www.bildvaxlarna.se . I gave him the PDF file from the Zwift Insider site. They put that file into a special program that breaks the picture down, gets rid of all pixels, and makes every little detail sharp. Then it’s printed on a special wallpaper sticker.
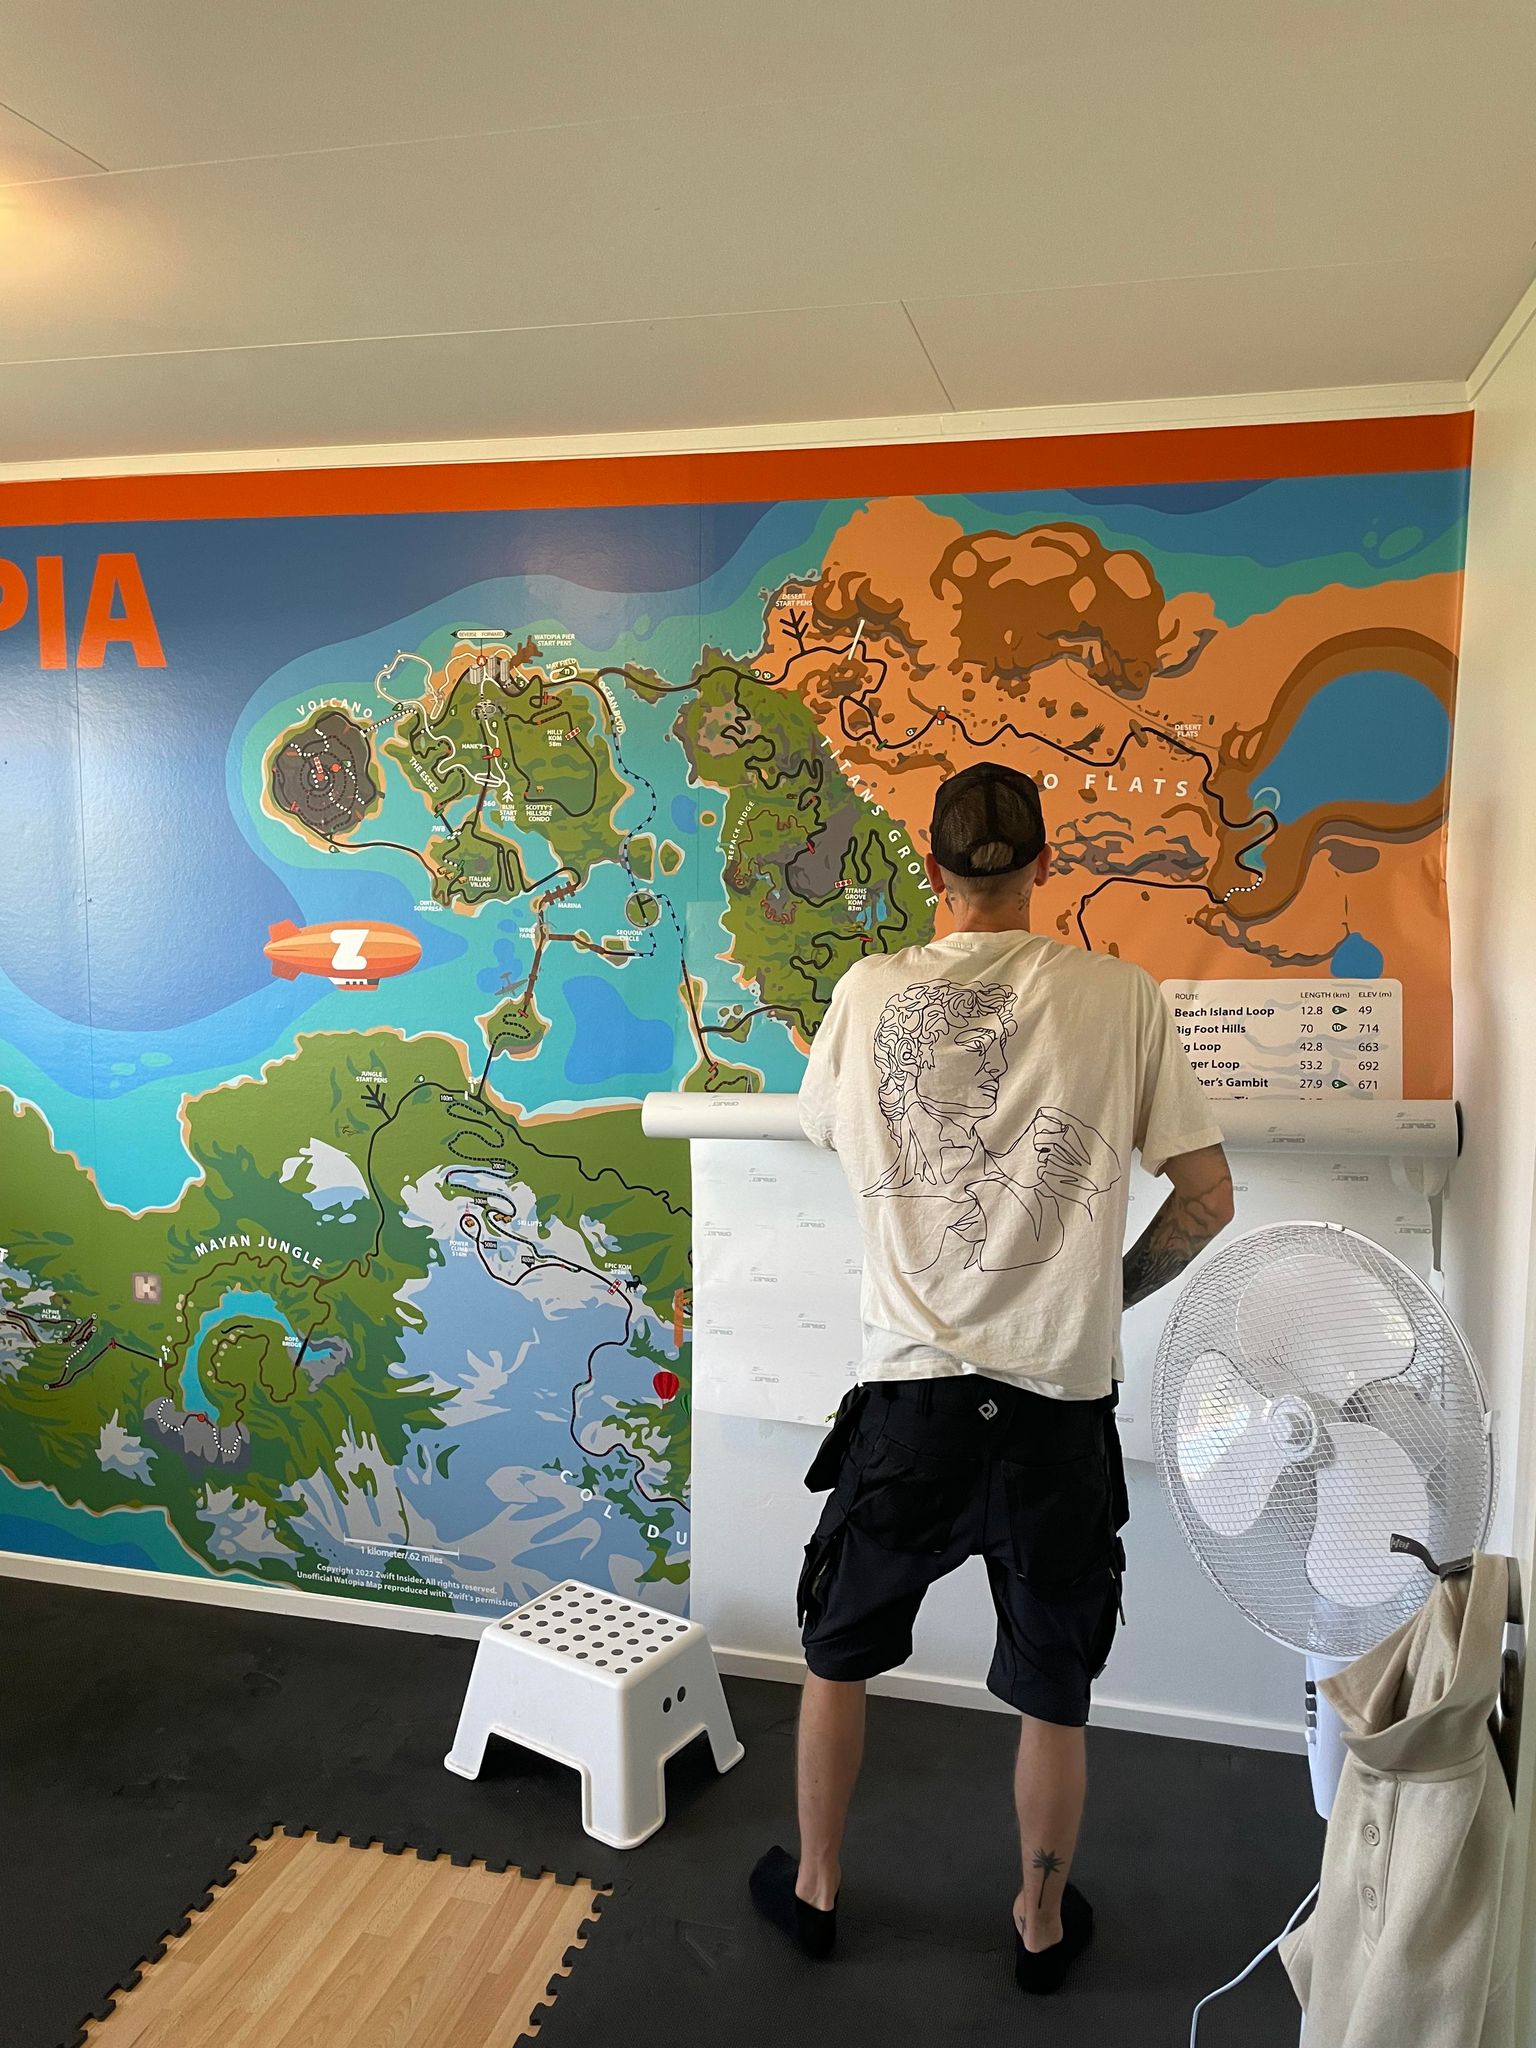
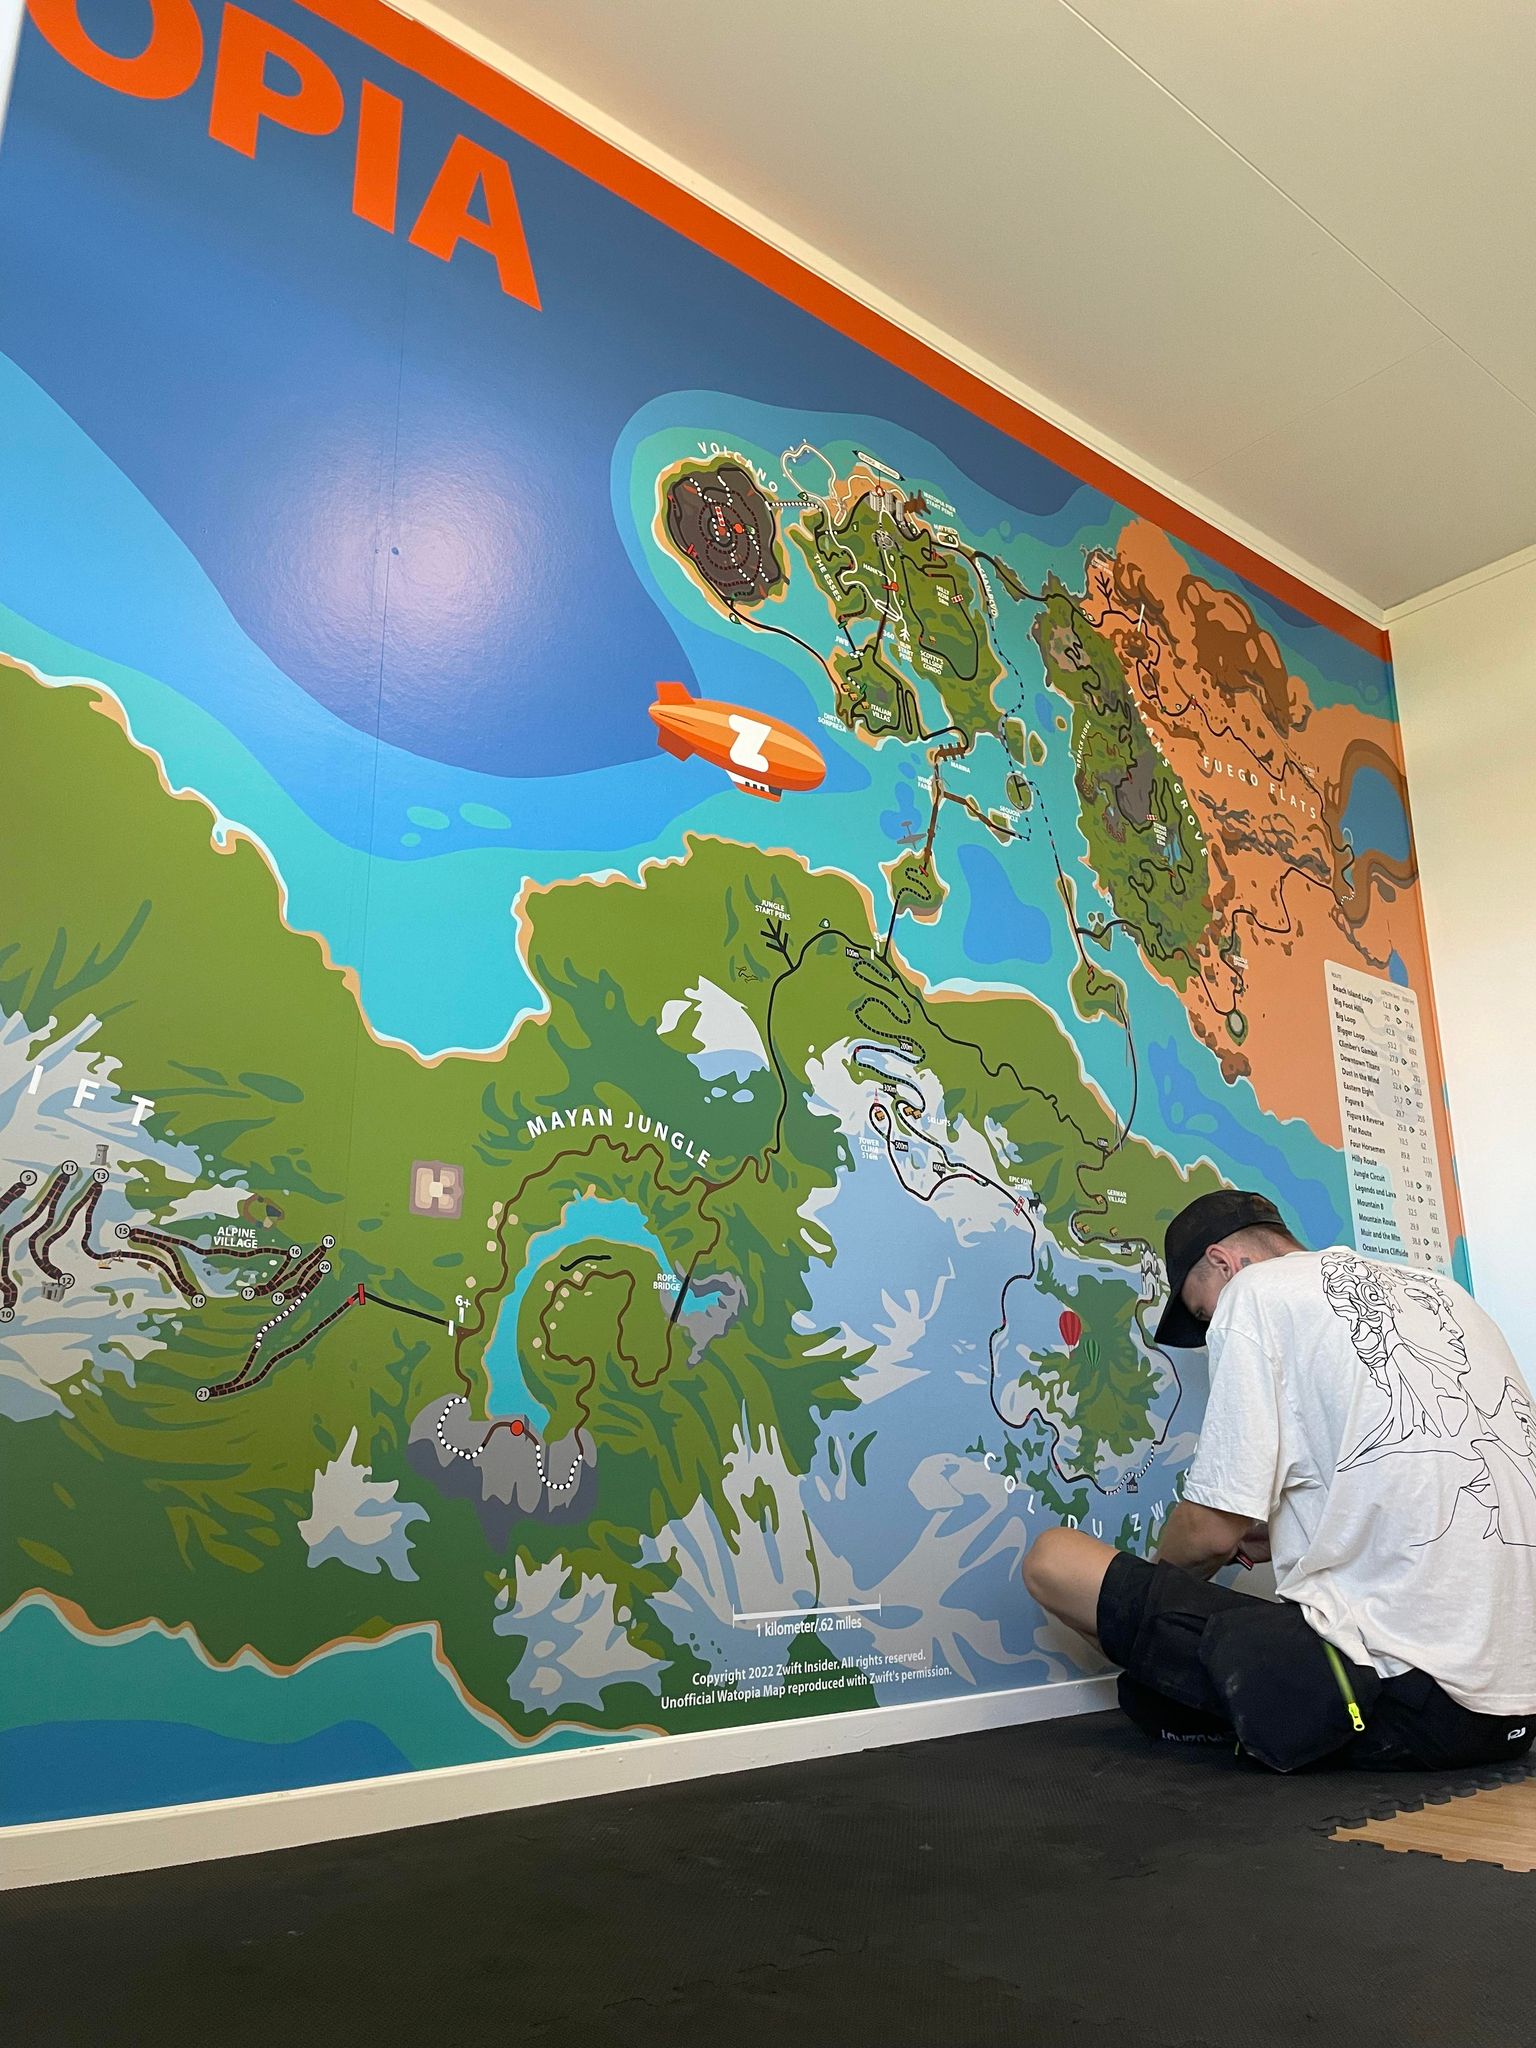
Are you happy with how it turned out? Anything you’d do differently?
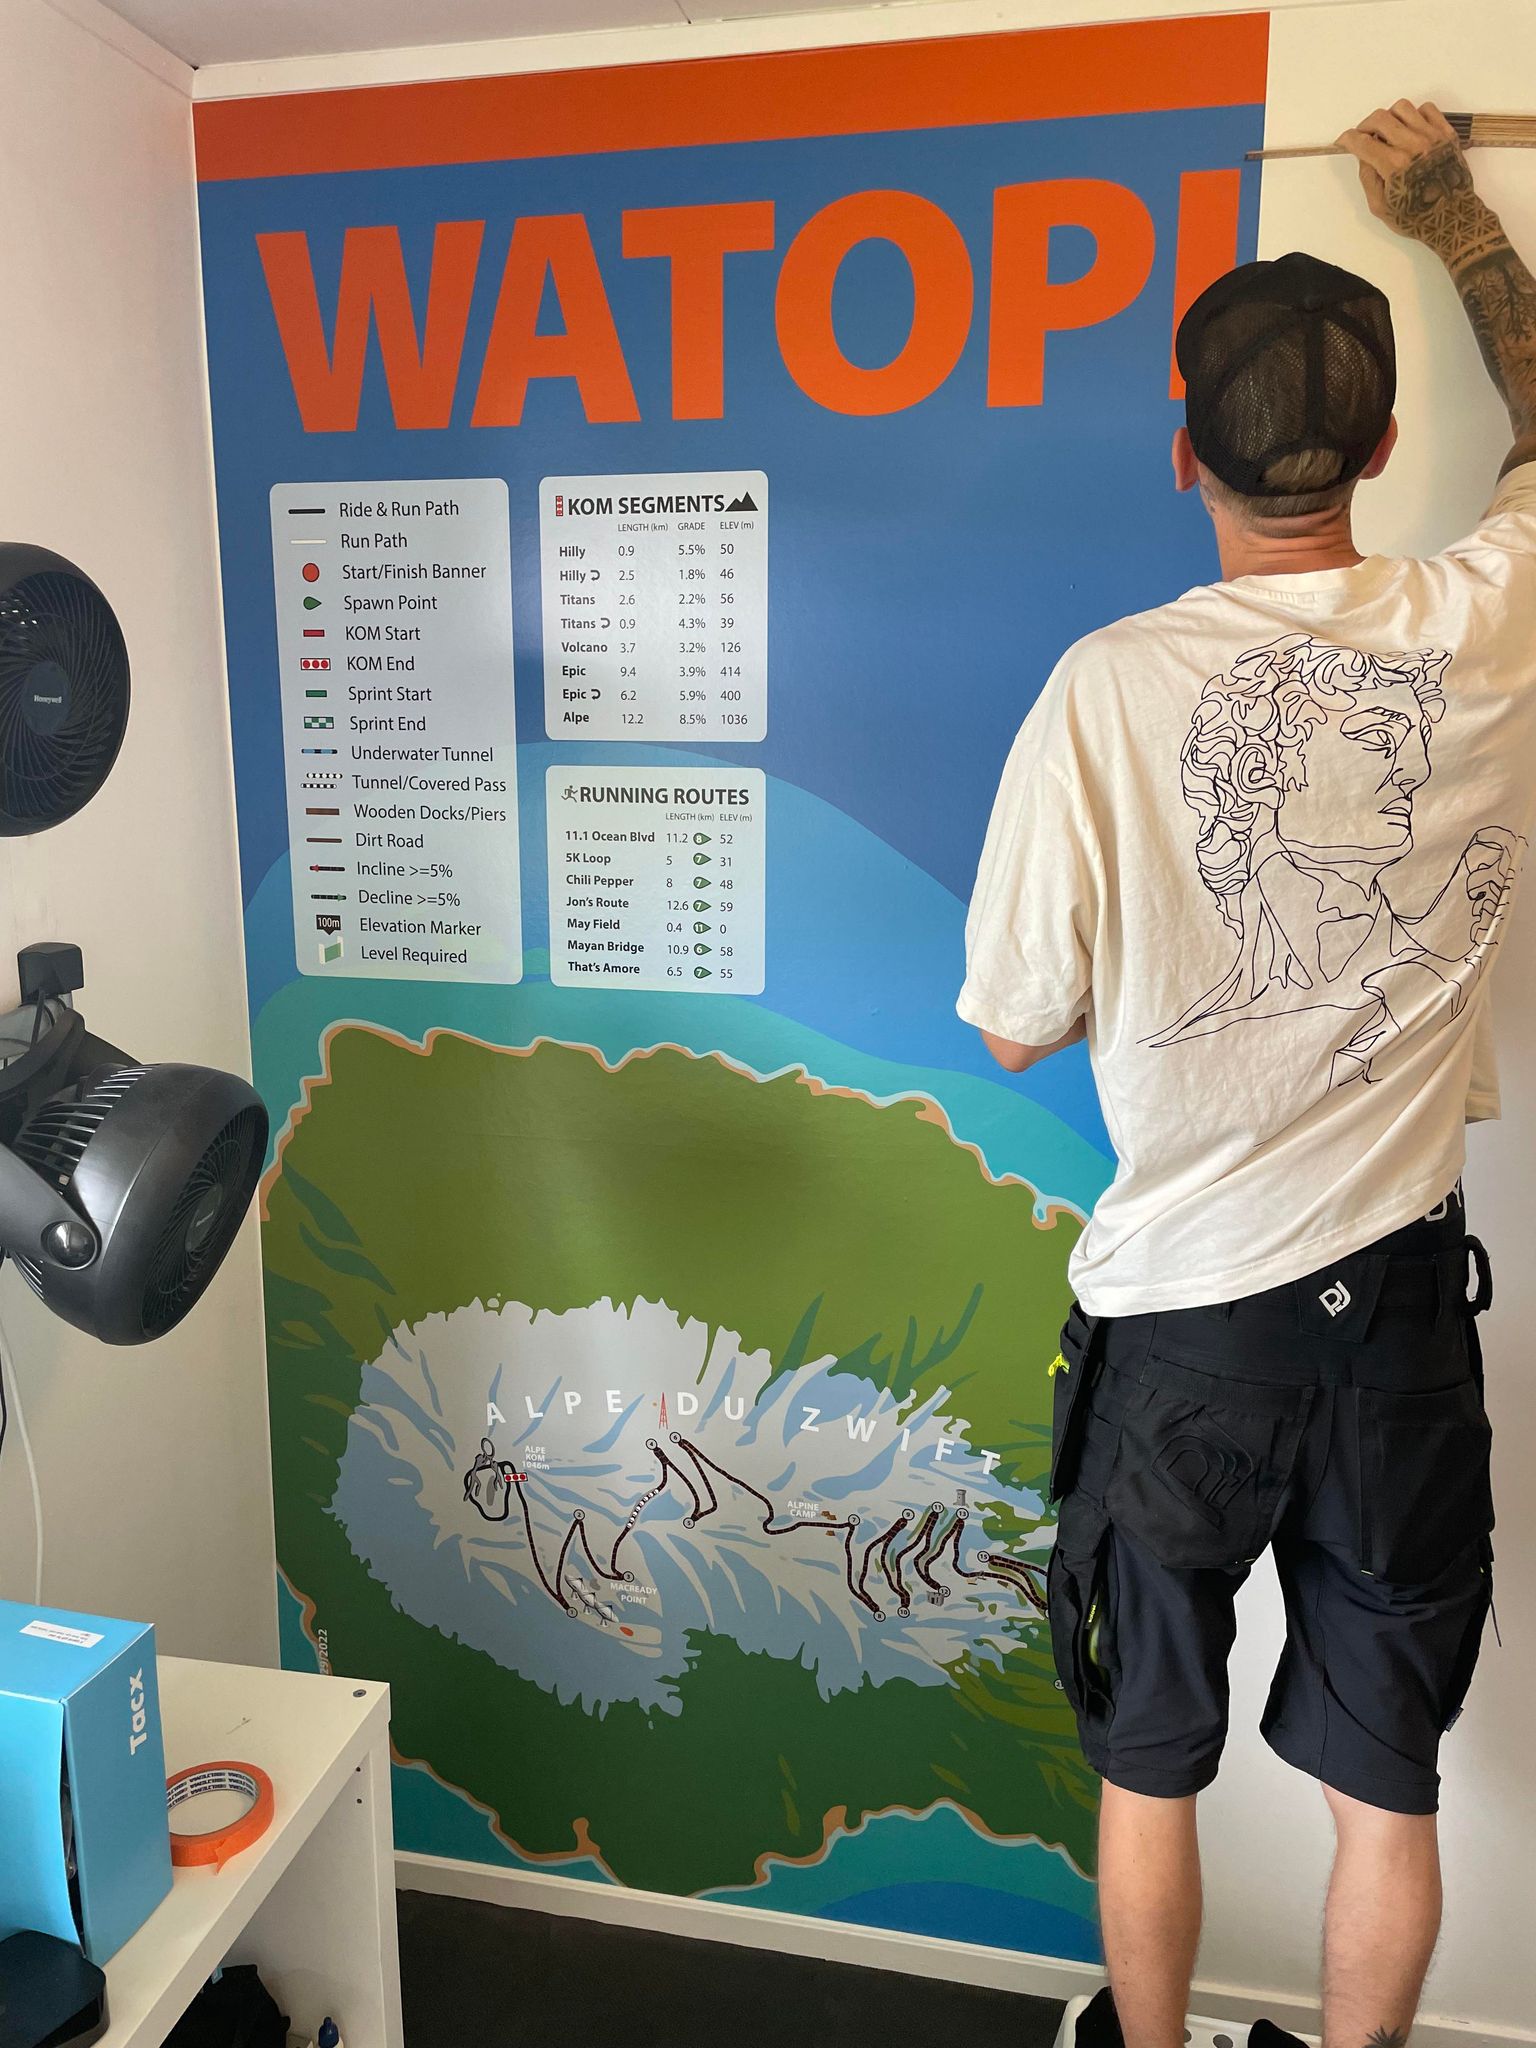
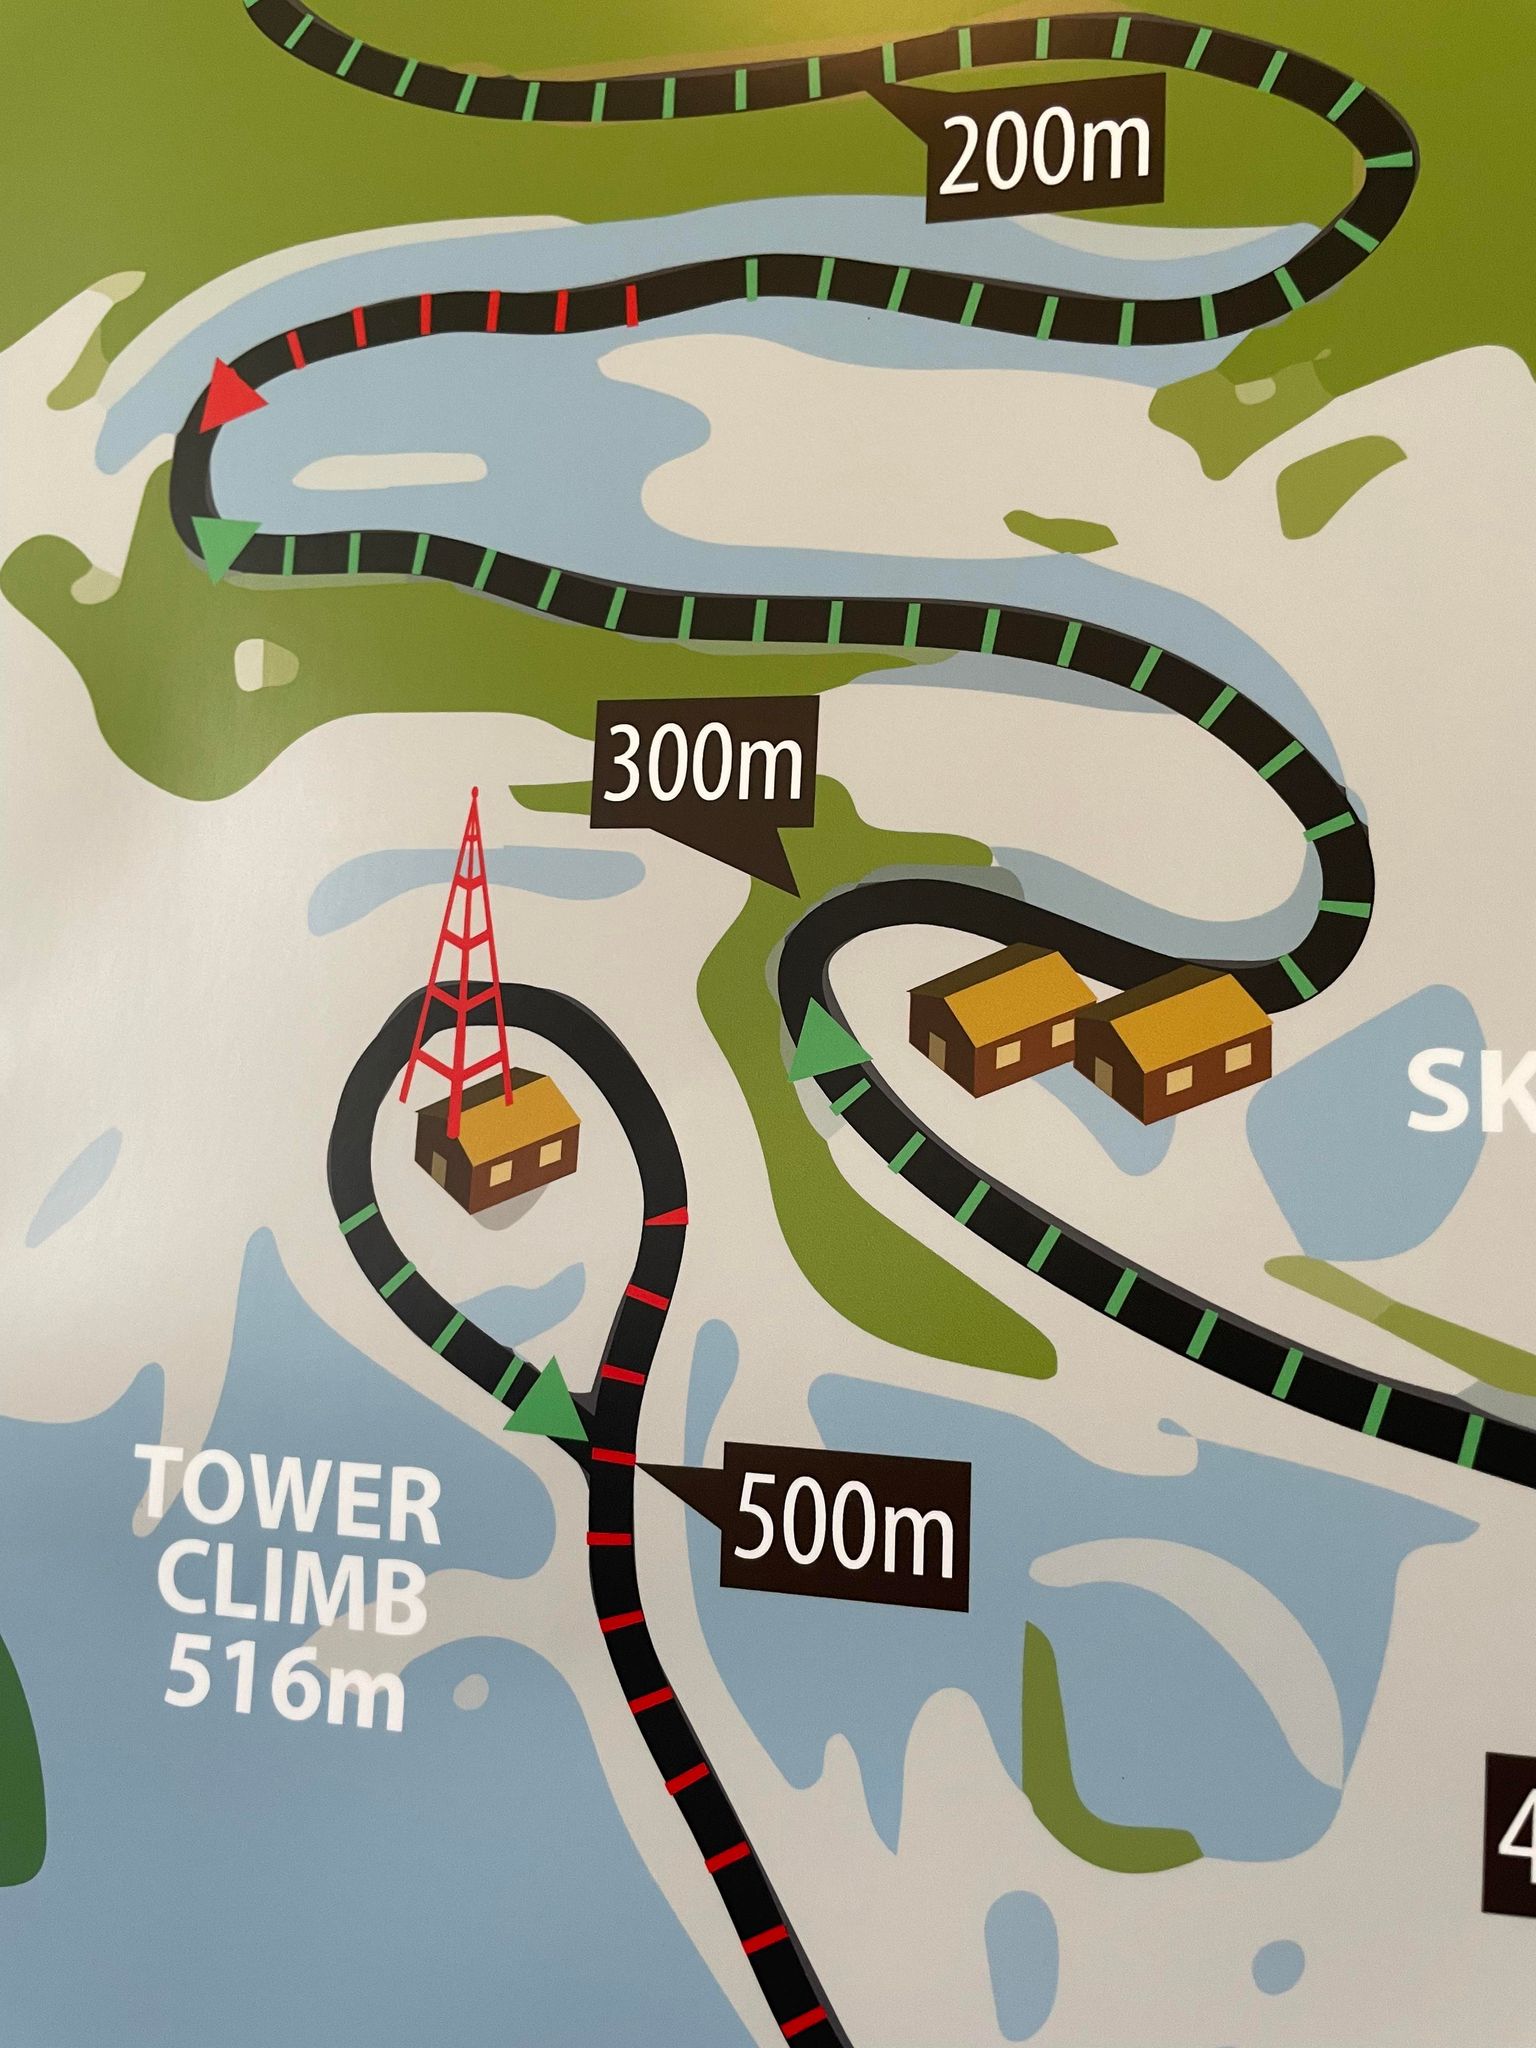
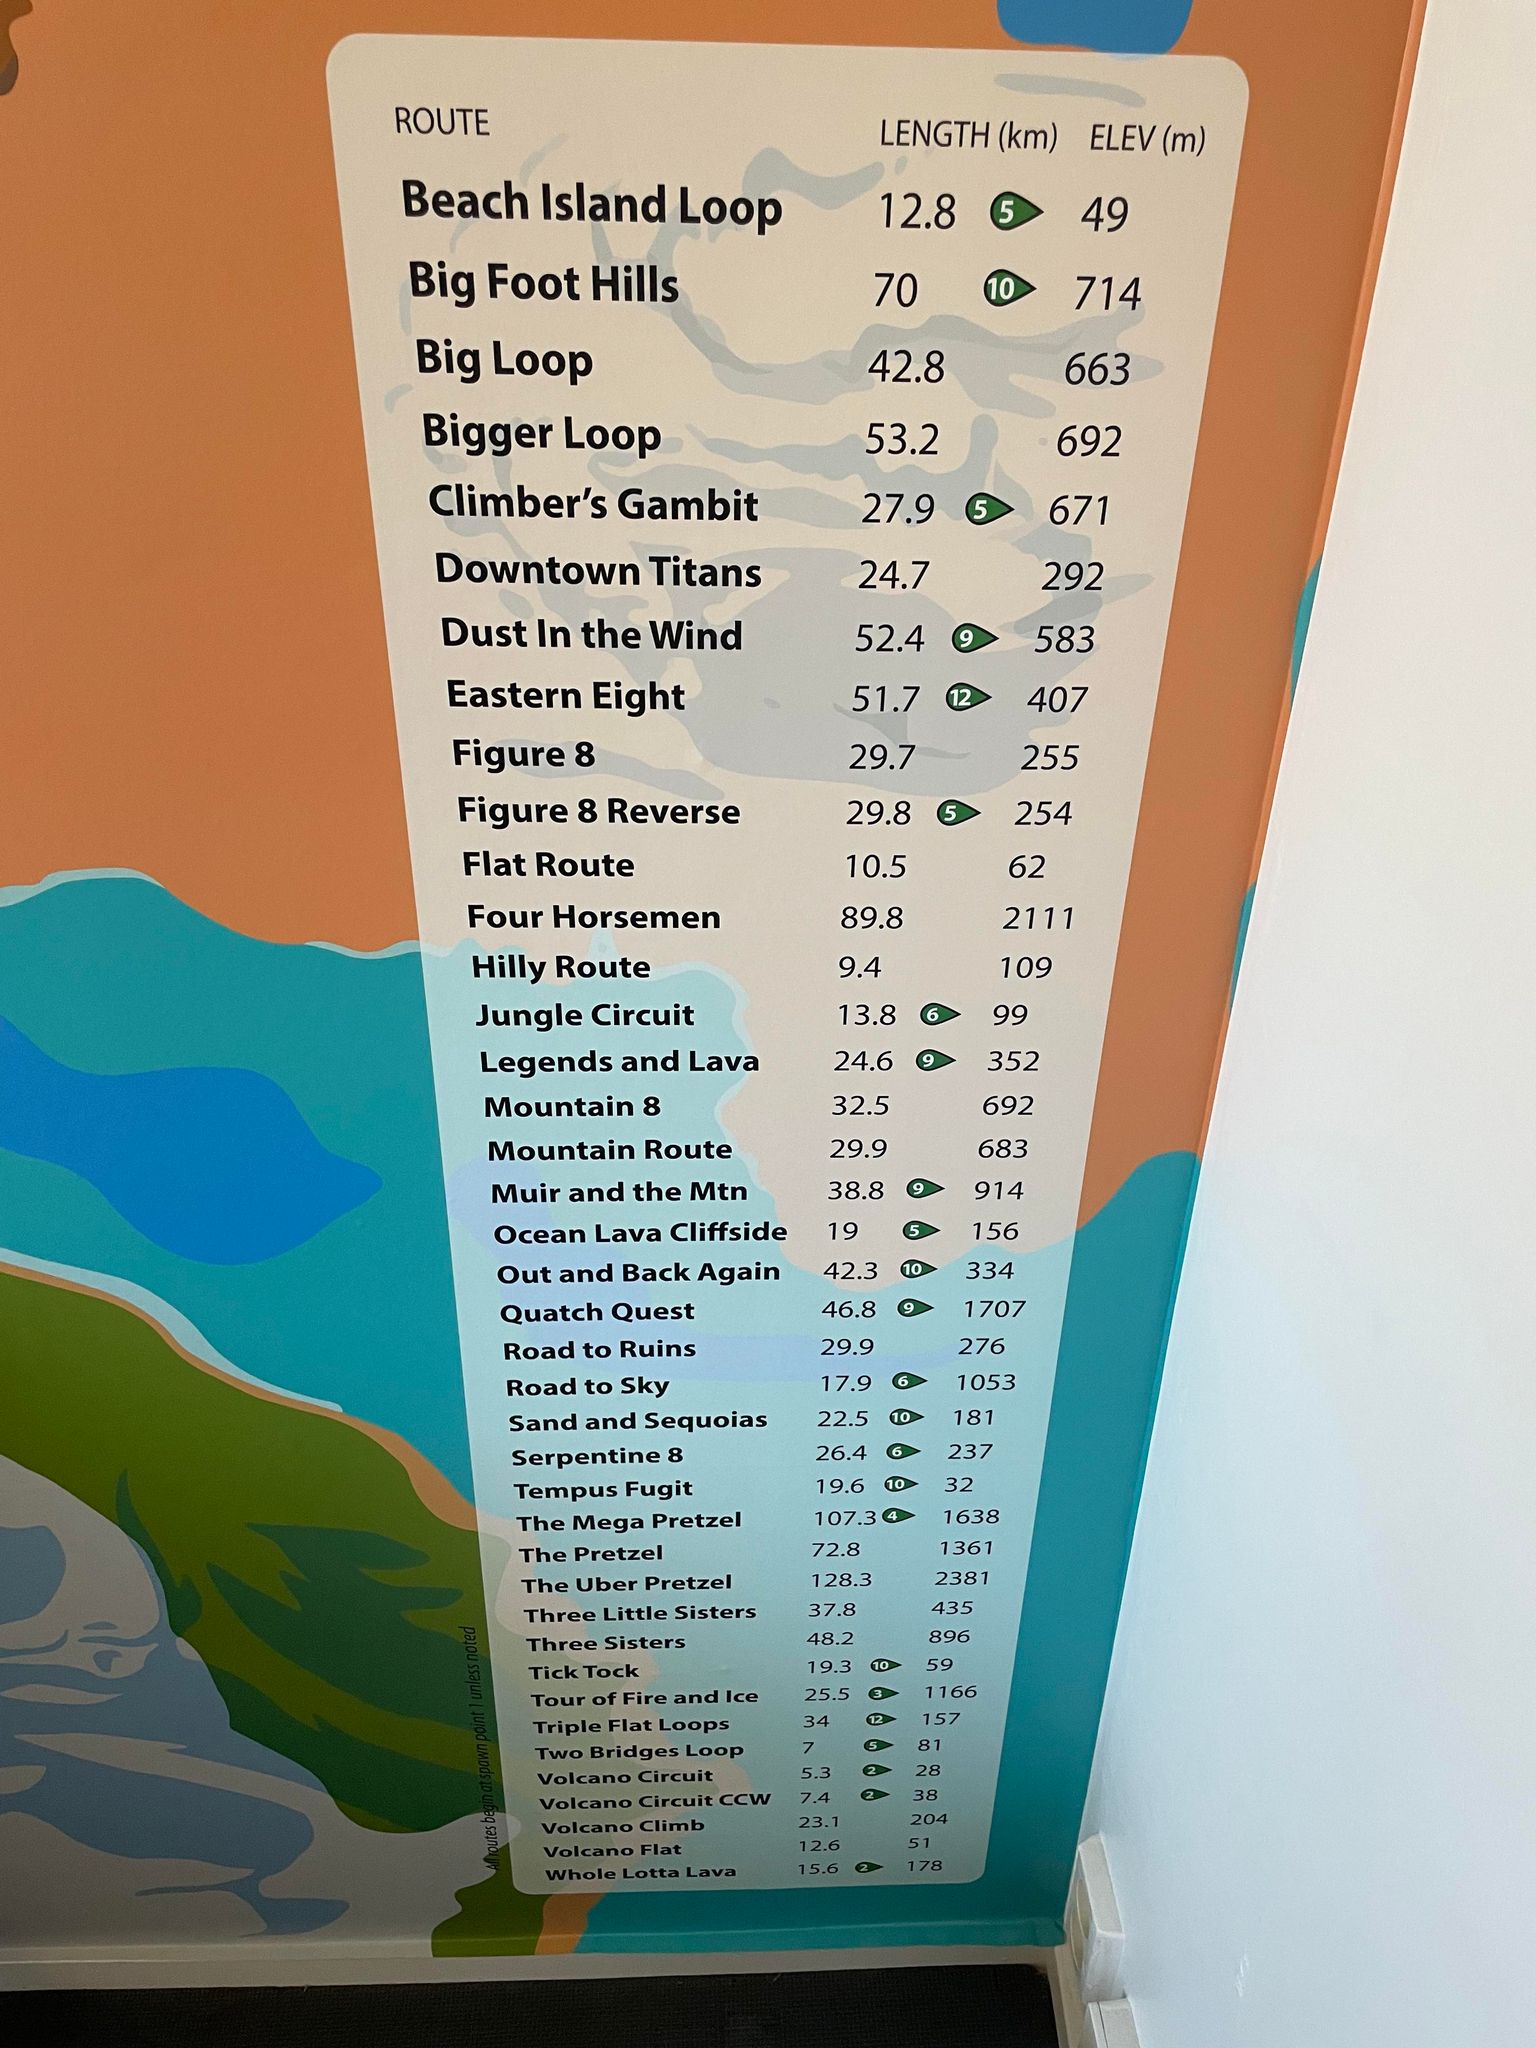
The outcome was better than I ever could imagine. Every detail is so sharp.
What else are you putting into your epic pain cave?
Now that the room is remade with better TV/trainer position, I will invest in a better fan on the floor. I’ve also ordered special LED lights to go around the Watopia wall.
Because the outcome of the wall print was so good, the other wall will be the black and gold eSRT logo:
Anything else you’d like to add?
A little comment on some of the feedback I got when I posted it on the Zwift Racers Facebook group. Some folks asked, “What happens when Zwift updates Watopia?”
I didn’t make this picture to get around right in Watopia! I don’t care if Zwift remakes the map or adds new routes. For me the map right now is iconic, as a ground floor for Zwift that will always have the “base routes” in the game.
A quick video of the Watopia wall fully installed:
As the Tour De France wraps up, many of the simulation series are too. This week, we’ve selected the final stage of a Tour De France race-along, a community ride for a good cause, a women-only race, and two social rides!
✅ Popular Event✅ Highly Competitive✅ Innovative Format
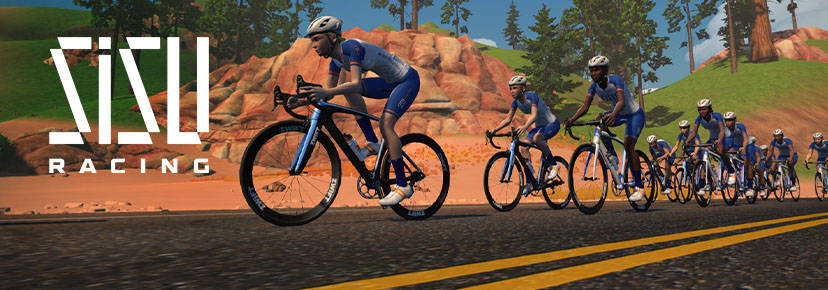
This is riders’ last chance to participate in the 2023 SISU Racing Tour. Over the past three weeks, this event has been very competitive across all categories and time zones, so we highly recommend checking it out!
Most cyclists who’ve seen the Tour de France probably know that the final stage of the tour ends on the Champs Elysees in Paris. Likewise, stage 7 of the SISU tour takes place over 4 laps of the Champs Elysees course in Zwift’s Paris.
✅ Feel-Good Factor✅ Popular Event✅ Endurance Ride✅ Innovative Format
This Saturday and Sunday, the Bike MS Community Challenge will be taking place. The goal of this event series is to bring riders together to raise awareness for MS. In 2022, Bike MS raised an astounding $50 million for the National MS Society!
The group ride will take place over various lengths of the Casse Pattes course on Saturday and the Douce France course on Sunday (select a category to select your course length).
The Fierce Felines events are back on the Zwift calendar, and they’re starting with 4 weeks of events as they ease back into hosting Zwift races. This first race is a time trial, so choosing your fastest TT bike will help you get to the line as quickly as possible.
The iTT is held on two laps of the Beach Island Loop course in Watopia.
BanditZ events have received very positive feedback in the past, so we’ve decided to feature another one! The BanditZ Waistband is a traditional 60-minute group ride. The leader will be holding a steady pace of 1.5-2 w/kg.
This group ride will last for 60 minutes on the Douce France course.
✅ Popular Event✅ Beginner-Friendly✅ Legacy Leaders
Looking for a nice way to round out the weekend? The EZR Weekend Wind Down offers riders a well-paced social ride. The leaders will do their best to hold the advertised 0.9-1.3 w/kg.
This 60-minute group ride takes place on the Champs Elysees course – the same course the Tour de France riders will ride on Sunday!
We choose each weekend’s Notable Events based on a variety of factors including:
Is the event unique/innovative in some way?
Are celebrities (pro riders, etc) attending/leading?
Are signup counts already high, meaning the event is extra-popular?
Does the ride include desirable unlocks or prizes?
Does the event appeal to ladies on Zwift? (We like to support this under-represented group!)
Is it for a good cause?
Is it just plain crazy (extra long races, world record attempts, etc)?
Is it a long-running, popular weekly event with a dedicated leader who deserves a shout out?
In the end, we want to call attention to events that are extra-special and therefore extra-appealing to Zwifters. If you think your event qualifies, comment below with a link/details and we may just include it in an upcoming post!
Your Thoughts
Got other events that stand out this weekend? Share below in the comments!
For many riders, Zwift plays a big role in fitness gains. This week we’ve selected a video where a rider tests his fitness after 6 months of using Zwift as a crucial part of his training. Additionally, we’ve selected a short film about Zwift, tips and tricks for Zwift racing, a trick for gaining XP quicker, and another rider tackling an FTP test.
How Much Faster After 6 Months Of Cycling? New Ramp FTP Test
Six months after his first FTP test, Benji Naesen tackles another to see where he is at with his fitness. He also discusses some of his cycling achievements in the past six months.
It’s Just A Game // A Short Film About Zwift
As his last Zwift video, Oli from ZRace Central talks about Zwift and its impacts beyond fitness.
Zwift Race | Cat B Tips / Tactics
Max from The Watt Life provides commentary on his latest Zwift race while giving tips and tricks for other Zwift racers to improve their results.
How to Gain XP Quickly
The Mussette shares the trick that earned him 5320 XP in only 48 kilometers of riding on Zwift.
FTP Test (Ramp test)
Maydeus the Cyclist recently started a new training plan. As part of the plan, he must tackle a ramp test to see where his fitness is at. Can he improve his FTP?
Got a Great Zwift Video?
Share the link below and we may feature it in an upcoming post!
Next-Level Video Streaming with Zwift: Microphones, Fans, and Ducking
With so many Zwifters producing live video of themselves in game, you can find a wide range of video quality on YouTube, Twitch, Facebook, and elsewhere.
This is the first post in what I hope will be a series detailing simple tips for taking your Zwift streaming to the next level. Today we focus on the microphone. How can we get the best voice quality in our Zwift streams? Let’s go!
Three Zwifty Challenges
Zwift streamers are sort of like sweaty podcasters. But Zwifters have to deal with a few challenges podcasters don’t generally worry about:
Fan noise: if you’re racing, you probably have one (or more!) fans blowing hard and straight at you. But your viewers don’t want to hear that.
Mic Proximity: podcasters have it easy – they can sit at a desk with a microphone just inches from their mouth and thus get the best voice quality. Zwifters don’t have that luxury, though, since we shift positions on our bikes.
Mixing with Music: most streamers will want some sort of music playing while they ride, as it creates an energetic sonic layer to complement the visuals. How can you make the music loud enough while ensuring your voice is clearly heard?
Happily, there are ways to overcome each of these challenges. Let’s tackle them one at a time.
#1: Fan Noise
I use a Wahoo’s KICKR Headwind fan, and when I’m racing it’s typically at 100% and blowing a lot of air. It’s quite noisy:
The first step toward reducing fan noise is to set up and position your microphone optimally. (Don’t skip this part! Especially if you’re not a musician or someone familiar with microphones, if you skip this you may regret it later.)
Make sure you have a mic that picks up sound in just one focused direction. I use the Blue Yeti USB Microphone, which has four different pickup patterns: Cardioid, Omni, Bidirectional, and Stereo. You will want cardioid for Zwifting, since that picks up sound from one direction (your mouth)!
Next, position your microphone so the fan isn’t blowing directly into it. For me that means placing it about 12″ above and 3″ forward of my right brake hood. This lets my Headwind blow on my body and face, while very little wind hits my mic. Additionally, my trainer table (see recommendations here) is between my mic and the fan, blocking any wind that might hit the mic.
The second step toward reducing fan noise is to set up noise cancellation. There are multiple ways to do this, but two popular solutions are the (free) NVIDIA Broadcast or (paid) Krisp apps. I’ve used both, and have found Krisp seems to work a bit better – but NVIDIA Broadcast is free (although it requires a higher-end NVIDIA GPU).
These apps are easy to set up and use. After installation, just tell the app which mic you want noise cancellation on, then pair the app’s noise-canceled feed as your mic feed in your video streaming software.
Step 1 greatly reduces the fan sound going into your physical mic, while step 2 should essentially eliminate whatever fan sound gets through.
#2: Mic Proximity
When it comes to single-voice streaming, having a microphone closer to the sound source produces better sound. When you’re sitting at a desk, speaking from a lectern, or rocking with the band on a stage, having the mic within a few inches of your lips is ideal.
But that’s not easy to do on the bike. When you shift positions from out of the saddle to the hoods the drops to the flats (maybe even on some aero bars), your lips move too. Unless you want to change your position whenever you speak into your mic (and who wants to do that?) the best solution is to move your mic so it is 12-18″ away from your head in whatever positions you use when riding.
Again, for me, that means placing it about 12″ above and 3″ forward of my right brake hood. Centering the mic would be ideal in terms of audio, but it would block a significant portion of the camera feed, so I keep it off center where it’s barely visible in the video, and not blocking anything that matters.
For most setups, mic positioning is made easier with an adjustable stand. Quality podcasting mics like my Blue Yeti will come with a simple table stand, but when I purchased mine I bought the “bundle” on Amazon which includes a boom arm, pop filter, and shock mount. This allows me to place the mic exactly where I’d like, plus the shock mount is a nice bonus for reducing room noise.
#3: Mixing with Music
Entertaining Zwift streams typically include rights-free background music since it adds energy and ambiance to your video. Watch just about any entertaining high-energy YouTube vid, in fact, and you’ll notice background music which is louder when nobody is speaking, and quieter when voices are the focus.
Here’s an example of this happening, in one of my recent race vids:
While this dance of “turn the music down, let the voices speak, then turn the music up again” is typically handled by video editors after all the footage is shot, we don’t want to faff about with editing our videos before uploading (and if we’re streaming we certainly can’t rely on post-processing).
This is where the “audio ducking” feature in OBS comes to the rescue! It will automatically reduce the volume of other sound sources whenever mic input is detected. And it’s easy to set up! Here’s a great tutorial that walks you through OBS Audio Ducking step-by-step in just a few minutes:
Testing 1, 2…
Getting good sound quality in a Zwift stream requires quality hardware and software that is set up optimally. But what exactly is the optimal setup? That’s a question you will need to answer for yourself through a bit of trial and error.
Hop on the bike, turn up for your fan to “cruising speed”, and start doing some test recordings. Then watch them back (with a good set of headphones) and decide if everything sounds the way it should.
Live Zwift video is a game of compromises. If you turn up your fan for comfort, it will impact voice quality. If you move your mic closer to your face it may get in the camera shot or not work when you shift positions. And all of these choices have to be made within the constraints of your pain cave, which may have its own unique set of challenges!
In the end, the best you can do is the best you can do. Follow the advice in this post (there’s plenty more online if you look around) and you’ll create quality sound without a huge investment of time or money.
Bonus for Discord Users
Do you use Discord while Zwifting (perhaps when doing team races like ZRL)? If you spend the time and money to get a good microphone that’s set up properly, your teammates on Discord will thank you. And you won’t have to use push to talk!
Just pair your noise-canceled mic feed to Discord and you can casually chat with friends. They’ll only hear your high-quality audio coming through when you talk, and nothing at all when you’re quiet.
Microphone Recommendations
There’s a lot you can do to sculpt your voice once it comes in through your microphone, but if you have a crappy microphone you’ll just be sculpting crap. And who wants to do that?
When it comes to microphones (or any audio gear), you generally get what you pay for until you’re in the very upper reaches of the price range. Quality podcasting microphones cost anywhere from $75-$250USD.
A few recommendations:
Top tier (and priced like it): Shure MV7 Shure is the #1 name in the world of microphones, and this is their flagship mic for podcasters. Includes both USB and XLR inputs, so if you ever get fancy and want to go the XLR route you won’t have to upgrade mics.
Quality reputation: Rode Podcaster Rode’s microphones have a great reputation in the broadcast and podcast industry, and this is their well-reviewed model aimed at podcasters.
Upgraded version of my mic: Blue Yeti X TThe X has a four-capsule array (vs the Yeti’s three) for better sound, and LED metering for easier use.
My mic: Blue Yeti A super-popular mic for podcasters because it walks the thin line between great sound and a reasonable price. That’s why I use it… and so does GPLama!
Budget solution: JLab Talk Looking for the most affordable solution that still sounds decent? This one does the job.
Coming Up Next
Future posts in this series will cover the following:
Streaming/Recording Zwift Videos with Apple TV
Webcam Lighting, Angles, Backgrounds
Rights-free Music for Your Videos
Fun with Sauce (Including Apple TV)
Other topics (suggest below!)
Questions or Comments?
Got any other tips for dialing in your voice audio when Zwifting? Got topics you’d like to see covered in this series? Share below!
Beginning this week, we’re enforcing hardware requirements when joining the pens to get rid of bots and zPower rangers who have been affecting some of the A races.
A power meter or smart trainer/smart bike will be required to be paired as your power source, and a paired heart rate monitor will also be required in order to entire the pens. If you are on a “classic” trainer (using a speed sensor) or don’t have a heart rate monitor paired you will not be able to enter the start pens.
This Week’s Routes: 4 Routes, 4 Worlds
This week’s routes alternate between rolling profiles and climby stuff. Each route is in a different map, so be prepared to travel!
Valley to Mountaintop custom finish at TempleApproaching Mountain 8 finishMountain 8 finish line
Race 1: Downtown Dolphin (3 laps, 5.7km) Racers know this route well. The question is: who will go long, and can they stay away?
Powerup: Aero Boost (2x)
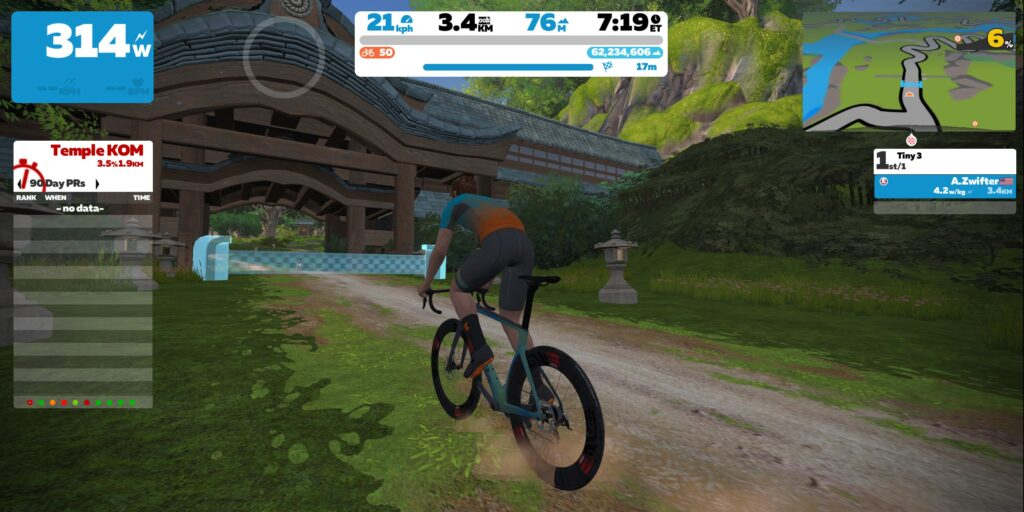
Race 2: Valley to Mountaintop (3.5km, ends at Temple entrance partway up KOM) This route’s key climbs are dirt, beginning with the beautiful Golden Forest which will stretch the pack out and create gaps, then ending partway up the Temple KOM after a bit of pavement in between.
Powerup: none
Race 3: Park Perimeter Loop (7.434km, ends at sprint banner) The Harlem Hill climb will stretch and split the field. But with a few kilometers left until the line, some riders may be able to chase back onto the front.
Powerup: none
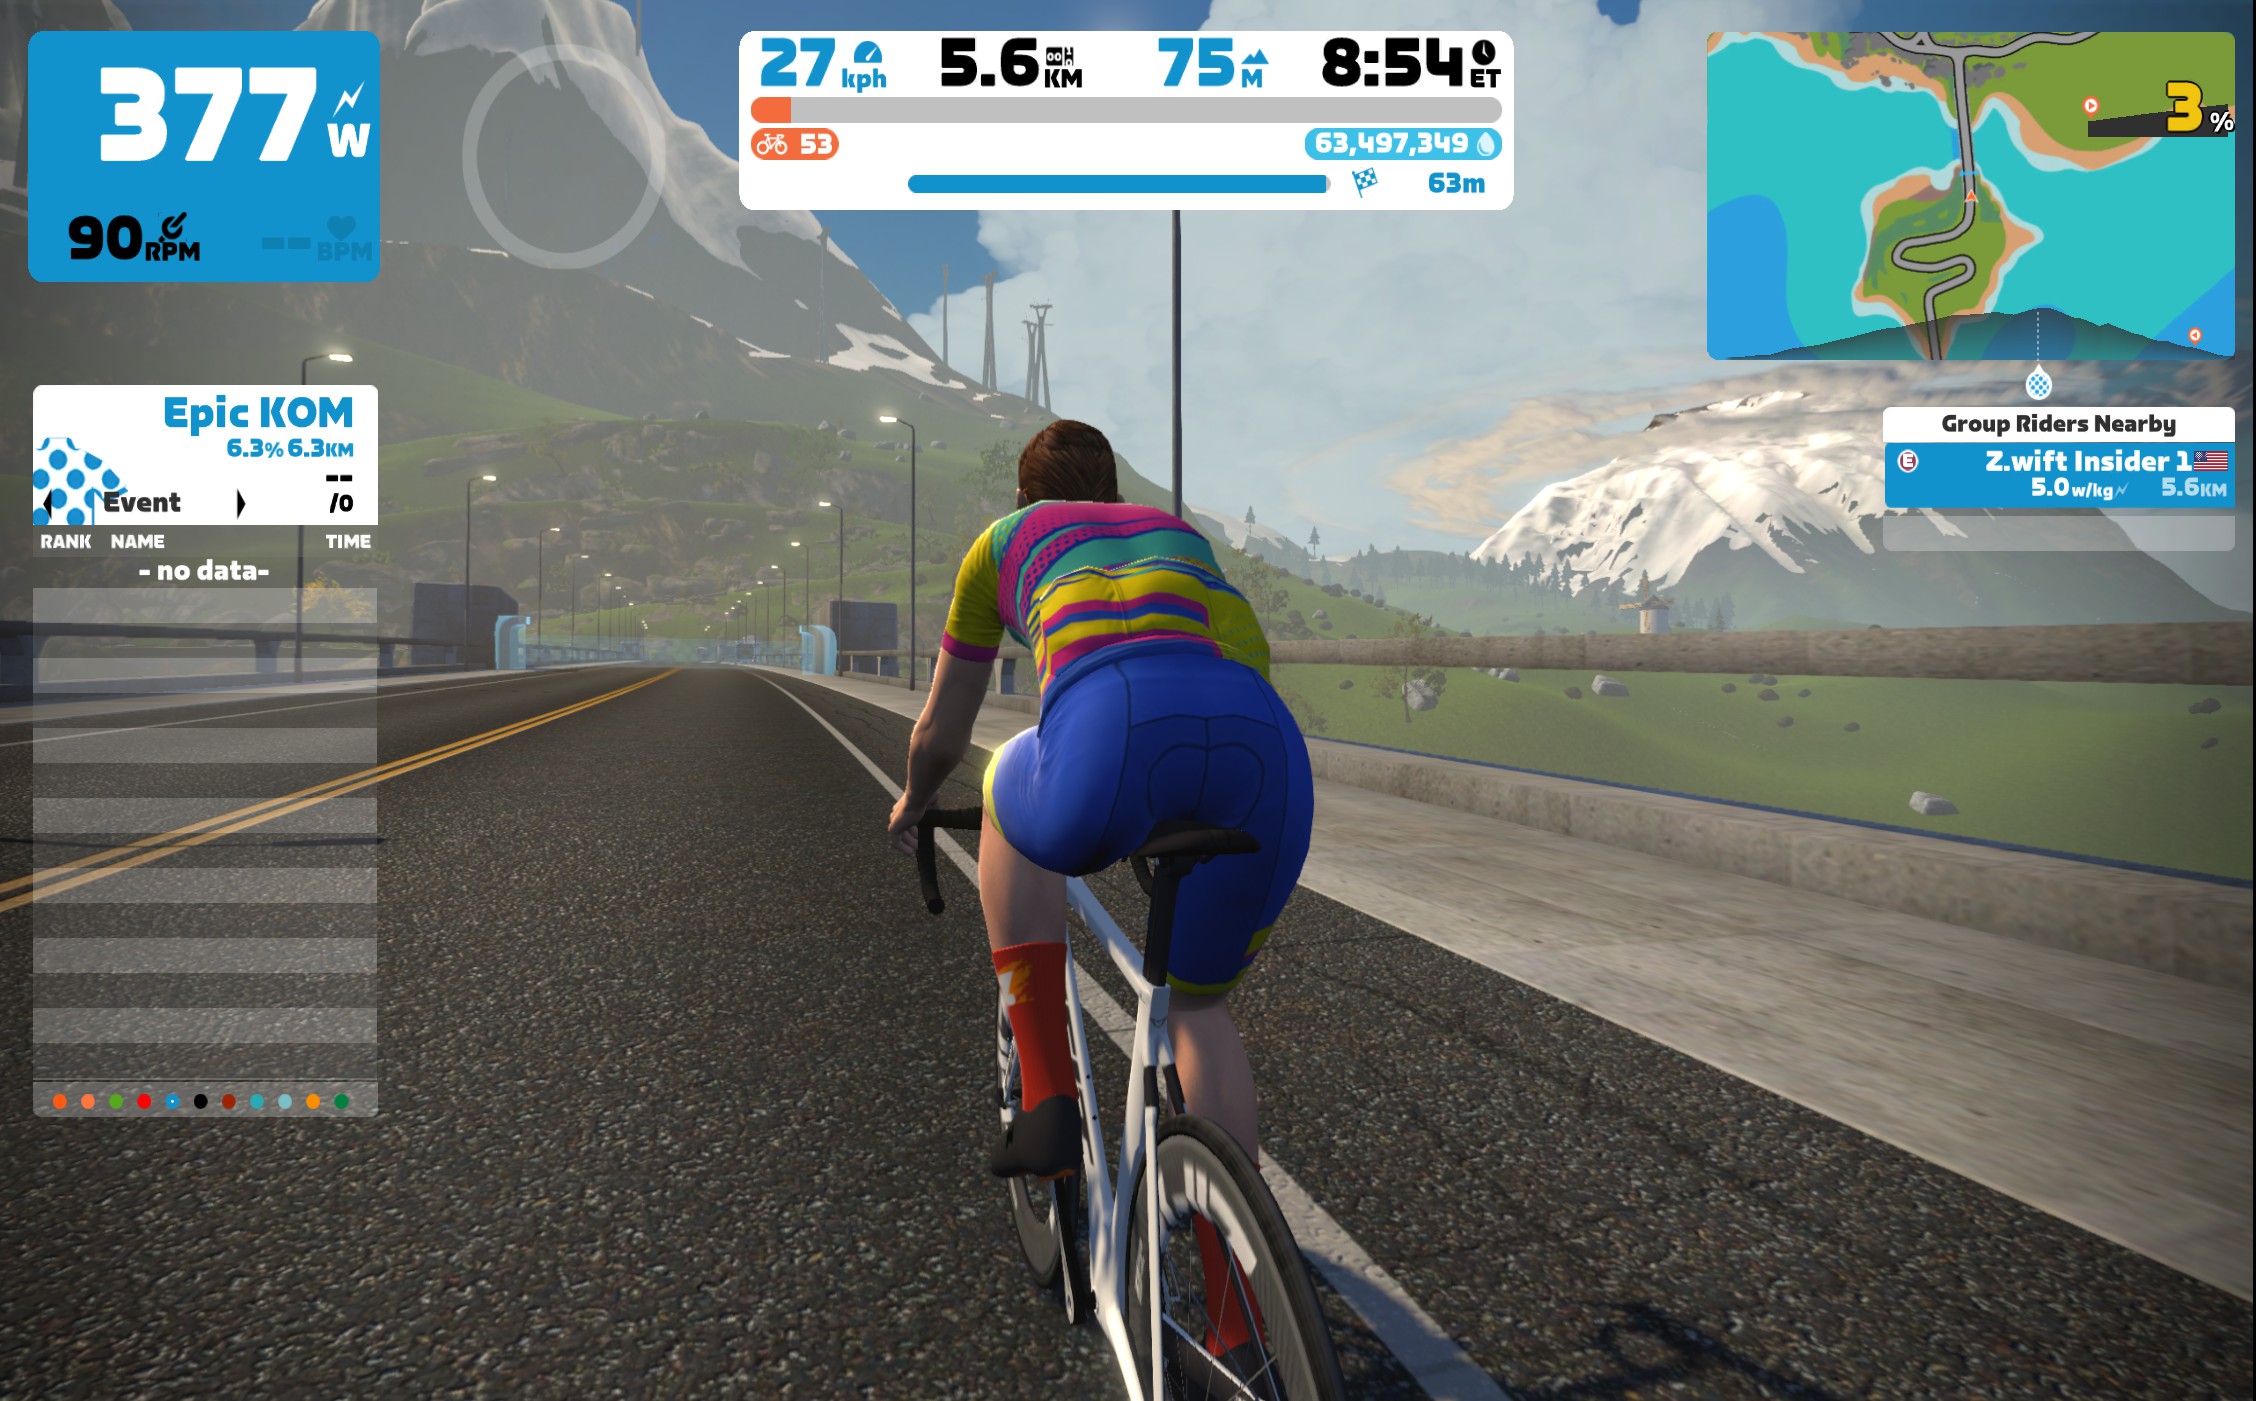
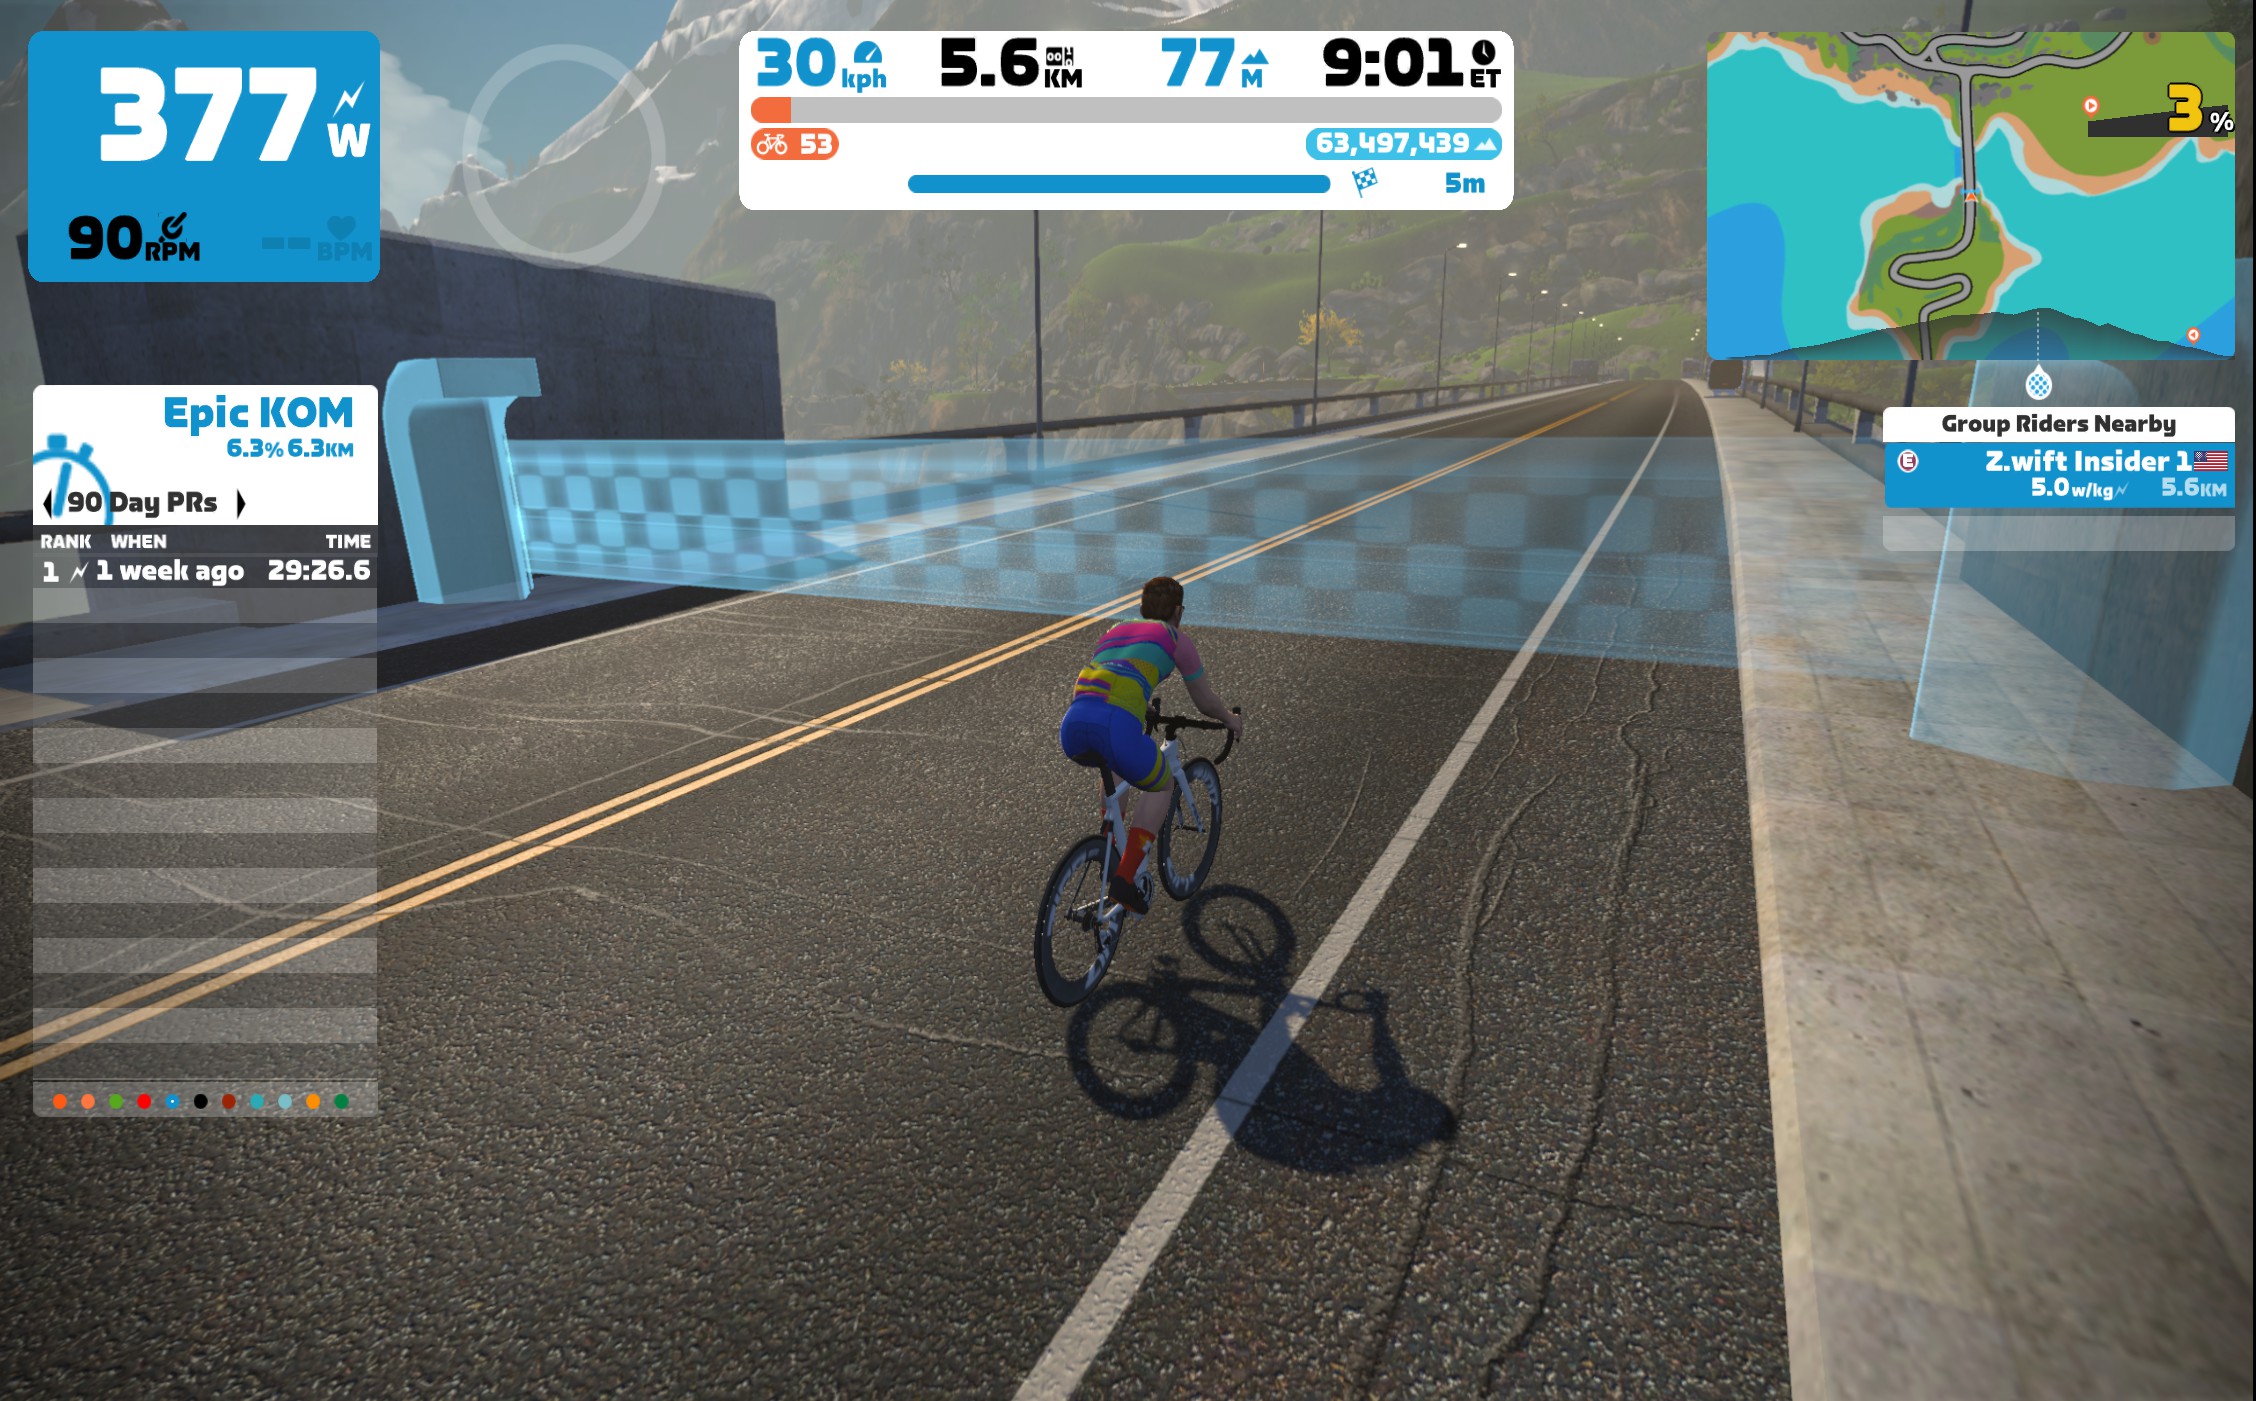
Race 4: Watopia Mountain 8 (5.67km, ends between pier blocks) The climbiest of this week’s routes takes you through the Ocean Boulevard tunnel and past the windmills before attacking the base of the Epic KQOM Reverse climb. The finish line is on a false flat, on the bridge after the initial snaking climb (see photos).
Last week’s races used Pack Dynamics 4.1 for the first time ever. Feedback from racers ranged from positive (“As a lightweight rider it was easier for me to hang with the pack”) to neutral (“Was PD4.1 enabled for Tiny Races? I didn’t notice anything.”)
We’ll keep it on in the coming weeks, and will announce here if anything changes.
Read more about PD4.1 on this forum thread, and chime in there after your races to share your experience and help Zwift improve their pack dynamics!
ZwiftPower Results
Zwift displays preliminary race results in game when you cross the line, but points are computed after all four races are finished, with final results on ZwiftPower. (We have to do some data processing on our side to compute results, so if your rankings don’t show up right away, be patient.)
Riders will earn points based on finish position in each of the 4 Tiny Races. The category winner of each week’s series is the rider with the most points across their timezone’s 4 races. Here are the links for each timezone’s results on ZwiftPower:
Tiny Race rules are simple, but still every week 6-8% of registered ZwiftPower racers get disqualified and removed from the final results. Don’t let that be you! Four races, four rules:
You must have a ZwiftPower account, because final results are processed by ZwiftPower (learn how to sign up)
No skipping then returning. These races are meant to be raced as a set of 4. If you need to leave early, that’s fine… but once you miss a race in your hour’s set of 4, don’t come back and race another or you’ll be disqualified from that race since you rested while others were racing! (Example: racing only races 1 and 2 is fine. Racing 1, 2, and 4 is not – you will be DQ from race 4. And if you race 2, 3, and 4, you’ll be DQ from all those races, since you skipped race 1!)
Heart rate monitors are required.
ZPower/Virtual power is not allowed. Smart trainer/smart bike or power meter required.
Join a Chat & Chill Cooldown
Immediately following each hour’s racing, we’ve scheduled 30-minute “Chat & Chill” events where riders from all categories can spin their legs together and chat about how it all went down. Find them at zwift.com/events/tag/tinyraces.
Zwift Insider Kit Unlock
Finish any Tiny Race or a Chat & Chill ride and unlock the Zwift Insider “Ride Smarter // Ride Harder” in-game kit.
The latest Zwift update has been announced and will be released in phases over the next few days.
In contrast to recent updates, this release doesn’t include any fun new headline features – just a lot of bug fixes and small “quality of life” improvements.
Release Notes
Here are the tweaks and bug fixes Zwift provided for this update, with notes from us in italics:
Sections of the road in Watopia should now appear seamless, without gaps or texture issues.
Mega Pretzel lap arch moved to correct finish of route. We’re not sure what this means, but we’ve got a bot riding the Meta Pretzel right now to find out!
Cyclists using Wattbike Atom smart bikes will now see their selected gear displayed in Workouts during Free Ride blocks.
Climb Portal routes are now more clearly identified in Route cards and saved activities.
Zwift Play: Giving Ride-On bombs (by pressing and holding the Z-button) no longer plays the “Ride On” sound effect. Riiiiiide on!
Teleport: The Friends list now shows average w/kg. Nice little tweak, so you can see your friend’s pace before joining.
Fixed an issue where, in some situations, the Zwifters Nearby list would show your name at the top of the list and riders ahead of you were not visible. Hopefully this is finally fixed, as it’s been an issue for several weeks.
Fixed an issue with Offroad Steering Sensitivity slider not saving after an adjustment.
Fixed an issue where the running split time may be displayed on the Login screen after completing a run.
Fixed cosmetic issues with the Pause Menu user interface.
Fixed an issue where riders would be positioned at the side of the road without steering input when paired with a steering device
Corrected the phenomenon where some portions of Climb Portal routes would appear black (instead of their gradient color) on some Apple devices.
Fixed an issue where messages sent via Zwift Companion may not be visible to others while riding Climb Portal.
Fixed an issue where U-turns may not function properly after completing an Event ride.
Fixed an issue where cyclists may briefly swerve on some routes.
Fixed an issue where in-game graphs could not be toggled during workouts.
Fixed an issue where camera views would continually cycle in an Event paddock after manually selecting a camera view.
Fixed an issue where canceling the Confirm Teleport prompt in Zwift Companion did not close the corresponding prompt in Zwift.
Climb Portal roads have been adjusted so it is no longer possible to slightly ride off the edge of the visible road.
Pair with Phone: Fixed an issue where devices may not be discoverable if Zwift Companion is restarted during a ride.
Fixed game crashes that could occur when loading into a route or joining an Event in another world.
Zwift Play: Various improvements to in-game navigation and connection reliability.
Various improvements to game visuals, animations, game performance, and stability. Rumor has it that the swerving rider bug with steering has been fixed in today’s update.
PC & Mac
Zwift game launcher updated to v1.1.9, which improves game update reliability.
Fixed an issue where the Save button on the End Activity screen would flicker enthusiastically when hovered over.
PC
AMD Radeon RX 6650 XT GPUs now have the Ultra graphics profile enabled.
iOS, tvOS
Fixed a visual issue that affected the nameplates of nearby riders.
tvOS
Fixed an issue where the Ride Report “Highlights” section could not be navigated via Apple TV remotes.
Android
Fixed a crash for Zwifters that would sometimes happen when switching to a new world after an event.


 Released")