Home Blog Page 411

Video: Cheating in eSports: How to Cheat at Virtual Cycling (from DEF CON)

1

Video: Cheating in eSports: How to Cheat at Virtual Cycling (from DEF CON)

DEF CON is one of the world’s largest and most popular hacker conventions. It happens in Las Vegas each year in late July/early August, and Zwift was featured at this year’s conference in a presentation by Brad Dixon titled “Cheating in eSports: How to Cheat at Virtual Cycling Using USB Hacks”.

Should We Even Talk About Hacking Zwift?

Let’s start here.

Hacking isn’t always a bad thing. Sure, some hackers are are malicious, breaking into systems to do damage, hold data for ransom, or perform other nefarious acts. But other hackers are actually paid to breach security systems so holes can be found and fixed. And others just do it for fun, enjoying the challenge of making a system do something it wasn’t designed to do.

I would put Brad in the third category. And perhaps the second as well. He includes this line at the end of his talk: “Winners never cheat. Cheaters never win. Hackers sometimes cheat for fun.”

The point of Brad’s presentation is to demonstrate the security flaws inherent in systems like Zwift, with the idea that such a demonstration may push Zwift and others to develop more secure systems.

We’re featuring Brad’s presentation here for the very same reason. If Zwift wants to be taken seriously on the eSports level, more needs to be done to mitigate cheating.

Of course, this isn’t news to Zwift. They, more than anyone, know the holes in their system and what it will take to be ready for the world stage (think 2020 UCI championships and the Olympics.)

Presentation Summary

Brad’s presentation begins with a look at the growth of eSports, and in particular the “sweaty eSports”, where Zwift is leading the way. He briefly touches on the colorful history of doping in cycling, then digs into the basics of how Zwift functions.

Things get really technical next as Brad explains the details of the tools he’s developed to hack Zwift, but here’s a simple explanation.

USBQ is a tool Brad helped develop commercially, then repurposed for the task of hacking Zwift sensor data. It’s basically a “man-in-the-middle” tool for manipulating data flowing through the USB bus.

He then wrote a plugin that runs on top of USBQ. In a nod to Lance Armstrong it’s dubbed ELANCE: eSports Leet Automatic Network Cheating Enhancement. ELANCE is used to decode the ANT+ data coming in, manipulate it, then send it back out. It has two modes:

  • EPO Mode: boost your power with a multiplier, and set all grades to flat
  • Slacker Mode: no work required. Use a game controller trigger to set power levels!

Brad demonstrates his tool in a recorded Zwift session, then discusses the possibilities of using the tool to cheat in actual Zwift races. He says it’s plausible, but you’d have to be careful about it–creating an IRL track record on Strava, using multiple accounts to test the limits of Zwift’s performance verification, etc.

Watch his entire presentation:

Brad’s work on this project, along with related links, can be found at his edope.bike website.

My Thoughts

In his wrapup, Brad makes two key points:

  1. Indoor cycling’s overall system was not designed for high-stakes competition. Insecure sensor networks and untrusted hardware are not a good foundation for security.
  2. Electronics and software are part of cycling, now more than ever. These are new domains for cheaters to exploit, and organizations governing cycling need to look at how this affects competition.

Both of these points are obviously valid. But what can be done at this stage to deal with the problem of insecure sensors and other hardware, not to mention the ease of weight or height doping?

To date, Zwift has always held real-world events for their high-stakes races–it makes for more exciting race streams, but it also makes for secure racing! (You can’t cheat weight, height, or power numbers in real-life settings.) Is this the way forward? Will the vast majority of Zwift races be open to edoping, while only a few top events per year are held in the real-world?

I think we can do better.

My hope is that Zwift’s new Fitness Tech division can lead the way in pushing for more secure communication protocols and hardware to help reduce or eliminate edoping. Because if Zwift racing is going to explode on the world stage, it must first be more cheat-proof for everyday races in our homes. A more trustworthy system will ignite a stronger spirit of competition and fair play which will raise the stakes and competition levels of all races, including the big ones.

Your Thoughts

Do you race on Zwift? How concerned are you about cheating in these competitions, and what solutions (if any) can you propose? Share your thoughts below!
Does Zwift make your feet stink? Try this.

1

Does Zwift make your feet stink? Try this.

shoe-fan

Early on, my Zwift addiction coupled with manly sweat glands created a stinky situation. My shoes weren’t drying completely, so stinky odor-causing bacteria threw a party with odoriferous results.

When riding outside, much of my foot sweat evaporates thanks to nicely-ventilated shoes and socks. But that doesn’t happen with Zwift, plus I find myself riding more than once a day on occasion.

Putting on sweaty shoes is unpleasant. And shoes that never dry get stinky. Quickly.

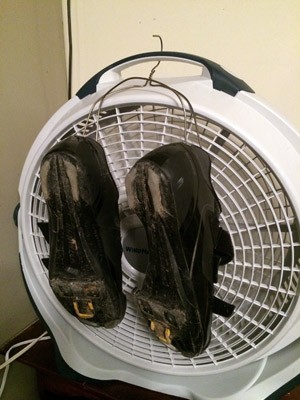
So here’s my redneck PEET Dryer. Just bend a clothes hanger so the ends hook onto your shoes and the hook grabs your fan. Done!

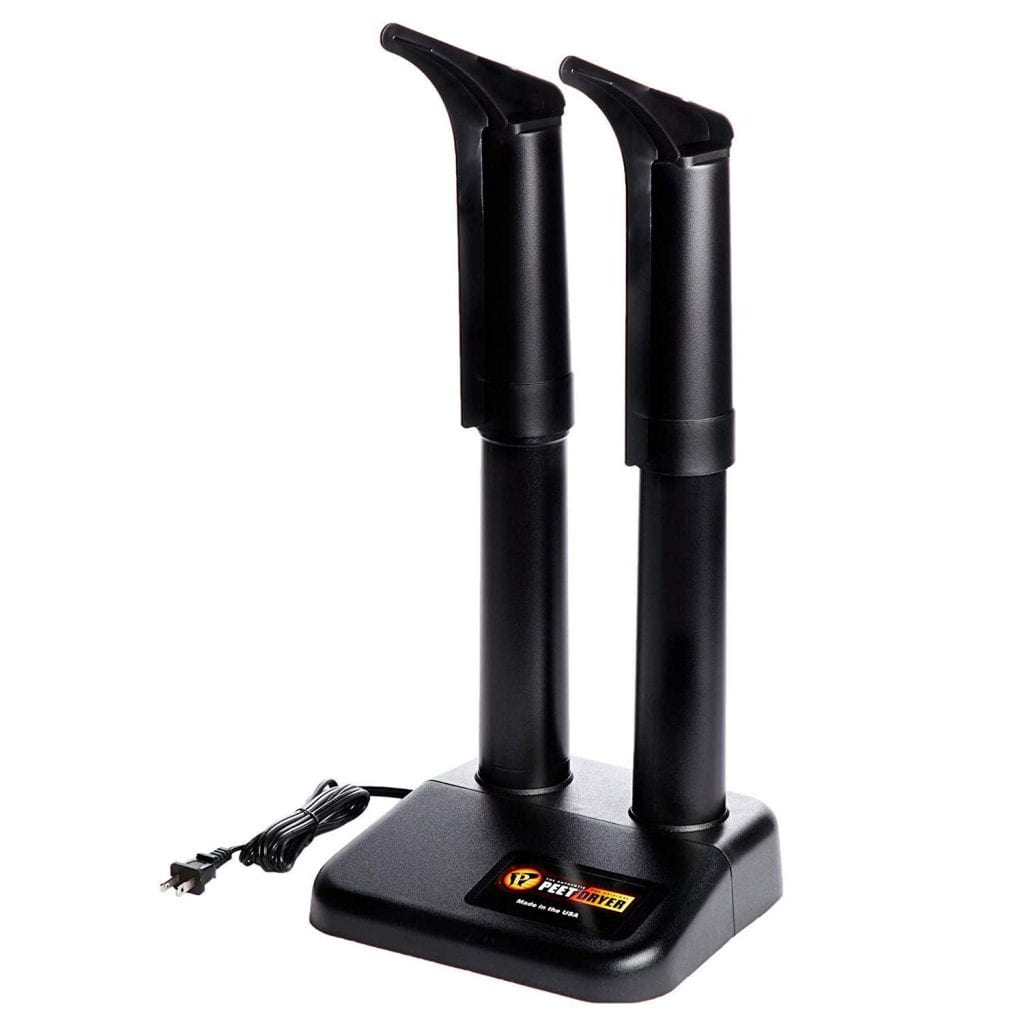
(Got an extra $40? The PEET is a brilliant solution as well.)

I leave the hanger there all the time, then after each ride, I hang my shoes and let the fan keep running for an hour or two. The shoes dry out quickly, and don’t get overly smelly.

Other Solutions

  • Stuff your shoes with material that soaks up moisture. Newspaper is commonly used. A sock full of cedar wood chips (the kind used pet cages) also works great and prevents bacterial growth.
  • Place them over another wind/heat source. On top of an AC great, in front of the AC inlet, or purchase something like a PEET dryer.
  • Two pairs of shoes. Swap ’em out!

Peter Kennaugh and Dr. David Spindler on Mental Health in Pro Cycling (Zwift PowerUp Cycling Podcast #40)

0

Peter Kennaugh and Dr. David Spindler on Mental Health in Pro Cycling (Zwift PowerUp Cycling Podcast #40)

Matt and Kev talk to Dr. David Spindler and Peter Kennaugh about that taboo subject–Mental Health. What it is, common misconceptions, and the role of a Psychological Scientist within World Tour Cycling Teams.

Dr. David Spindler is a Sports Psychologist who works with Team Dimension Data, while Olympic gold medalist Peter Kennaugh draws from personal experience after recently stepping away indefinitely from cycling to focus on his own mental health.


About the Podcast

The Zwift PowerUp Cycling Podcast features host Matt Rowe (Rowe & King), with regular co-hosts Greg Henderson (Coach Hendy) and Kev Poulton (Powerhouse Cycling). The hosts share tips on how road races can get faster in-game and outdoors.


Using the “Trainer Difficulty” Setting in Zwift

144

Using the “Trainer Difficulty” Setting in Zwift

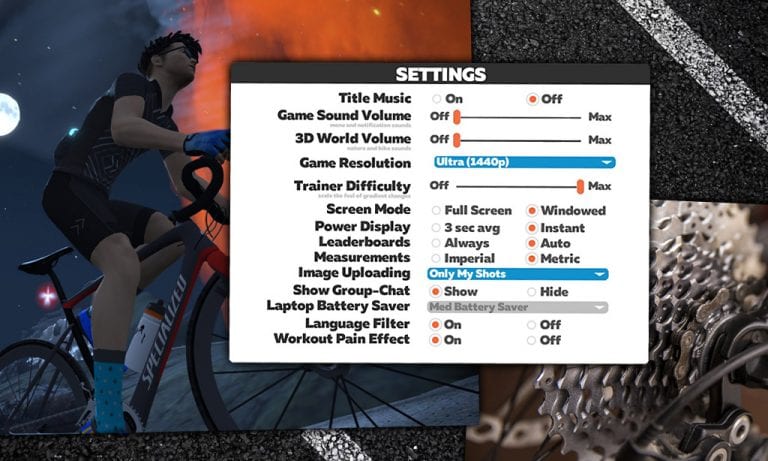
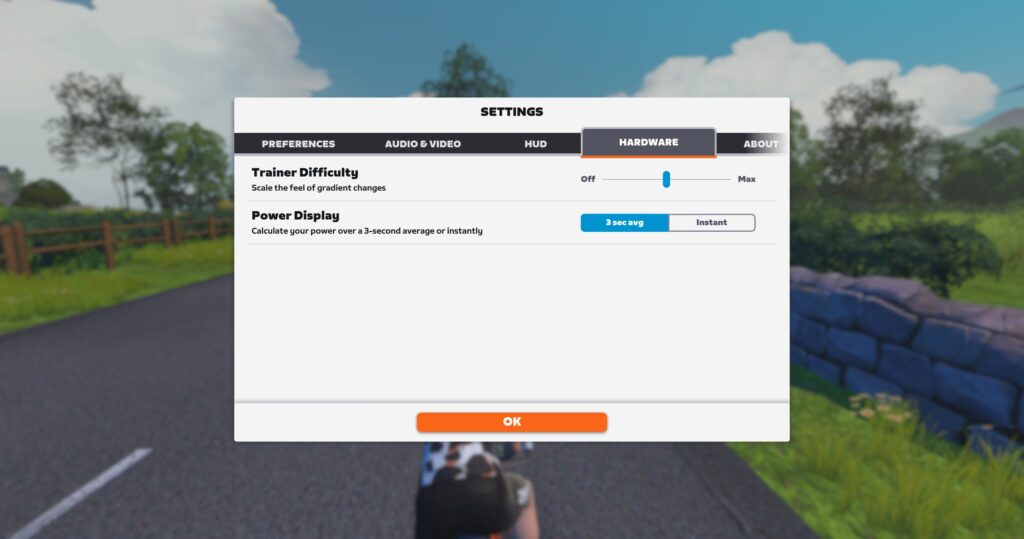
“Trainer Difficulty” is absolutely the most misunderstood Zwift setting (Menu>Settings). Zwift has said:

This adjustment won’t change how far or fast you ride, but it will change how climbs feel…

but that doesn’t really explain how the setting works. Hopefully, this post will help you wrap your head around Trainer Difficulty on Zwift.

Here’s the best way to understand it: this setting is really “gradient feel scaling.” Zwift is constantly sending current gradient numbers to your smart trainer, and the trainer adjusts its resistance to match the gradient you are riding. The Trainer Difficulty setting simply scales the gradients sent to your trainer. Nothing more, nothing less.

Trainer Difficulty is set to 50% by default, which is why Zwift says it “treats the gradient as half of the true grade.” So when you hit a 10% climb in Zwift, your trainer is only giving you the resistance of a 5% climb.

Bump your Trainer Difficulty up to 100% and you’ll feel the full gradient. Set it to 0% and you won’t feel gradient changes at all!

How Trainer Difficulty Affects Your Ride

Lowering your Trainer Difficulty decreases resistance changes on hills. You still have to put in the same amount of power to get up (and down) the hill, but you will “feel” the hill less.

Another way to look at it: Trainer Difficulty determines how much shifting you will need to do. Where you might typically use ~7 of your gears when riding at the default 50% setting, lowering it to 25% would let you ride and only use ~4 gears, since the incline changes are less dramatic.

Increasing your trainer difficulty, on the other hand, will force you to use more gears. So instead of 7, you may use 10 or 12, since the hills will feel steeper and you will need to shift more to maintain a healthy cadence.

What It Does Not Do

Changing Trainer Difficulty does not change the power needed to get up the hill. You still have to put out the same watts to move the same distance as before… you’ll just be doing it in a different gear.

That’s why we think “Trainer Difficulty” really is a misleading name for the setting. Perhaps “Gradient Feel” or “Trainer Realism” would be better.

Frequently Asked Questions

Doesn’t a higher Trainer Difficulty make racing harder? Am I “difficulty doping” by running it lower?

A higher Trainer Difficulty will typically result in a higher variability index (VI) due to more resistance fluctuation. For many riders this may result in an overall effort which feels more difficult since maintaining steady power is easier than doing intervals.

But this isn’t true for everyone, and skilled shifting can reduce or eliminate the effect of resistance fluctuations.

In the end, watts are watts, and your Trainer Difficulty setting doesn’t change the power needed to cover any particular stretch of Zwift tarmac. So set it wherever you’d like!

I’m spinning out on descents. Can Trainer Difficulty help me here?

One common complaint from smart trainer owners is that they get dropped by other riders on downhills. Especially if you’re running Trainer Difficulty at 75% or more, steep gradients simply won’t offer the resistance needed to put power into the pedals.(Note: the same can happen outside!)

The problem comes when you’re racing against others who have their Trainer Difficulty set low, or perhaps are riding dumb trainers with a constant resistance. These riders will have the resistance needed to go hard on the descents, while you’re spinning out.

Trainer Difficulty can help here. Try lowering it to 25-40% when racing. This will allow you to put more power into the downhills without spinning out. Give it a try and tweak the setting until it feels good to you.

For more on this topic, read Trainer Difficulty On Descents: Did You Know? and Hanging with the Group Over Gradient Changes. Also–don’t forget the Supertuck!

I have a KICKR Climb, but it doesn’t respond to gradients because I’ve lowered my Trainer Difficulty. Is there a workaround?

There’s a pretty simple hack for this – see KICKR Climb Wheelsbase Hack for details.

Why don’t I see “Trainer Difficulty” in my settings?

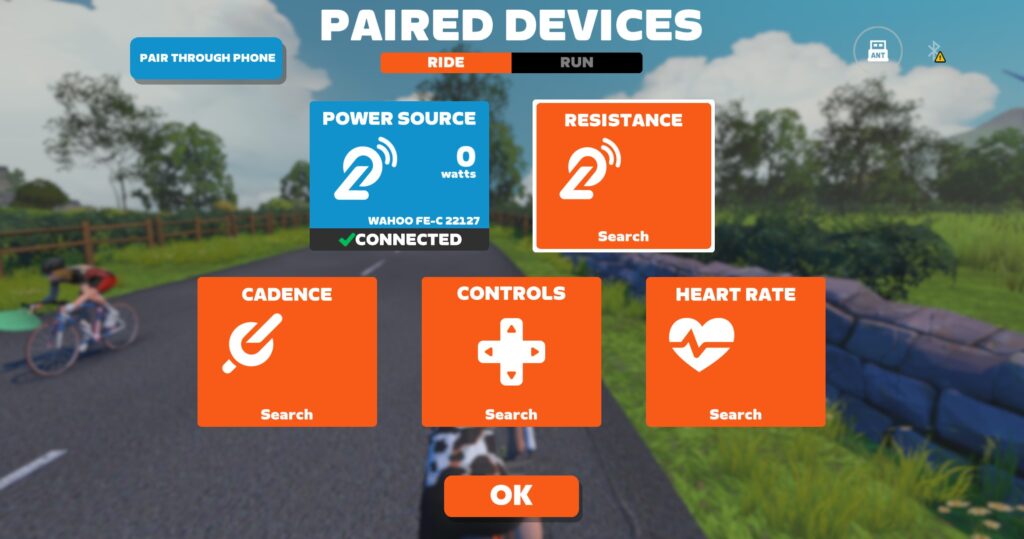
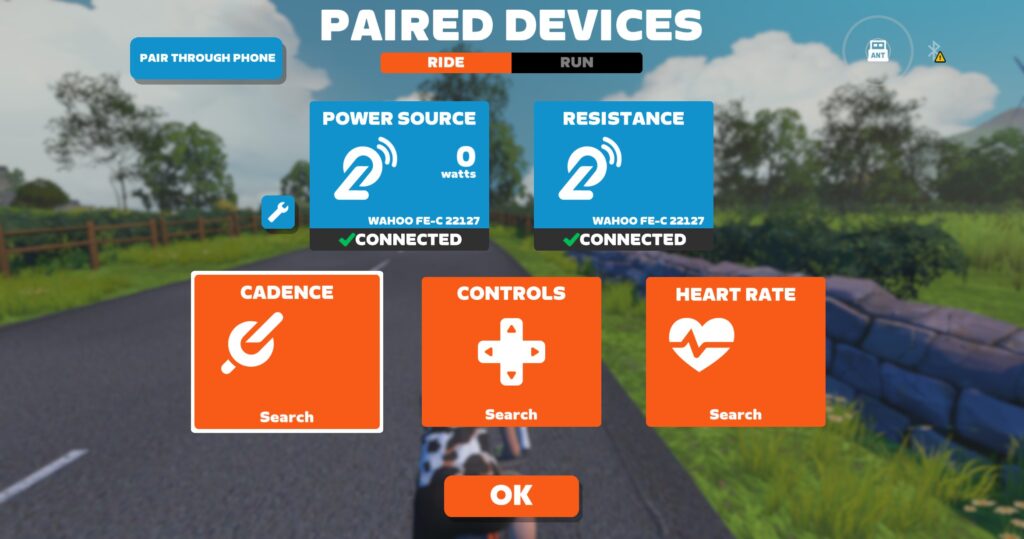
The slider is only visible once you’ve paired a smart trainer in the “Resistance” box in the pairing screen.

Should I Change My Trainer Difficulty Setting?

No need to change the setting if you are happy with the “feel” of your rides and aren’t struggling with yo-yoing in and out of the pack on group rides. If you think you’d like to adjust it, though, go ahead and give it a try–you can always set it back to 50%.


Watopia “Road to Sky” Route Details

13

Watopia “Road to Sky” Route Details

Watopia’s “Road to Sky” route is the shortest route which includes Alpe du Zwift, a massive climb modeled after the iconic Alp d’Huez.

About the Alpe

Zwift created this route using GPS data to perfectly match the incline and distance of the storied climb with its 21 hairpin turns. The climb to Alp d’Huez actually has two different finish points: the “tourist version” and the Tour de France version. Alpe du Zwift matches the tourist version, which is ~2km shorter with 40 meters less climbing than the TdF. In all, Alpe du Zwift is 12.24km (7.6 miles) long, with a total elevation gain of over 1000 meters (3400′)! Read more >

Looking to get your fastest time up the Alpe? Check out Fastest Bike Frame and Wheelset for Climbing Alpe du Zwift.

Route Description

If you choose this route for a freeride you’ll begin just a few hundred yards before the jungle start pens. Events on Road to Sky now begin in the jungle start pens.

So whatever type of ride you’re doing, you’ll drop into the jungle, wave to the sloth and enjoy a little gravel riding before you hang a right and head up the Alpe.

The route ends at the KOM banner atop Alpe du Zwift.

Level Restriction

Like all Alpe routes, Road to Sky is restricted to Zwifters level 12 and up unless you access it through an official group ride.

Want to ride it anyway? Here are a few ways to make that happen.

Route details:
Distance: 17.3 km (10.7 miles)
Elevation Gain: 1045m (3430′)
Strava Forward Segment

Changelog

  • 11/29/19: updated to reflect the new spawn point. Zwift changed it from beginning on the pier near the seaplane to beginning a few hundred meters before the new jungle start pens.

Watopia “Muir and the Mountain” Route Details

12

Watopia “Muir and the Mountain” Route Details

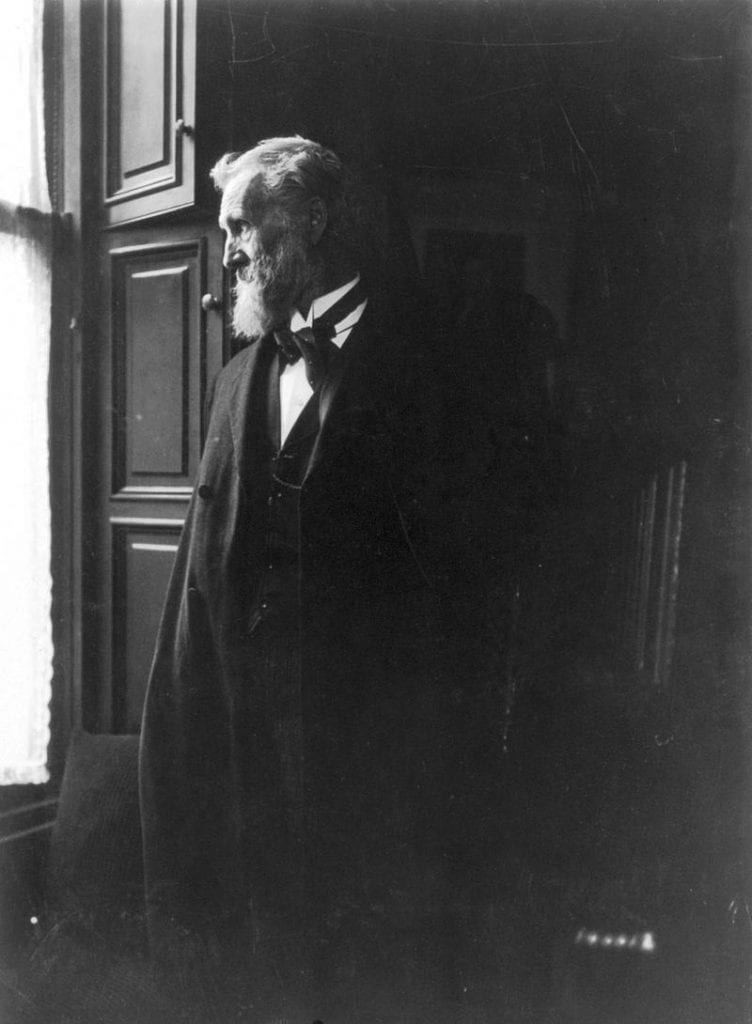
John Muir, circa 1910

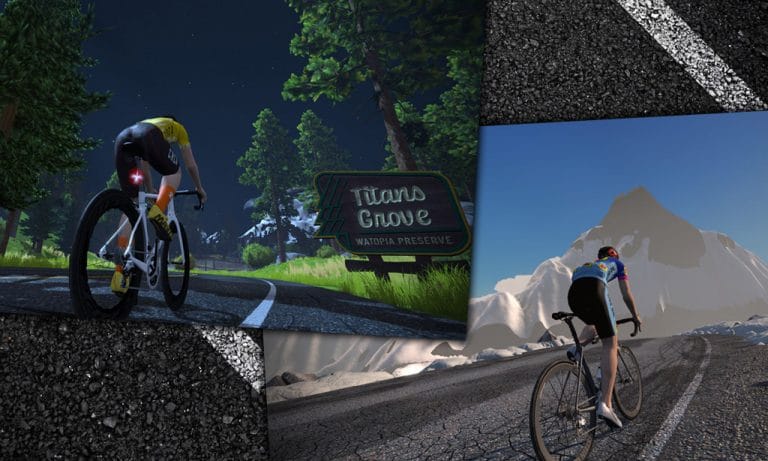
One of five routes rolled out with Zwift’s Titans Grove expansion, “Muir and the Mountain” takes you on a loop which includes the Titans Grove “Watopia Preserve” and the Epic KOM. Fittingly named for John Muir, “Father of National Parks”, this route’s in-game description is an adaptation of Muir’s famous quote: “The mountains are calling, and I must go.”

The route’s length and profile make it a nice choice for an hour-long session which includes a hard climbing effort.

Start, Finish, and Lead-In

This route begins just west of the desert start pens, facing the Titans Grove entrance. You will need to ride the ~4.8km lead-in to the top of the Titans Grove reverse KOM before the route begins.

Once you cross the KOM line the route officially starts. It ends when you cross the same line a second time.

Route Description

Begin by turning left into Titans Grove (reverse direction) and enjoy your roller-coaster ride through the sequoia forest. Hit the reverse KOM section hard if you’d like, but keep in mind you’ll be hitting it again at the end of the ride… plus the much longer and steeper Epic KOM and radio tower climbs are coming up soon!

At the end of Titans Grove hang a right onto the Fuego Flats road, descending across the bridge and turning left onto the road to the Epic KOM. Climb up through this mountain pass, and when you hit the banner at the top remember: you’re not done yet! This route takes you up even higher as you turn left to take Watopia’s steepest climb: the radio tower road.

Once you reach the tower it’s time for a long descent. Enjoy the downhill–you’ve earned it! When you reach the windmills at the Ocean Boulevard intersection turn right, then another right after climbing out of the ocean tunnel to get back onto the road to Titans Grove. Keep riding all the way to the top of the Titans Grove reverse KOM–the route ends at the KOM line.

Profile

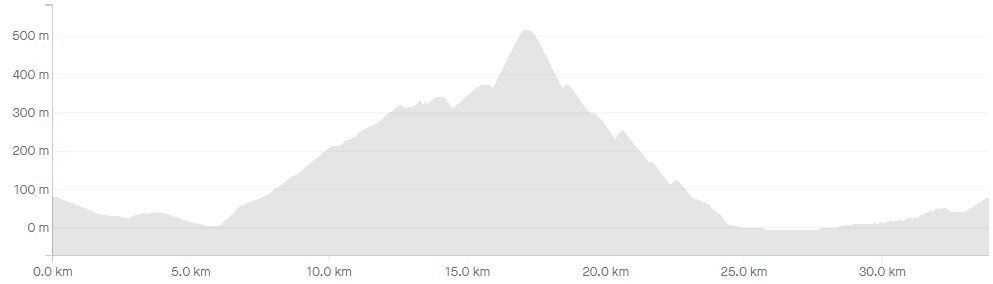
The route begins with a rolling lead-in punctuated by a short climb to the official start line. Then it’s a quick descent before attacking the Epic KOM and radio tower climbs.

The top of the radio tower climb is our halfway point distance-wise, but in terms of time you’re well past half because “it’s all downhill from here!”

Route details:
Lead-In: approximately 5km
Distance: 33.9km (21.1 miles)
Elevation Gain: 762m (2501′)
Strava Segment

Changelog

  • 11/29/19: changed Strava segment and descriptions to reflect Zwift’s recent route change, which has this route officially beginning and ending at the Titans Grove KOM.

Video: Zwift Winter Speculation

0

Video: Zwift Winter Speculation

Wondering what’s next for Watopia? So are we!

We scoured the Internet for hints about what the Zwift development team has in store for this winter season and here are the predictions we can make. Forecasts are calling for gravel, user interface upgrades and so much more.

But you may not believe what our longshot prediction is…


All About this Weekend’s Giro di Castelli

0

All About this Weekend’s Giro di Castelli

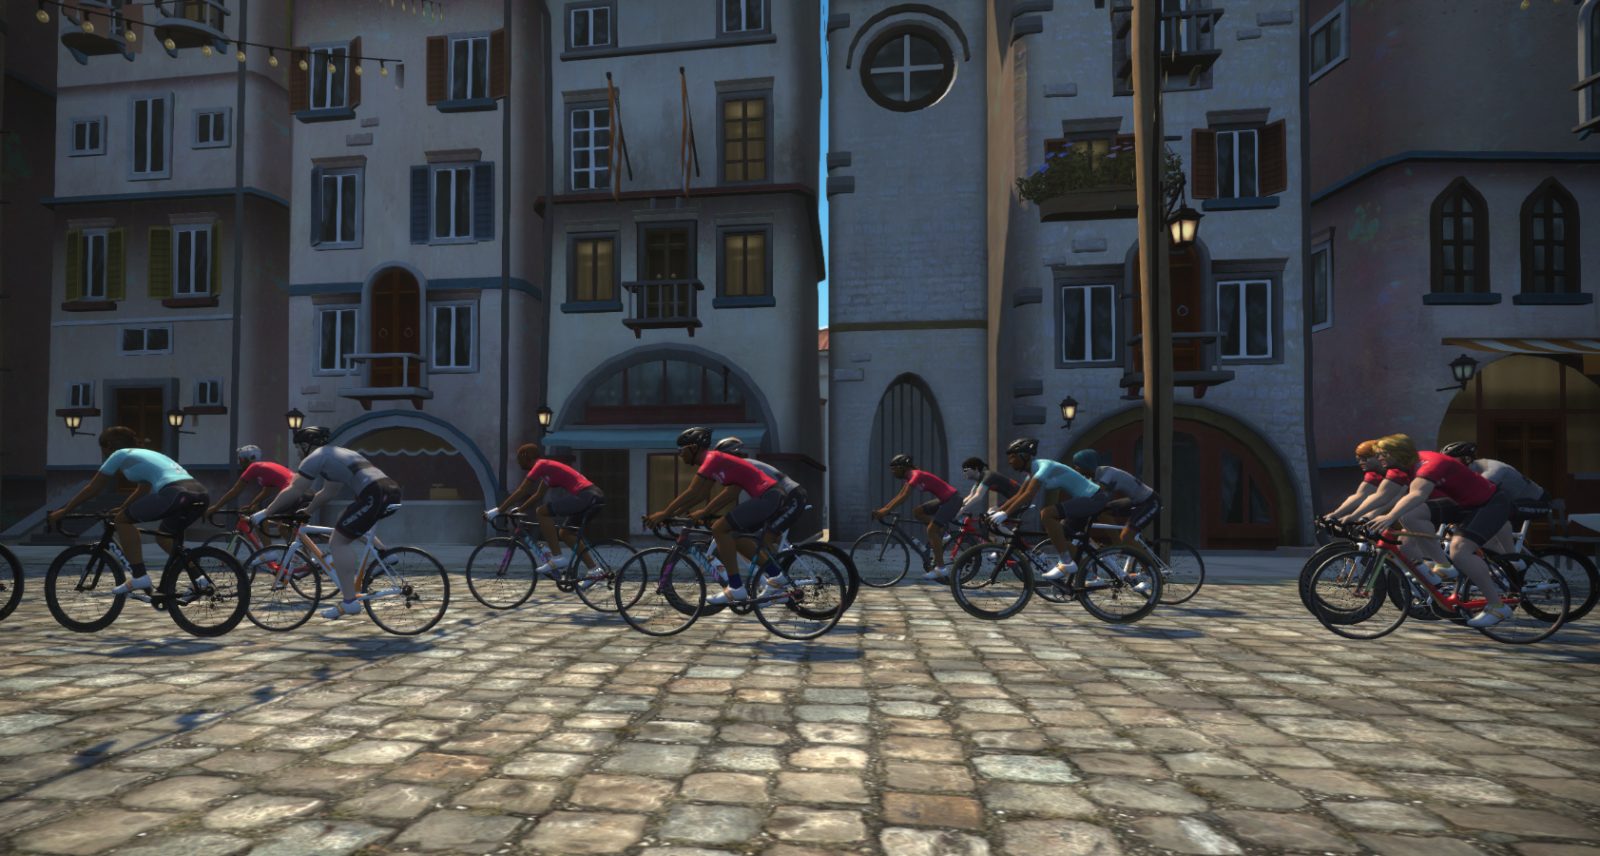
Zwift has announced the Giro di Castelli, a 3-stage event happening this weekend. Official Zwift stage events are always popular, so expect big groups!

Is it a race? Zwift says no, but there will be plenty of riders treating each stage as a race. Find a group riding at your pace and enjoy the challenge and camaraderie.

Groups and Times

Each stage has 5-6 event times to accommodate everyone’s schedule (see schedule). Additionally, riders must select a group when signing up for each stage. This dictates which route you ride:

  • A Group: long distance, men and women
  • B Group: short distance, men and women
  • C Group: short distance, women only

Unlocks

There are three different Giro di Castelli kits, one for each stage. You will unlock each kit upon completing each stage. Here’s a preview:

Stage 1: Bologna

It’s a Giro, so it’s fitting that we start in Bologna, site of the Giro d’Italia prologue time trial stage in 2019.

  • A Group (2 laps): 24.6km (15.3 miles), 495m (1627′) elevation. Note: 2 laps on Bologna means you ride up to the finish line, back to the start, then up to the finish once more.
  • B and C Groups (1 lap): 8km (5 miles), 230m (757′) elevation

While this stage is on the Bologna TT course, it doesn’t appear to be a TT event. We recommend finding a bike frame and wheelset that lets you climb quickly because that’s where this course really gets challenging!

Stage 2: Watopia Flat (Reverse)

This stage is nice and flat, but that doesn’t mean it will be easy! Find a pace you can manage, and use the draft to conserve energy.

  • A Group (4 laps): 41.2km (25.6 miles), 216m (708′) elevation.
  • B and C Groups (2 laps): 20.6km (12.8 miles), 108m (354′) elevation

Stage 3: Epic KOM

The Queen Stage of this tour, stage 3 has each group going over the Epic KOM. The B and C groups get the added joy of ascending to the Radio Tower!

  • A Group: 1 lap of Big Loop route – 42.4km (26.6 miles), 651m (2175′) elevation
  • B Group: 1 lap of Mountain route – 29.5km (18.3 miles), 671m (2201′) elevation
  • C Group: 1 lap of Mountain 8 route – 32km (19.9 miles), 677m (2221′) elevation

See event schedule >


How Zwift Calculates Time Gaps

8

How Zwift Calculates Time Gaps

Ah, the time gap. It’s a time-honored bike racing tool used to tell riders how far they are from other riders who are up the road or chasing from behind. While the pros have motos zipping by with signs displaying the time gaps, amateur racers often don’t have that luxury.

This can lead to funny situations, like my buddy who was racing an outdoor cat 3 crit where three riders went off the front from the gun. They quickly opened a big enough gap that the chasing peloton lost sight, and soon enough, it was like the peloton had forgotten about the group up the road. It wasn’t until the breakaway caught the peloton from behind that everyone realized the podium had slipped from their grasp!

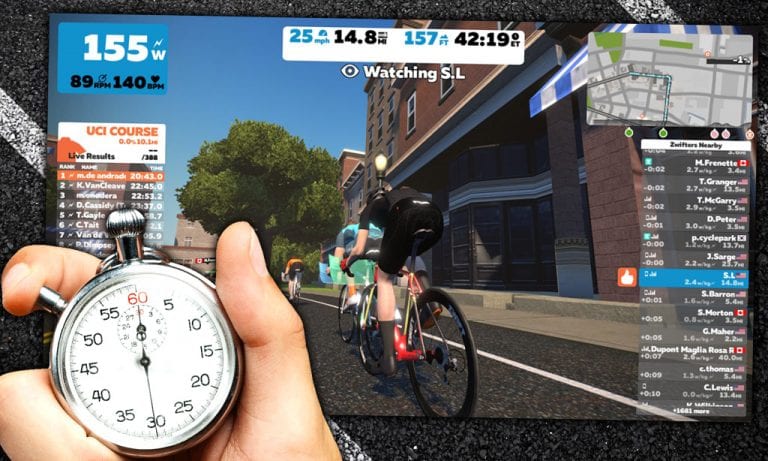
In Zwift we have a display on the right of nearby Zwifters that includes time gaps from you to each rider. Have you ever wondered how those gaps are calculated?

This past weekend I raced the DADurday Chase Race, where knowing the gap between your group and those ahead and behind is very helpful. While doing some quick time gap estimates based on the minimap I realized I had no idea how Zwift calculates time gaps. So I decided to figure it out!

How It Works

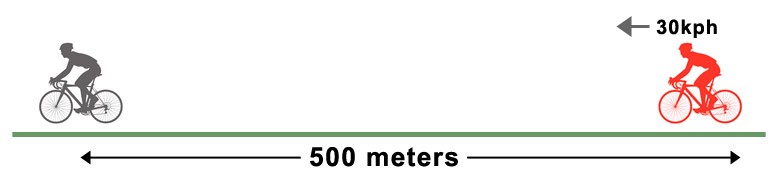
After doing some testing, I’ve discovered that Zwift’s gaps are based purely on distance. Or more accurately: Zwift’s time gap calculation assumes everyone is traveling at 30kmh.

This makes it an easy calculation on Zwift’s side–they just need to know the distance from one Zwifter to the next.

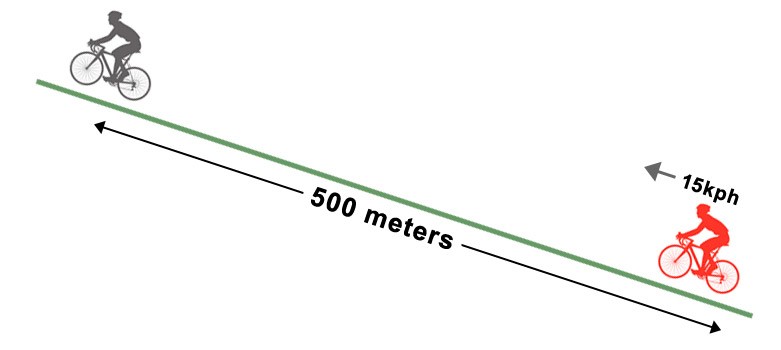
Here’s a simple example: if you are the red rider, traveling at 30kph, and the rider up the road isn’t moving, you would catch them in 60 seconds. In this example, Zwift would show a time gap of 60 seconds between the two riders.

The downside of Zwift’s time gap calculation method is that it’s only accurate when you are traveling at 30kph. Let’s look at more examples.

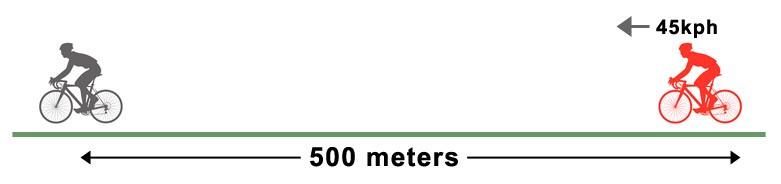
What about a flat race situation? Most of my flat races on Zwift find me sitting in the pack traveling between 40-50kph.

At this speed, the rider ahead is 40 seconds away–but Zwift will still tell me 60 seconds.

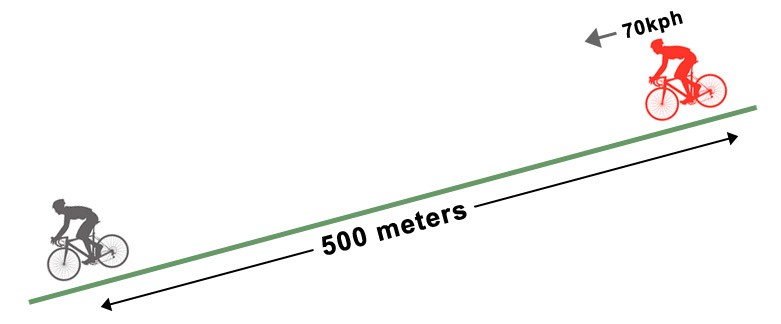
This disparity increases with speed, so on a descent when I’m traveling at 70kph the rider is only ~25 seconds ahead, but Zwift will tell me 60 seconds.

What if we slow down, like on a climb?

At 15kph (not an unreasonable climbing speed, especially on steeper climbs and/or for bigger riders), Zwift now drastically underestimates the time gap, showing 60 seconds when the next rider is really 120 seconds up the road.

This explains why, in a race situation, you might show a gap of 20 seconds to the lead rider on a climb. But when that rider crests the hill and begins to descend, the gap suddenly grows to 60 seconds! Did the leader attack? No. But they’ve increased their distance from you because they’re moving fast while you’re still crawling up the hill. Don’t panic, because you will be making up that distance soon enough!

ZwiftPower to the Rescue

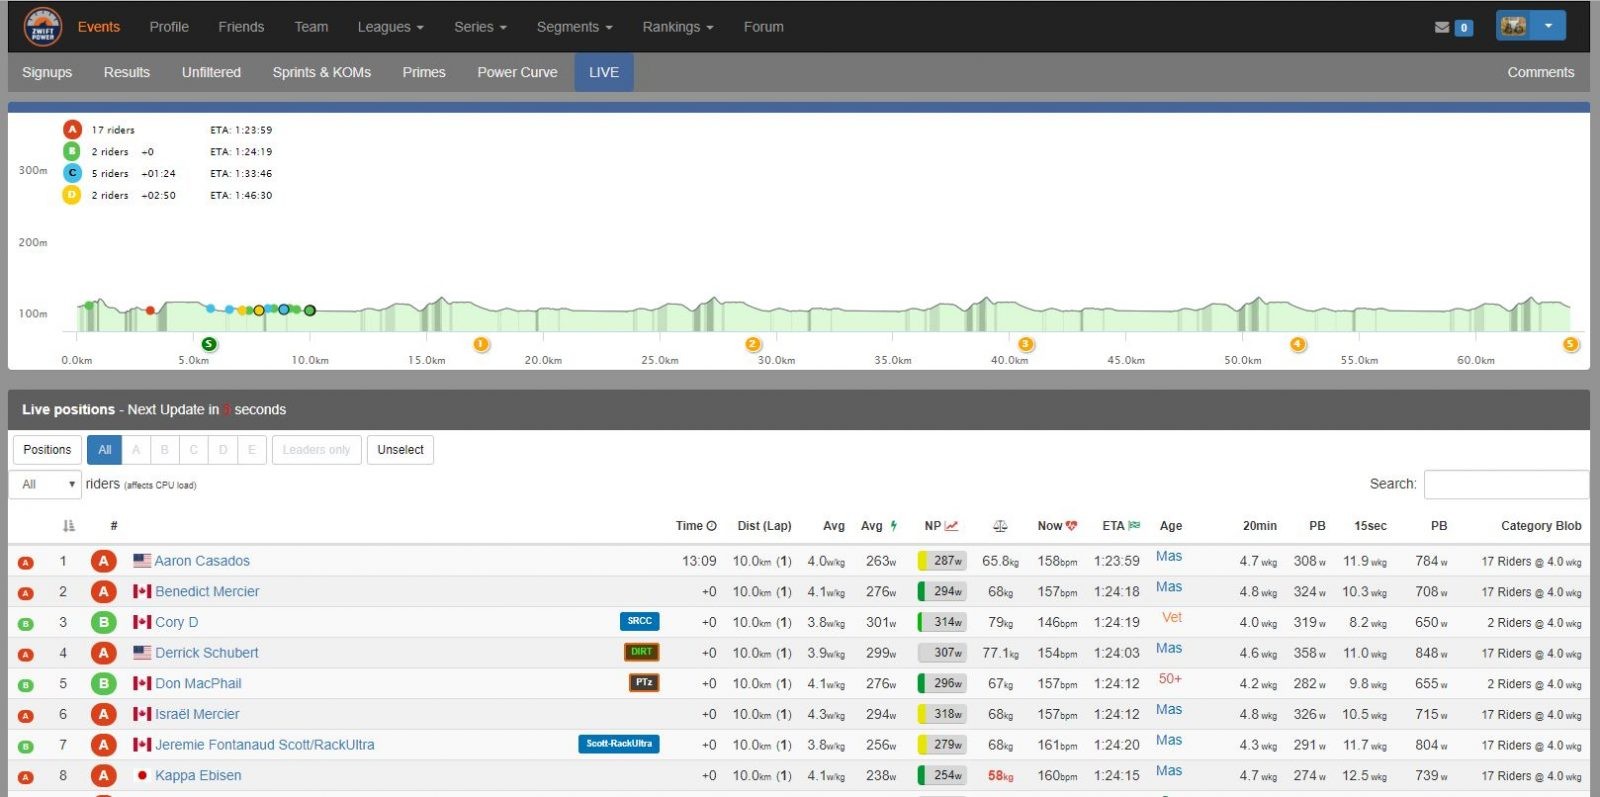
If you want more accurate live time gaps in Zwift events, ZwiftPower has your solution. I chatted with James Hodges, the programming mastermind behind ZwiftPower, and he explained that ZwiftPower estimates time gaps based on 100-meter waypoints scattered throughout Zwift. The system is constantly logging the precise time when each rider passes each waypoint. It can then compare the times of riders for the same waypoint and thus display the gap between those riders.

Here’s one example of what this live event data looks like–note the “Time” column, which displays the number of seconds each rider is behind the leader. (In this particular case there is obviously a sizeable group of riders at the front of the race.)

To access these live time gaps, just find your event in ZwiftPower and click the “Live” link in the menu. Especially handy in chase/handicap races!

Reframing Time Gaps

Armed with this information about how Zwift calculates time gaps, perhaps it’s wise to begin thinking of the gaps not as time, but distance. The math is easy: 60 seconds of a “time gap” means the rider is 500 meters away. That 10-second gap which seems impossible to close? It’s 83 meters and change. You can do it!

Can it be better?

It seems Zwift’s time gap algorithm has room for improvement, but what would that look like? Should they implement a waypoint system like ZwiftPower? Is there something they could implement that would work even better? Or should they not change a thing? Share your thoughts below!

Join Eric Min’s Thanksgiving Day 2019 Ride

0

Join Eric Min’s Thanksgiving Day 2019 Ride

Join Eric Min and lots of special guests this week for the 5th annual Thanksgiving Day Ride!

Eric Thanksgiving morning ride has become an annual tradition on Zwift. It’s a fun way to pre-burn some calories before the feasting begins. Here’s more info…

Hear from the Big Man

Typically these rides have been a place where Mr. Min gives us a glimpse of what’s coming up next for Zwift. If you want to hear from the CEO himself on a variety of Zwifty topics, this is a fun way to do it!

Ride Details

  • Date and Time: 7AM PST / 10AM EST / 3PM GMT this Thursday, November 28th
  • Route: Sand and Sequoias
  • Length: 60 minutes
  • Pace: past Thanksgiving Day rides have been loosely-controlled affairs, with Eric Min averaging around ~2.6-2.8w/kg (190-200 watts). This ride will not be using the leader fence, so expect it to be strung out, with some riders going harder on the front. It’s a social ride, so go at your pace and enjoy the big group!
Chloé Dygert

Special Guests

Reigning UCI elite TT world champion Chloé Dygert (Team Sho-Air TWENTY20) will be on the ride as well, and easy to spot with the red beacon over her avatar. GPLama Shane Miller will also be there, along with Zwiftcast‘s Simon Schofield, Zwift Community Live‘s Nathan Guerra, many Zwift leaders from Zwift HQ, and myself!

Signing Up

Sign up via Zwift Companion, in game, or on the web.

Hope to see you there!