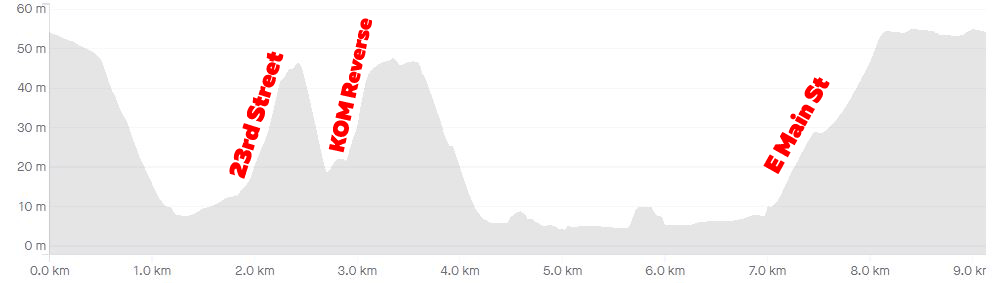
Richmond’s “Cobbled Climbs Reverse” was launched as part of the Richmond refresh in February 2020. It is simply the reverse version of the Cobbled Climbs route, containing three challenging, short climbs and very little flat road.
The route begins on a slight descent near Richmond’s start/finish banner, but the road which quickly gets steeper down Governor Street. Enjoy the free speed now, because as soon as you get to the bottom the 23rd Street KOM section begins. This climb ends at the 23rd Street KOM banner.
A quick descent down 23rd St takes you onto the start of the second (and final) timed KOM of this route, simply called the “KOM Reverse” in game. This climb starts off very steep, hitting 22% (the steepest pitch in Zwift?) around the first right-hand bend before leveling into a false flat to the KOM banner atop Libby Hill.
Next you’ll fly down the twisty cobbles of Libby Hill to the waterfront for the flattest portion of the course, which is approximately 2.5km long with a few rollers. This brings you to the final climb of the route, up East Main Street. It’s the longest climb on the loop (1.2km at 3.8%), but is not a timed KOM segment.
At the top of this climb the road flattens out and you’ll turn two rights, heading through the start/finish banner for additional laps.
Your fitness level is the key determiner of how well you will start your race. But many Zwifters get dropped for reasons unrelated to fitness… and we can fix that. Here are five simple tips to help you start well.
1: Be Warm
A proper warmup is so important, especially if your race is short! The shorter the race, the harder the start and the overall pace. Don’t let your body be surprised by the effort – get a warmup in that brings up your heart rate, wakes up the muscles, and gets your body primed for top performance.
Aim for at least 15-20 minutes of warm-up, starting easy then ramping up your power and heart rate so they’re close to race levels and you’ve begun to sweat. As a general rule: the shorter the race, the harder/longer the warmup.
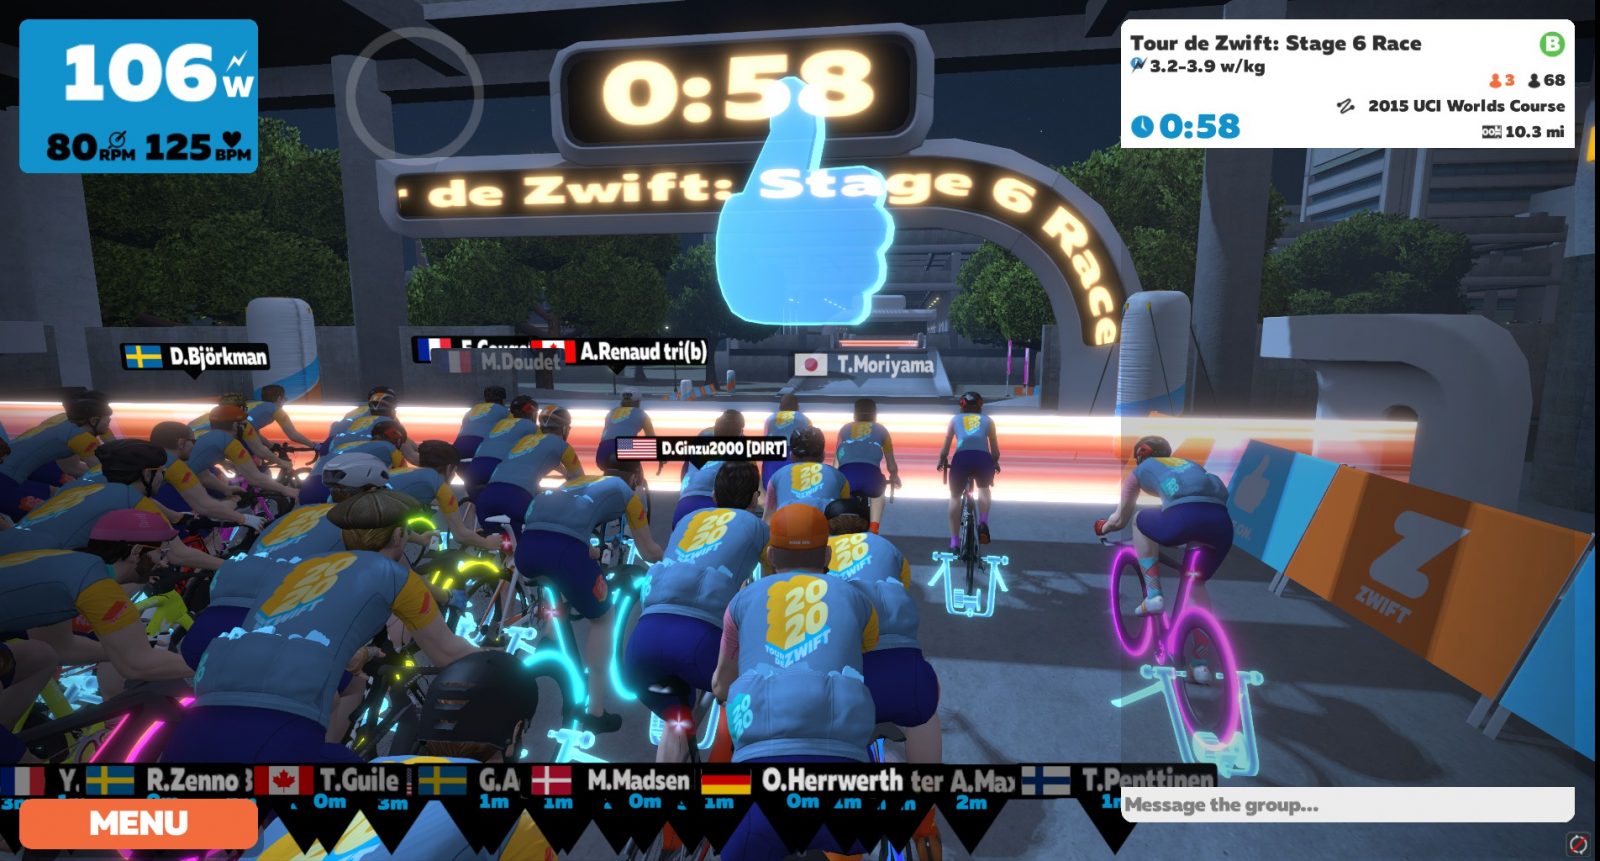
The sooner you click to “Join the Event”, the closer to the front of the start group you will be placed. In a race of 50 riders or less this isn’t a big deal, but in a race of 100 or more it could mean the difference between grabbing the wheel of the front group or losing it!
So head to the start pens early. This gives you prime position to push hard at the front and create gaps, or if you think you’ll struggle to stay in the front group at the start it gives you more wheels to grab onto.
3: Ramp Up Your Wattage Before the Start
This isn’t outdoors, where you wait to pedal until the whistle blows! Start pedaling decently hard 10 seconds before the race starts, and keep ramping up your power until the timer hits zero and you are around 150% of FTP.
This strategy eliminates shifting and game lag as factors in your race start.
Shifting: it’s smart to not shift under full power, but if you start from 0 watts you’ll need to shift to harder gears as you spin up. Do this before the race starts, so you can shift just once or twice if needed once the race begins.
Game Lag: Zwift can take a little time (less than a second) to recognize changes in wattage output, and that’s time you don’t have when the race has just begun. If you’re already at high power when the race starts, this will be a non-issue.
4: Start Hard
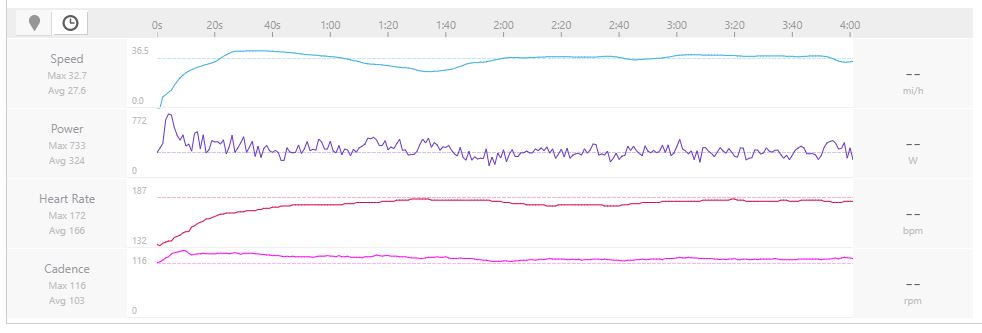
New racers seem most surprised by just how hard the starts are. The first selection of every Zwift race happens in the initial 1-2 minutes of racing as stronger riders push the pace to try to drop as many hangers-on as possible. This hard start is typically more pronounced in flat races, while races with a big climb will have an easier start since riders know the big moves will happen on the uphill.
Looking at a few of my recent B-category races, typically hanging with the front group means the first two minutes of the race average 350-400 watts, while the next two settle down to average 275-300.
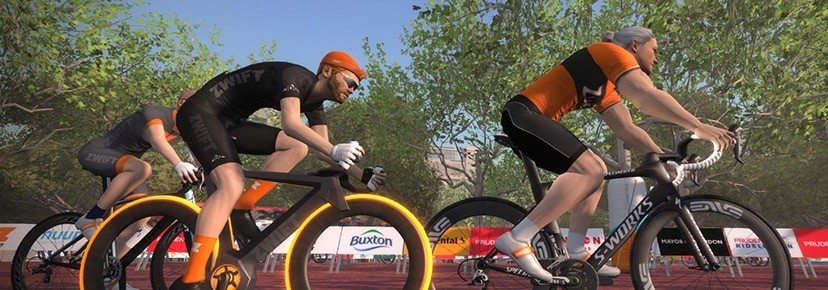
To make your start as easy as possible, stay out of the wind and on a wheel. That is: don’t be riding on the front of the group (in the wind). Keep your rider behind another rider so you benefit from the draft, which lets you move faster with less power.
A dangerous gap!
Watch for gaps opening ahead of you. As riders on the front push hard to create a selection, gaps will open up, and riders left behind will lose the draft and fall off the group. Don’t let that be you! If you see a gap begin to open, hammer to close the gap if you’re able, then sit on those wheels and recover as much as possible.
The goal here is to make the front group selection. If you get dropped from the front pack by even 5 seconds, you will not be catching them without an enormous effort. Instead of getting spit out the back, use these tips to start fast and use the power of the leading group to put time into anyone unfortunate enough to get dropped.
Happy racing!
Got Tips… or Questions?
Got more race start tips to share? Questions on how best to start a race? Comment below!
This release is newsworthy if only to show how far Zwift racing has come. As the Zwiftcast’s Simon Schofield said, “We’ve come a long way from ‘let’s meet on the Richmond start line’.” As esport cycling evolves and organizers seek to attract top racers, a globally-defined set of rules and regulations must be put into place to help ensure fair competition. This is the UCI’s first attempt at such a ruleset, and even though it’s a fairly small document, it lays necessary groundwork for further development of cycling esports on the world stage.
As the first esports regulations ever published by the UCI, this document is certainly worthy of discussion. Let’s dig in to the most interesting parts.
Chapter 1: General Provisions
The UCI begins by defining what a “Cycling esports platform” is. It’s worth noting that “Zwift” is not mentioned anywhere in this document. Rather, the UCI keeps it generic, allowing the rules to apply to any esports platform which may be developed.
1.1 – A cycling esports event is held on a cycling esports platform. A cycling esports platform is a software that, when coupled with certain hardware, allows individuals to participate in cycling races in a virtual environment. The cycling esports platform must at minimum provide a form of continuous feedback to the participants as to their progress within the competition as related to other participants
Categories of Riders
1:6 – Participation in races is organised on the basis of the age and gender categories set out in articles 1.1.034 to 1.1.037 of the UCI Regulations.
If you’re waiting for UCI-sanctioned races using “standard” Zwift categories… don’t hold your breath. Races will be based on standard UCI categories defined in their main ruleset, which are based on age and gender. So we’ll have men’s juniors, U23, Elite, Masters, etc. No surprise here! While lower-level Zwift racers enjoy the competition of categories B, C, and D, the UCI is just concerned with the top racers in particular age/gender groups.
Race Types
The UCI defines two types of esports races in section 1.7:
In real life races, in which all participants and the necessary equipment are verified by a commissaire at the race location.
Remote races, in which participants and the necessary equipment are not verified by a commissaire at the race location(s).
This is notable because the UCI is leaving the door open for UCI-sanctioned esports events where competitors are remote and therefore using non-verified equipment.
Chapter 2: Equipment
Participants in a UCI-sanctioned esports event must use a UCI-legal bike or a smart bike that is compatible with the platform:
2.1 – Subject to any applicable competition guide and applicable UCI Regulations, bicycles used for cycling esports races shall be (i) bicycles as defined in part 1 of the UCI Regulations in combination with a smart trainer compatible with the cycling esports platform, or (ii) smart bicycles or other equipment compatible with the cycling esports platform.
Heart Rate Required
While the rule leaves it up to the race organizer, by default heart rate monitors are required:
2.2 – Unless explicitly specified in the competition guide for a race, riders must compete using a power meter or smart trainer, paired together with a cadence sensor and heart rate monitor
In addition, up-to-date firmware and proper spin-down/calibration of power meters is required. Some of this language appears to be taken directly from Zwift’s own eRacing Ruleset.
2.3 – Riders shall be responsible for following any manufacturer’s specifications on maintaining the accuracy of their equipment including but not limited to using up-to-date firmware versions and conducting a spin-down, zeroing or other calibration or offset procedure for power meters or smart trainers immediately prior to a race.
Chapter 3: Performance Verification
This section is interesting because of what it does not say. Far from spelling out how performance verification should take place, the UCI merely states here that:
3.1 – The organiser of a cycling esports event is required to have a performance verification system.
This leaves the specifics of performance verification up to the event organizers. Is this the UCI smartly deferring to organizers who know their platform well? Zwift has their own performance verification system set up, although it is still evolving. Does this rather loose rule open up the sport up to platforms that mismanage performance verification? Time will tell, but it seems certain that this section of the rules will be expanded as cycling esport develops.
Chapter 4: Specific Regulations for Cycling Esports Events
Most of this section is dedicated to defining how event organizers must publish a “competition guide” for their event. This would contain details like participation requirements, qualification system, specific performance verification measures, prizes/titles to be awarded, and more.
Nothing unexpected here, but it is clear that UCI-sanctioned esports events are on a much higher level than a typical Zwift race where a rider can sign up from within the game itself and never see a bit of information about the event except the title!
Chapter 6: Specific Infringements for Cycling Esports
This section details specific infringements and the punishments to be given for each. Yes: this includes fines! The maximum fines are 5000 Swiss Francs (~$5000US), while initial fines begin at 200 Swiss Francs. Riders receiving the maximum fines also receive a lifetime suspension.
There are actually three sets of infringements listed, varying from more minor infringements to more serious.
The first set of infringements includes out-of-date firmware, unintentional disconnect from the server for over one minute, and other situations that could be construed as accidental and fairly minor. The sanction defined for these is “Refusal to start, elimination or disqualification.”
The second set of infringements is significantly more serious, carrying definite intention to gain an unfair advantage. This includes:
Incorrect Rider Height/Weight Providing inaccurate information about height or weight. Any information varying by more than 5% from the real measure shall be considered incorrect.
Does 5% seem high to anyone else? That’s over 9cm (3.6″) of height if you’re 183cm (6′) tall. And that’s 3.75kg (8.26 pounds) if you’re a 75kg (165 pound) rider! Probably a much lower number for height, and a slightly lower number for weight would make sense.
Also included here is “Using bots or simulated riders either in-competition or out-of-competition for any reason.” It looks like the UCI learned a lesson from British Cycling/Cam Jeffers here.
This second set of infringements carries escalating penalties:
First violation: Refusal to start, elimination or disqualification + 200 CHF fine
Second violation: One-year suspension + 1000 CHF fine
Third violation: Lifetime suspension + 5000 CHF fine
The third and final set of infringements are the most serious of all: fabricating data, mechanical fraud, hacking/game modification, etc. It also carries escalating penalties:
First violation: One-year suspension + 1000 CHF fine
Second violation: Lifetime suspension + 5000 CHF fine
Your Thoughts
Reactions from Zwift Racers thus far have been mixed. Some say the regulations contain a lot of loopholes, others say they want the UCI to stay away from Zwift racing, and still others see these rules as a necessary step toward greater acceptance of cycling esports.
What are your thoughts on the UCI’s new esports rules? Share them below!
Zwift has hidden surprises throughout the game. Here we look at the hidden feature that was planned to go into the Zwift volcano but ultimately was cut. While the working machine didn’t make it into the game the art for it did!
Thanks to Simon Schofield’s Zwiftcast for the original interview with game creator Jon Mayfield.
What do you think?
Was the “machine in the volcano” a great idea, or was cutting it an even better idea? What sorts of crazy ideas can you think of to further gamify Zwift? Share below!
Each stage event includes three ride categories to select from when signing up: A, B, and C. A is the longer ride, B is the shorter ride, and C is the same course as B, but for women only.
Group A: 122.3km (76 miles) with 2839m (9315′) of elevation
Groups B and C: 85km (52.9 miles) with 1951m (6401′) of elevation
These events are officially group rides, not races. But there will certainly be many riders who treat the event as a race, so do whatever you’d like – take it easy, or go hard. It’s all good!
Stage Details
Stage 1: Lutscher route. A group rides 2 times up the KOM while B/C ride just 1. A Distance: 24.2km (15 miles) B/C Distance: 10.8km (6.7 miles) A Elevation Gain: 824m (2703′) B/C Elevation Gain: 427m (1400′)
Stage 2: 2018 UCI Worlds Course Short Lap route. A group rides 2 laps while B/C ride 1 lap. Distance (per lap): 23.6km (14.7 miles) Elevation Gain (per lap): 487m (1598′)
Stage 3: Innsbruck KOM After Party route, 1 lap for all categories. Distance: 37.2km (23.1 miles) Elevation Gain: 640m (2100′)
Kit Unlock
Complete any stage of the tour and unlock the Tour of Innsbruck kit. (This is the same kit which was awarded in the 2018 ToI.)
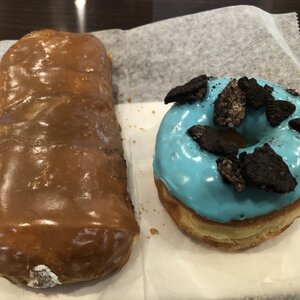
It’s no secret that Ilovedonuts. Eating them is a significant reason why I ride my bike so much. They’re an acceptable dessert you can eat for breakfast, they’re incredibly sweet and indulgent, and they can be found nearly everywhere you go. There aren’t many foods I love more than a maple-glazed, creme-filled long john after a hard morning on the bike.
But donuts are probably one of the last things you think of when you think of elite-level cycling. With so much attention on strict training regimen and diet, cyclists are often pushed towards calorie restriction in the search of gains in watt-per-kilogram performance in order to climb hills faster. While weight loss is a great way to climb faster, skipping out on the foods you love is not necessary to achieve that goal. To me, consumption is all about balance.
Since September 25, 2014, I have accounted for every maple-glazed donut, every double IPA, every Baskin Robbins double-scoop in a waffle cone, and every calorie burned in exercise. Nearly 2,000 days of data on my calorie consumption and expenditure cataloged meticulously. That probably seems a bit insane — who really tracks their food every single day without fail? Well, thanks to the MyFitnessPal app’s guilt-inducing, built-in streak counter: me.
I do this every single day. Thanksgiving, Christmas, my wedding day, on vacations abroad.
The Beginning
After studying for and passing the Certified Public Accountants exam I found myself with an immense amount of free time. For nearly a year and a half, I had spent hours each day studying, neglecting my love for exercise almost completely. So when I received my passing grade for the exam I dove headfirst into fitness — signing up for my first half-Ironman triathlon. I knew if I wanted to get across the finish line that I would have to start training hard and eating better, so I downloaded the MyFitnessPal app and I logged my first meal: Quaker Oats Maple & Brown Sugar Oatmeal (160 cal), 1/4 cup of Silk Vanilla Almond Milk (15 cal), and 1 tablespoon of Jif Creamy Peanut Butter (95 cal).
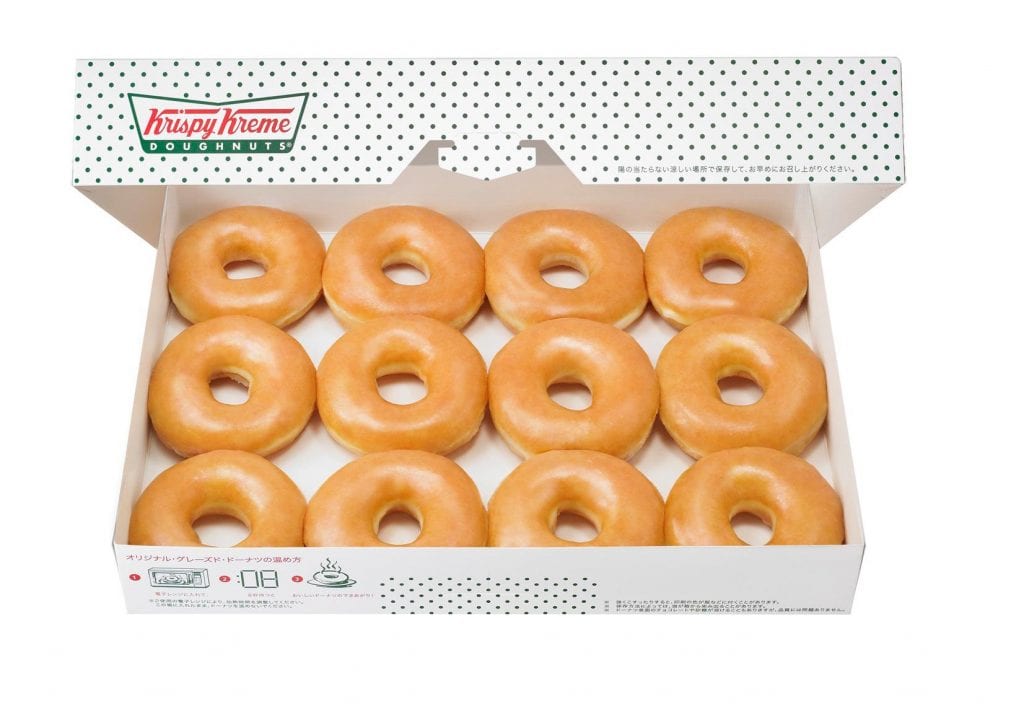
In the ~7,700 meals (4 per day counting snacks as a meal) I’ve logged since that breakfast, I have learned so much. I’ve learned how to make better decisions at restaurants, how I should fuel my exercise to maximize my performance, and most importantly: I’ve learned if I ride at 250 Watts for 2 1/2 hours, I’ll burn enough calories to eat a dozen Krispie Kreme original glazed donuts (12 x 190 cal = 2,280 cal), and still have my dietary baseline of 2,160 cal remaining for the day.
The Routine
As I stated before, it is a bit insane to log everything you eat, but for me, it’s all or nothing. Making food logging a daily routine was the only way I was going to stick to it, and thanks to MyFitnessPal’s streak counter I have been able to maintain this routine for over 5 years. The app gives you an updated notification every five days saying “you’ve logged in for 5 days in a row!” or for instance, this week’s “you’ve logged in for 1,955 days in a row!”
In 2014, I couldn’t have told you that a pint of my favorite Ben & Jerry’s ice cream was 1,250 cal — I could only have told you that it isn’t enough ice cream for a single sitting. The MyFitnessPal app allows you to scan an item’s bar-code and easily record the dietary information. Plus, many restaurants have built their menus into the MyFitnessPal database, so you can learn exactly how many calories are in that Arby’s Brisket Bacon Beef ‘n Cheddar (760 cal), Large Curly Fries (650 cal), and Ultimate Chocolate Shake (820 cal) before you order it. For the home cook, recipes found on the Internet can be imported directly by pasting the link into the app’s Recipe Importer — making portioning out your week’s meals a snap (or you can build your own recipes by pulling in the ingredients from the MyFitnessPal database)!
Whatever you’re eating, logging it and forming a routine is the best way to learn about your diet and make better-informed decisions about what you put in your body.
The Data
After nearly 2,000 days of logging, the amount of information I amassed on the food I’ve eaten is a mountain of donuts, peanut butter and jelly sandwiches, sports gels, and pizza slices. Sifting through that data is pretty hard to do, and honestly I’m not sure what I can do with all of it. The weekly data I glean from my logging is more important to me as I track my training and nutritional needs. Did I have a weekend which outpaced the weekday deficits? Do I need to increase next week’s intake for not eating enough this week? Each week I reflect on the data and plan accordingly.
This sustainable habit is built on consistency, while still giving myself days where I couldn’t care less about the amount I eat. I don’t panic about the implications of eating over goal calories — I quantify it and move forward, because knowing the numbers behind the decisions you make allows you to track, plan, and stick to your goals.
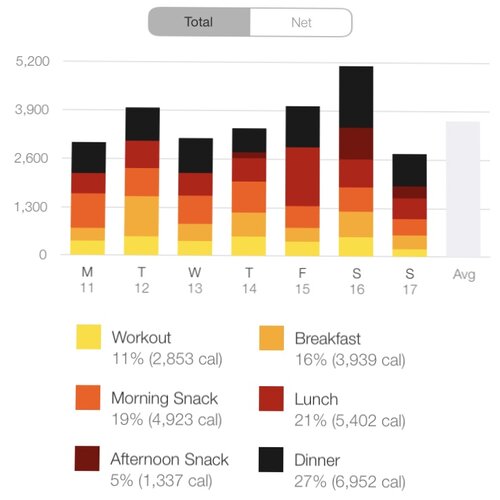
For example, the week of November 11 – November 17: I ate my normal meals, and maintained training volume with small deficits each day of the week.
On Saturday when my wife Kathleen and I wanted to have some beers and go for Indian food at one of our favorite local restaurants: we went!
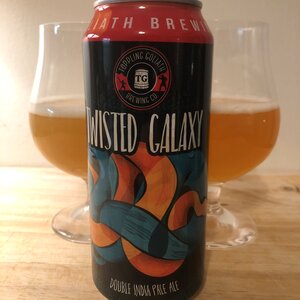
1,665 cal of delicious garlic naan, basmati rice, and chicken tikka masala, washed down with 855 cal of glorious Toppling Goliath Double IPA.
While I don’t have the time, and you certainly don’t have the interest, to sift through the detail of my last 5 years, I have gleaned some interesting information from the data:
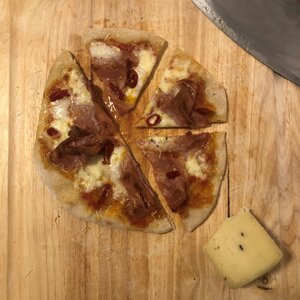
Details: Went out for donuts, then spent the day prepping, making pizza, and enjoying delicious beer with Kathleen. This was a doozy of a day to account for everything, and every single calorie was savored to the fullest extent! See the pics below!
Months with highest per-day exercise expenditure:
December: 1,860 cal avg per day (Time off around Christmas, riding more to enjoy all the food!)
November: 1,740 cal avg per day (Zwift season starts heavily. More riders online, more racing!)
April: 1,630 cal avg per day (Middle of my triathlon training build. Longer runs, longer rides!)
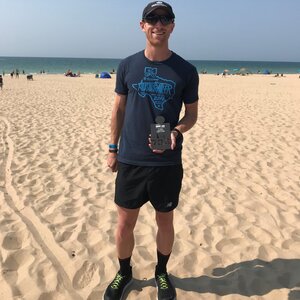
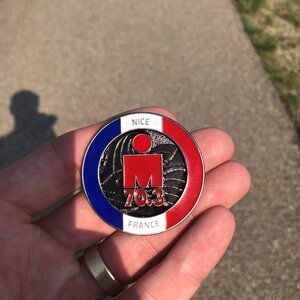
Largest single-day exercise expenditure: August 12, 2018
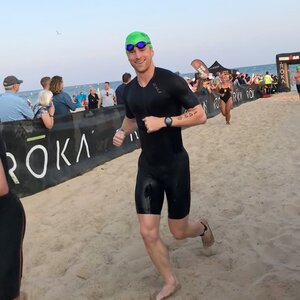
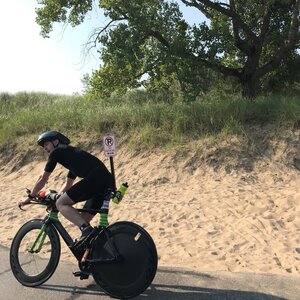
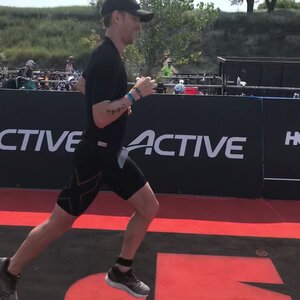
Details: This was my A-race in 2018 — aiming to qualify for 70.3 World Championship in Nice, France for 2019. I raced hard, I qualified! Huge calorie burn day replenished by an epic McDonald’s stop on the drive home to Des Moines. See the pics below!
The Takeaway
All in all, since I began logging my calorie consumption and expenditure, I’m at a total net deficit of 39 cal per day. How am I not a heap of bones and organs? Inaccuracies (under or over-estimations) and sometimes things just go un-logged. Did I eat some samples at the grocery store while shopping? 0 calories. How about that after-dinner mint or six at the restaurant? 0 calories. I will regularly steal a sip or bite of my wife’s meal — I don’t take the time to log it. I’m crazy, but I’m not that crazy. Just be flexible and realistic with yourself, stay consistent, and the rest will take care of itself.
I certainly don’t expect every person who reads this to take up logging every single meal they eat; that’s just the way I’ve chosen to do this. For me, food logging gives me crucial decision-making information so I can meet my nutritional needs, maintain weight, and train at a very high level. However, I do challenge you to give food logging a try for a day, or a week, or a month — whatever you can manage. I can promise you that it will grow your knowledge about the decisions you make regarding food and exercise, and knowledge is power!
This post originally appeared on TeamIndoorSpecialist.com and is re-posted here with permission.
Congratulations Ella Harris: First Zwift Academy Winner to Take a Pro Race Victory
2018 Zwift Academy winner Ella Harris won stage two of the Women’s Herald Sun Tour in Australia on February 6th, making her the first Zwift Academy winner to take victory in a pro race. Ride On, Ella!
Ella’s Zwift Academy win earned her a contract with Canyon-SRAM racing, and that contract was renewed again for the 2020 season. She was racing for the New Zealand national team at the Sun Tour, however. With this win, she also took the mountain classification for the 2-stage tour and fourth overall.
“I kept getting dropped so I just kept dieseling myself back on, then with about 500metres to go I felt like I had a little bit more power than everyone else. To cross the line in first after the surprise crosswinds yesterday, I can’t believe it, and it means so much to me. I’ve got so many people to thank and I am just ecstatic.”
Here’s the full race broadcast:
Watch this set of videos from Zwift to learn more about Ella, including her comeback from a broken collarbone:
A few days ago we saw a Facebook post from one Tyler Frazier of Cincinnati, OH (“Hello from Ohio!”). He told a story that deserves to be shared. It’s a story about not taking yourself too seriously. And it’s a story of true love, Zwift-style. Perfect for Valentine’s Day!
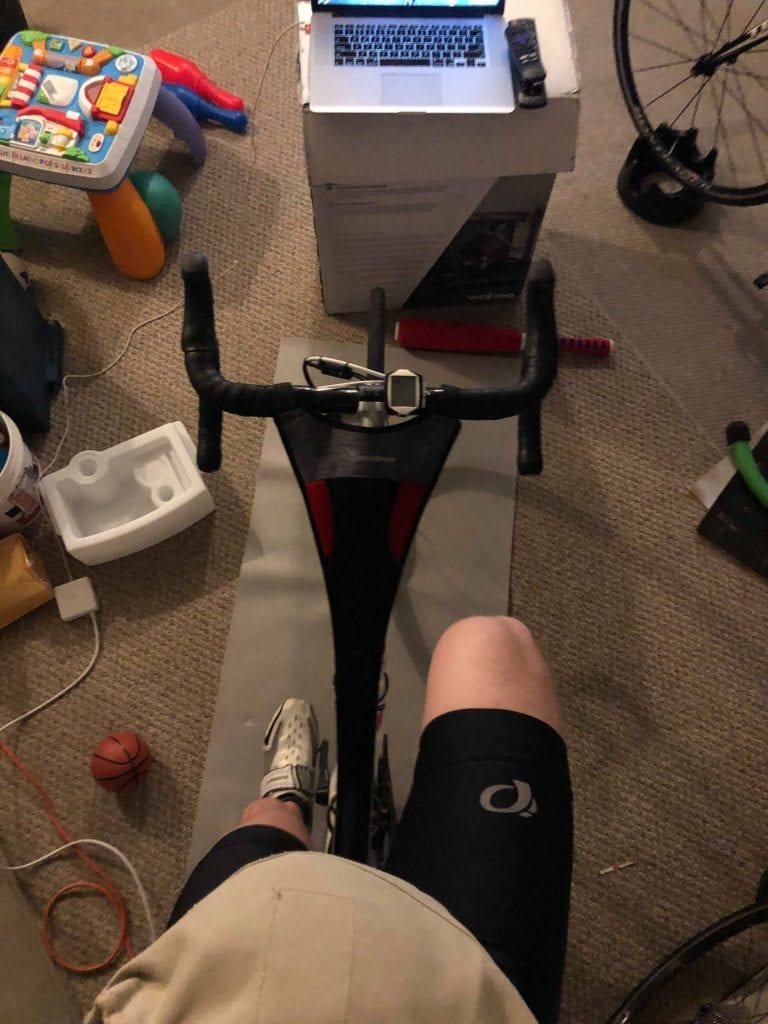
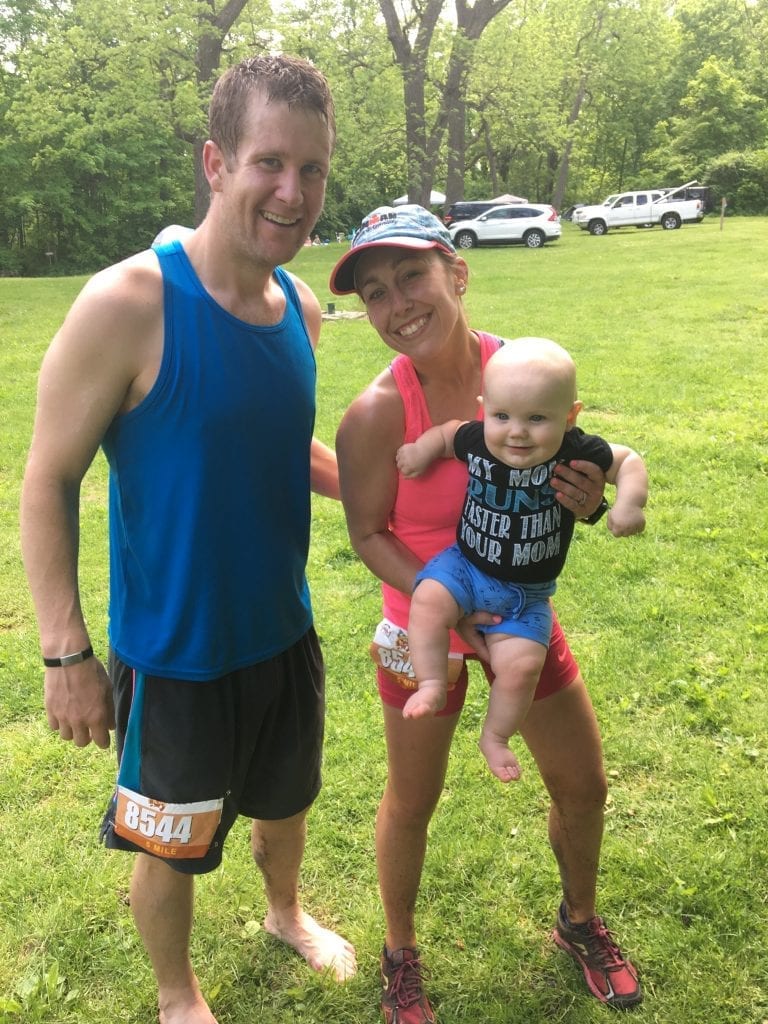
This past week my beautiful 5 months pregnant wife, who ran the Boston Marathon a little more than 4 months pregnant with our first, expressed her frustration about not riding her trainer as fast as she used to.
In all my father of one wisdom I said, “Well it’s not like you’re trying to ride super hard or anything.” Fast forward to today and my sister (who is a Home Economics teacher) gave my wife this 6-month, 15-pound pregnancy empathy vest and I have to ride in it for at least the next few days and run at least 2 miles in it a couple times… so here goes nothing.
Tyler began sharing his experiences, complete with photos. Here he is, riding “pregnant” on Zwift:
Initial reaction: Sucks pretty bad for the lower back and grabbing the handle/drop bars really pinches my man parts.
This isn’t surprising, of course. Any woman who’s been pregnant knows that just about everything becomes more challenging, especially in those later months! Here’s what Tyler’s wife had to say about her experiences combining endurance training with pregnancy:
Being an endurance athlete means it’s important to me to be as active as possible during my pregnancy. Just being active in general while pregnant is truly a blessing, but it’s also extremely humbling. I fatigue much easier, I’m unable to generate the same power or maintain anywhere close to the same speed as what my ‘normal’ is when not pregnant. Plus, my ever-increasing belly size is making it more uncomfortable by the day to get down on my aero bars and work to hold that position.
Tyler went for a run and posted another update:
Update as of 7:30am… running is worse than cycling on a trainer. Kudos to all the moms out there staying active through pregnancy, and just carrying children in their bodies in general, this junk is hard.
Kudos to you, Tyler, and your better half as well. Here’s hoping you survive your empathy vest experience, and best wishes for a safe and smooth pregnancy and delivery of baby #2. Ride/run on to both of you!
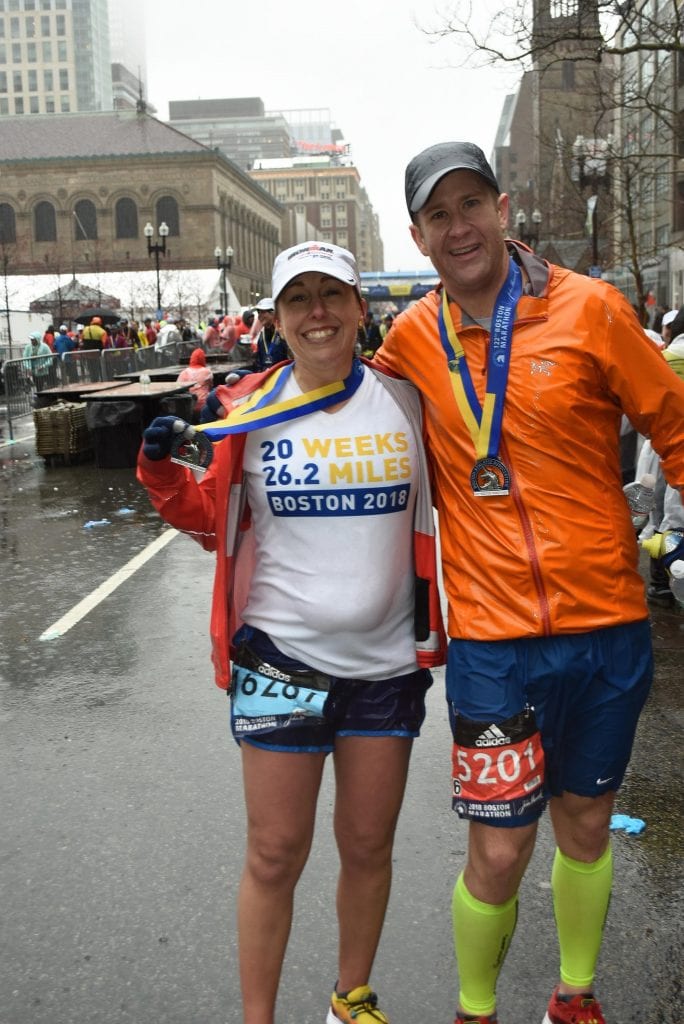
Here are a few more pics from Tyler:
After finishing the Boston Marathon 2018 (she was 20 weeks pregnant)
A family shot after completing a 50K in May (which she won 8 months after having their first child)
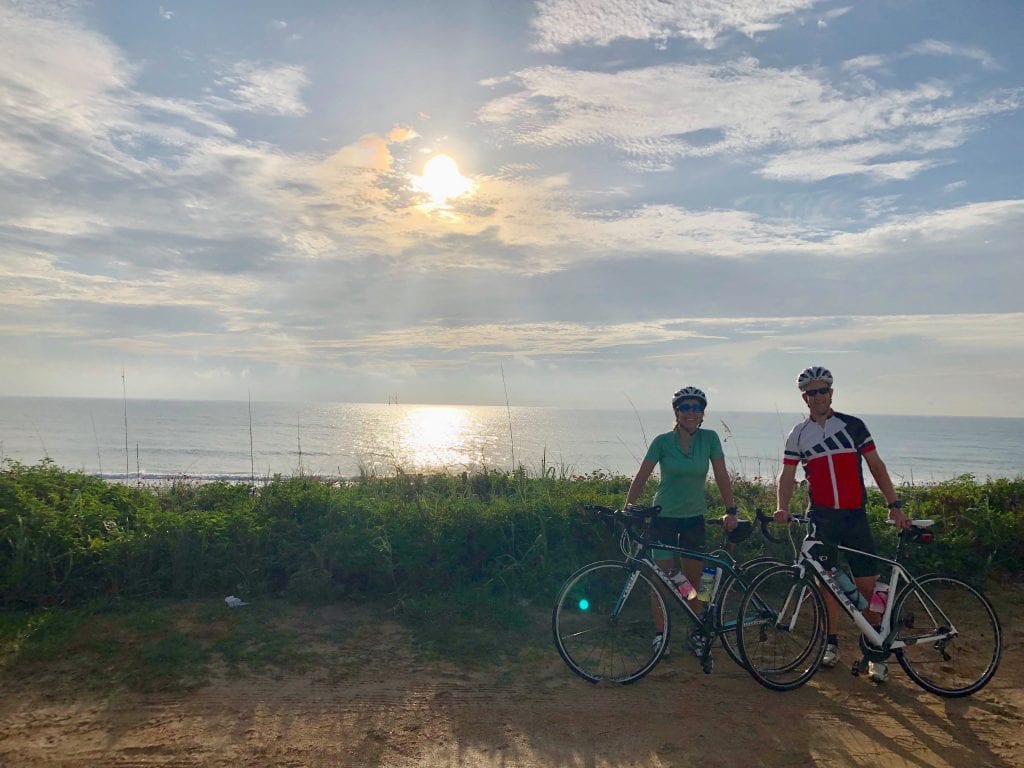
On a ride this summer while on vacation in Florida
Last week’s release of the updated my.zwift.com activity feeds gave us unique URLs for each Zwift activity. As long as a Zwifter hasn’t made their activity private, we can pull it up and see some of its details.
This makes for some interesting data sleuthing possibilities.
For example: what is activity #1, the very first one saved to Zwift’s system? Jon Mayfield riding on Jarvis Island of course! October 22, 2014: https://www.zwift.com/feed/1 (click the link and give the man a Ride On!)
The second activity is from Lloyd Murphy, Creative Director at Zwift, on that same day (https://www.zwift.com/feed/2) and Zwift Co-Founder Scott Barger logged the 3rd ride soon after (https://www.zwift.com/feed/3). I envision these guys sitting in some tiny Zwift office, smiling and high-fiving each other. “It’s working!”
Eric Min’s first saved activity was the next day: https://www.zwift.com/feed/10 and the rest, as they say, is history…
Here’s the first activity from Eric Chon, Community Support Manager at Zwift (he’s been helping Zwifters from day 1!): https://www.zwift.com/feed/17
Watopia launched on April 23, 2015 (probably late at night). Jarvis was turned off at that time, never to return. The first Watopia ride I could find (https://www.zwift.com/feed/100749) was from CJ Stoltie.
My friend Al Clewly’s first ride on Watopia: https://www.zwift.com/feed/100936 – he’s always been an outspoken fan of Zwift and a bit of a community organizer. I first met him when he started posting monthly challenges on the Zwift Riders Facebook group.
Here’s my very first Zwift ride – a short test on November 9, 2015: https://www.zwift.com/feed/442661 (Note: this activity page doesn’t want to load, for some reason. In fact, many of my older activities are behaving in this way.)
Growth Stats
One way to measure growth is to see how many activities occured. Zwift has easy access to all this data, of course, but we can have a little as well. For example: how many days did it take the Zwift Community to complete 10,000 activities?
It took 90 days to go from activity #1 thru 10,000
It took 18 days to go from activity #10,000 to 20,000
It took just 1 day to go from activity #~1,000,000 (January 19, 2016) to ~1,010,000
Some time between June 9-22, 2019 Zwift changed the numbering scheme on their activities. I know this because my June 9th activity ID (47699797) is quite different from June 22nd (312930753894291680). I’m not sure how the new IDs work, although it appears to be just an index, with some additional numbers tacked onto the end.
Do Some Sleuthing!
Poke around and see what interesting activities you can find. How about the first Richmond ride? What ID was YOUR first ride? It may take a lot of clicking to find out, but share below!
How To Use ZwiftPower’s Dual Recording Power Analysis Tool
More and more Zwifters have the ability to record power data from two different sources: most commonly a smart trainer plus a power meter installed on their bike. And ZwiftPower has the tools to make comparing the data from those two sources quick and easy!
Before we dig into how ZwiftPower’s tool works, let’s look at why dual recording is becoming popular among Zwifters.
Why Dual Recording?
It’s impossible to know if your power numbers are accurate when you don’t have another power meter reading to compare them to. Experienced riders can sometimes “feel” if the numbers aren’t accurate, but this is far from a reliable method, and it doesn’t help newer riders who haven’t trained enough with power to know what holding 2.5w/kg or 300 watts feels like.
Comparing the power numbers from one power meter to those from another helps ensure that both are accurate. It’s not a fool-proof method either, but what you want to see is your bike-based power meter (usually pedal or crank-based) reading a bit higher than your smart trainer due to small friction losses in your drivetrain.
Example: if you’re putting 250 watts into your pedals, and lose 4% through your drivetrain, your smart trainer should be reading 240 watts.
If those are the numbers you see, chances are both power sources are quite accurate.
It’s called “dual recording” in the land of Zwift because riders are recording the data from two different power meters. Zwift doesn’t currently have the ability to record two different power sources, so riders will record one power source on Zwift, and the second on their bike computer (Garmin, Wahoo ELMNT, etc).
Race Verification
Dual recording is especially popular among top Zwift racers because it streamlines the performance verification process. Zwift’s eRacing Rules say:
… riders are strongly encouraged to record a second source of power data. Providing a second source of recorded power data will, in many cases, streamline the performance verification process. The reviewers will analyze both sources of data to confirm that the power readings are accurate.
Comparing Power Files Using ZwiftPower
ZwiftPower has a tool accessible under Your Profile>Analysis which makes comparing two .fit files from two different power sources easy. If you’re registered on ZwiftPower the site can already see every Zwift session you’ve ridden – so all you need to do is upload the second file from your computer and you’re good to go!
Here’s what the process looks like:
Finish and save your ride (on Zwift and your bike computer)
Click Analysis>Create New Data Set from your ZwiftPower profile page
Select your activity from “Use .fit file from Zwift Activity”
Choose which power source was used for your Zwift activity (or enter the name of a new power source)
Optional: assign this analysis to a Zwift event you entered by choosing the event from the corresponding dropdown
Add a comparison file from your computer, and select which power source to associate with that file (or enter the name of a new power source)
Optional: change Visibility from Private to Public if you want other racers to be able to see your dual recording analysis
Click “Create Data Set”
This will take you to a page showing a graph of the data from your two power sources. You can now fine-tune that graph using the Time shift and crop tool. (It will probably be necessary to zoom in a bit so you can line up the two sources nicely and have them start and end together. Click and drag to zoom, then just click “Reset Zoom” at the top-left to see the full graph once more.)
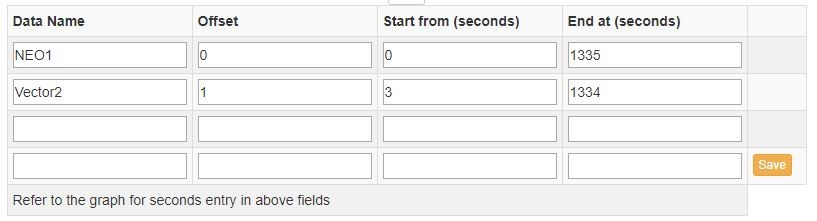
If perhaps your bike computer and Zwift’s clock aren’t perfectly aligned (they rarely are), this tool lets you easily shift the data by X seconds. Just enter the number of seconds in the “Offset” box and you’ll see the graphed lines move.
Time shift and crop tool
You may also use Time shift and crop to crop the power data, so you can be sure numbers like “Average power” are being pulled from the same time in the activity. (Sometimes you might save your Zwift ride but keep spinning for a minute and recording the power on your bike computer. This would throw off the average power numbers, so cropping that bike computer data file fixes things.)
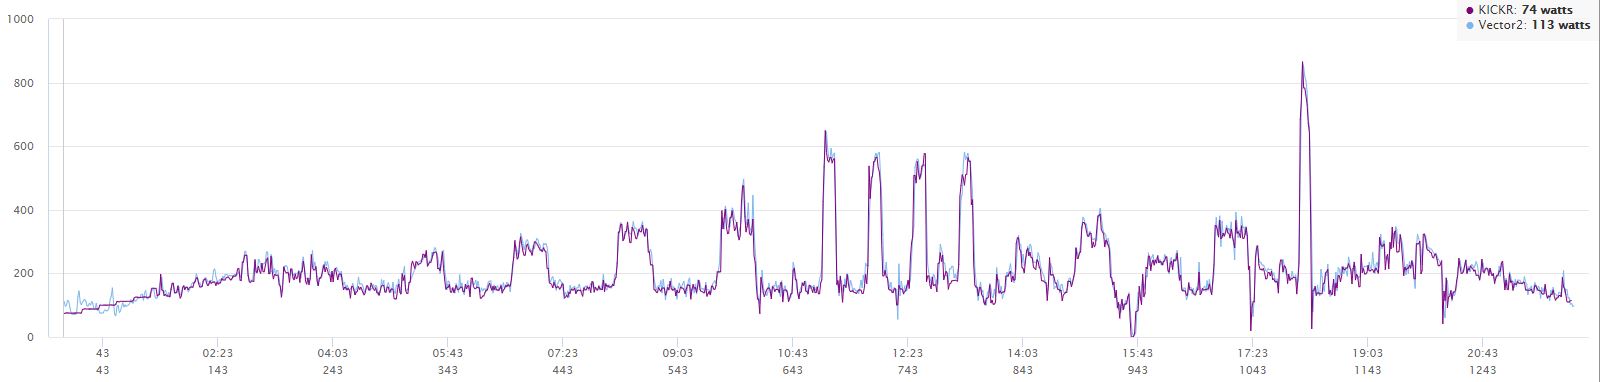
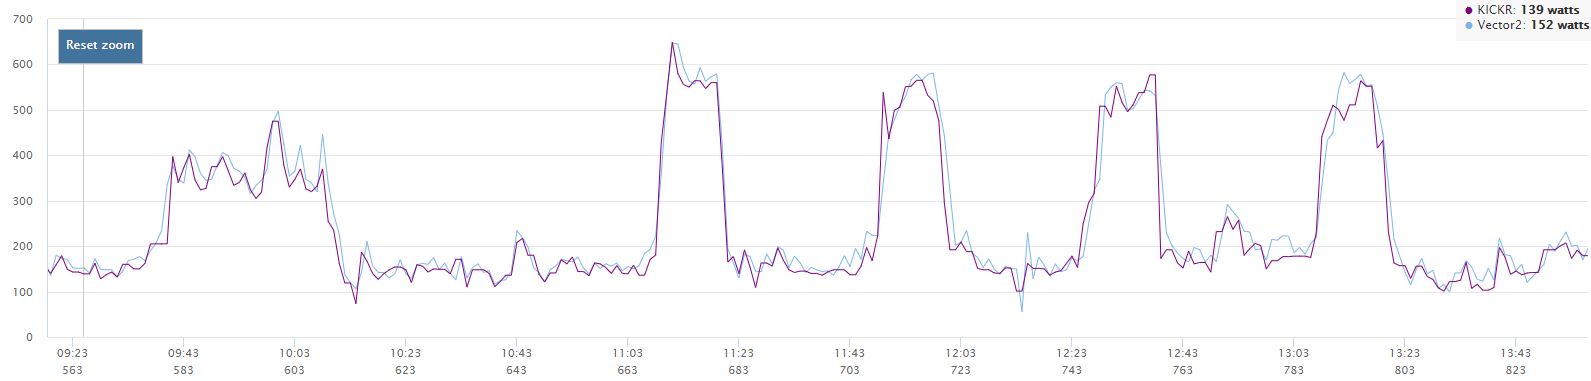
Once your files are nicely aligned and cropped, you have a rich data set you can use to compare your two power sources. This includes the zoomable power graph as well as numbers for Average, Normalized, and Maximum Power. It also includes additional graphs for elevation, heart rate, cadence, and critical power curves from both devices.
Power comparison graphPower comparison graph zoomed in
Conclusion
Dual recording will keep growing in popularity as more riders obtain on-bike power meters to use outdoors and compare with their smart trainer data. Additionally, the growth of Zwift racing as a sport should drive the adoption of dual recording as a standard for serious indoor racers. ZwiftPower’s analysis tool makes it easy to upload your power files and compare them to make sure your numbers are accurate.
Your Thoughts
Do you dual-record? If so, do you use ZwiftPower or other tools to compare files? Share your thoughts below!