TNP’s London–Watopia Stage Race Announced: Five Worlds In Five Days, March 11-15
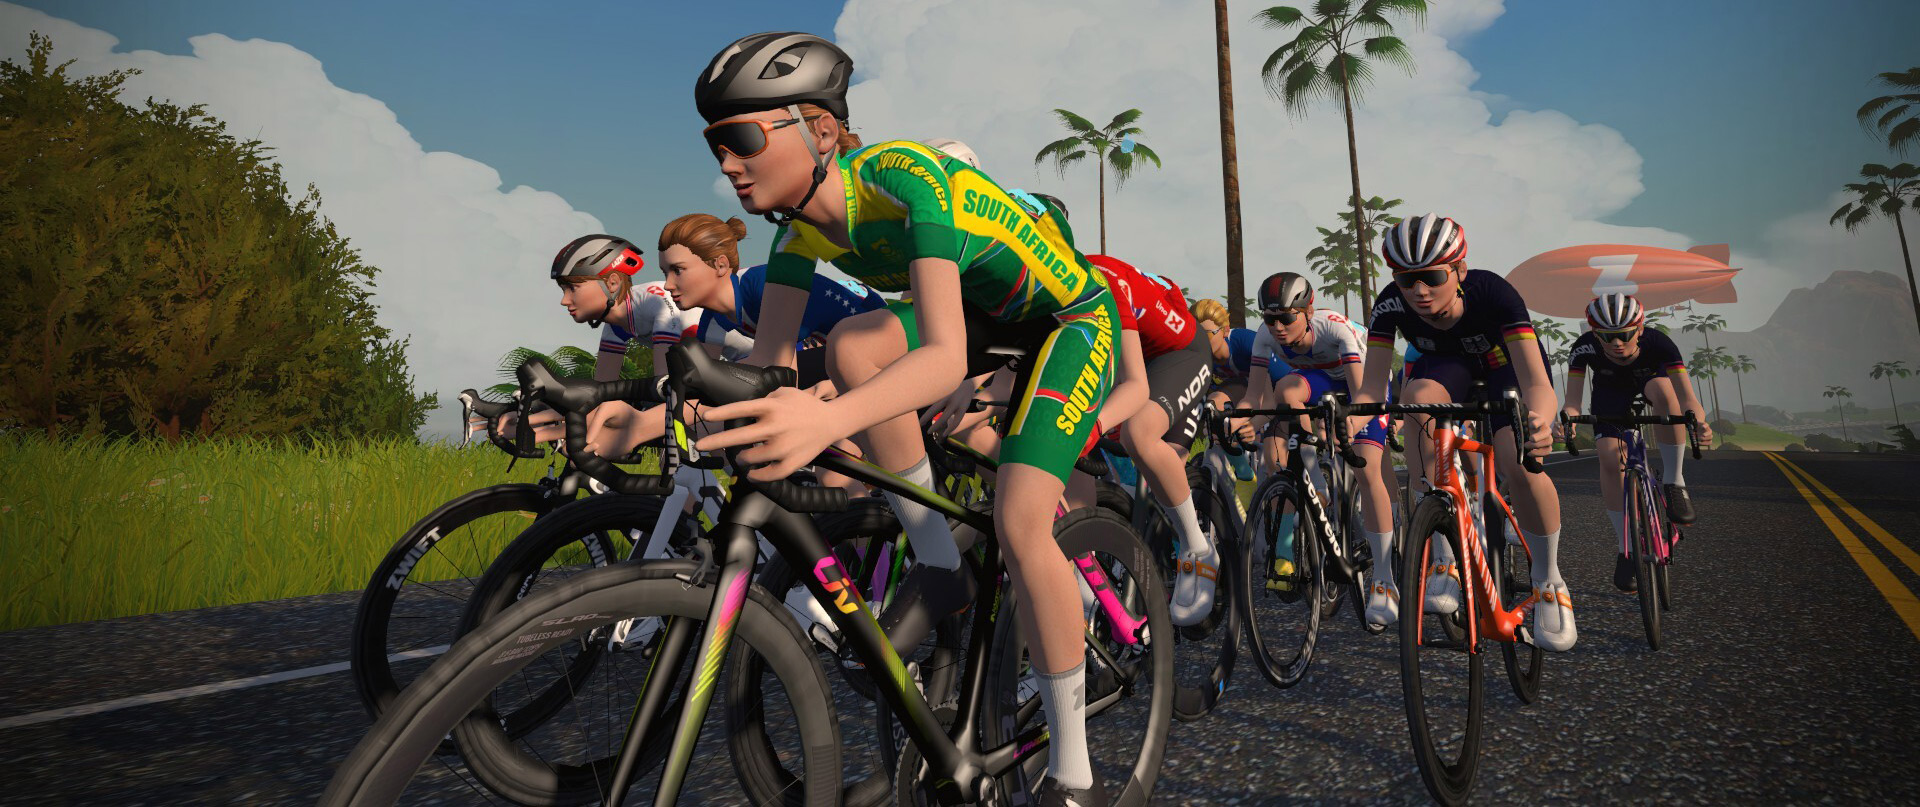
Team Not Pogi just announced TNP’s London–Watopia, a five-stage race across five different Zwift worlds from March 11-15, 2026. Each stage features a distinctive route, ranging from flat to punchy to pure climbing.
This is not a one-night effort. There are no rest days.
This is stage racing.
What Makes It Special
While there are hundreds of races on Zwift each week, true multi-day stage racing remains rare. TNP’s London–Watopia rewards resilience, tactical awareness, and the ability to perform under pressure across five distinct racing environments.
The Format
5 stages
5 consecutive days
One different Zwift world per stage
Mass category starts
Zwift Racing Score Categories:
A: 850+
B: 650–840
C: 450–640
D: 250–440
E: 0–240
Classifications and Results
With multiple classifications, every second matters. Every stage counts.
From flat city circuits to rolling Yorkshire roads and a decisive alpine queen stage in Innsbruck, the terrain shifts daily. Sprinters will look to London. Punchy riders may target Yorkshire. Climbers will circle Stage 3. And by the time Watopia arrives, GC gaps could be razor-thin.
Struggling to stay consistent through the winter? In this week’s top video, hear from one Zwifter as he discusses how he trains consistently during the long winter months.
We’ve also included videos about using an AI bike fit app for the Zwift Ride, a guide to Zwift’s trainer difficulty, a long-term review of the Cycplus T7, and a race commentary.
I rode 1203km in January on Zwift, here’s what I learned…
nomondayclub shares what he has learned about indoor cycling after clocking over a thousand kilometers on Zwift during the month of January.
I Tried an AI Bike Fit on My Zwift Ride | MyVeloFit
Liam Walker uses MyVeloFit, an AI bike fitting app, to see if he could improve the comfort and performance of the Zwift Ride.
Comprehensive Guide – Zwift Trainer Difficulty
Endurance Sweat shares a comprehensive guide to Zwift’s trainer difficulty settings.
Cycplus T7 – 6 Months Later
After riding the Cycplus T7 for the last 6 months, Leonard Goh shares his thoughts on the more budget-friendly smart bike. Has it lived up to his expectations?
Full Gas on the Punchy Climb 🥵 Zwift Syrup Cup Race #3
J Dirom provides commentary on race 3 of the Syrup Cup and shares an amazing compilation of the race from multiple perspectives.
Got a Great Zwift Video?
Share the link below and we may feature it in an upcoming post!
Alpecin-Premier Tech Team Camp Workout Series Announced
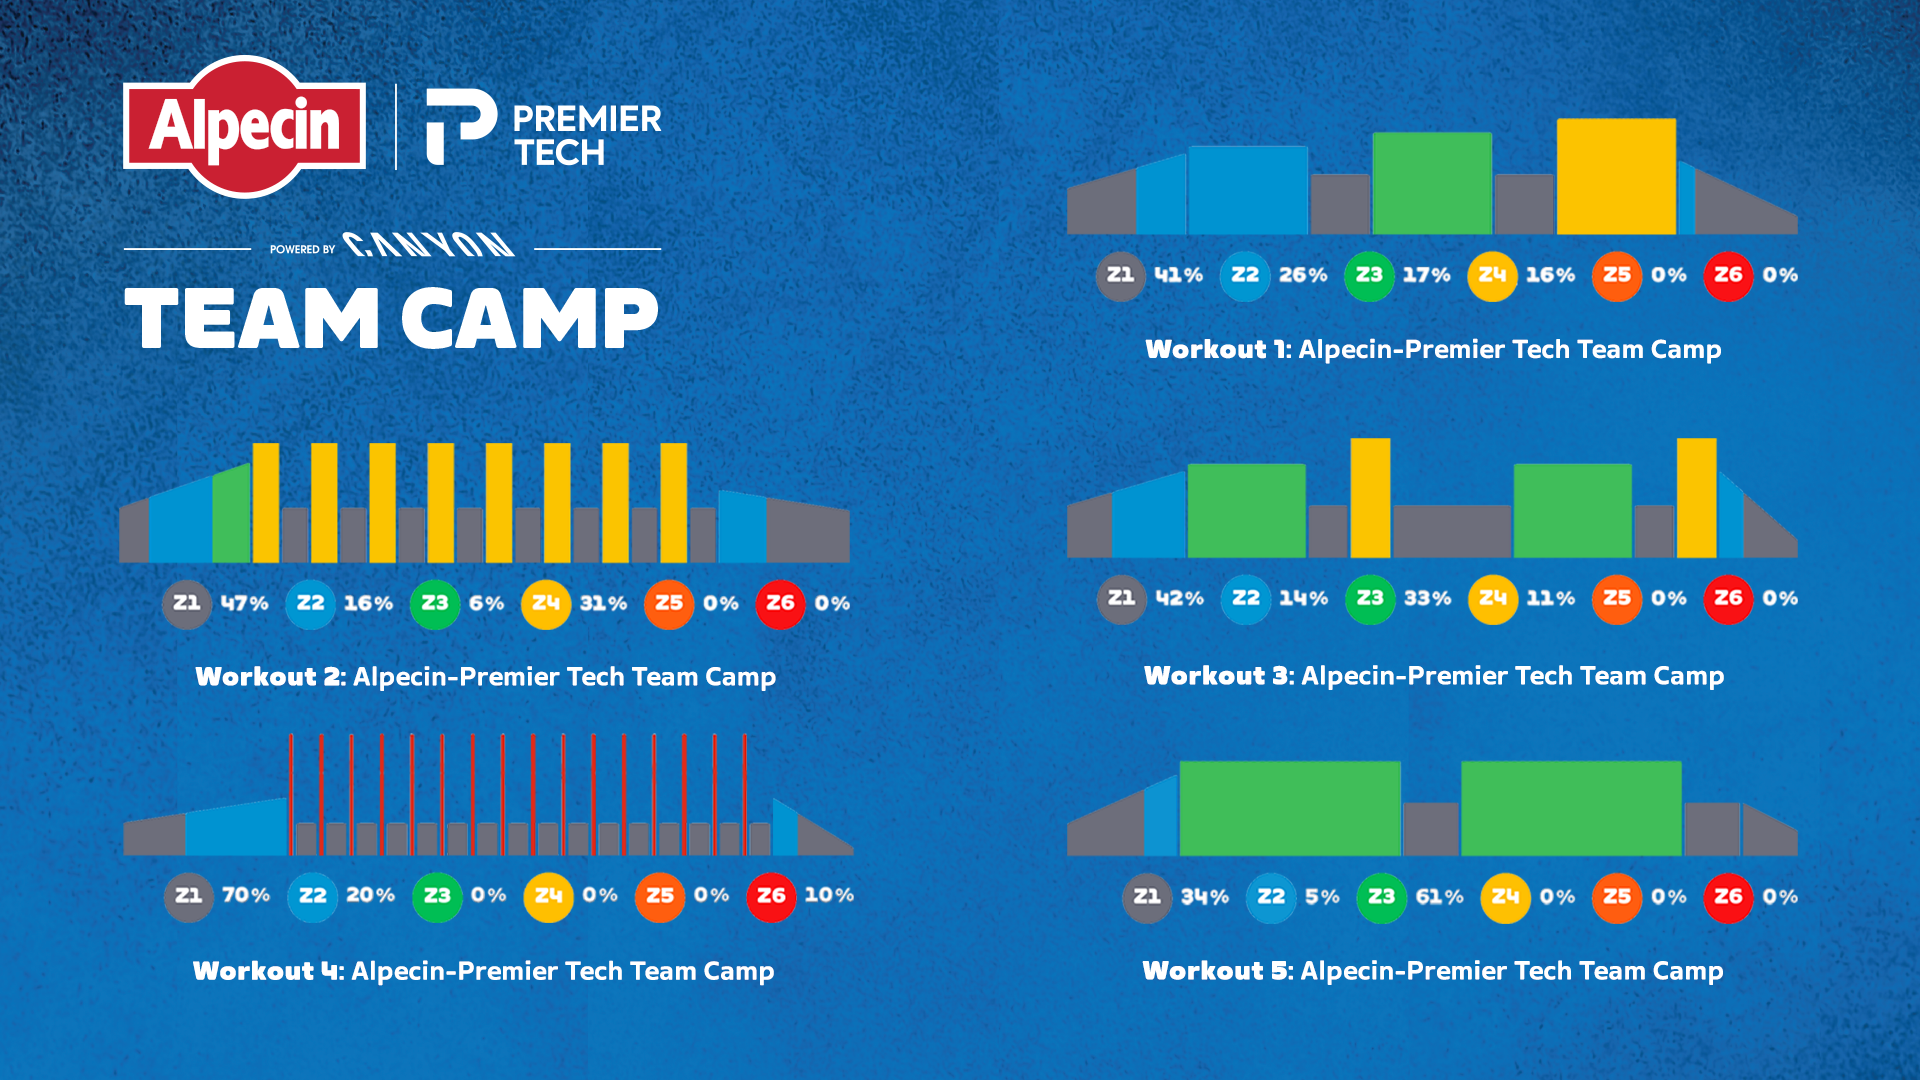
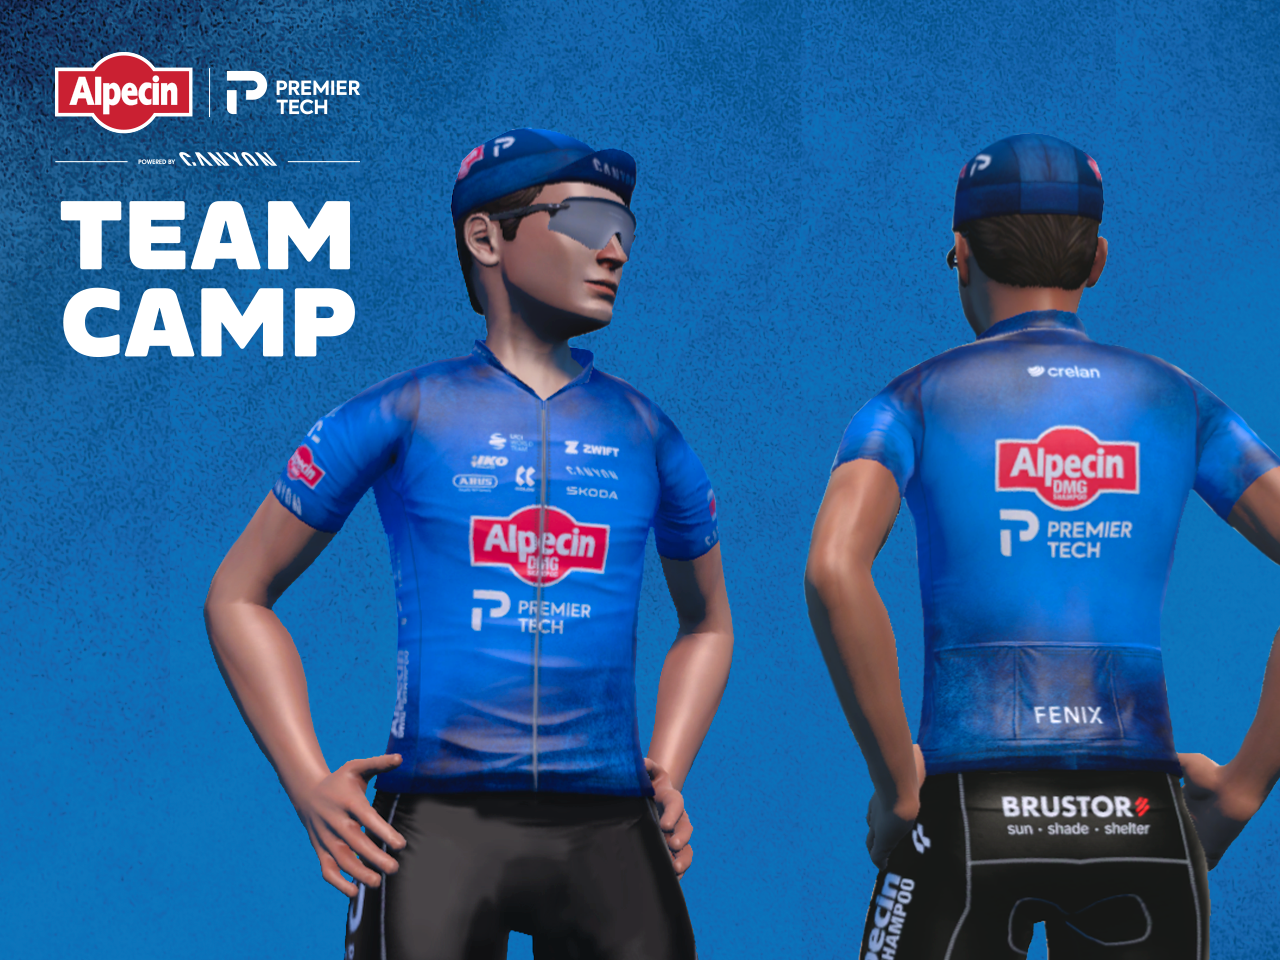
A new Zwift workout series begins on March 2, hosted by WorldTour pros Alpecin-Premier Tech. It’s a 5-week series, with a new workout featured each week to help you build speed and endurance. And you’ll unlock some fun team kit along the way!
Special events in the series feature some of the biggest names in cycling as guest riders, including Jasper Philipsen and Mathieu van der Poel (see event links below).
Workouts and Schedule
Group workouts are scheduled every 2 hours daily for the duration of the series, with a make-up week in case you miss a workout.
You can also do the workouts on demand by clicking the Team Camp card on the homescreen and selecting the workout whenever you’d like.
This is where it all begins. Build the engine that carries you through every workout in this camp. Steady endurance efforts train your body to produce energy more efficiently, helping you ride longer, go farther, and feel stronger with every pedal stroke. Set the tone today—everything builds from here!
Get ready for a power-focused session built around high-torque intervals and structured recovery. Each effort builds the strength you need for explosive moments, and every recovery helps you reset and go again. This is where raw power starts to show up!
This session sharpens your ability to ride smoothly and confidently at tempo pace. You’ll practice holding a steady rhythm like the peloton, with short pushes toward FTP to prepare when the pace lifts. Calm, controlled—this is where flow meets fitness.
This session builds explosive power and increases anaerobic capacity. You’ll tackle short, high-intensity efforts above threshold, each followed by controlled recovery. The goal is simple: hit every interval with focus and intent. This is race-style power—sharp, repeatable, and decisive.
This final session brings it all together. Two long tempo efforts build strong, sustainable endurance and reward the work you’ve done. Settle into a steady rhythm, stay composed, and finish the Alpecin–Premier Tech Training Camp strong!
Zwift version 1.108 begins its phased rollout today. This is a minor update, but there are a few new Climb Portals included that we’ll get to ride in the coming months, plus changes to Coffee Stops which regular users will want to know about. See details below…
New Climb Portals
Although not mentioned in the release notes, today’s update includes three new climbs for the Climb Portal. These are the first climbs added to the library since April 2025!
All three are short Belgian climbs known for their inclusion in iconic sprint classics. My guess is we’ll see these on the Climb Portal calendar for April 2026:
In case you’re wondering: yes, these are very short climbs! Look how close together the 10 arches are on the Paterberg:
The Paterberg is now the shortest climb in the library, with the Koppenberg 2nd-shortest and Mur de Huy 4th.
Coffee Stop Fixes/Changes
Today’s release, as well as the previous update, contains several changes and fixes for Zwift’s Coffee Stop feature, effectively making it “Coffee Stop v2”. Here’s the full list of what has changed…
Bug Fixes
Game v1.107: Fixed issues where Coffee Stop was permanently greyed out throughout the activity, but was supposed to be available. (This happened when users jumped from a workout to an event through the ‘join event’ pop-up.)
Game v1.108: Fixed issues where towing abruptly stopped, and shouldn’t have:
When triggered before the final 5km of a distance-based event, or the final 15 minutes of a time-based event. Where towing used to abruptly stop when you hit 5km or 15 minutes to go, it will now continue through the end of the Coffee Stop timer.
When finishing the cooldown portion of an event, the activity automatically transitions into a free ride. If you triggered your Coffee Stop during the cooldown, towing used to suddenly stop right when the cooldown ended and the free ride began. It will now continue through the end of the Coffee Stop timer.
Your momentum and selected route will now continue after an intersection if your “tow truck” turns onto a different route.
What’s New
Earlier Availability: The 3-minute Coffee Stop is now available starting at the 5-minute mark, instead of 30 minutes into the ride. It will be available at the 5-minute mark even if you use the 30-second Coffee Stop in those first 5 minutes. (Hurray!)
Hover Tooltips: If the Coffee Stop icon is greyed out/disabled, hovering over it will now display the reason.
Activity Reset Logic: Coffee Stop timers and availability are now correctly reset whenever switching between different activity types where Coffee Stops are allowed (i.e. non-competitive group rides, and rides that don’t involve a structured workout), or returning to the Home Screen.
Note: These behaviors remain unchanged:
Coffee Stop is disabled in all competitive events and structured workouts.
Full 3-minute Coffee Stops regenerate 30 minutes after the previous one ended.
You need at least one other Zwifter nearby headed in the same direction.
Windows Folder Relocation
In late-breaking news not mentioned in the release notes, today (February 24) Zwift flipped the switch to begin rolling out a folder change for Windows users.
Zwift files (logs, .FIT files, workouts, prefs.xml, and more) have always been written to \Documents\Zwift on Windows machines, but after this change, they will be written to \Users\AppData\Local\Zwift\ (or whatever folder is designated for %LocalAppData% on your Windows PC). This is being done to better follow Windows standards and to reduce errors caused when cloud storage tools like OneDrive interact with active Zwift files (e.g., error z117).
The folder relocation happens automatically in the background. Once it happens, new activities are written to the new folder, while old activities remain in the old folder.
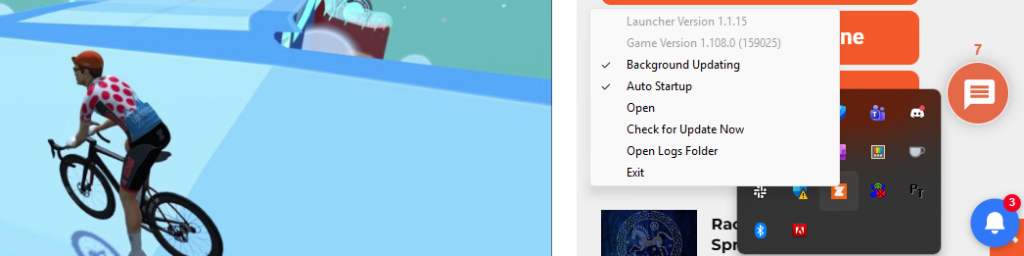
You will need Zwift Launcher v1.1.15+ and Zwift game v1.107+ installed in order for the change to take place. Check your versions by right-clicking the Zwift logo in your system tray. As of February 24, the change has been activated for a small percentage of users. It should be rolled out to everyone in the coming weeks.
Zwift will force a launcher update in the next month or so, but if you want to update now, download Zwift at zwift.com/downloads and run the installer. (Please note: Updating your Launcher version won’t force the folder change, but it increases your chances of seeing it kick in on your system sooner.)
If you aren’t experiencing any errors running Zwift on Windows, then simply letting the Zwift app do its thing automatically is probably the easiest and smartest move. The folder change should happen with zero intervention on your part sometime in the next month.
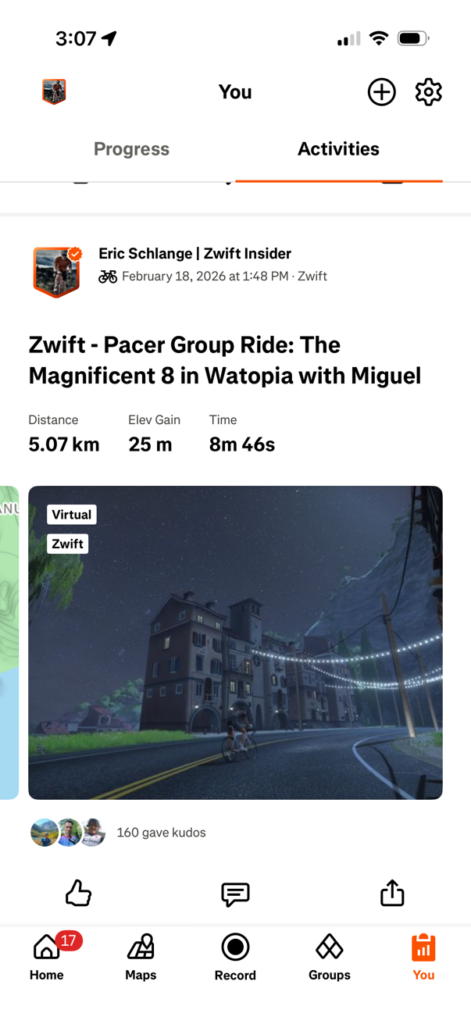
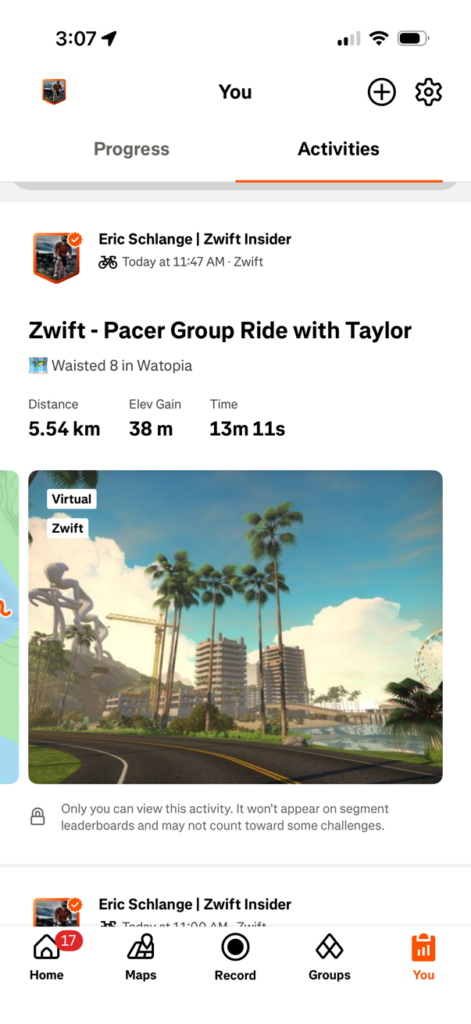
Zwift says, “We’ve simplified how Zwift activities appear on Strava by shortening activity titles and moving the route and world into the description. This change applies only to events, workouts, and RoboPacer rides.”
Here are shots of a Robopacer ride before and after this change. Nice change!
Computrainer Connection Fix
Racermate earned legend status years ago in the indoor cycling community due to their bombproof CompuTrainers. And even though Racermate closed up shop in 2017 (after 40 years making trainers!), there are still a number of Zwifters rolling CompuTrainers.
Unfortunately, back in January, Windows released a driver update for Win10 users that broke Zwift’s connection to CompuTrainer devices. (Or was it a Zwift update that caused the issue? Read the 120+ comment thread and decide.) Whatever the cause, today’s update includes a fix. Zwift says, “Windows: Improved an issue that could cause CompuTrainer devices to not appear in the Pairing screen after a recent Windows Update driver update.”
Release Notes
Zwift supplied the following additional release notes:
Fixed an issue that could cause the Goal Met notification banner to incorrectly appear in-game.
Fixed an issue that could cause the level-up visual effect to display the wrong level.
Fixed an issue that could cause level-up notifications to not appear in the Zwifters Nearby list when riding in Climb Portal.
Fixed an issue that could cause Apple Watch to appear as “UNKNOWN DEVICE” in the Pairing Screen.
Fixed an issue that could cause workout arches to render incorrectly in the Watopia volcano.
Fixed an issue that could cause minor visual discrepancies between the Race Score shown in the Zwift post-ride progress report vs. Zwift Companion. This only affected the display of Race Score – the underlying values were unaffected.
Zagreb Virtucup Brings Croatian Riders and Friends Together Indoors
Last week, the Zagreb Cycling Federation took an important step into the world of virtual cycling by launching Zagreb League 1, the first organized virtual cycling league of its kind in Croatia. Organizers tell me the idea behind the league is simple: to promote virtual cycling as an accessible and enjoyable form of training and racing – especially during the colder, rainy winter months when outdoor riding is limited.
The debut race delivered an impressive turnout, with 129 riders on the start line, including around 40 riders from Croatia. Feedback after the first race was overwhelmingly positive, and with five races still to come, the hope is that even more riders will join this week!
What makes it special?
There’s a lot about the Zagreb League’s setup that makes it stand out from the crowd:
Age-Based Results: Race categories are divided into five age-based groups, allowing riders to participate even if they do not yet have an established FTP on Zwift. This makes the league especially welcoming for new Zwifters.
Gender-Based Results: While race signups are age-based, the final race results on ZwiftPower and all bonus point allocations are additionally split by gender. This means that women and men each have their own full set of five age-category rankings, ensuring fair competition and equal recognition across the league.
Alternating Scratch + Points Progressive Races: The league includes 3 Scratch races and 3 Points races, with courses becoming progressively hillier as the series unfolds (see routes below).
Best of 5: Although the first race has already taken place, the overall league standings are calculated from the best five results out of six, so it’s not too late to join.
Neutralized Bikes: Equipment is fully neutralized, so beginners aren’t disadvantaged.
Steering and Braking Disabled: So no riders have a steering advantage over others.
Mass Starts: Races feature mass starts, and results do not affect the Zwift Racing Score, allowing riders to participate without pressure and focus on enjoyment rather than rankings alone.
Schedule and Routes
Zagreb League 1 consists of six races, held weekly on Thursdays at 18:20 UTC/13:20 ET/10:20 PT, running until the end of March.
February 26: Coast to Coast (26.8km, 163m) – Points Race
Powerups: Draft/Aero/Ghost
March 5: Turf N Surf (24.7km, 196m) – Scratch Race
ZWB Omnium Tuesdays Announced: 4 Unique Races, Combined
Tomorrow, ZWB Cycling is holding the second edition of their fresh Zwift race concept: the ZWB Omnium!
While the omnium concept isn’t entirely new to Zwift, it’s an uncommon competition format due to the heavy lifting organizers have to do in planning races and compiling results. The good folks at ZWB Cycling have certainly put in the effort, choosing thoughtful routes, setting up a sensible rules structure, and creating a website to share details and results.
What Makes It Special
Each week features a set of four unique back-to-back races combining into one intense omnium competition. Riders earn points based on their performance in each race, and the combined points total determines overall ranking. Plan on 90 minutes of combined speed, endurance, and strategy!
The 4 races are in the following formats:
Prologue: A short, individual TT. The race of truth!
Sprint Quali: No hiding! Fastest sprint wins.
Spicy Scratch: A climbing battle where the first across the line wins.
Crit Royale: Combines segment points and finish points for the final battle!
These are mass start races, although riders sign up based on Zwift Racing Score groupings. Riders are separated into ZwiftRacing.app vELO Score leagues (which roughly map to ZRS groupings) for the final results.
Schedule and Routes
Races happen every Tuesday through April 2026, starting at 19:45 CET/18:45 UTC/13:35 ET/10:45 PT. See upcoming events >
Courses change each week, with details and writeups available at zwbomnium.netlify.app. This week’s routes are Scotland-themed:
Racers: Iceni Women’s Spring Classics Series Begins March 3
The popular Iceni Women’s Series is back, celebrating Women’s History Month with a 5-week series inspired by the legendary WorldTour Spring Classics! Presented by The Warrior Games and The Femme Cycle Collab, each race mimics the demands of an iconic race, from relentless tempo to all-out attacks, delivering a true test of strength, strategy, and resilience.
Weekly races begin on March 3rd. Here are the details…
About the Name
The Iceni tribe was ‘peacefully annexed’ by the Roman Empire at some point before 47 AD, though it was allowed some autonomy. When the king died and Boudicca I became High Queen of Iceni, the Roman Empire saw her unfit to rule and invaded the region. Iceni led a revolt against the Roman Empire and regained its independence, along with the independence of several other tribes. This led to the subsequent formation of the Comhairle, an alliance of the British tribes. Iceni had a major say in Comhairle affairs and became an important center of trade, military, and leadership.
Schedule and Route Details
Races are held on Tuesdays, and there are two time slots to choose from:
Slot 1: 6pm UTC/1pm ET/10am PT
Slot 2: 12am UTC/7pm ET/4pm PT
* note that daylight savings time happens in the US on March 8, so these times will shift to 1 hour later starting with the March 10th race
The overall series GC ranking is based on your points total for the series across Challenges 1-5. In the event of a tie, the rider with the highest total QOM points will be declared the winner.
Sprint and QOM segments listed for each race award points to the first 6 riders across the line:
1st – 10 points
2nd – 8 points
3rd – 6 points
4th – 4 points
5th – 2 points
6th – 1 point
Riders also receive points based on their finishing position in their category for each race. The top five score 100, 95, 90, 86, 83, and every place after that drops by 1 point.
Each time slot will have its own league on ZwiftPower. If you’re going for the overall series competition, you’ll need to finish all five races in the same timeslot.
Team Competition
For Team GC, the top three riders from each team will combine their points to determine the overall team ranking.
Sign Up
Want to race the series? Start by signing up for the race events! Numbers attract numbers, so women are encouraged to sign up early.
We’ve got a nice blend of events chosen this weekend, headlined by Zwift Games (of course) but also including a memorial/charity ride, an epic Uber Pretzel event, a chase race for the ladies, and a banded ride on a brand-new route. Pick your party!
These are the most popular races happening on Zwift right now, so if you’re looking for some healthy competition, check ’em out! You’ll also get to experience new routes and earn some fun unlocks.
Join the BMTR and friends as they approach the one-year anniversary of teammate Michael Lander’s untimely passing at the age of 56 due to previously undiagnosed heart issues.
This BMTR Cares event is fundraising in partnership with Michael’s sister, Rebecca Lander, for Sports Cardiology Toronto, a cause that perfectly reflects Michael’s passion for ultra-endurance sport and helps protect other athletes and families from the same devastating loss.
The ride is on Watopia’s Accelerate to Elevate (43.5km, 1158m), and everyone will stop for a moment of silence just past the Alpe’s 7th bend, where Michael’s memorial is written on the tarmac. Rebecca (Bex) will be there as well.
Ladies, hop into this chase race and experience what makes this format special! Categories begin in staggered order, with slower groups starting first. The goal? Work together with your category, and if you get caught by a faster group from behind, try to hold on to the finish!
This ride has a lot to love. It’s banded, so riders of all abilities can stay together as long as they keep pedaling. It’s on the new Three Step Sisters route (38.1km, 587m), which launched to host the final stage of Zwift Games 2026.
Finish this ride to recon the Games’ Queen Stage, or to check this route off your list and earn the badge!
We choose each weekend’s Notable Events based on a variety of factors including:
Is the event unique/innovative in some way?
Are celebrities (pro riders, etc) attending/leading?
Are signup counts already high, meaning the event is extra-popular?
Does the ride include desirable unlocks or prizes?
Does the event appeal to ladies on Zwift? (We like to support this under-represented group!)
Is it for a good cause?
Is it just plain crazy (extra long races, world record attempts, etc)?
Is it a long-running, popular weekly event with a dedicated leader who deserves a shout out?
In the end, we want to call attention to events that are extra-special and therefore extra-appealing to Zwifters. If you think your event qualifies, comment below with a link/details and we may just include it in an upcoming post!
All About Zwift’s Fitness Trends Metrics: Training Score, Training Status, Stress Points, and More
Zwift’s Fitness Metrics, initially released in April of 2025, help to answer common questions from endurance athletes: “How am I doing? Can I train more? Should I train less? What’s my potential?”
But if you’re new to riding or running, these metrics may be a bit confusing. So we’re here to help!
If you aren’t sure how to use Zwift’s Fitness Metrics, or what they’re even telling you, read on…
Riders: It Starts with FTP
As a cyclist, if you want your Training Score to be accurate in Zwift, you must have your FTP (functional threshold power) value set accurately in your profile.
What is “FTP”? It is the wattage you can stay below and sustain for longer durations, while going above it causes fatigue to set in very quickly. Most riders, if they put in a steady but maximal effort on fresh legs, can hold their FTP for 40-60 minutes.
Your Training Score is directly based on the Stress Points accumulated with each ride, and Stress Points are calculated from your FTP (see below).
So if your FTP isn’t accurate, your Stress Points won’t be, either, which means your Training Score won’t be accurate.
FTP is also used to calculate power targets in ERG workouts – for example, a VO2 interval may have you ride at 110% of FTP for 4-minute intervals. So you’ll want an accurate FTP value if you’re doing structured workouts on Zwift as well.
Zwift will automatically estimate your FTP based on your power bests as you ride or race in the game. But if you want a more accurate FTP value, I recommend taking an FTP test.
Once your FTP is set accurately, the Stress Points (SP) calculated for each ride will be accurate. SP is just a Zwifty name for TSS, an industry-standard metric developed by TrainingPeaks that combines both time and intensity into one number indicating how much stress a particular workout puts on your body.
You don’t need to know how SP are calculated to use them, although this post has the formula if you’re curious. To give you some idea of typical SP ranges, an easy 1-hour recovery ride may be around 40-50 SP, while a 1-hour race will be closer to 90-100 SP, and a 3-hour endurance ride may be more like 150-180 SP.
If you’re syncing outdoor rides to Zwift, but don’t have a power meter on your outdoor bike, Zwift will do its best to estimate your SP for the ride, much like Strava estimates your power even on rides without power data. If you want your training metrics to be truly dialed in, though, maybe it’s time to get a power meter on your outdoor bike?
I recommend the Favero Assioma pedals. They’re the most respected in the industry, more affordable than most, and easy to install (unlike crank or spider-based power meters).
Zwift uses industry-standard algorithms to compute SP for runs:
If your run includes heart rate data, this is used to calculate the SP for that activity based on the hrTSS formula.
If an outdoor run lacks heart rate data, Zwift uses the RPE (Rate of Perceived Exertion) from that activity as synced from Garmin or Wahoo to estimate SP using the method shown here.
For Zwift activities without heart rate data, SP is calculated with a default RPE of 5 using the method shown here.
Seeing SP in Zwift
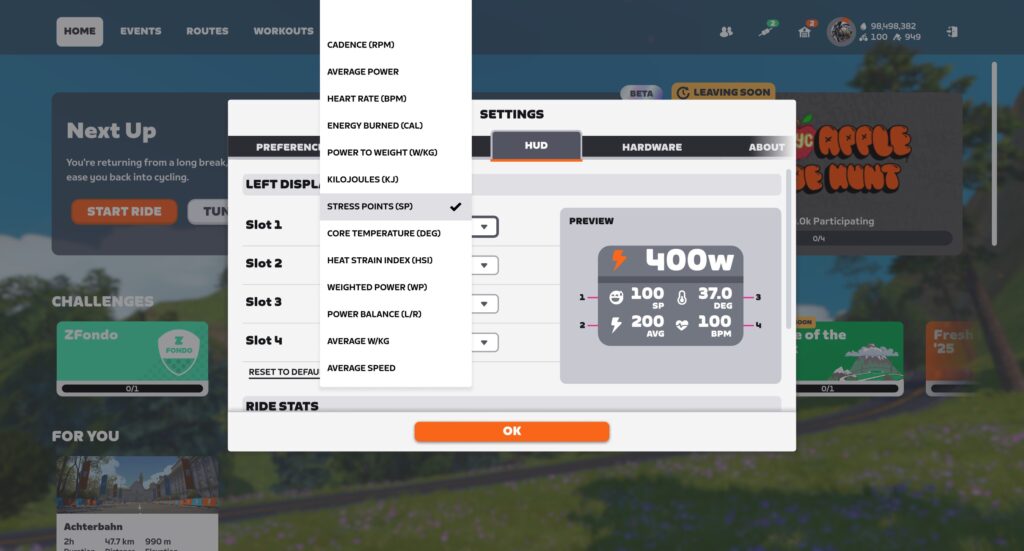
You can show SP in real-time in Zwift’s HUD by selecting it for one of the display metrics via Menu>Settings>HUD:
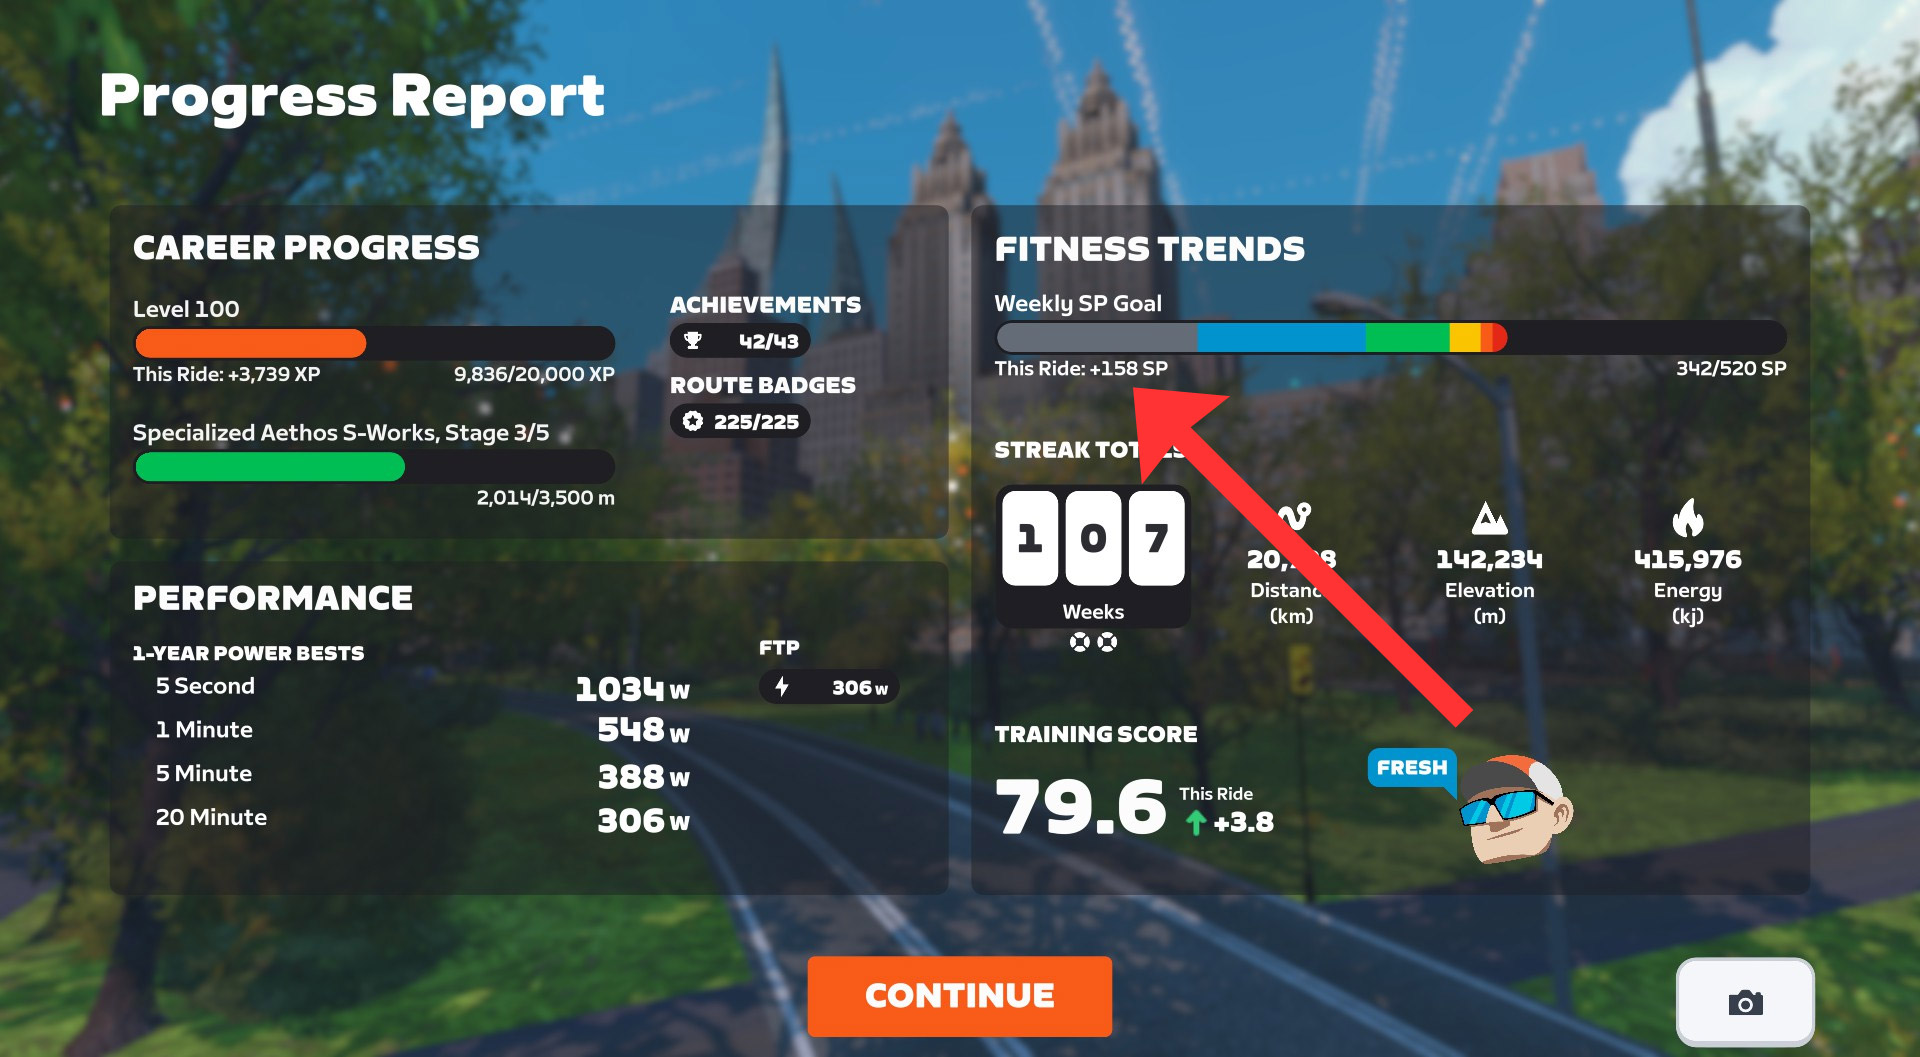
SP are also shown on the Ride/Run Report when completing an activity, and on the Progress Report screen if you’ve set a fitness goal based on SP:
Outdoor Activities
If you do any outdoor riding or running (and most of us do), you’ll want to get that data into Zwift’s system. Otherwise, your Fitness Metrics won’t be accurate, since they won’t include your outdoor efforts!
You’ll need to record your outdoor session on a device such as a bike computer (aka “head unit”), smart watch, or even your phone. I’m partial to Wahoo’s bike computers, but Zwift supports importing outdoor rides from Garmin, Wahoo, and Hammerhead accounts.
Your Training Score in Zwift is the 42-day exponentially weighted moving average of your training load. What does that mean in simple terms? It means your Training Score is an average of your daily SP, weighted so recent sessions affect the score more than older ones. Note that “Training Score” is more often called “Fitness” in other apps, or “Chronic Training Load/CTL” in TrainingPeaks.
This comment from ZI reader R. Chung (yes, thatChung) unpacks how Training Score is calculated: “The ‘42-day exponentially weighted moving average’ (and the 7-day version) don’t mean they’re an average over the previous 42 days. That’s a common misconception. It means the exponential decay rate is 1/42 days = 2.38% per day (and the 7-day decay rate is 1/7 = 14.28% per day). The 2.38% decay rate means about three-eighths of the TSS from a ride is still around after 42 days, not zero.”
You can see your current Training Score in the Companion app at the top-left of the Fitness Trends box:
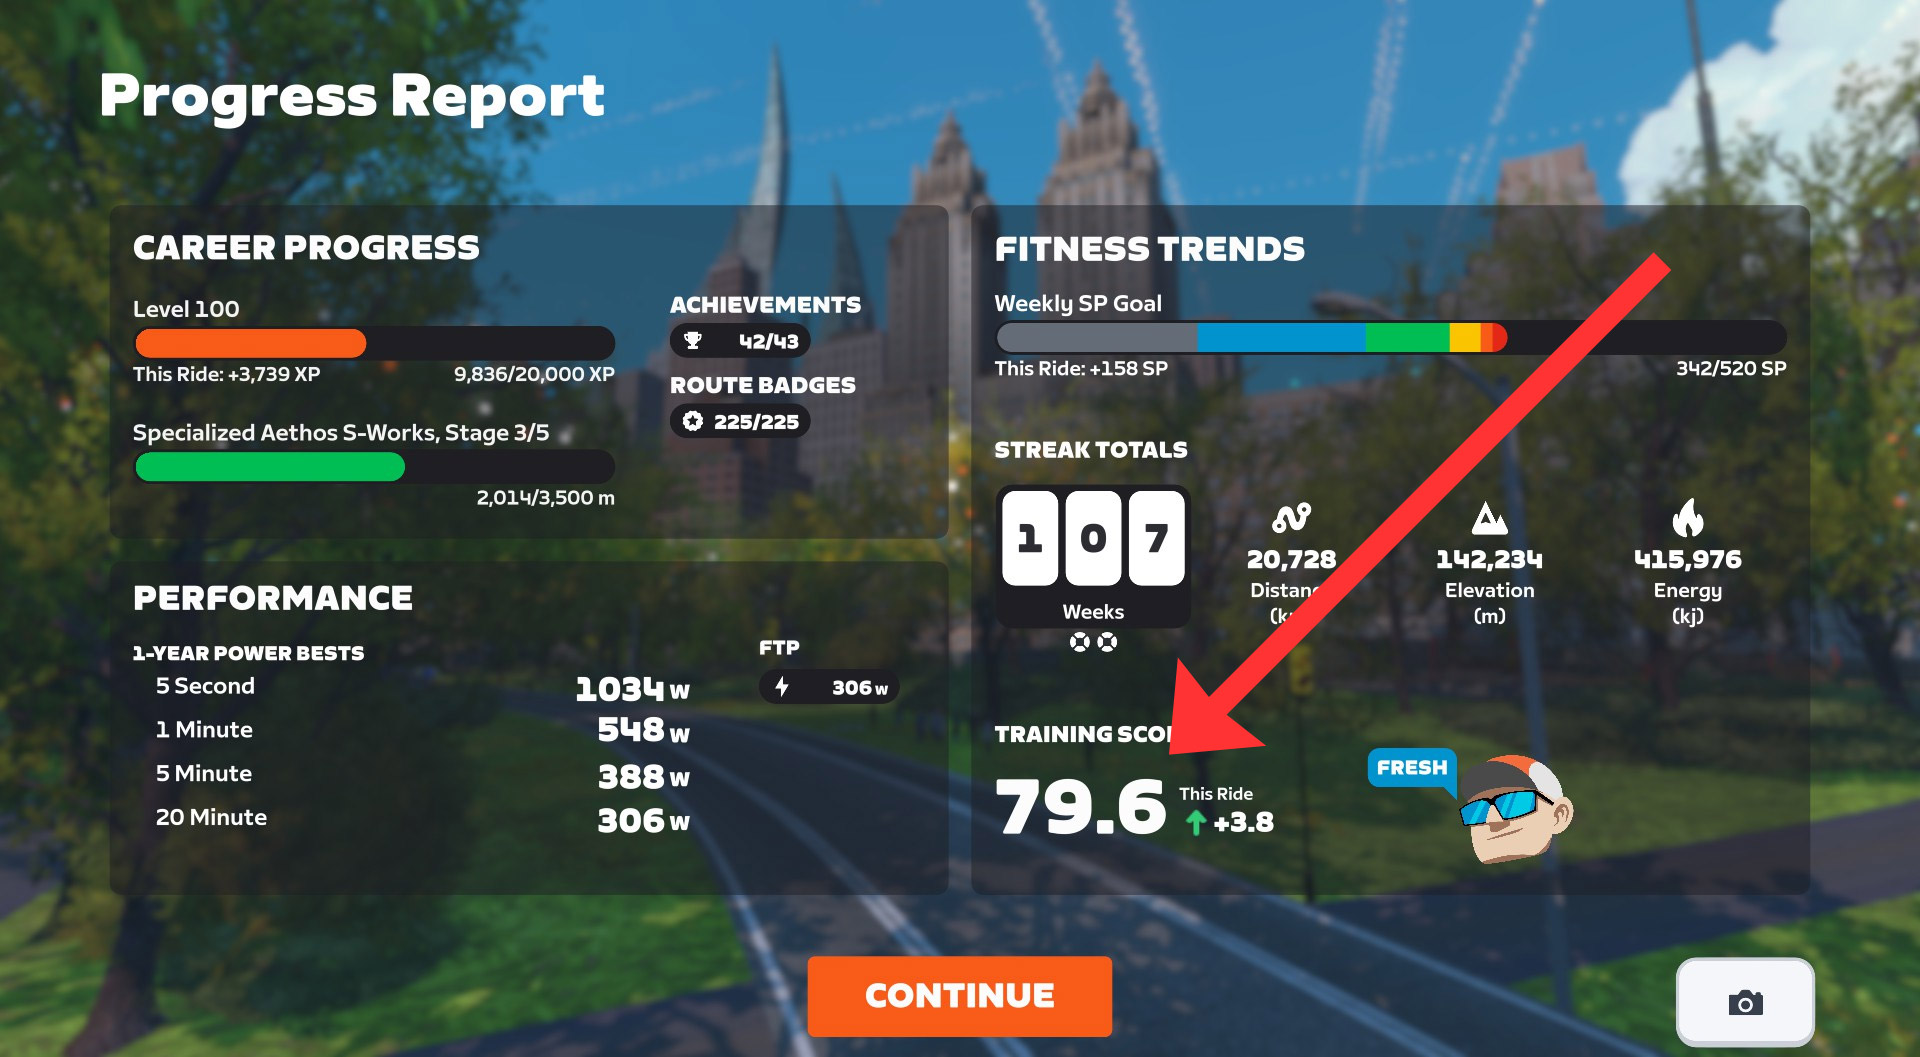
It is also shown on the Progress Report screen, along with a value showing how much your session changed the score:
Training Status
Your Training Status is also displayed in the Companion app and Progress Report. It will place you in one of the following categories:
Overreaching: avoid staying here long, or you may become over-trained
Productive: gaining fitness
Fresh: fit and ready to race
Detraining: losing fitness
Ready: new to training, not enough data to categorize you
Zwift Training Status is based on a metric that other apps call “Form” or “Freshness”. This is calculated as your current Training Score minus your current Fatigue. (Fatigue is calculated similarly to Training Score, except it’s only a 7-day exponentially weighted moving average of your training load instead of 42-day.)
Since Zwift likes to keep metrics simple, they don’t display this Form/Freshness value. Instead, they simply chart it in the Companion app under “Fitness Trends”, so you can see where you’re trending:
How To Use It
So that’s how all of Zwift’s Fitness Metrics work. But how do you actually use them?
In some ways, that’s a very individual question, and thus impossible for me to answer. A qualified coach could look at your data and give you some really helpful insights, though!
But there are some general principles, and some obvious use cases, which apply to just about everyone.
First: it’s worth mentioning that your Zwift Training Status is not an indicator of how well you may feel on a given day. If you’re anything like me, Zwift may often say you’re “fresh,” but your legs disagree! That’s OK. Training Status summarizes overall Training Stress Balance (TSB), giving a sort of zoomed-out view of your current freshness, which may not match how you feel on the day.
If your Training Status is “Overreaching”, you’ll want to ease up soon. The great Joe Friel says, “…if you spend much time here you will create great fatigue and are flirting with extreme overreaching that would likely become overtraining if continued for too long.” Typically, you’ll automatically ease up training at this phase, because the body simply can’t keep overreaching. But be careful if you find yourself here.
Zwift’s Fitness Metrics are just a Zwifty (that is, simpler and more colorful) version of the commonly-used Performance Management Chart seen in coaching plans on TrainingPeaks and other platforms. These charts show the detailed results of periodized training plans, where athletes typically go through sections of training in the “productive” zone, take a recovery week to enter the “fresh zone,” then start another block of training. Often, these training plans are structured with a target event in mind, and athletes will taper their training in the week or two leading up to it.
You may not have a coach or the expertise to structure a full training plan, but you can use Zwift’s Fitness Metrics to help determine an effective training load for your situation. The metrics won’t tell you which workout to do each day, but they’ll help you manage your overall training load. And that’s half of the battle! While it’s good to know which specific workouts will help you most, so much of endurance training is about building up a training load. Getting on the bike. Running the planned distance. Putting in the work. Consistency.
So put in the effort to get into the productive zone, then take a week off after 3-4 productive weeks. And if you get into overreaching, don’t panic. But also, don’t keep digging that hole deeper!
Those are just a few tips and thoughts, but training management is a huge topic with plenty of rabbit holes. So I’ll leave it here for now.
What’s Next?
More Activities from More Devices
Zwift’s Fitness Metrics do a great job of delivering a simple, easy-to-understand view of your fitness trends… if most or all of your training syncs into Zwift’s ecosystem. That means most or all of your training needs to be cycling and/or running, and it all has to be recorded on Garmin/Wahoo/Hammerhead so it syncs into Zwift.
If you are a Zwifter who does substantial training outside of cycling and running (triathletes, for example), or you record your runs on, say, an Apple or Coros watch, Fitness Trends won’t reflect your training accurately. Not yet.
So what many Zwifters want is for Zwift to expand its ecosystem so a broader list of activities (swimming, cross-country skiing, etc) can be pulled in, from a broader set of devices.
Something Bigger
Lastly, it’s worth mentioning that these metrics are just one part of the more robust training platform Zwift is building. You can see the pieces coming together: first, third-party workout syncing brought all the big training plan providers to the table. Then revamped automatic FTP detection made it easier to set your power zones. Next, Zwift added outdoor rides and began computing training metrics. Then run activities were added to the mix!
To what end? We don’t know for sure, but Zwift recently released Personalized Recommendations, and there’s much, much more that could be done in this space…
Questions or Comments?
Did this post help you better understand and utilize Zwift’s Fitness Metrics? Still got questions? Comments? Share below!
Heat Training with CORE on Zwift, Part 3: Tips, Gains, and My Personal Experience
Yesterday, I published a post covering the CORE sensor’s metrics, the science backing them up, and how Zwift and the CORE sensor and app work together. Read it here >
Today, I’ll be discussing my personal experience heat training with CORE in recent weeks. Also included: a pile of tips to help you optimize your heat training.
My Heat Training Experience
Cycling provides such an interesting “laboratory” for testing our bodies, doesn’t it? I’m continually fascinated by how different training methods and tools lead to different adaptations in our bodies. Sometimes I feel like I’m more of a lab rat than a human as I test all this stuff out. But it’s just too much fun!
Heat training is particularly compelling because it delivers proven results, and Zwift provides an ideal heat-training environment. It’s really interesting to watch (and feel) in real time as your body reacts to heat stress.
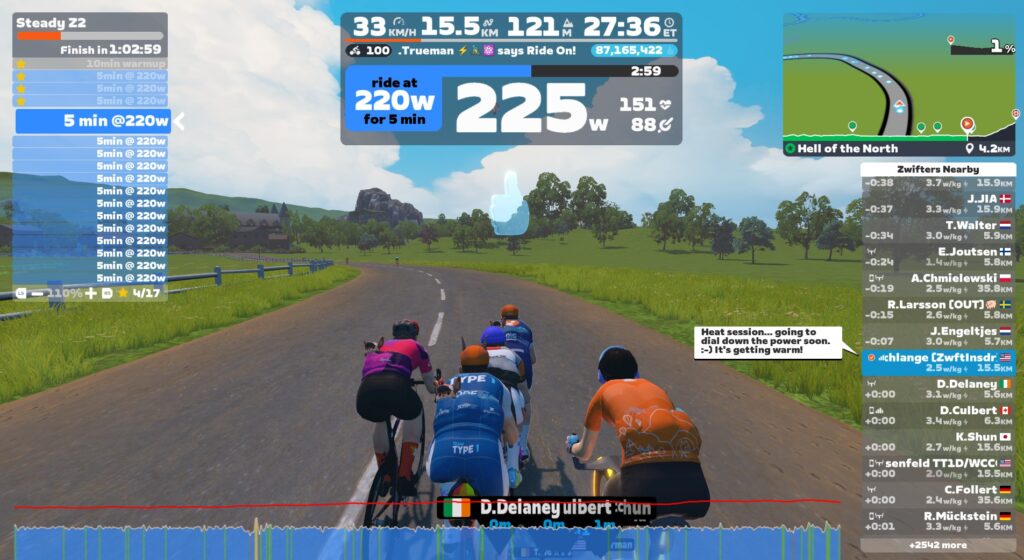
While I did a lot of heat sessions that were free rides or even Zwift group ride events, what I found I enjoyed the most was using ERG mode to precisely control my power output, clicking my Play controller buttons to adjust FTP bias to increase or decrease the power to keep my heart rate in its desired range.
I built a custom ERG workout that was basically 90 minutes of 5-minute zone 2 blocks. I would start with the FTP bias adjusted up to 110% or even 125%, then drop it to keep my heart rate below ~150 (mid zone 3 HR for me).
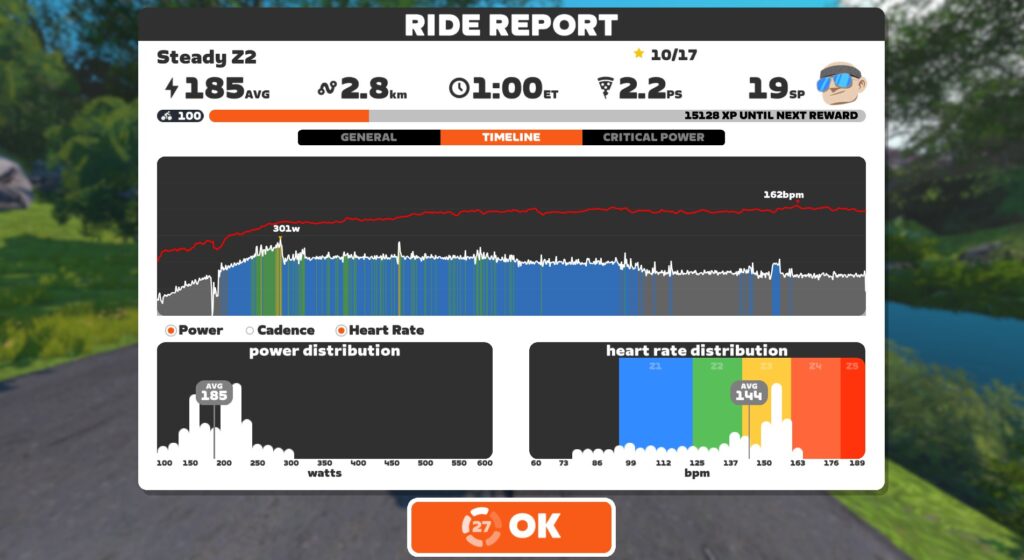
As the workout progressed, eventually my heart rate would get up over 150 and not want to come down, even at low power numbers. That’s when I knew it was about time to wrap it up. Those ERG sessions would end up looking like this:
Note how power decreases over time, while heart rate increases. This is what an increasing core temperature does to your performance, and why you should have good ventilation and a good fan running if you want to perform your best on race day!
My (Anecdotal) Evidence
I’m sure readers will want to know if heat training boosted my performance, and by exactly how much. Unfortunately, I’m going to disappoint you here, because I didn’t go about this in a structured/scientific way.
In hindsight, I should have measured various performance metrics (VO2max, FTP) and even sweat metrics (I have two different sweat sensors sitting here to review) prior to starting my hard heat training block. Then I could have repeated those tests afterward.
But I didn’t do that. In the swirl of testing various trainers, Zwift updates, three different bikes/power meters, enjoying the holidays, and deciding to jump into heat training, I missed that crucial setup step.
So all I can share with you is some anecdotal “evidence.” My feelings. Perceived exertion. Subjective event results. Here they are:
I definitely notice that I sweat earlier and more than I used to. This may seem counterintuitive (shouldn’t heat training help you sweat less?), but it’s the body doing a better job of keeping itself cool.
I sense a boost in VO2 power. Despite not training VO2 in a targeted way, I was able to go outside and do a 410W effort for 3 minutes, which is better than I’ve done in a few years. I also notice myself surviving those tough 3-6 minute climbs in Zwift races.
I feel like my aerobic engine has been boosted, allowing me to chug along for long periods of time between zone 2 and 3 power at a lower heart rate.
Heat Training Tips
There’s a lot of information in my heat training posts, but I think the most useful info is in this section. Here’s why: despite the promises of increased performance, I’ve historically struggled to fit heat training into my weekly schedule. Between ZRL races on Tuesdays, leading a 100km ride on Thursdays, and doing a long outdoor session on Saturdays, every time I decided to work on heat training I gave up because it was just too hard to dedicate enough training time to accumulate meaningful heat adaptation.
But then I booked a call with Brian Maiorano, Performance Coach at CORE. He gave me some tips to maximize my heat training sessions. I also saw that I had a 3-week block I could dedicate to heat training. Serendipity!
Here’s my distilled list of tips to help you train with heat successfully.
What To Wear
Unless you want to heat your Pain Cave to uncomfortable levels, you’ll need to wear warm clothing to get your core and skin temperatures high enough to accumulate a meaningful heat training load. Basically, what you’re looking for is clothing that keeps the air off your skin (which stops evaporative cooling) and keeps heat in.
Finding what works for you may take a bit of experimentation. We each have different clothes in our cycling wardrobes, unique bodies, and varying pain cave conditions.
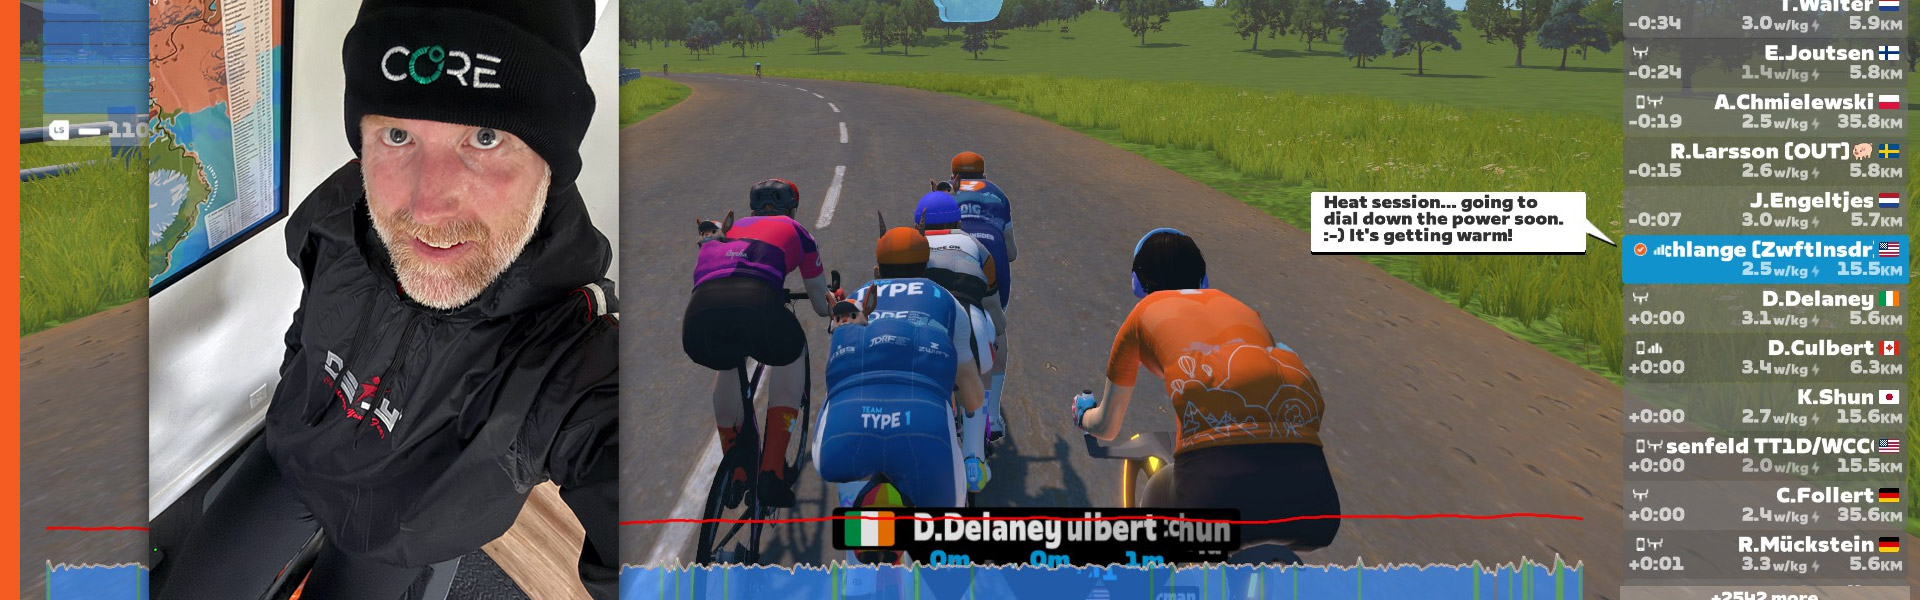
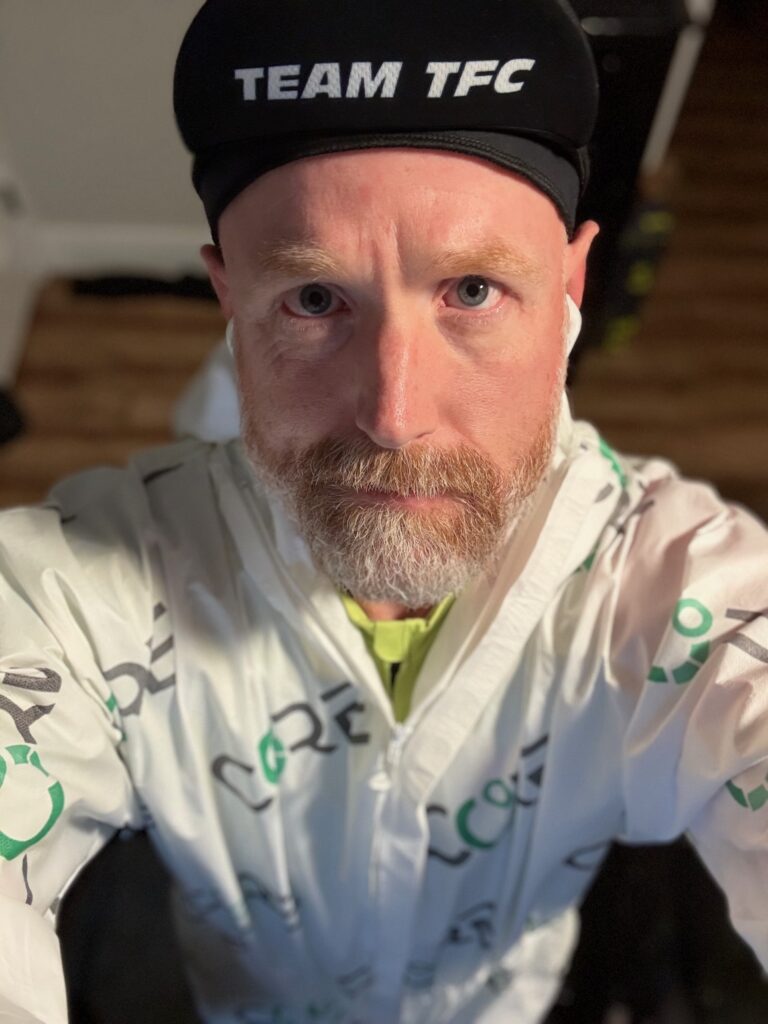
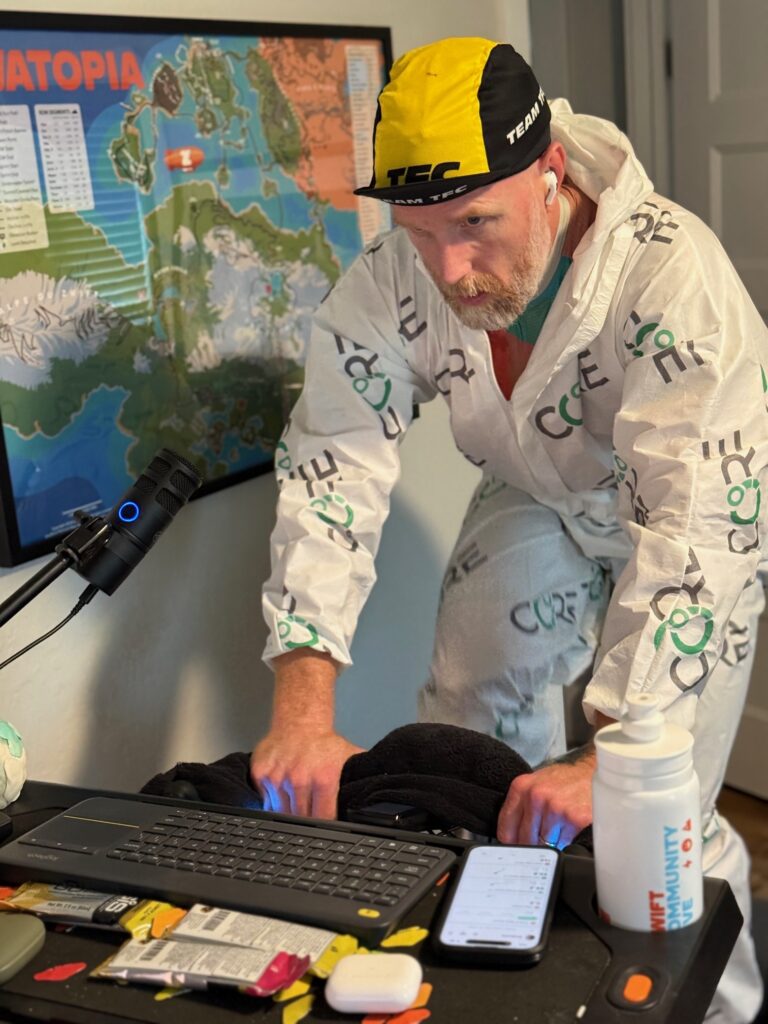
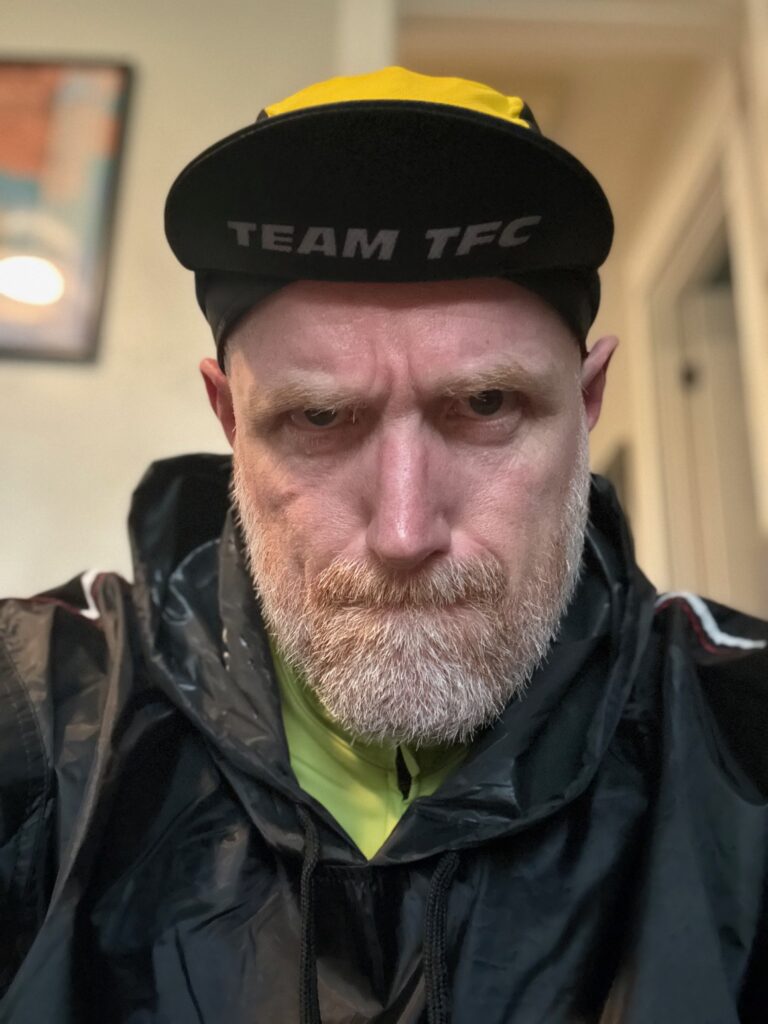
CORE sells a heat training suit, which I’m modeling above. This is what I wore for all my early heat sessions, and I also wore it when I started my big heat training block in December 2025. The suit is nice in that it’s a single article of clothing you can put on over your normal Zwifting kit, and it works, trapping heat and stopping evaporation. The downside of the suit, for me at least, is that it’s not terribly comfortable. The loose fabric can move around and bunch up, the hood can get pulled tight when you sit down after standing up, etc.
Eventually, I bought a cheap “sauna suit” on Amazon. Best $36 I’ve ever spent! The pants I didn’t need, but I wore thermal bibs I already owned, plus an old cycling jersey, plus the sauna suit jacket, a Halo headband, and a casquette to top it all off and keep the heat in. Viola! This was the winning combo. It felt fairly comfortable, while also keeping the heat in.
Shoe Drying
While we’re talking about clothes, let’s give a nod to our poor cycling shoes. Mine would be soaked through by the end of a heat session, a pool of sweat having dripped out the holes in the bottom of the shoes, and I could actually pour sweat out of the shoes when I took them off.
After each heat session I would be so sweaty, and my clothes so sweat-soaked, that I would just climb into the shower fully clothed. Shoes and all! I would let the water wash away much of the sweat, stripping off pieces of clothing and purposely rinsing then ringing them out and hanging them on the shower rack.
This removed most of the sweat from the clothes, so they didn’t sit around stinking all day. It also let me reuse my sauna jacket the next day without having to launder it, since it’s made of a material that doesn’t absorb sweat.
Three Sensor Notes
Here are three CORE sensor must-dos:
Don’t wear it backward: What kind of idiot would wear it backward? Me, it turns out. When I first started using the version 2 sensor, it seemed impossibly hard to get my numbers high enough to accumulate meaningful head adaptation. Turns out, the portion of the sensor I was wearing against my skin was supposed to be facing outward. The CORE logo should face out. The side with all the grey text – including the text that says “THIS SIDE ON SKIN” – that goes against your skin.
Enable Automatic Standby: This is enabled by default, but I had disabled it because the previous version of the app labeled it confusingly. Keep it enabled, as it greatly increases battery life!
Pair your HRM: Pair your heart rate monitor to your CORE sensor via the CORE app, then connect directly to the CORE sensor in Zwift. This will deliver the CORE metrics plus your heart rate data to Zwift, while allowing the CORE app to see your heart rate data, increasing the accuracy of your metrics.
Hydration
Heat training shouldn’t involve massive dehydration. You’ll sweat a lot, but you want to be replacing that sweat! Be sure to drink at least two bidons per hour of heat training, and add electrolytes to your water, since you’ll be losing a lot of them.
Weighing myself before and after sessions, I learned that I sweat around 5 bidons worth in 1 hour. Amazing! Of course, your sweat rate may be higher or lower. I recommend weighing yourself before and after a session or two to learn how much you need to drink.
I settled on filling two bidons per hour of riding, along with drinking a lot following each session.
While I tried various electrolyte powders, I used EC Sports’ Electralyte the most due to its good taste, lower cost, and high potassium content. (I tend to be rather potassium-deficient, especially when doing a lot of sweaty training.)
Rehydrating fully/quickly and managing electrolytes isn’t as crucial if you aren’t doing heat training on back-to-back days, but it’s absolutely vital if you’re doing a heavily concentrated heat block like I did. And even then, there were days when it felt like my body was just confused. “You’re sweating out so many electrolytes, and ingesting a lot as well!”
Sweat Wrangling
You may not sweat as much as me, but I promise, you will sweat a lot. You’ll want to have some sort of sweat wrangling scheme in place, because it will get everywhere.
Think of what you’d need to do in your pain cave to keep things clean and undamaged if you were going to empty 4-5 bidons worth of liquid above your bike, then do that. You can always change the setup later, but it’s better to avoid regrets.
What I found worked for me was a beach-sized towel on the floor below my bike (beginning in front of my handlebars and ending past the back of my pedal stroke). This towel would be soaked by the end of the session. I would also have four hand towels within reach. Two would be used to dab my face for sweat, and two would be used on my handlebars to catch sweat before it dripped onto my bars or stem. (I used four towels because I would swap to a dry towel about halfway through the session.)
Session Structure: Start Fast, End Slow
To accumulate maximum Heat Training Load per session, the trick is raising your core and skin temperatures quickly, then keeping them high as long as possible.
Raising them quickly means ramping up your power quickly. The more watts you’re putting out, the more heat your body is dumping into your core. Simple as that. So get on the bike, spin a bit to wake up the legs and heart as long as you need, then ramp up the power for the next 10-20 minutes. This will quickly get your temperatures up.
How high you spike your power in these early minutes is entirely up to you. You could go really high (think race pace), get up into sweet spot territory (~85-95% of FTP), or go lower, perhaps just high tempo. What you do may depend on what sort of effort you’re looking to do that day, because you could do some hard intervals early in your ride, before you get overheated.
Me, I found that during my hard heat training block, I couldn’t hold my power any higher than sweet spot for very long, even early in the workouts. So I would sit in that power window for 10-20 minutes, then settle into zone 2 power, then eventually drop below zone 2 as my core temp continued to rise along with my heart rate.
The big tip CORE’s Brian Maiorano shared with me that helped me get more heat stress is this: when you’re done with your session, don’t just strip everything off and hit the showers to cool down. Instead, sit down and sweat. I would climb off my bike, spread my driest towels on the floor, then sit there for another 15 minutes or so, checking notifications on my phone.
The beauty of this is, you don’t feel like you’re suffering anymore. You’re just sitting there, still sweating, while your temperature and heart rate slowly come down. While this is happening, the CORE app is still recording your metrics, and your elevated temperature and heart rate are still combining to count for more heat training stress, which boosts your session’s Heat Training Load. This added a point or two to each session’s HTL (which is scored from 0 to 10). That’s huge!
Maintaining Adaptations
One interesting thing about heat training is that you don’t need to time it to “peak” at a particular time. You can maintain your high heat adaptation if you prioritize it and work it into your training schedule.
CORE says, “Once you are adapted to the desired level, you can maintain those adaptations by performing 1–3 heat sessions per week. Failure to continue heat training will result in loss of adaptations. Adaptations decrease by about 2.5% for every day without heat training, disappearing entirely within 5–6 weeks.”
10/10 Heat Training Load
Once I learned I’d been wearing the v2 sensor backward, I was looking forward to doing a session with it worn correctly, to see if I could get my numbers up! Here’s that first session, in late November of 2025, when I jumped into an Off the MAAP event and rode in the CORE suit for 90 minutes, accumulating the maximum Heat Training Load possible in one session: a 10 out of 10!
Your Thoughts
Have you done any heat training? Have you used the CORE sensor to do so? Share your thoughts, questions, and experiences below!
If you have questions about heat training, I highly recommend checking out CORE’s support articles, which are impressively detailed and thorough. Visit help.corebodytemp.com.