Home Blog Page 421

Complete Master List of All Zwift Course Routes

389

Here is a complete list summarizing the details of all active Zwift routes.

Looking for Climb Portal routes? See our Master List of Climb Portal Routes >

How to use this list:

  • Click a route name to read more details, get maps, etc
  • Click a column title to sort
Route Map Length Elevation Lead-In Restriction
Time Trial Lap Bologna 8km (5.0 miles) 236m (774‘) 0km ( miles) Event only
Downtown Dolphin Crit City 2km (1.2 miles) 17m (56‘) 0km ( miles) Event Only
The Bell Lap Crit City 2km (1.2 miles) 17m (56‘) 0km ( miles) Event Only
Bon Voyage France 28.2km (17.5 miles) 132m (433‘) 3.2km (2.0 miles)
Casse-Pattes France 23km (14.3 miles) 155m (509‘) 0.9km (0.6 miles)
Croissant France 9.3km (5.8 miles) 49m (161‘) 3.2km (2.0 miles)
Douce France France 24km (14.9 miles) 133m (436‘) 0.2km (0.1 miles)
France Classic Fondo France 145.9km (90.7 miles) 1099m (3,606‘) 1km (0.6 miles) Event Only
Gentil 8 France 23.1km (14.4 miles) 243m (797‘) 0.6km (0.4 miles)
Hell of the North France 19.8km (12.3 miles) 241m (791‘) 0.3km (0.2 miles)
Knights of the Roundabout France 51.2km (31.8 miles) 336m (1,102‘) 3.2km (2.0 miles)
La Reine France 22.4km (13.9 miles) 1201m (3,940‘) 0.4km (0.2 miles)
Macaron France 2.6km (1.6 miles) 15m (49‘) 0km ( miles) Event Only
Peaky Pavé France 30.6km (19.0 miles) 369m (1,211‘) 0.2km (0.1 miles)
Petit Boucle France 60.8km (37.8 miles) 483m (1,585‘) 0.9km (0.6 miles)
Petite Douleur France 13.9km (8.6 miles) 194m (636‘) 10.9km (6.8 miles)
R.G.V. France 24km (14.9 miles) 133m (436‘) 0.9km (0.6 miles)
Rapide Run France 6km (3.7 miles) 38m (125‘) 0km ( miles) Run Only
Roule Ma Poule France 23km (14.3 miles) 155m (509‘) 3.1km (1.9 miles)
Sacre Bleu France 71.2km (44.2 miles) 396m (1,299‘) 0.5km (0.3 miles)
Three Musketeers France 35.2km (21.9 miles) 193m (633‘) 2.6km (1.6 miles)
Tire-Bouchon France 61km (37.9 miles) 483m (1,585‘) 3.1km (1.9 miles)
Ven-10 France 10km (6.2 miles) 781m (2,562‘) 1.4km (0.9 miles)
Ven-Top France 20.9km (13.0 miles) 1534m (5,033‘) 0.2km (0.1 miles)
Gravel Mountain Reverse Gravel Mountain 5.13km (3.2 miles) 51m (167‘) 0km ( miles) Event Only
Gravel Mountain Gravel Mountain 5.22km (3.2 miles) 51m (167‘) 0km ( miles) Event Only
Red Rock Loop Reverse Gravel Mountain 2.1km (1.3 miles) 21m (69‘) 0.1km (0.1 miles) Event Only
Red Rock Loop Gravel Mountain 2.1km (1.3 miles) 21m (69‘) 0.1km (0.1 miles) Event Only
2018 Worlds Short Lap Innsbruck 23.6km (14.7 miles) 494m (1,621‘) 0.2km (0.1 miles)
Achterbahn Innsbruck 47.4km (29.5 miles) 989m (3,245‘) 0.2km (0.1 miles)
Innsbruck KOM After Party Innsbruck 36.9km (22.9 miles) 656m (2,152‘) 0.2km (0.1 miles)
InnsbruckConti Innsbruck 12.5km (7.8 miles) 480m (1,575‘) 0.5km (0.3 miles) Event Only
Innsbruckring Innsbruck 8.8km (5.5 miles) 77m (253‘) 0.2km (0.1 miles)
Lutscher CCW Innsbruck 13.8km (8.6 miles) 402m (1,319‘) 8.8km (5.5 miles)
Lutscher Innsbruck 13.7km (8.5 miles) 402m (1,319‘) 10.9km (6.8 miles)
Greater London 8 London 23.8km (14.8 miles) 276m (906‘) 0.6km (0.4 miles)
Greater London Flat London 11.7km (7.3 miles) 36m (118‘) 5.6km (3.5 miles)
Greater London Loop Reverse London 21.0km (13.0 miles) 255m (837‘) 0km ( miles) Event Only
Greater London Loop London 21km (13.0 miles) 222m (728‘) 0.6km (0.4 miles)
Greatest London Flat London 23.6km (14.7 miles) 164m (538‘) 7.5km (4.7 miles)
Greatest London Loop Reverse London 25.6km (15.9 miles) 318m (1,043‘) 0.2km (0.1 miles) Event Only
Greatest London Loop London 25.6km (15.9 miles) 356m (1,168‘) 0.6km (0.4 miles)
Keith Hill After Party London 36.2km (22.5 miles) 431m (1,414‘) 0.6km (0.4 miles) Event Only
Leith Hill After Party London 41.5km (25.8 miles) 435m (1,427‘) 0.6km (0.4 miles) Event Only
London 8 Reverse London 20.3km (12.6 miles) 219m (719‘) 0.2km (0.1 miles) Event Only
London 8 London 20.3km (12.6 miles) 219m (719‘) 0.6km (0.4 miles)
London Calling London 31.2km (19.4 miles) 207m (679‘) 0.5km (0.3 miles)
London Classique Reverse London 5.4km (3.4 miles) 25m (82‘) 7.6km (4.7 miles) Event Only
London Classique London 5.5km (3.4 miles) 16m (52‘) 5.6km (3.5 miles)
London Flat London 11.99km (7.5 miles) 115m (377‘) 0.39km (0.2 miles)
London Loop Reverse London 14.8km (9.2 miles) 231m (758‘) 0.2km (0.1 miles) Event Only
London Loop London 14.9km (9.3 miles) 231m (758‘) 0.6km (0.4 miles)
London Uprising London 20.5km (12.7 miles) 356m (1,168‘) 0.3km (0.2 miles)
Surrey Hills London 39.2km (24.4 miles) 837m (2,746‘) 5.1km (3.2 miles)
The London Pretzel London 55.7km (34.6 miles) 571m (1,873‘) 0.6km (0.4 miles)
The PRL Full London 173km (107.5 miles) 2621m (8,599‘) 0.5km (0.3 miles)
The PRL Half London 69.1km (42.9 miles) 1009m (3,310‘) 0.6km (0.4 miles)
Triple Loops London 40.9km (25.4 miles) 565m (1,854‘) 0.5km (0.3 miles)
ZG25 Climb Champs London 4.7km (2.9 miles) 156m (512‘) 0.3km (0.2 miles) Event Only
Bridges and Boardwalks Makuri Islands 6.2km (3.9 miles) 60m (197‘) 1.9km (1.2 miles)
Castle Crit Makuri Islands 3.5km (2.2 miles) 44m (144‘) 1.5km (0.9 miles)
Castle to Castle Makuri Islands 22.4km (13.9 miles) 140m (459‘) 0.8km (0.5 miles)
Chain Chomper Makuri Islands 13.6km (8.5 miles) 184m (604‘) 2.3km (1.4 miles)
Chasing the Sun Makuri Islands 35.1km (21.8 miles) 316m (1,037‘) 0km ( miles)
Country to Coastal Makuri Islands 33.4km (20.8 miles) 275m (902‘) 0.1km (0.1 miles)
Countryside Tour Makuri Islands 16km (9.9 miles) 185m (607‘) 0.2km (0.1 miles)
Electric Break Makuri Islands 17.8km (11.1 miles) 190m (623‘) 1.8km (1.1 miles)
Electric Loop Makuri Islands 8.9km (5.5 miles) 43m (141‘) 0km ( miles)
Farmland Loop Makuri Islands 7.9km (4.9 miles) 58m (190‘) 0.2km (0.1 miles)
Fine and Sandy Makuri Islands 10.6km (6.6 miles) 77m (253‘) 0.1km (0.1 miles)
Flatland Loop Makuri Islands 12.9km (8.0 miles) 96m (315‘) 0.2km (0.1 miles)
Island Hopper Makuri Islands 18km (11.2 miles) 129m (423‘) 0.1km (0.1 miles)
Island Outskirts Makuri Islands 11.4km (7.1 miles) 90m (295‘) 0.1km (0.1 miles)
Kappa Quest Reverse Makuri Islands 9km (5.6 miles) 139m (456‘) 5.1km (3.2 miles)
Kappa Quest Makuri Islands 9.1km (5.7 miles) 140m (459‘) 3.8km (2.4 miles)
Kaze Kicker Makuri Islands 16.9km (10.5 miles) 134m (440‘) 0.4km (0.2 miles)
Makuri 40 Makuri Islands 40.2km (25.0 miles) 308m (1,010‘) 0.1km (0.1 miles)
Makuri Madness Makuri Islands 15.9km (9.9 miles) 85m (279‘) 0.1km (0.1 miles)
Makuri Pretzel Makuri Islands 77.6km (48.2 miles) 616m (2,021‘) 1.1km (0.7 miles)
Mech Isle Loop Makuri Islands 4km (2.5 miles) 39m (128‘) 0.1km (0.1 miles)
Neokyo All-Nighter Makuri Islands 24.3km (15.1 miles) 168m (551‘) 0.2km (0.1 miles)
Neokyo Crit Course Makuri Islands 3.9km (2.4 miles) 19m (62‘) 0.7km (0.4 miles) Event Only
Neon After Party Makuri Islands 16.15km (10.0 miles) 141m (463‘) 1.15km (0.7 miles)
Neon Flats Makuri Islands 14.7km (9.1 miles) 73m (240‘) 0.2km (0.1 miles)
Neon Shore Loop Makuri Islands 32.9km (20.4 miles) 215m (705‘) 1.1km (0.7 miles) Event Only
Railways and Rooftops Makuri Islands 6.2km (3.9 miles) 71m (233‘) 2.1km (1.3 miles)
Red Zone Repeats Makuri Islands 19.4km (12.1 miles) 87m (285‘) 0.2km (0.1 miles)
Rooftop Rendezvous Makuri Islands 3.7km (2.3 miles) 56m (184‘) 2.9km (1.8 miles)
Sea to Tree Makuri Islands 3.2km (2.0 miles) 106m (348‘) 0.6km (0.4 miles)
Shisa Shakedown Makuri Islands 49.3km (30.6 miles) 495m (1,624‘) 4km (2.5 miles)
Sleepless City Makuri Islands 9.6km (6.0 miles) 43m (141‘) 0km ( miles)
Spirit Forest Makuri Islands 8.4km (5.2 miles) 135m (443‘) 4.6km (2.9 miles)
Sprinter's Playground Makuri Islands 12.4km (7.7 miles) 68m (223‘) 0.2km (0.1 miles)
Suki's Playground Makuri Islands 18.3km (11.4 miles) 150m (492‘) 0.2km (0.1 miles)
Temples and Towers Makuri Islands 32.6km (20.3 miles) 319m (1,047‘) 0.7km (0.4 miles)
Three Village Loop Makuri Islands 10.6km (6.6 miles) 93m (305‘) 2.3km (1.4 miles)
Tropic Rush Makuri Islands 41.2km (25.6 miles) 328m (1,076‘) 1.6km (1.0 miles)
Turf N Surf Makuri Islands 24.6km (15.3 miles) 196m (643‘) 0.1km (0.1 miles)
Twilight Crit Makuri Islands 3.9km (2.4 miles) 20m (66‘) 1.8km (1.1 miles) Event Only
Twilight Harbor Makuri Islands 6.9km (4.3 miles) 33m (108‘) 0.2km (0.1 miles)
Two Village Loop Makuri Islands 12.8km (8.0 miles) 88m (289‘) 0.2km (0.1 miles)
Valley to Mountaintop Makuri Islands 5km (3.1 miles) 129m (423‘) 0.1km (0.1 miles)
Wandering Flats Makuri Islands 25.1km (15.6 miles) 146m (479‘) 0.1km (0.1 miles)
WhatYumeziWe'reLost? Makuri Islands 17.4km (10.8 miles) 280m (919‘) 0.1km (0.1 miles) Event Only
Yoru Run Makuri Islands 6.9km (4.3 miles) 32m (105‘) 1.1km (0.7 miles) Run Only
Yumezi Grit Makuri Islands 7.5km (4.7 miles) 78m (256‘) 4.1km (2.5 miles)
2022 Cycling Esports World Championships Route New York 54.7km (34.0 miles) 943m (3,094‘) 0.2km (0.1 miles) Event Only
Astoria Line 8 New York 11.5km (7.1 miles) 140m (459‘) 0km ( miles)
Avon Flyer New York 3.3km (2.1 miles) 25m (82‘) 1.8km (1.1 miles)
Couch to Sky K New York 6.7km (4.2 miles) 0.1km (0.1 miles) Run Only
Double Parked New York 42.2km (26.2 miles) 330m (1,083‘) 0.1km (0.1 miles)
Double Span Spin New York 7km (4.3 miles) 80m (262‘) 5.6km (3.5 miles)
Empire Elevation New York 24.2km (15.0 miles) 261m (856‘) 1.8km (1.1 miles)
Everything Bagel New York 34.8km (21.6 miles) 525m (1,722‘) 0.1km (0.1 miles)
Flat Irons New York 14.8km (9.2 miles) 0.8km (0.5 miles) Run Only
Fuhgeddaboudit New York 79km (49.1 miles) 838m (2,749‘) 0km ( miles)
Gotham Grind Reverse New York 9.3km (5.8 miles) 96m (315‘) 0km ( miles) Event Only
Gotham Grind New York 9.3km (5.8 miles) 96m (315‘) 0.1km (0.1 miles)
Grand Central Circuit Reverse New York 6.8km (4.2 miles) 144m (472‘) 2.4km (1.5 miles) Event Only
Grand Central Circuit New York 6.8km (4.2 miles) 144m (472‘) 1.5km (0.9 miles)
Green to Screen New York 28.4km (17.6 miles) 207m (679‘) 0.1km (0.1 miles)
Hudson Hustle New York 20.3km (12.6 miles) 216m (709‘) 0.1km (0.1 miles)
Hudson Roll New York 9km (5.6 miles) 0.2km (0.1 miles) Run Only
Issendorf Express New York 7.2km (4.5 miles) 53m (174‘) 0.1km (0.1 miles)
Knickerbocker Reverse New York 22.5km (14.0 miles) 364m (1,194‘) 0.1km (0.1 miles)
Knickerbocker New York 22.5km (14.0 miles) 364m (1,194‘) 0km ( miles)
Lady Liberty New York 12.4km (7.7 miles) 206m (676‘) 0.1km (0.1 miles)
LaGuardia After Party New York 20.8km (12.9 miles) 326m (1,070‘) 0km ( miles)
LaGuardia Loop Reverse New York 2.8km (1.7 miles) 27m (89‘) 2.4km (1.5 miles) Event Only
LaGuardia Loop New York 2.8km (1.7 miles) 27m (89‘) 1.5km (0.9 miles) Event Only
Mighty Metropolitan New York 20.1km (12.5 miles) 316m (1,037‘) 0km ( miles)
No Sleep Till Brooklyn New York 31.8km (19.8 miles) 247m (810‘) 0.2km (0.1 miles)
NYC KOM After Party New York 37km (23.0 miles) 480m (1,575‘) 0km ( miles)
Park Perimeter Loop New York 9.8km (6.1 miles) 126m (413‘) 0km ( miles)
Park Perimeter Reverse New York 9.8km (6.1 miles) 126m (413‘) 0.2km (0.1 miles) Event Only
Park to Peak New York 4.6km (2.9 miles) 0.1km (0.1 miles) Run Only
Prospect Park Loop New York 5.4km (3.4 miles) 37m (121‘) 0.1km (0.1 miles)
Rising Empire New York 20.7km (12.9 miles) 375m (1,230‘) 0km ( miles)
Shuman Trail Loop Reverse New York 2.5km (1.6 miles) 0.1km (0.1 miles) Run Only, Event Only
Shuman Trail Loop New York 2.5km (1.6 miles) 0.3km (0.2 miles) Run Only
Spinfinity Ultra New York 35km (21.7 miles) 291m (955‘) 0.8km (0.5 miles)
Spinfinity New York 19.3km (12.0 miles) 155m (509‘) 0.8km (0.5 miles)
Stay Puft Pursuit New York 31.2km (19.4 miles) 416m (1,365‘) 0.8km (0.5 miles)
The 6 Train Reverse New York 6.5km (4.0 miles) 70m (230‘) 0km ( miles) Event Only
The 6 Train New York 6.5km (4.0 miles) 70m (230‘) 0.1km (0.1 miles)
The Double Borough New York 17.8km (11.1 miles) 147m (482‘) 0.1km (0.1 miles)
The Greenway New York 36.2km (22.5 miles) 290m (951‘) 0.6km (0.4 miles)
The Highline Reverse New York 10.5km (6.5 miles) 179m (587‘) 10.5km (6.5 miles) Event Only
The Highline New York 10.5km (6.5 miles) 179m (587‘) 9.9km (6.2 miles)
Times Square Circuit New York 3.5km (2.2 miles) 20m (66‘) 0.8km (0.5 miles)
Toefield Tornado New York 10.2km (6.3 miles) 53m (174‘) 0.1km (0.1 miles)
Watts the Limit New York 29.5km (18.3 miles) 200m (656‘) 1.5km (0.9 miles)
Champs-Élysées Paris 6.6km (4.1 miles) 39m (128‘) 3.1km (1.9 miles)
Cirque du Suffer Paris 20.9km (13.0 miles) 29m (95‘) 0km ( miles)
Crêpe Escape Paris 16.4km (10.2 miles) 117m (384‘) 3.1km (1.9 miles) Event Only
Double Espresso Paris 30.4km (18.9 miles) 198m (650‘) 3.1km (1.9 miles) Event Only
Heart of Montmartre Paris 74.5km (46.3 miles) 500m (1,640‘) 3.1km (1.9 miles)
La Boucle Paris 16km (9.9 miles) 118m (387‘) 3.1km (1.9 miles) Event Only
Loop de loop de loop Paris 7.2km (4.5 miles) 36m (118‘) 3.1km (1.9 miles)
Lutece Express Paris 6.6km (4.1 miles) 39m (128‘) 3.6km (2.2 miles)
Montmartre Mixer Paris 25.1km (15.6 miles) 190m (623‘) 2.4km (1.5 miles)
Paris Pacer Paris 11km (6.8 miles) 79m (259‘) 1km (0.6 miles) Run Only
Paris Toujours Paris 69.2km (43.0 miles) 448m (1,470‘) 3.1km (1.9 miles)
Rues in Rythme Paris 5km (3.1 miles) 34m (112‘) 0.3km (0.2 miles) Run Only
2015 Worlds Course Richmond 16.3km (10.1 miles) 127m (417‘) 0.2km (0.1 miles)
Cobbled Climbs Reverse Richmond 9.2km (5.7 miles) 116m (381‘) 0km ( miles) Event Only
Cobbled Climbs Richmond 9.2km (5.7 miles) 117m (384‘) 0.2km (0.1 miles)
Cobbled Crown Richmond 24km (14.9 miles) 288m (945‘) 0.3km (0.2 miles)
Libby Hill After Party Richmond 33km (20.5 miles) 102m (335‘) 0.2km (0.1 miles)
Richmond 2015 Worlds Reverse Richmond 16.3km (10.1 miles) 127m (417‘) 0km ( miles)
Richmond Loop Around Richmond 42.2km (26.2 miles) 555m (1,821‘) 0.3km (0.2 miles)
Richmond Rollercoaster Richmond 5km (3.1 miles) 19m (62‘) 12km (7.5 miles)
The Fan Flats Richmond 5.1km (3.2 miles) 12m (39‘) 4.2km (2.6 miles)
BRAEk-fast Crits and Grits Scotland 20.8km (12.9 miles) 211m (692‘) 1.3km (0.8 miles)
City and the Sgurr Scotland 5.9km (3.7 miles) 103m (338‘) 2.7km (1.7 miles)
Dùn Dash Scotland 12.4km (7.7 miles) 139m (456‘) 0km ( miles)
Glasgow Crit Circuit Scotland 3km (1.9 miles) 34m (112‘) 0.2km (0.1 miles)
Glasgow Crit Six Scotland 18.1km (11.2 miles) 199m (653‘) 0.2km (0.1 miles) Event Only
Glasgow Reverse Scotland 3km (1.9 miles) 34m (112‘) 1.1km (0.7 miles) Event Only
Highland Run Scotland 5.7km (3.5 miles) 52m (171‘) 1.1km (0.7 miles) Run Only
Loch Loop Scotland 8km (5.0 miles) 71m (233‘) 0km ( miles)
Outer Scotland Scotland 11.1km (6.9 miles) 104m (341‘) 0.2km (0.1 miles)
Rolling Highlands Scotland 9km (5.6 miles) 77m (253‘) 5.1km (3.2 miles)
Scotland After Party Scotland 13.6km (8.5 miles) 190m (623‘) 1.1km (0.7 miles)
Scotland Smash Scotland 17.8km (11.1 miles) 167m (548‘) 0.2km (0.1 miles)
The Epiloch Scotland 8.1km (5.0 miles) 71m (233‘) 2.8km (1.7 miles)
The Muckle Yin Scotland 23.4km (14.5 miles) 282m (925‘) 0.2km (0.1 miles)
11.1 Ocean Blvd Watopia 11.15km (6.9 miles) 0.5km (0.3 miles) Run Only
5K Loop Watopia 5km (3.1 miles) 0.3km (0.2 miles) Run Only
Accelerate to Elevate Watopia 41km (25.5 miles) 1153m (3,783‘) 2.3km (1.4 miles) Level 10+
Bambino Fondo Watopia 52.1km (32.4 miles) 581m (1,906‘) 0.5km (0.3 miles) Event Only
Beach Island Loop Watopia 13.1km (8.1 miles) 44m (144‘) 0.2km (0.1 miles)
Big Flat 8 Watopia 29.2km (18.1 miles) 103m (338‘) 2.3km (1.4 miles)
Big Foot Hills Watopia 67.5km (41.9 miles) 708m (2,323‘) 2.3km (1.4 miles)
Big Loop Reverse Watopia 42.5km (26.4 miles) 663m (2,175‘) 0.2km (0.1 miles) Event Only
Big Loop Watopia 42.1km (26.2 miles) 661m (2,169‘) 0.5km (0.3 miles) Level 5+
Bigger Loop Watopia 52.7km (32.7 miles) 691m (2,267‘) 0.5km (0.3 miles) Level 5+
Canopies and Coastlines Watopia 22.6km (14.0 miles) 124m (407‘) 5.1km (3.2 miles) Level 10+
Chili Pepper Reverse Watopia 7.3km (4.5 miles) 46m (151‘) 0.2km (0.1 miles) Run Only, Event Only
Chili Pepper Watopia 7.95km (4.9 miles) 0.3km (0.2 miles) Run Only
Climb Control Watopia 23.7km (14.7 miles) 191m (627‘) 0.3km (0.2 miles)
Climber's Gambit Watopia 27.7km (17.2 miles) 670m (2,198‘) 0.2km (0.1 miles)
Coast Crusher Watopia 34.7km (21.6 miles) 174m (571‘) 8.1km (5.0 miles) Level 10+
Coast to Coast Watopia 24.1km (15.0 miles) 154m (505‘) 2.6km (1.6 miles)
Coastal Crown Loop Watopia 15km (9.3 miles) 185m (607‘) 8.6km (5.3 miles) Level 10+
Danger Noodle Watopia 32.1km (19.9 miles) 413m (1,355‘) 0.2km (0.1 miles)
Deca Dash Watopia 48.2km (30.0 miles) 484m (1,588‘) 4km (2.5 miles)
Downtown Eruption Watopia 19.4km (12.1 miles) 275m (902‘) 0.5km (0.3 miles)
Downtown Titans Watopia 24.6km (15.3 miles) 292m (958‘) 0km ( miles)
Dust In the Wind Watopia 52.1km (32.4 miles) 582m (1,909‘) 0.3km (0.2 miles) Level 6+
Eastern Eight Watopia 51.7km (32.1 miles) 406m (1,332‘) 2.3km (1.4 miles)
Elevation Evaluation Watopia 24.6km (15.3 miles) 396m (1,299‘) 3.1km (1.9 miles)
Epic Run Watopia 6.2km (3.9 miles) 296m (971‘) 0km ( miles) Run Only
Figure 8 Reverse Watopia 29.7km (18.5 miles) 254m (833‘) 0.2km (0.1 miles)
Figure 8 Watopia 29.7km (18.5 miles) 254m (833‘) 0km ( miles)
Flat Out Fast Watopia 21.4km (13.3 miles) 46m (151‘) 0.9km (0.6 miles)
Flat Route Reverse Watopia 10.2km (6.3 miles) 61m (200‘) 0.2km (0.1 miles) Event Only
Flat Route Watopia 10.2km (6.3 miles) 61m (200‘) 0.1km (0.1 miles)
Four Horsemen Watopia 88.7km (55.1 miles) 2113m (6,932‘) 0.5km (0.3 miles) Level 6+
Glyph Heights Watopia 25.3km (15.7 miles) 537m (1,762‘) 8.6km (5.3 miles) Level 10+
Going Coastal Watopia 16.5km (10.3 miles) 63m (207‘) 2.3km (1.4 miles) Level 10+
Gran Fondo Watopia 97.3km (60.5 miles) 1196m (3,924‘) 0.5km (0.3 miles) Event Only
Handful of Gravel Watopia 6.1km (3.8 miles) 75m (246‘) 4.1km (2.5 miles) Event Only
Hilltop Hustle Watopia 13.6km (8.5 miles) 336m (1,102‘) 2.7km (1.7 miles)
Hilly Route Reverse Watopia 9.3km (5.8 miles) 109m (358‘) 0.2km (0.1 miles) Event Only
Hilly Route Watopia 9.3km (5.8 miles) 109m (358‘) 0km ( miles)
Hot Laps Watopia 23.3km (14.5 miles) 149m (489‘) 0.2km (0.1 miles) Event Only
Italian Villas Circuit Watopia 1.92km (1.2 miles) 11m (36‘) 0.8km (0.5 miles) Run Only, Event Only
Itza Climb Finish Watopia 29.1km (18.1 miles) 291m (955‘) 0.9km (0.6 miles)
Itza Party Watopia 45.7km (28.4 miles) 505m (1,657‘) 0.5km (0.3 miles)
Jarvis Seaside Sprint Watopia 12.5km (7.8 miles) 95m (312‘) 2.8km (1.7 miles)
Jon's Route Watopia 12.53km (7.8 miles) 0.3km (0.2 miles) Run Only
Jungle Circuit Reverse Watopia 7.9km (4.9 miles) 83m (272‘) 6.3km (3.9 miles) Event Only
Jungle Circuit Watopia 7.9km (4.9 miles) 82m (269‘) 5.7km (3.5 miles) Level 5+
Jurassic Coast Watopia 19.5km (12.1 miles) 212m (696‘) 0.2km (0.1 miles)
Legends and Lava Watopia 24.6km (15.3 miles) 352m (1,155‘) 0km ( miles)
Loop de Loop Watopia 12.4km (7.7 miles) 144m (472‘) 0.2km (0.1 miles)
Loopin Lava Watopia 14.3km (8.9 miles) 196m (643‘) 4.1km (2.5 miles)
May Field Watopia 0.4km (0.2 miles) 0km ( miles) Run Only
Mayan 8 Watopia 23.1km (14.4 miles) 241m (791‘) 3.1km (1.9 miles)
Mayan Bridge Loop Watopia 5.27km (3.3 miles) 47m (154‘) 5.7km (3.5 miles) Run Only
Mayan Mash Watopia 34.6km (21.5 miles) 756m (2,480‘) 3.1km (1.9 miles) Level 10+
Mayan San Remo Watopia 21km (13.0 miles) 219m (719‘) 0.3km (0.2 miles)
Medio Fondo Watopia 72.9km (45.3 miles) 1010m (3,314‘) 0.5km (0.3 miles) Event Only
Mountain 8 Watopia 32.1km (19.9 miles) 691m (2,267‘) 0km ( miles)
Mountain Mash Watopia 5.7km (3.5 miles) 335m (1,099‘) 0.2km (0.1 miles)
Mountain Route Watopia 29.6km (18.4 miles) 682m (2,238‘) 0km ( miles)
Muir and the Mountain Watopia 33.9km (21.1 miles) 793m (2,602‘) 5.1km (3.2 miles)
Navig8 Watopia 63.9km (39.7 miles) 417m (1,368‘) 2.3km (1.4 miles)
Ocean Lava Cliffside Loop Watopia 19.1km (11.9 miles) 157m (515‘) 0.2km (0.1 miles)
Oh Hill No Watopia 7.9km (4.9 miles) 306m (1,004‘) 0.2km (0.1 miles) Level 10+
Out and Back Again Watopia 40.3km (25.0 miles) 329m (1,079‘) 2.3km (1.4 miles)
Peak Performance Watopia 45.7km (28.4 miles) 726m (2,382‘) 0.9km (0.6 miles) Level 10+
Power Punches Watopia 23.5km (14.6 miles) 205m (673‘) 0.2km (0.1 miles)
Power to the Portal Watopia 17.6km (10.9 miles) 99m (325‘) 0.9km (0.6 miles) Event Only
Power to the Tower Watopia 43.8km (27.2 miles) 1494m (4,902‘) 0.9km (0.6 miles)
Quatch Quest Watopia 46.7km (29.0 miles) 1710m (5,610‘) 0km ( miles) Level 6+
Radio Rendezvous Watopia 20.4km (12.7 miles) 728m (2,388‘) 3.1km (1.9 miles)
Repack Rush Watopia 2.76km (1.7 miles) 27m (89‘) 0km ( miles) Steering required
Road to Ruins Reverse Watopia 29.6km (18.4 miles) 276m (906‘) 0.2km (0.1 miles) Event Only
Road to Ruins Watopia 29.6km (18.4 miles) 276m (906‘) 0km ( miles) Level 5+
Road to Sky Watopia 17.3km (10.7 miles) 1045m (3,428‘) 0.1km (0.1 miles) Level 6+
Run Path Reverse Watopia 5km (3.1 miles) 0.3km (0.2 miles) Run Only, Event Only
Sand and Sequoias Watopia 20.1km (12.5 miles) 175m (574‘) 2.3km (1.4 miles)
Seaside Sprint Watopia 6.4km (4.0 miles) 46m (151‘) 2.8km (1.7 miles) Event Only
Serpentine 8 Watopia 19.4km (12.1 miles) 206m (676‘) 7.5km (4.7 miles)
Shorelines and Summits Watopia 46.1km (28.6 miles) 776m (2,546‘) 4.1km (2.5 miles) Level 10+
Snowman Watopia 43.9km (27.3 miles) 577m (1,893‘) 0.2km (0.1 miles)
Southern Coast Cruise Watopia 23.6km (14.7 miles) 137m (449‘) 2.7km (1.7 miles)
Spiral Into the Volcano Watopia 55.8km (34.7 miles) 336m (1,102‘) 0.2km (0.1 miles)
Splash and Dash Watopia 5.92km (3.7 miles) 26m (85‘) 0.323km (0.2 miles) Run Only
Sugar Cookie Watopia 33.6km (20.9 miles) 251m (823‘) 5.6km (3.5 miles) Level 10+
Surfin' Safari Watopia 9.77km (6.1 miles) 43m (141‘) 0.19km (0.1 miles) Run Only
Tair Dringfa Fechan Watopia 31.5km (19.6 miles) 349m (1,145‘) 0.5km (0.3 miles)
Temple Trek Watopia 6.5km (4.0 miles) 25m (82‘) 4.1km (2.5 miles) Level 10+
Tempus Fugit Watopia 17.3km (10.7 miles) 26m (85‘) 2.3km (1.4 miles)
That's Amore Reverse Watopia 7.4km (4.6 miles) 0.1km (0.1 miles) Run Only, Event Only
That's Amore Watopia 6.43km (4.0 miles) 0.3km (0.2 miles) Run Only
The Big Ring Watopia 48.9km (30.4 miles) 269m (883‘) 2.3km (1.4 miles) Level 10+
The Classic Watopia 4.7km (2.9 miles) 49m (161‘) 4.1km (2.5 miles)
The Magnificent 8 Watopia 28.9km (18.0 miles) 156m (512‘) 0.2km (0.1 miles)
The Mega Pretzel Watopia 107km (66.5 miles) 1640m (5,381‘) 3.7km (2.3 miles) Level 5+
The Pretzel Watopia 72.9km (45.3 miles) 1362m (4,469‘) 0km ( miles)
The Über Pretzel Watopia 128.3km (79.7 miles) 2335m (7,661‘) 0.5km (0.3 miles) Level 6+
Three Little Sisters Watopia 37.8km (23.5 miles) 434m (1,424‘) 0km ( miles)
Three Sisters Reverse Watopia 45.5km (28.3 miles) 884m (2,900‘) 0.2km (0.1 miles) Event Only
Three Sisters Watopia 48km (29.8 miles) 897m (2,943‘) 0km ( miles)
Three Step Sisters Watopia 37.9km (23.5 miles) 586m (1,923‘) 0.2km (0.1 miles)
Tick Tock Watopia 16.8km (10.4 miles) 53m (174‘) 2.3km (1.4 miles)
Tides and Temples Watopia 36.5km (22.7 miles) 460m (1,509‘) 2.6km (1.6 miles) Level 10+
Titan's Run Watopia 5.9km (3.7 miles) 122m (400‘) 0km ( miles) Run Only
Tour of Fire and Ice Watopia 25.3km (15.7 miles) 1167m (3,829‘) 2.7km (1.7 miles) Level 6+
Track Meet Watopia 6.1km (3.8 miles) 22m (72‘) 0.5km (0.3 miles) Run Only
Triple Flat Loops Watopia 33.9km (21.1 miles) 134m (440‘) 2.3km (1.4 miles)
Triple Twist Watopia 19.8km (12.3 miles) 180m (591‘) 4.5km (2.8 miles)
Two Bridges Loop Watopia 7.1km (4.4 miles) 81m (266‘) 0km ( miles)
Volcano Circuit CCW Watopia 4.1km (2.5 miles) 20m (66‘) 4.8km (3.0 miles)
Volcano Circuit Watopia 4.1km (2.5 miles) 20m (66‘) 2.7km (1.7 miles)
Volcano Climb After Party Watopia 40.3km (25.0 miles) 287m (942‘) 0km ( miles) Event Only
Volcano Climb Watopia 23.1km (14.4 miles) 203m (666‘) 0km ( miles)
Volcano Flat Reverse Watopia 12.3km (7.6 miles) 50m (164‘) 0.2km (0.1 miles) Event Only
Volcano Flat Watopia 12.3km (7.6 miles) 50m (164‘) 0km ( miles)
Waisted 8 Watopia 30.7km (19.1 miles) 144m (472‘) 0.2km (0.1 miles)
Watopia's Waistband Watopia 25.4km (15.8 miles) 96m (315‘) 2.3km (1.4 miles)
Watts of the Wild Watopia 42km (26.1 miles) 309m (1,014‘) 0.2km (0.1 miles)
WBR Climbing Series Watopia 43.4km (27.0 miles) 1118m (3,668‘) 0km ( miles) Event Only
Whole Lotta Lava Watopia 12.3km (7.6 miles) 160m (525‘) 4.8km (3.0 miles)
ZG25 Queen Watopia 44.6km (27.7 miles) 896m (2,940‘) 0.2km (0.1 miles)
Zwift Bambino Fondo 2022 Watopia 53.1km (33.0 miles) 398m (1,306‘) 0.2km (0.1 miles) Event Only
Zwift Games 2024 Epic Watopia 79.6km (49.5 miles) 821m (2,694‘) 1.9km (1.2 miles)
Zwift Gran Fondo 2022 Watopia 92.5km (57.5 miles) 1116m (3,661‘) 0.2km (0.1 miles) Event Only
Zwift Medio Fondo 2022 Watopia 79.2km (49.2 miles) 922m (3,025‘) 0.2km (0.1 miles) Event Only
2019 Worlds Harrogate Circuit Yorkshire 13.8km (8.6 miles) 245m (804‘) 0.1km (0.1 miles)
Duchy Estate Yorkshire 3km (1.9 miles) 41m (135‘) 1.7km (1.1 miles)
Harrogate Circuit Reverse Yorkshire 13.7km (8.5 miles) 245m (804‘) 0km ( miles) Event only
Queen's Highway After Party Yorkshire 17.2km (10.7 miles) 259m (850‘) 2.6km (1.6 miles)
Queen's Highway Yorkshire 3km (1.9 miles) 40m (131‘) 2.6km (1.6 miles)
Royal Pump Room 8 Yorkshire 27.5km (17.1 miles) 490m (1,608‘) 0km ( miles)
Tour of Tewit Well Yorkshire 10.8km (6.7 miles) 204m (669‘) 0km ( miles)
Yorkshire Double Loop Yorkshire 29.6km (18.4 miles) 547m (1,795‘) 0km ( miles)


Looking for a printable list of Zwift routes, sorted by difficulty? Go here >
Zwitch – How to Run Zwift on the Nintendo Switch

Zwitch – How to Run Zwift on the Nintendo Switch

Nintendo: A Brief History

In the 1980s, Home Video Game consoles were dead.  Sales had dropped, companies had gone out of business and consumer electronics magazines had declared that the silly fad of arcade games you can plug into your TV at home was over.

Enter Nintendo.  A century-old Japanese company that got started making playing cards; they built an inexpensive, simple to use game console—and sold it in the toy aisle, not in specialty electronics stores.  The Nintendo Entertainment System was a rousing success, and the video game industry was reborn.

Fast forward to today and Nintendo continues to try to find new ways to package videogames.  From the Wii (a tremendous success) to the Wii U (a dismal failure).  And in March of 2017, the Nintendo Switch.

The Switch is equipped with a 6.1-inch 720p LCD screen, and an innovative custom System-on-a-Chip from nVidia.  The chip underclocks itself to save battery when games are played handheld at 720p, and then boosts itself when the Switch is in its dock, plugged into power and outputting to a TV at 1080p.

The portability and power of the Switch makes it an attractive console for developers.  And for many of us Zwifters who own them, it’s natural to wonder what a Zwift experience might be on the portable handheld.

A Hack is Born

When the Nintendo Switch was launched back in 2017, hackers quickly discovered an internal recovery mode (abbreviated RCM).  This was intended to be a way for technicians at Nintendo to repair the Switch by getting root access to its onboard memory.  However, if an end-user is able to put the switch into RCM mode, then they can run unofficial, unsigned code.   Things like home-brew emulators and even booting an entirely different operating system.

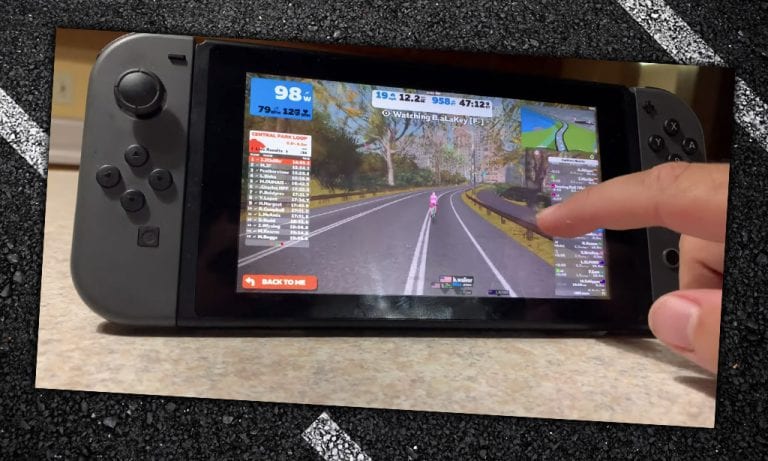
And that’s exactly what we’re doing here.   By booting LineageOS, a special variant of Android 8.1, we suddenly have a powerful Android tablet with built-in game controllers!

For most Switch owners, this means having the best of both worlds.  They can leave Horizon OS (the switch’s native operating system) unchanged, allowing them to play online through Nintendo’s servers without risking a ban, and allowing them to keep their system up-to-date.  But, whenever they want, they can boot into Android and play games on Emulators, play Android games, or even access online video streaming services that don’t have native Switch support.

For us, this means we can Zwift!

FAQ’s

Will this work with my Switch?

Possibly.  Nintendo patched the exploit in July of 2018.  If you have a first-generation switch, it’ll work.  This is a permanent exploit, if you have an early edition of the Switch, it will always be hackable.  If you’re not sure, check this forum post and compare the list to the serial number of your Switch.  If you’re shopping, some people have reported luck finding hackable models still on store shelves; but it’s been over a year now that the exploit has been patched, so you’d have to be pretty lucky.  If you’re determined, you can find hackable Switch models on eBay, but expect to pay a premium.

How do I connect my trainer/sensors?

The experience is identical to an Android phone or tablet.  You’ll connect them via Bluetooth.  Zwift does not support ANT+ under Android.

Will it work in docked mode?

Yep!  Though don’t expect great graphics.  Zwift and this particular Android implementation are not well optimized for the Switch.  This means that Zwift will look worse than your favorite Switch games, all while consuming more battery and running hotter.  The Switch display does not turn off when docked when running Android, but that doesn’t seem to affect the experience.

Will I get disconnects or experience crashes?

I haven’t.  If you’re not getting sensor disconnects now, there’s no reason to think you suddenly would with the switch.  It’s designed to work with Bluetooth controllers in docked mode, and it’s pretty reliable.

Will this void my warranty?

Potentially.  Though if you have a Switch that’s still under warranty, it’s not likely exploitable.

Will I get banned from Nintendo Online?

No.  Not if you’re only running Android.  If you install Custom Firmware (CFW) or install homebrew apps on Horizon, then there is a risk.  But the beauty if this Android implementation is that it runs entirely off of the microSD card, and doesn’t modify the Switch in any way.

Can I damage my console?

Yes.  But the risk is extremely low.  Follow the instructions and you shouldn’t have any issues.  However, any sort of unauthorized modification of a device carries some risk.

Why would I want to do this?

To be honest, if you have almost any other way to Zwift; such as a PC, Mac, Android device or iOS device; that’s probably a better experience.  But for people like me who eventually take everything I own apart to see how it works, it’s fun!

What’s the Zwift experience like?

Framerates are smooth, but graphical fidelity is low and battery life is hilariously abysmal.  It may be that despite the Switch’s decent hardware, it’s so unoptimized in Android that it can’t keep up.  Or, it’s possible that Zwift simply doesn’t recognize the Switch and thus doesn’t apply its own graphical tweaks and settings.

Otherwise, it’s “just Zwift”.  It works the same as any other Zwift experience. 

How It’s Done

You will need:

  • A Nintendo Switch with an unpatched RCM exploit.  (Pre July 2018)
  • An RCM Jig (get it on Amazon)
  • A USB-C cable and a PC, OR a Payload injector such as SX-OS.
  • While it’s a little more expensive than other methods, my preferred method is SX-OS.  It’s a kit that comes with an RCM Jig, a USB-C dongle and the software necessary to perform these modifications.  It’s very easy to use, and for that, worth the extra $20 over other solutions.
  • Then, you can follow this excellent guide for installing Lineage OS on the Switch.  Complete with all the links you need to download.  (https://gbatemp.net/threads/how-to-install-android-8-1-lineageos-to-your-nintendo-switch.544568/)

The TL;DR:

  1. Use a free tool called BalenaEtcher to flash the image containing Android to an empty MicroSD Card.  (Note: The faster the SD card, the faster this process goes.)
  2. Put the switch into RCM Mode.  Follow the instructions for whatever method you chose.  (Note: If using the SX-OS dongle, you’ll need to add the SX-OS boot.bin to the root of your microSD card).
  3. Launch the Hekate payload, then select ‘switchroot’.
  4. Hold ‘volume up’ to boot into TWRP.  Then install all of your optional packages, including Open GApps.  This MUST be done BEFORE booting into Android.  I also recommend installing Magisk (which gives you root privileges) and the JoyCon fix (which helps the Joycons work for Android games and emulators)
  5. Restart, put the switch back into RCM mode, and launch ‘switchroot’ again, this time without holding ‘VolumeUp’.
  6. Wait 10 minutes for the first boot (it takes a while!  Don’t be afraid of the blank screen.)
  7. Follow the on-screen instructions.
  8. Go to the Google Play Store, and Download Zwift.

And… that’s it!  It’s a simple process.  To get back to playing MarioKart, just reboot.  And anytime you want to boot Android, just put it back into RCM mode and boot using the same method above. 

I found that the easiest way to keep everything working was to have two separate microSD cards.  One for my Switch and all of my Switch games, and the other for Android. 


Rebel Routes – Manual Navigation on Zwift

166

“Rebel Routes” are Zwift rides that are not available on Zwift’s routes list, thus requiring manual navigation. The reward for your rebel ride? Exploring a new route, knowing you’ve gone where few Zwifters have gone before. And a Strava segment rank in the tens or hundreds instead of the thousands!

Here are all of Zwift Insider’s Rebel Routes. Enjoy!

Canyon to Cavern (Makuri Islands)

  • Distance: 13.41km (8.33 miles)
  • Elevation Gain: 87m (284′)
  • We think the connector roads between Urukazi and Neokyo/Yumezi are some of the coolest parts of the Urukazi expansion, so we made this route which takes you on the shortest loop possible covering both of these connector roads.
  • Read all about this Rebel Route >

Cliffside Epic Double (Watopia)

  • Distance: 52.71km (32.75 miles)
  • Elevation Gain: 991m (3,252′)
  • Ready for a bit of climbing? This route is a longish one up the Epic KOM in both directions, with some flats in between. Suggested by James Bailey.
  • Read all about this Rebel Route >

Dirty Temple KOM Loop (Makuri Islands)

  • Distance: 4.37km (2.7 miles)
  • Elevation Gain: 75m (247′)
  • Grab your gravel bike for this one, because it’s all dirt. This short loop takes you up repeated partial climbs of the all-dirt Temple KOM. A great route if you’re looking to do some VO2 intervals!
  • Read all about this Rebel Route >

Down Up Down (Watopia)

  • Distance: 49.35km (30.7 miles)
  • Elevation Gain: 1257m (4,124′)
  • Planned along the same theme as the infamous Badwater Ultramarathon, this route takes you from the lowest point on Watopia to the highest point then back again. Suggested by Craig Devonshire.
  • Read all about this Rebel Route >

Epic Loop (Watopia)

  • Distance: 14.4km (9.2 miles)
  • Elevation Gain: 378m (1,240′)
  • A climber’s dream! This loop begins atop the Epic KOM, descends to the bypass road, cuts across, then climbs up. Perfect for ~20-minute sweetspot intervals.
  • Read all about this Rebel Route >

Fower Power (Scotland)

  • Distance: 19.74km (12.27 miles)
  • Elevation Gain: 214m (702′)
  • Complete each of the four (“fower” in Scots) loops of the Scotland map in a counterclockwise direction, starting in Glasgow at the southwest side of the map and working your way northeast to the Tower area.
  • Read all about this Rebel Route >

Hilly KOM Bypass Loop (Watopia)

  • Distance: 2.5km (1.6 miles)
  • Elevation Gain: 31m (101′)
  • A pitchy little number covering the upper portion of Watopia’s oldest climb, “the KOM”. Great for building sprint/anaerobic power by going easy on the descents and all in for the climbs.
  • Read all about this Rebel Route >

KOMonster (Watopia)

  • Distance: 99.8km (62.1 miles)
  • Elevation Gain: 2570m (8433′)
  • When this was created, it was our most challenging Rebel Route, taking on every timed KOM segment on Watopia, since no official Zwift routes accomplished this. (It is now outdated.)
  • Read all about this Rebel Route >

Litus Fugit (Watopia)

  • Distance: 61km (37.9 miles)
  • Elevation Gain: 269m (882′)
  • This is the flattest Zwift route over 30km, with only 4.4 meters of climbing per kilometer of riding. And it’s a loopable route, not a one-way affair like many of Zwift’s southern coast routes.
  • Read all about this Rebel Route >

Mangrove Circuit (Makuri Islands)

  • Distance: 1.88km (1.17 miles)
  • Elevation Gain: 13m (42′)
  • Our smallest Rebel Route to date, this twisty circuit keeps you on the Mangrove Maze portion of Urukazi.
  • Read all about this Rebel Route >

Nessie’s Loop (Scotland)

  • Distance: 1.89km (1.17 miles)
  • Elevation Gain: 15m (49′)
  • Our smallest Scotland Rebel Route, this quick loop always has the Loch in its center and includes the rarely-ridden Breakaway Brae Reverse climb each time around.
  • Read all about this Rebel Route >

Sgurr 8 (Scotland)

  • Distance: 12.62km (7.84 miles)
  • Elevation Gain: 150m (492′)
  • A figure 8 route that takes you up and over the Sgurr’s gravel climb twice, but also lets you enjoy some of Scotland’s best scenery.
  • Read all about this Rebel Route >

Summit City Velodrome (Watopia)

  • Distance: 2.53km (1.57 miles)
  • Elevation Gain: 0m (0′)
  • 10 laps of the Ciudad La Cumbre traffic circle makes an excellent stand-in for an outdoor Watopian velodrome.
  • Read all about this Rebel Route >

The Full Makuri (Makuri Islands)

  • Distance: 80.9km (50.3 miles)
  • Elevation Gain: 650m (2132′)
  • Cover the full Makuri Islands map in the shortest distance possible.
  • Read all about this Rebel Route >

The Full New York (New York)

The Full Watopia (Watopia)

The Marvelous Metric (Watopia)

  • Distance: 102km (63.4 miles)
  • Elevation Gain: 489m (1604′)
  • The flattest long route in Watopia, by a long shot! Created to host long group rides.
  • Read all about this Rebel Route >

The Perimeter (Watopia)

The Roads Less Traveled (Watopia)

  • Distance: 53.6km (33.3 miles) + Lead-In of 5.7km (3.5 miles)
  • Elevation Gain: 437m (1433′)
  • This route includes all four of the rarely-traveled road sections Zwift added back in December 2020. In fact, when this route was created, it covered three of those four roads in a direction no official Zwift route covered.
  • Read all about this Rebel Route >

The Snake (Watopia)

  • Distance: 77.4km (48.1 miles)
  • Elevation Gain: 661m (2170′)
  • A true “Out and Back” route that covers most of the roads in Watopia proper in both directions, meaning you’ll hit 5 timed KOMs and 3 timed sprints.
  • Read all about this Rebel Route >

Toutes les Routes (France)

  • Distance: 104.8km (65.1 miles)
  • Elevation Gain: 1968m (6,458′)
  • We wanted a route that covered all the roads in France… so we made one! This is our longest Rebel Route yet, and the first to break 100km.
  • Read all about this Rebel Route >

Urukazi Flats (Makuri Islands)

  • Distance: 7.51km (4.67 miles)
  • Elevation Gain: 22m (71′)
  • Take the flattest route possible around the Urukazi Island complex so you can see all three sections with minimal elevation gain.
  • Read all about this Rebel Route >

Tamed Rebels

Several routes that began as Rebel Routes eventually made it into Zwift! We’ve removed them from the list above, but you can see the details of the official Zwift routes below:

Got Suggestions?

Got an idea for a Rebel Route? Share below, and it just might make the official list!

Route Maps & Details for Zwift’s Watopia Course

109

This page includes basic details for all routes on Zwift’s Watopia world. For additional route details, click the corresponding link to access that route’s home page.

Accelerate to Elevate

toolsetCommonEs.styleToHead()
Animated “Accelerate to Elevate” Route Details (Watopia) Map
Animated map provided by ZwiftHacks

By far the climbiest of the eight routes released with Zwift’s October 2023 southern coast expansion, this point-to-point route is quite flat… until it hits the base of Alpe du Zwift!

Route Basics

Length: 41 km (25.5 miles)
Elevation:
1153 m (3,783‘)
Lead-In: 2.3 km (1.4 miles)
Map: Watopia

Restriction: Level 10+

Achievement Badge: 825 XP

By far the climbiest of the eight routes released with Zwift’s October 2023 southern coast expansion, this point-to-point route is quite flat… until it hits the base of Alpe du Zwift!

Beach Island Loop

toolsetCommonEs.styleToHead()
Animated “Beach Island Loop” Route Details (Watopia) Map
Animated map provided by ZwiftHacks

Introduced in Zwift’s December 2020 update, Beach Island Loop is the first route to use the new Bridge/Islands Bypass – a short stretch of road connecting the JWB Bridge to the 360 Bridge.

This route is a slightly modified version of the event-only Volcano Flat Reverse route, placing riders on a more northerly segment which adds a quick trip through the Italian Villas and a chance for green glory in the forward sprint.

Route Basics

Length: 13.1 km (8.1 miles)
Elevation:
44 m (144‘)
Lead-In: 0.2 km (0.1 miles)
Map: Watopia

Restriction: none

Achievement Badge: 255 XP

Introduced in Zwift’s December 2020 update, Beach Island Loop is the first route to use the new Bridge/Islands Bypass – a short stretch of road connecting the JWB Bridge to the 360 Bridge.

This route is a slightly modified version of the event-only Volcano Flat Reverse route, placing riders on a more northerly segment which adds a quick trip through the Italian Villas and a chance for green glory in the forward sprint.

Big Flat 8

Animated “Big Flat 8” Route Details (Watopia) Map
Animated map provided by ZwiftHacks

Originally created as a Rebel Route in November of 2021, the Big Flat 8 was created because we wanted a long, flat route on Watopia without riding over the same tarmac repeatedly. At 3.5 meters of climb per kilometer of distance, this is Watopia’s flattest route apart from Tempus Fugit and Tick Tock. And it’s much more scenic!

This route was added to the Zwift canon in January 2024 to host the final stage of Tour de Zwift 2024.

Route Basics

Length: 29.2 km (18.1 miles)
Elevation:
103 m (338‘)
Lead-In: 2.3 km (1.4 miles)
Map: Watopia

Restriction: none

Achievement Badge: 580 XP

Originally created as a Rebel Route in November of 2021, the Big Flat 8 was created because we wanted a long, flat route on Watopia without riding over the same tarmac repeatedly. At 3.5 meters of climb per kilometer of distance, this is Watopia’s flattest route apart from Tempus Fugit and Tick Tock. And it’s much more scenic!

This route was added to the Zwift canon in January 2024 to host the final stage of Tour de Zwift 2024.

Big Foot Hills

Animated “Big Foot Hills” Route Details (Watopia) Map
Animated map provided by ZwiftHacks

One of five routes rolled out with Zwift’s Titans Grove expansion, “Big Foot Hills” takes you on a meandering journey over the lower peaks of Watopia, including Titans Grove in both directions.

This longer route is perfect for a ~2-hour free ride and includes 5 different KOM sections of short to medium length. A nice choice if you want to do some VO2 max hill training!

Route Basics

Length: 67.5 km (41.9 miles)
Elevation:
708 m (2,323‘)
Lead-In: 2.3 km (1.4 miles)
Map: Watopia

Restriction: none

Achievement Badge: 1340 XP

One of five routes rolled out with Zwift’s Titans Grove expansion, “Big Foot Hills” takes you on a meandering journey over the lower peaks of Watopia, including Titans Grove in both directions.

This longer route is perfect for a ~2-hour free ride and includes 5 different KOM sections of short to medium length. A nice choice if you want to do some VO2 max hill training!

Big Loop

Animated “Big Loop” Route Details (Watopia) Map
Animated map provided by ZwiftHacks

Watopia’s “Big Loop” was added with the Mayan jungle expansion in late October 2017. It includes the Epic KOM, Mayan jungle roads, and a portion of the Volcano Flat route.

Route Basics

Length: 42.1 km (26.2 miles)
Elevation:
661 m (2,169‘)
Lead-In: 0.5 km (0.3 miles)
Map: Watopia

Restriction: Level 5+

Achievement Badge: 840 XP

Watopia’s “Big Loop” was added with the Mayan jungle expansion in late October 2017. It includes the Epic KOM, Mayan jungle roads, and a portion of the Volcano Flat route.

The Big Ring

Animated “The Big Ring” Route Details (Watopia) Map
Animated map provided by ZwiftHacks

As one of the longest of the eight routes released with Zwift’s October 2023 southern coast expansion, “The Big Ring” is a big ring that lets you stay in the big ring. It’s the longest flat route in Watopia!

Route Basics

Length: 48.9 km (30.4 miles)
Elevation:
269 m (883‘)
Lead-In: 2.3 km (1.4 miles)
Map: Watopia

Restriction: Level 10+

Achievement Badge: 977 XP

As one of the longest of the eight routes released with Zwift’s October 2023 southern coast expansion, “The Big Ring” is a big ring that lets you stay in the big ring. It’s the longest flat route in Watopia!

Bigger Loop

Animated “Bigger Loop” Route Details (Watopia) Map
Animated map provided by ZwiftHacks

“Bigger Loop” is a modified version of Zwift’s “Big Loop” which basically adds ~11km of flat road to the start of the route. Released as part of Zwift’s Fuego Flats desert expansion, this route features the new desert roads as well as the Epic KOM, Jungle Circuit, and portions of Volcano flat.

Route Basics

Length: 52.7 km (32.7 miles)
Elevation:
691 m (2,267‘)
Lead-In: 0.5 km (0.3 miles)
Map: Watopia

Restriction: Level 5+

Achievement Badge: 1060 XP

“Bigger Loop” is a modified version of Zwift’s “Big Loop” which basically adds ~11km of flat road to the start of the route. Released as part of Zwift’s Fuego Flats desert expansion, this route features the new desert roads as well as the Epic KOM, Jungle Circuit, and portions of Volcano flat.

Canopies and Coastlines

Animated “Canopies and Coastlines” Route Details (Watopia) Map
Animated map provided by ZwiftHacks

This route has the toughest lead-in of the eight routes released with Zwift’s October 2023 southern coast expansion, but once you finish the lead-in you can almost say, “It’s all downhill from here…”

Route Basics

Length: 22.6 km (14.0 miles)
Elevation:
124 m (407‘)
Lead-In: 5.1 km (3.2 miles)
Map: Watopia

Restriction: Level 10+

Achievement Badge: 444 XP

This route has the toughest lead-in of the eight routes released with Zwift’s October 2023 southern coast expansion, but once you finish the lead-in you can almost say, “It’s all downhill from here…”

Climb Control

Animated “Climb Control” Route Details (Watopia) Map
Animated map provided by ZwiftHacks

Added to the game in August 2025 as an event-only route to host events for Zwift Camp: Baseline, this route begins at the southern coast start pen and travels across to the Jungle for two dusty laps.

Route Basics

Length: 23.7 km (14.7 miles)
Elevation:
191 m (627‘)
Lead-In: 0.3 km (0.2 miles)
Map: Watopia

Restriction: none

Achievement Badge: 475 XP

Added to the game in August 2025 as an event-only route to host events for Zwift Camp: Baseline, this route begins at the southern coast start pen and travels across to the Jungle for two dusty laps.

Climber's Gambit

Animated “Climber’s Gambit” Route Details (Watopia) Map
Animated map provided by ZwiftHacks

Launched in Zwift’s August 2021 update, this route was created to host Zwift Academy Road 2021‘s “advanced” Baseline and Finish Line rides. It went from event-only to free ridable in Zwift’s December 2021 update.

Route Basics

Length: 27.7 km (17.2 miles)
Elevation:
670 m (2,198‘)
Lead-In: 0.2 km (0.1 miles)
Map: Watopia

Restriction: none

Achievement Badge: 600 XP

Launched in Zwift’s August 2021 update, this route was created to host Zwift Academy Road 2021‘s “advanced” Baseline and Finish Line rides. It went from event-only to free ridable in Zwift’s December 2021 update.

Coast Crusher

Animated “Coast Crusher” Route Details (Watopia) Map
Animated map provided by ZwiftHacks

One of the longer routes released with Zwift’s October 2023 southern coast expansion, “Coast Crusher” is the only route covering the new road in both directions, hitting all eight sprint segments.

Route Basics

Length: 34.7 km (21.6 miles)
Elevation:
174 m (571‘)
Lead-In: 8.1 km (5.0 miles)
Map: Watopia

Restriction: Level 10+

Achievement Badge: 684 XP

One of the longer routes released with Zwift’s October 2023 southern coast expansion, “Coast Crusher” is the only route covering the new road in both directions, hitting all eight sprint segments.

Coast to Coast

Animated “Coast to Coast” Route Details (Watopia) Map
Animated map provided by ZwiftHacks

Beginning on Watopia’s southern coast and making its way over to Jarvis Island for a single counterclockwise lap of the circuit, Coast to Coast is the only point-to-point route among the six released in Zwift’s November 2024 Jarvis expansion.

Route Basics

Length: 24.1 km (15.0 miles)
Elevation:
154 m (505‘)
Lead-In: 2.6 km (1.6 miles)
Map: Watopia

Restriction: none

Achievement Badge: 480 XP

Beginning on Watopia’s southern coast and making its way over to Jarvis Island for a single counterclockwise lap of the circuit, Coast to Coast is the only point-to-point route among the six released in Zwift’s November 2024 Jarvis expansion.

Coastal Crown Loop

Animated “Coastal Crown Loop” Route Details (Watopia) Map
Animated map provided by ZwiftHacks

Climb the Mayan Mountainside and Itza KOMs, then fly down The Grade. This short loop includes two timed sprints and two timed KOM segments!

Route Basics

Length: 15 km (9.3 miles)
Elevation:
185 m (607‘)
Lead-In: 8.6 km (5.3 miles)
Map: Watopia

Restriction: Level 10+

Achievement Badge: 300 XP

Climb the Mayan Mountainside and Itza KOMs, then fly down The Grade. This short loop includes two timed sprints and two timed KOM segments!

Danger Noodle

Animated “Danger Noodle” Route Details (Watopia) Map
Animated map provided by ZwiftHacks

Are you a snake charmer? Put yourself to the test on Danger Noodle! With no major climbs, the elevation here comes in bite-sized pieces.

Designed by Mark Brzezinski (ZSUNR), this route won the ZRL 2024/25 Round 3 design contest, earning it the right to be added to the game to host the final race of the round.

Route Basics

Length: 32.1 km (19.9 miles)
Elevation:
413 m (1,355‘)
Lead-In: 0.2 km (0.1 miles)
Map: Watopia

Restriction: none

Achievement Badge: 645 XP

Are you a snake charmer? Put yourself to the test on Danger Noodle! With no major climbs, the elevation here comes in bite-sized pieces.

Designed by Mark Brzezinski (ZSUNR), this route won the ZRL 2024/25 Round 3 design contest, earning it the right to be added to the game to host the final race of the round.

Deca Dash

Animated “Deca Dash” Route Details (Watopia) Map
Animated map provided by ZwiftHacks

By far the longest route released in Zwift’s November 2024 Jarvis expansion, Deca Dash is sort of a mini PRL Full. It derives its name from the 10 laps of Jarvis Island you must complete before earning the achievement badge.

Route Basics

Length: 48.2 km (30.0 miles)
Elevation:
484 m (1,588‘)
Lead-In: 4 km (2.5 miles)
Map: Watopia

Restriction: none

Achievement Badge: 1000 XP

By far the longest route released in Zwift’s November 2024 Jarvis expansion, Deca Dash is sort of a mini PRL Full. It derives its name from the 10 laps of Jarvis Island you must complete before earning the achievement badge.

Downtown Eruption

Animated “Downtown Eruption” Route Details (Watopia) Map
Animated map provided by ZwiftHacks

Released for Zwift Games 2025, Downtown Eruption keeps riders in Watopia proper while taking them up two climbs: the Volcano KOM mid-route, and the Hilly KOM to finish things off!

Route Basics

Length: 19.4 km (12.1 miles)
Elevation:
275 m (902‘)
Lead-In: 0.5 km (0.3 miles)
Map: Watopia

Restriction: none

Achievement Badge: 400 XP

Released for Zwift Games 2025, Downtown Eruption keeps riders in Watopia proper while taking them up two climbs: the Volcano KOM mid-route, and the Hilly KOM to finish things off!

Downtown Titans

Animated “Downtown Titans” Route Details (Watopia) Map
Animated map provided by ZwiftHacks

Originally published as a Rebel Route by Zwift Insider in March 2020, “Downtown Titans” is the brainchild of Zwifter Shawn McAfee. The thinking behind this route was to cover the newest (Titans Grove) and oldest (Hilly) KOMs in Watopia.

Zwift’s February 2022 update included this route as an event-only route that awards an achievement badge. The April 2022 update then made this route free ridable.

Route Basics

Length: 24.6 km (15.3 miles)
Elevation:
292 m (958‘)
Lead-In: 0 km ( miles)
Map: Watopia

Restriction: none

Achievement Badge: 490 XP

Originally published as a Rebel Route by Zwift Insider in March 2020, “Downtown Titans” is the brainchild of Zwifter Shawn McAfee. The thinking behind this route was to cover the newest (Titans Grove) and oldest (Hilly) KOMs in Watopia.

Zwift’s February 2022 update included this route as an event-only route that awards an achievement badge. The April 2022 update then made this route free ridable.

Dust In the Wind

Animated “Dust In the Wind” Route Details (Watopia) Map
Animated map provided by ZwiftHacks

One of five routes rolled out with Zwift’s Titans Grove expansion, “Dust In the Wind” covers Titans Grove twice, as well as Fuego Flats, part of Ocean Boulevard, and a Mayan Jungle out and back.

Along the way you’ll encounter a fair amount of virtual dirt/gravel road, so you might consider swapping to a gravel bike so you can move to the front of the pack and make everyone else eat your dust!

Route Basics

Length: 52.1 km (32.4 miles)
Elevation:
582 m (1,909‘)
Lead-In: 0.3 km (0.2 miles)
Map: Watopia

Restriction: Level 6+

Achievement Badge: 1080 XP

One of five routes rolled out with Zwift’s Titans Grove expansion, “Dust In the Wind” covers Titans Grove twice, as well as Fuego Flats, part of Ocean Boulevard, and a Mayan Jungle out and back.

Along the way you’ll encounter a fair amount of virtual dirt/gravel road, so you might consider swapping to a gravel bike so you can move to the front of the pack and make everyone else eat your dust!

Eastern Eight

Animated “Eastern Eight” Route Details (Watopia) Map
Animated map provided by ZwiftHacks

Originally published as a Rebel Route by Zwift Insider in February 2020, “Eastern Eight” covers the easternmost roads of Watopia (Fuego Flats, Titans Grove, and most of Ocean Boulevard) in both directions. 

Zwift’s February 2022 update included this route as an event-only route that awards an achievement badge. The April 2022 update then made this route free ridable.

Route Basics

Length: 51.7 km (32.1 miles)
Elevation:
406 m (1,332‘)
Lead-In: 2.3 km (1.4 miles)
Map: Watopia

Restriction: none

Achievement Badge: 1345 XP

Originally published as a Rebel Route by Zwift Insider in February 2020, “Eastern Eight” covers the easternmost roads of Watopia (Fuego Flats, Titans Grove, and most of Ocean Boulevard) in both directions. 

Zwift’s February 2022 update included this route as an event-only route that awards an achievement badge. The April 2022 update then made this route free ridable.

Elevation Evaluation

Animated “Elevation Evaluation” Route Details (Watopia) Map
Animated map provided by ZwiftHacks

If you’re looking for a single route that includes The Grade for an FTP test, this is it. While Oh Hill No begins right at the bottom of The Grade, Elevation Evaluation begins around 3km from the start of The Grade (if free riding) or around 6km from the start if you ride it in an event. This should provide ample warmup time before taking on The Grade as an FTP test.

Route Basics

Length: 24.6 km (15.3 miles)
Elevation:
396 m (1,299‘)
Lead-In: 3.1 km (1.9 miles)
Map: Watopia

Restriction: none

Achievement Badge: 490 XP

If you’re looking for a single route that includes The Grade for an FTP test, this is it. While Oh Hill No begins right at the bottom of The Grade, Elevation Evaluation begins around 3km from the start of The Grade (if free riding) or around 6km from the start if you ride it in an event. This should provide ample warmup time before taking on The Grade as an FTP test.

Figure 8

Animated “Figure 8” Route Details (Watopia) Map
Animated map provided by ZwiftHacks

Watopia’s “Figure 8” route covers the entire hilly and flat routes in both directions. If you’re looking for a ride around an hour long that includes some short climbs and a nice mix of flats and rollers, this is a solid choice.

This route is popular with racers since its nice mix of punchy climbs, flats, and rollers keep the race interesting and allow for strategic attacks from a variety of riders.

Route Basics

Length: 29.7 km (18.5 miles)
Elevation:
254 m (833‘)
Lead-In: 0 km ( miles)
Map: Watopia

Restriction: none

Achievement Badge: 580 XP

Watopia’s “Figure 8” route covers the entire hilly and flat routes in both directions. If you’re looking for a ride around an hour long that includes some short climbs and a nice mix of flats and rollers, this is a solid choice.

This route is popular with racers since its nice mix of punchy climbs, flats, and rollers keep the race interesting and allow for strategic attacks from a variety of riders.

Figure 8 Reverse

Animated “Figure 8 Reverse” Route Details (Watopia) Map
Animated map provided by ZwiftHacks

Watopia’s “Figure 8” route covers the entire hilly and flat routes in both directions. If you’re looking for a ride around an hour long that includes some short climbs and a nice mix of flats and rollers, this is a solid choice.

The reverse Figure 8 route is popular with racers since it doesn’t start with a tough climb out of the box, and has a nice mix of punchy climbs, flats, and rollers to keep the race interesting by allowing for strategic attacks from a variety of riders. 

Route Basics

Length: 29.7 km (18.5 miles)
Elevation:
254 m (833‘)
Lead-In: 0.2 km (0.1 miles)
Map: Watopia

Restriction: none

Achievement Badge: 580 XP

Watopia’s “Figure 8” route covers the entire hilly and flat routes in both directions. If you’re looking for a ride around an hour long that includes some short climbs and a nice mix of flats and rollers, this is a solid choice.

The reverse Figure 8 route is popular with racers since it doesn’t start with a tough climb out of the box, and has a nice mix of punchy climbs, flats, and rollers to keep the race interesting by allowing for strategic attacks from a variety of riders. 

Flat Out Fast

Animated “Flat Out Fast” Route Details (Watopia) Map
Animated map provided by ZwiftHacks

Added to the game in August 2025 as an event-only route to host events for Zwift Camp: Baseline, this route is second only to Tempus Fugit in overall flatness (measured in meters of climb/kilometers of distance). Which makes sense, since this route is essentially Tempus Fugit with a longer, slightly uphill lead-in!

Route Basics

Length: 21.4 km (13.3 miles)
Elevation:
46 m (151‘)
Lead-In: 0.9 km (0.6 miles)
Map: Watopia

Restriction: none

Achievement Badge: 430 XP

Added to the game in August 2025 as an event-only route to host events for Zwift Camp: Baseline, this route is second only to Tempus Fugit in overall flatness (measured in meters of climb/kilometers of distance). Which makes sense, since this route is essentially Tempus Fugit with a longer, slightly uphill lead-in!

Flat Route

Animated “Flat Route” Route Details (Watopia) Map
Animated map provided by ZwiftHacks

Route Basics

Length: 10.2 km (6.3 miles)
Elevation:
61 m (200‘)
Lead-In: 0.1 km (0.1 miles)
Map: Watopia

Restriction: none

Achievement Badge: 200 XP

Four Horsemen

Animated “Four Horsemen” Route Details (Watopia) Map
Animated map provided by ZwiftHacks

When it was released in March 2018, the “Four Horsemen” covered all of Watopia’s timed climbs: the original Hilly KOM, Volcano KOM, Epic KOM, and Alpe du Zwift. Along the way it also covered (nearly) every bit of Watopian road.

The Fuego Flats and Titans Grove extensions were released after this route launched, so Four Horsemen is no longer a nearly complete tour of Watopia.

Route Basics

Length: 88.7 km (55.1 miles)
Elevation:
2113 m (6,932‘)
Lead-In: 0.5 km (0.3 miles)
Map: Watopia

Restriction: Level 6+

Achievement Badge: 1780 XP

When it was released in March 2018, the “Four Horsemen” covered all of Watopia’s timed climbs: the original Hilly KOM, Volcano KOM, Epic KOM, and Alpe du Zwift. Along the way it also covered (nearly) every bit of Watopian road.

The Fuego Flats and Titans Grove extensions were released after this route launched, so Four Horsemen is no longer a nearly complete tour of Watopia.

Glyph Heights

Animated “Glyph Heights” Route Details (Watopia) Map
Animated map provided by ZwiftHacks

Up up up! After a flattish lead-in, this loop front loads lots of climbing, beginning with the Itza KOM, progressing to the upper half of The Grade, and finishing on the final portion of the Epic KOM! A long descent follows, but the loop ends on a climb, finishing at the Mayan Mountainside KOM banner.

Route Basics

Length: 25.3 km (15.7 miles)
Elevation:
537 m (1,762‘)
Lead-In: 8.6 km (5.3 miles)
Map: Watopia

Restriction: Level 10+

Achievement Badge: 510 XP

Up up up! After a flattish lead-in, this loop front loads lots of climbing, beginning with the Itza KOM, progressing to the upper half of The Grade, and finishing on the final portion of the Epic KOM! A long descent follows, but the loop ends on a climb, finishing at the Mayan Mountainside KOM banner.

Going Coastal

Animated “Going Coastal” Route Details (Watopia) Map
Animated map provided by ZwiftHacks

Sort of the “desert version” of Temple Trek, this is one of the shorter routes released with Zwift’s October 2023 coastal road expansion. It’s a very flat route, beginning at the desert arch in Fuego Flats and takes you partway down the new coastal road.

Route Basics

Length: 16.5 km (10.3 miles)
Elevation:
63 m (207‘)
Lead-In: 2.3 km (1.4 miles)
Map: Watopia

Restriction: Level 10+

Achievement Badge: 308 XP

Sort of the “desert version” of Temple Trek, this is one of the shorter routes released with Zwift’s October 2023 coastal road expansion. It’s a very flat route, beginning at the desert arch in Fuego Flats and takes you partway down the new coastal road.

Hilltop Hustle

Animated “Hilltop Hustle” Route Details (Watopia) Map
Animated map provided by ZwiftHacks

Released in April 2025, this route is the first to let Zwifters do hill repeats on The Grade. (It may not a hugely popular feature request on Zwift, but you could turn this into a solid route-based workout for sweet spot or threshold intervals!)

Route Basics

Length: 13.6 km (8.5 miles)
Elevation:
336 m (1,102‘)
Lead-In: 2.7 km (1.7 miles)
Map: Watopia

Restriction: none

Achievement Badge: 275 XP

Released in April 2025, this route is the first to let Zwifters do hill repeats on The Grade. (It may not a hugely popular feature request on Zwift, but you could turn this into a solid route-based workout for sweet spot or threshold intervals!)

Hilly Route

Animated “Hilly Route” Details (Watopia) Map
Animated map provided by ZwiftHacks

As the very first route on the Zwift’s Watopia island, “Watopia Hilly Route” is still a favorite among racers. It includes timed KOM climbs and sprints in both the forward and reverse directions.

Route Basics

Length: 9.3 km (5.8 miles)
Elevation:
109 m (358‘)
Lead-In: 0 km ( miles)
Map: Watopia

Restriction: none

Achievement Badge: 180 XP

As the very first route on the Zwift’s Watopia island, “Watopia Hilly Route” is still a favorite among racers. It includes timed KOM climbs and sprints in both the forward and reverse directions.

Itza Climb Finish

Animated “Itza Climb Finish” Route Details (Watopia) Map
Animated map provided by ZwiftHacks

This route is largely flat/rolling for the first 24km, but the final ~6km are uphill, making for a spicy finish.

Route Basics

Length: 29.1 km (18.1 miles)
Elevation:
291 m (955‘)
Lead-In: 0.9 km (0.6 miles)
Map: Watopia

Restriction: none

Achievement Badge: 600 XP

This route is largely flat/rolling for the first 24km, but the final ~6km are uphill, making for a spicy finish.

Itza Party

Animated “Itza Party” Route Details (Watopia) Map
Animated map provided by ZwiftHacks

Is it a party? Not exactly, although most of the route’s roads could be described as “rolling”. The one-way route begins with a climb, ends with a climb, and has one more thrown into the middle just for fun!

Route Basics

Length: 45.7 km (28.4 miles)
Elevation:
505 m (1,657‘)
Lead-In: 0.5 km (0.3 miles)
Map: Watopia

Restriction: none

Achievement Badge: 920 XP

Is it a party? Not exactly, although most of the route’s roads could be described as “rolling”. The one-way route begins with a climb, ends with a climb, and has one more thrown into the middle just for fun!

Jarvis Seaside Sprint

Animated “Jarvis Seaside Sprint” Route Details (Watopia) Map
Animated map provided by ZwiftHacks

Launched in September 2025 as an event-only course for the final race of ZRL round 1, Jarvis Seaside Sprint combines a clockwise loop of Jarvis Island with a lap of the Seaside Sprint route… hence the name.

Route Basics

Length: 12.5 km (7.8 miles)
Elevation:
95 m (312‘)
Lead-In: 2.8 km (1.7 miles)
Map: Watopia

Restriction: none

Achievement Badge: 250 XP

Launched in September 2025 as an event-only course for the final race of ZRL round 1, Jarvis Seaside Sprint combines a clockwise loop of Jarvis Island with a lap of the Seaside Sprint route… hence the name.

Jungle Circuit

Animated “Jungle Circuit” Route Details (Watopia) Map
Animated map provided by ZwiftHacks

Watopia’s “Jungle Circuit” was added with the Mayan jungle expansion in late October 2017. This is a lollipop route, meaning you start with a lead-in then remain on the circuit portion until your legs fall off.

Route Basics

Length: 7.9 km (4.9 miles)
Elevation:
82 m (269‘)
Lead-In: 5.7 km (3.5 miles)
Map: Watopia

Restriction: Level 5+

Achievement Badge: 260 XP

Watopia’s “Jungle Circuit” was added with the Mayan jungle expansion in late October 2017. This is a lollipop route, meaning you start with a lead-in then remain on the circuit portion until your legs fall off.

Jurassic Coast

Animated “Jurassic Coast” Route Details (Watopia) Map
Animated map provided by ZwiftHacks

Created to support the inaugural Zwift Games, this rolling route begins in Titans Grove and ends with a sprint on Watopia’s southern coast. It’s basically a shortened version of the Canopies and Coastlines route.

Route Basics

Length: 19.5 km (12.1 miles)
Elevation:
212 m (696‘)
Lead-In: 0.2 km (0.1 miles)
Map: Watopia

Restriction: none

Achievement Badge: 386 XP

Created to support the inaugural Zwift Games, this rolling route begins in Titans Grove and ends with a sprint on Watopia’s southern coast. It’s basically a shortened version of the Canopies and Coastlines route.

Legends and Lava

Animated “Legends and Lava” Route Details (Watopia) Map
Animated map provided by ZwiftHacks

Launched in Zwift’s August 2021 update, this route was created to host Zwift Academy Road 2021‘s “standard” Baseline and Finish Line rides. It went from event-only to free ridable in Zwift’s December 2021 update.

Route Basics

Length: 24.6 km (15.3 miles)
Elevation:
352 m (1,155‘)
Lead-In: 0 km ( miles)
Map: Watopia

Restriction: none

Achievement Badge: 490 XP

Launched in Zwift’s August 2021 update, this route was created to host Zwift Academy Road 2021‘s “standard” Baseline and Finish Line rides. It went from event-only to free ridable in Zwift’s December 2021 update.

Loop de Loop

Animated “Loop de Loop” Route Details (Watopia) Map
Animated map provided by ZwiftHacks

Created to support the inaugural Zwift Games, this short route is a new take on Watopia’s oldest roads.

Route Basics

Length: 12.4 km (7.7 miles)
Elevation:
144 m (472‘)
Lead-In: 0.2 km (0.1 miles)
Map: Watopia

Restriction: none

Achievement Badge: 246 XP

Created to support the inaugural Zwift Games, this short route is a new take on Watopia’s oldest roads.

Loopin Lava

Animated “Loopin Lava” Route Details (Watopia) Map
Animated map provided by ZwiftHacks

Loopin Lava is the climbiest of the six routes released with Zwift’s November 2024 Jarvis expansion, taking riders up and over the Jarvis KOM as well as the Volcano KOM.

Route Basics

Length: 14.3 km (8.9 miles)
Elevation:
196 m (643‘)
Lead-In: 4.1 km (2.5 miles)
Map: Watopia

Restriction: none

Achievement Badge: 285 XP

Loopin Lava is the climbiest of the six routes released with Zwift’s November 2024 Jarvis expansion, taking riders up and over the Jarvis KOM as well as the Volcano KOM.

Mayan 8

Animated “Mayan 8” Route Details (Watopia) Map
Animated map provided by ZwiftHacks

This shortish route is two different loops, connected by a bit of flat road. The upper loop is a Jungle half-loop, and the lower, larger loop takes in the southern coast road and Mayan Mountainside + Itza KOMs.

Route Basics

Length: 23.1 km (14.4 miles)
Elevation:
241 m (791‘)
Lead-In: 3.1 km (1.9 miles)
Map: Watopia

Restriction: none

Achievement Badge: 460 XP

This shortish route is two different loops, connected by a bit of flat road. The upper loop is a Jungle half-loop, and the lower, larger loop takes in the southern coast road and Mayan Mountainside + Itza KOMs.

Mayan Mash

Animated “Mayan Mash” Route Details (Watopia) Map
Animated map provided by ZwiftHacks

This challenging figure eight route begins and ends flat, but everything in between is quite pitchy. Bring your climbing legs, but also your supertuck!

Route Basics

Length: 34.6 km (21.5 miles)
Elevation:
756 m (2,480‘)
Lead-In: 3.1 km (1.9 miles)
Map: Watopia

Restriction: Level 10+

Achievement Badge: 700 XP

This challenging figure eight route begins and ends flat, but everything in between is quite pitchy. Bring your climbing legs, but also your supertuck!

Mayan San Remo

Animated “Mayan San Remo” Route Details (Watopia) Map
Animated map provided by ZwiftHacks

Winning the award for the best route name in recent Zwistory, “Mayan San Remo” is presumably titled as such because the route profile roughly matches the final kilometers of the famous Milan-San Remo classic. (Check out this Strava segment starting with the Cipressa descent and then climbing the Poggio before descending to the finish in San Remo.)

Route Basics

Length: 21 km (13.0 miles)
Elevation:
219 m (719‘)
Lead-In: 0.3 km (0.2 miles)
Map: Watopia

Restriction: none

Achievement Badge: 420 XP

Winning the award for the best route name in recent Zwistory, “Mayan San Remo” is presumably titled as such because the route profile roughly matches the final kilometers of the famous Milan-San Remo classic. (Check out this Strava segment starting with the Cipressa descent and then climbing the Poggio before descending to the finish in San Remo.)

Mega Pretzel

Animated “The Mega Pretzel” Route Details (Watopia) Map
Animated map provided by ZwiftHacks

Watopia’s “Mega Pretzel” was released with Zwift’s February 1, 2018 update as the longest available route for Zwift’s iconic course. At the time of its release it covered every segment of the course except the radio tower climb, and in fact covered nearly all segments in both directions. The Alpe du Zwift climb is notably absent from this route since the Alpe was released after the route was created.

Route Basics

Length: 107 km (66.5 miles)
Elevation:
1640 m (5,381‘)
Lead-In: 3.7 km (2.3 miles)
Map: Watopia

Restriction: Level 5+

Achievement Badge: 2140 XP

Watopia’s “Mega Pretzel” was released with Zwift’s February 1, 2018 update as the longest available route for Zwift’s iconic course. At the time of its release it covered every segment of the course except the radio tower climb, and in fact covered nearly all segments in both directions. The Alpe du Zwift climb is notably absent from this route since the Alpe was released after the route was created.

Mountain

Animated “Mountain Route” Route Details (Watopia) Map
Animated map provided by ZwiftHacks

This route is simply a loop up to the radio tower, then back through the Italian Villas and the Esses to the downtown finish line. This was the “main” route created to showcase the Epic KOM when it was released in March 2016 as the largest climb in Zwift.

Route Basics

Length: 29.6 km (18.4 miles)
Elevation:
682 m (2,238‘)
Lead-In: 0 km ( miles)
Map: Watopia

Restriction: none

Achievement Badge: 580 XP

This route is simply a loop up to the radio tower, then back through the Italian Villas and the Esses to the downtown finish line. This was the “main” route created to showcase the Epic KOM when it was released in March 2016 as the largest climb in Zwift.

Mountain 8

Animated “Mountain 8” Route Details (Watopia) Map
Animated map provided by ZwiftHacks

The “Mountain 8” route on Watopia similar in distance to “Figure 8“, but with substantially more climbing since it takes you over the reverse Epic KOM and up the radio tower climb. The strongest riders can complete this route in under an hour, but mere mortals will need 75 minutes or more.

Route Basics

Length: 32.1 km (19.9 miles)
Elevation:
691 m (2,267‘)
Lead-In: 0 km ( miles)
Map: Watopia

Restriction: none

Achievement Badge: 640 XP

The “Mountain 8” route on Watopia similar in distance to “Figure 8“, but with substantially more climbing since it takes you over the reverse Epic KOM and up the radio tower climb. The strongest riders can complete this route in under an hour, but mere mortals will need 75 minutes or more.

Mountain Mash

Animated “Mountain Mash” Route Details (Watopia) Map
Animated map provided by ZwiftHacks

Created to support the inaugural Zwift Games, this mountain route takes you straight up the Epic KOM Reverse. Bring a lightweight climbing bike!

Route Basics

Length: 5.7 km (3.5 miles)
Elevation:
335 m (1,099‘)
Lead-In: 0.2 km (0.1 miles)
Map: Watopia

Restriction: none

Achievement Badge: 116 XP

Created to support the inaugural Zwift Games, this mountain route takes you straight up the Epic KOM Reverse. Bring a lightweight climbing bike!

Muir and the Mountain

Animated “Muir and the Mountain” Route Details (Watopia) Map
Animated map provided by ZwiftHacks

One of five routes rolled out with Zwift’s Titans Grove expansion, “Muir and the Mountain” takes you on a loop which includes the Titans Grove “Watopia Preserve” and the Epic KOM. Fittingly named for John Muir, “Father of National Parks”, this route’s in-game description is an adaptation of Muir’s famous quote: “The mountains are calling, and I must go.”

The route’s length and profile make it a nice choice for an hour-long session which includes a hard climbing effort.

Route Basics

Length: 33.9 km (21.1 miles)
Elevation:
793 m (2,602‘)
Lead-In: 5.1 km (3.2 miles)
Map: Watopia

Restriction: none

Achievement Badge: 680 XP

One of five routes rolled out with Zwift’s Titans Grove expansion, “Muir and the Mountain” takes you on a loop which includes the Titans Grove “Watopia Preserve” and the Epic KOM. Fittingly named for John Muir, “Father of National Parks”, this route’s in-game description is an adaptation of Muir’s famous quote: “The mountains are calling, and I must go.”

The route’s length and profile make it a nice choice for an hour-long session which includes a hard climbing effort.

Navig8

Animated “Navig8” Route Details (Watopia) Map
Animated map provided by ZwiftHacks

Added to Watopia in September 2024, Navig8 isn’t so much a figure 8 as it is two loops connected by a long stretch of road.

The larger upper loop is Watopia’s Waistband, while the smaller, hillier lower loop is a common one we’ve seen in other routes: the western portion of the southern coast road plus the Mayan Mountainside and Itza KOMs, ending with a descent on the bottom half of The Grade.

Route Basics

Length: 63.9 km (39.7 miles)
Elevation:
417 m (1,368‘)
Lead-In: 2.3 km (1.4 miles)
Map: Watopia

Restriction: none

Achievement Badge: 1280 XP

Added to Watopia in September 2024, Navig8 isn’t so much a figure 8 as it is two loops connected by a long stretch of road.

The larger upper loop is Watopia’s Waistband, while the smaller, hillier lower loop is a common one we’ve seen in other routes: the western portion of the southern coast road plus the Mayan Mountainside and Itza KOMs, ending with a descent on the bottom half of The Grade.

Ocean Lava Cliffside Loop

Animated “Ocean Lava Cliffside Loop” Route Details (Watopia) Map
Animated map provided by ZwiftHacks

Introduced in Zwift’s December 2020 update, Ocean Lava Cliffside Loop is the first route to use the new Epic KOM Bypass – a twisty, rolling, narrow stretch of cliffside road connecting the lower sections of the Epic KOM and Epic KOM Reverse.

A wonderful choice for anyone seeking a scenic Watopian sightseeing spin, this route should also make for fun racing, as it gives lightweight riders a chance to get away on a short, steep climb halfway through. Heavier, more powerful riders can spend the back half of the loop trying to chase any breakaway down before the finish!

Route Basics

Length: 19.1 km (11.9 miles)
Elevation:
157 m (515‘)
Lead-In: 0.2 km (0.1 miles)
Map: Watopia

Restriction: none

Achievement Badge: 380 XP

Introduced in Zwift’s December 2020 update, Ocean Lava Cliffside Loop is the first route to use the new Epic KOM Bypass – a twisty, rolling, narrow stretch of cliffside road connecting the lower sections of the Epic KOM and Epic KOM Reverse.

A wonderful choice for anyone seeking a scenic Watopian sightseeing spin, this route should also make for fun racing, as it gives lightweight riders a chance to get away on a short, steep climb halfway through. Heavier, more powerful riders can spend the back half of the loop trying to chase any breakaway down before the finish!

Oh Hill No

Animated “Oh Hill No” Route Details (Watopia) Map
Animated map provided by ZwiftHacks

If you’re looking to directly access Zwift’s “The Grade” FTP test climb, this is the route to do it. But you’ll want to be warmed up beforehand, because the test begins as soon as you start pedaling!

Route Basics

Length: 7.9 km (4.9 miles)
Elevation:
306 m (1,004‘)
Lead-In: 0.2 km (0.1 miles)
Map: Watopia

Restriction: Level 10+

Achievement Badge: 160 XP

If you’re looking to directly access Zwift’s “The Grade” FTP test climb, this is the route to do it. But you’ll want to be warmed up beforehand, because the test begins as soon as you start pedaling!

Out and Back Again

Animated “Out and Back Again” Route Details (Watopia) Map
Animated map provided by ZwiftHacks

“Out and Back Again” is a route which is quite flat… until it isn’t. Released as part of Zwift’s Fuego Flats desert expansion, this oddly-named route isn’t an out and back at all, but rather two loops connected in a figure 8-style course.

This is a popular race route given its length and mostly-flat profile punctuated by two distinct climb sections.

Route Basics

Length: 40.3 km (25.0 miles)
Elevation:
329 m (1,079‘)
Lead-In: 2.3 km (1.4 miles)
Map: Watopia

Restriction: none

Achievement Badge: 840 XP

“Out and Back Again” is a route which is quite flat… until it isn’t. Released as part of Zwift’s Fuego Flats desert expansion, this oddly-named route isn’t an out and back at all, but rather two loops connected in a figure 8-style course.

This is a popular race route given its length and mostly-flat profile punctuated by two distinct climb sections.

Peak Performance

Animated “Peak Performance” Route Details (Watopia) Map
Animated map provided by ZwiftHacks

Want a long warmup before taking on The Grade FTP test? Peak Performance is a large loop route beginning in downtown Watopia, giving 23km of rolling terrain as a lead-in to The Grade before continuing on over the Epic KOM and back to downtown.

Route Basics

Length: 45.7 km (28.4 miles)
Elevation:
726 m (2,382‘)
Lead-In: 0.9 km (0.6 miles)
Map: Watopia

Restriction: Level 10+

Achievement Badge: 920 XP

Want a long warmup before taking on The Grade FTP test? Peak Performance is a large loop route beginning in downtown Watopia, giving 23km of rolling terrain as a lead-in to The Grade before continuing on over the Epic KOM and back to downtown.

Power Punches

Animated “Power Punches” Route Details (Watopia) Map
Animated map provided by ZwiftHacks

Added to the game in August 2025 as an event-only route to host events for Zwift Camp: Baseline, Power Punches takes riders from downtown Watopia through The Esses and the Volcano before completing three clockwise loops of Jarvis.

Route Basics

Length: 23.5 km (14.6 miles)
Elevation:
205 m (673‘)
Lead-In: 0.2 km (0.1 miles)
Map: Watopia

Restriction: none

Achievement Badge: 470 XP

Added to the game in August 2025 as an event-only route to host events for Zwift Camp: Baseline, Power Punches takes riders from downtown Watopia through The Esses and the Volcano before completing three clockwise loops of Jarvis.

Power to the Tower

Animated “Power to the Tower” Route Details (Watopia) Map
Animated map provided by ZwiftHacks

Power to the Tower is perhaps the most inventive of the new routes announced July 2024 for the inaugural Zwift World Series. It features three tough climbs: the Epic KOM Reverse, The Grade, and the Epic KOM forward with the Radio Tower KOM as the finish line!

As of July 2024 this is, in fact, the only route in Watopia ending at the Radio Tower KOM.

Route Basics

Length: 43.8 km (27.2 miles)
Elevation:
1494 m (4,902‘)
Lead-In: 0.9 km (0.6 miles)
Map: Watopia

Restriction: none

Achievement Badge: 900 XP

Power to the Tower is perhaps the most inventive of the new routes announced July 2024 for the inaugural Zwift World Series. It features three tough climbs: the Epic KOM Reverse, The Grade, and the Epic KOM forward with the Radio Tower KOM as the finish line!

As of July 2024 this is, in fact, the only route in Watopia ending at the Radio Tower KOM.

The Pretzel

Animated “The Pretzel” Route Details (Watopia) Map
Animated map provided by ZwiftHacks

When this route was released it was the longest and most challenging on Zwift, covering all segments in Watopia at least twice. With new roads and routes added since its creation, The Pretzel is no longer the longest or toughest route. But it still packs a punch at 44.8 miles (72.1km) in length with 4,375′ (1333m) of elevation gain.

Route Basics

Length: 72.9 km (45.3 miles)
Elevation:
1362 m (4,469‘)
Lead-In: 0 km ( miles)
Map: Watopia

Restriction: none

Achievement Badge: 1440 XP

When this route was released it was the longest and most challenging on Zwift, covering all segments in Watopia at least twice. With new roads and routes added since its creation, The Pretzel is no longer the longest or toughest route. But it still packs a punch at 44.8 miles (72.1km) in length with 4,375′ (1333m) of elevation gain.

Quatch Quest

Animated “Quatch Quest” Route Details (Watopia) Map
Animated map provided by ZwiftHacks

One of five routes rolled out with Zwift’s Titans Grove expansion, “Quatch Quest” is by far the most challenging, with more than twice the elevation gain of Muir and the Mountain, the next most mountainous route.

Zwift teases us in the description of this route: “If you keep your eyes open, there’s no telling what you might see.” What are they referring to? We know a large, bluish Yeti has been spotted on Alpe du Zwift. But Sasquatch is an entirely different creature. Perhaps one is hiding in Titans Grove?

Route Basics

Length: 46.7 km (29.0 miles)
Elevation:
1710 m (5,610‘)
Lead-In: 0 km ( miles)
Map: Watopia

Restriction: Level 6+

Achievement Badge: 920 XP

One of five routes rolled out with Zwift’s Titans Grove expansion, “Quatch Quest” is by far the most challenging, with more than twice the elevation gain of Muir and the Mountain, the next most mountainous route.

Zwift teases us in the description of this route: “If you keep your eyes open, there’s no telling what you might see.” What are they referring to? We know a large, bluish Yeti has been spotted on Alpe du Zwift. But Sasquatch is an entirely different creature. Perhaps one is hiding in Titans Grove?

Radio Rendezvous

Animated “Radio Rendezvous” Route Details (Watopia) Map
Animated map provided by ZwiftHacks

Added in Zwift’s September 2024 update, this route features The Grade as its central climb. But it doesn’t stop there, as the route continues up the Epic KOM and finishes atop the dauntingly steep Radio Tower KOM!

This route is actually a solid option if you’re looking to complete The Grade as an FTP test, but want a route that offers a nice warmup prior to the max effort.

Route Basics

Length: 20.4 km (12.7 miles)
Elevation:
728 m (2,388‘)
Lead-In: 3.1 km (1.9 miles)
Map: Watopia

Restriction: none

Achievement Badge: 410 XP

Added in Zwift’s September 2024 update, this route features The Grade as its central climb. But it doesn’t stop there, as the route continues up the Epic KOM and finishes atop the dauntingly steep Radio Tower KOM!

This route is actually a solid option if you’re looking to complete The Grade as an FTP test, but want a route that offers a nice warmup prior to the max effort.

Repack Rush

Animated “Repack Rush” Route Details (Watopia) Map
Animated map provided by ZwiftHacks

A new steering test course to replace Repack Ridge, Repack Rush is a twisting, paved route with boost strips, time bonuses, and hazards. Steering your way into the helpful elements, steer to avoid the hazards, and see where you’re ranked on the leaderboard!

Route Basics

Length: 2.76 km (1.7 miles)
Elevation:
27 m (89‘)
Lead-In: 0 km ( miles)
Map: Watopia

Restriction: Steering required

Achievement Badge: 56 XP

A new steering test course to replace Repack Ridge, Repack Rush is a twisting, paved route with boost strips, time bonuses, and hazards. Steering your way into the helpful elements, steer to avoid the hazards, and see where you’re ranked on the leaderboard!

Road to Ruins

Animated “Road to Ruins” Route Details (Watopia) Map
Animated map provided by ZwiftHacks

Watopia’s “Road to Ruins” was added with the Mayan jungle expansion in late October 2017. It begins just like the Jungle Circuit, but takes you to the Volcano Flat and back home to the start/finish banner instead of leaving you riding jungle laps.

Route Basics

Length: 29.6 km (18.4 miles)
Elevation:
276 m (906‘)
Lead-In: 0 km ( miles)
Map: Watopia

Restriction: Level 5+

Achievement Badge: 580 XP

Watopia’s “Road to Ruins” was added with the Mayan jungle expansion in late October 2017. It begins just like the Jungle Circuit, but takes you to the Volcano Flat and back home to the start/finish banner instead of leaving you riding jungle laps.

Road to Sky

Animated “Road to Sky” Route Details (Watopia) Map
Animated map provided by ZwiftHacks

Watopia’s “Road to Sky” route is the shortest route which includes Alpe du Zwift, a massive climb modeled after the iconic Alp d’Huez.

Route Basics

Length: 17.3 km (10.7 miles)
Elevation:
1045 m (3,428‘)
Lead-In: 0.1 km (0.1 miles)
Map: Watopia

Restriction: Level 6+

Achievement Badge: 380 XP

Watopia’s “Road to Sky” route is the shortest route which includes Alpe du Zwift, a massive climb modeled after the iconic Alp d’Huez.

Sand and Sequoias

Animated “Sand and Sequoias” Route Details (Watopia) Map
Animated map provided by ZwiftHacks

The simplest of five routes rolled out with Zwift’s Titans Grove expansion, “Sand and Sequoias” is aptly named since it includes the Fuego Flats desert plus the rolling road of Titans Grove sequoia forest.

Route Basics

Length: 20.1 km (12.5 miles)
Elevation:
175 m (574‘)
Lead-In: 2.3 km (1.4 miles)
Map: Watopia

Restriction: none

Achievement Badge: 400 XP

The simplest of five routes rolled out with Zwift’s Titans Grove expansion, “Sand and Sequoias” is aptly named since it includes the Fuego Flats desert plus the rolling road of Titans Grove sequoia forest.

Serpentine 8

Animated “Serpentine 8” Route Details (Watopia) Map
Animated map provided by ZwiftHacks

Introduced in Zwift’s December 2020 update, Serpentine 8 is the first route to use the new Mayan Bridge road – a twisty stretch of dirt/stone/wood road crossing the jungle waters and bisecting the Mayan Jungle Circuit. This is a figure 8 route in terms of road layout, but it is ridden in such a way as to cover all roads (the Jungle Circuit and Mayan Bridge) in both directions. It also features a substantial lead-in which includes your first trip over the bridge.

Route Basics

Length: 19.4 km (12.1 miles)
Elevation:
206 m (676‘)
Lead-In: 7.5 km (4.7 miles)
Map: Watopia

Restriction: none

Achievement Badge: 385 XP

Introduced in Zwift’s December 2020 update, Serpentine 8 is the first route to use the new Mayan Bridge road – a twisty stretch of dirt/stone/wood road crossing the jungle waters and bisecting the Mayan Jungle Circuit. This is a figure 8 route in terms of road layout, but it is ridden in such a way as to cover all roads (the Jungle Circuit and Mayan Bridge) in both directions. It also features a substantial lead-in which includes your first trip over the bridge.

Shorelines and Summits

Animated “Shorelines and Summits” Route Details (Watopia) Map
Animated map provided by ZwiftHacks

This is one of the more difficult routes released with Zwift’s October 2023 coastal road expansion… a much spicier version of the Sugar Cookie. “Shorelines and Summits” begins near the Jungle start pens, then takes you on a loop along the coastline and up the Epic KOM, including the Radio Tower climb!

Route Basics

Length: 46.1 km (28.6 miles)
Elevation:
776 m (2,546‘)
Lead-In: 4.1 km (2.5 miles)
Map: Watopia

Restriction: Level 10+

Achievement Badge: 924 XP

This is one of the more difficult routes released with Zwift’s October 2023 coastal road expansion… a much spicier version of the Sugar Cookie. “Shorelines and Summits” begins near the Jungle start pens, then takes you on a loop along the coastline and up the Epic KOM, including the Radio Tower climb!

Snowman

Animated “Snowman” Route Details (Watopia) Map
Animated map provided by ZwiftHacks

This route is made up of three stacked loops (hence the name) taking rides through sections of Watopia proper, the Epic KOM, the Mayan Jungle, and The Grade.

Route Basics

Length: 43.9 km (27.3 miles)
Elevation:
577 m (1,893‘)
Lead-In: 0.2 km (0.1 miles)
Map: Watopia

Restriction: none

Achievement Badge: 880 XP

This route is made up of three stacked loops (hence the name) taking rides through sections of Watopia proper, the Epic KOM, the Mayan Jungle, and The Grade.

Southern Coast Cruise

Animated “Southern Coast Cruise” Route Details (Watopia) Map
Animated map provided by ZwiftHacks

Launched in September 2025 as an event-only TT course to kick off round 1 of ZRL, Southern Coast Cruise is a rolling route that covers the eastern portion of Watopia’s southern coast road in both directions.

Route Basics

Length: 23.6 km (14.7 miles)
Elevation:
137 m (449‘)
Lead-In: 2.7 km (1.7 miles)
Map: Watopia

Restriction: none

Achievement Badge: 475 XP

Launched in September 2025 as an event-only TT course to kick off round 1 of ZRL, Southern Coast Cruise is a rolling route that covers the eastern portion of Watopia’s southern coast road in both directions.

Spiral Into the Volcano

Animated “Spiral Into the Volcano” Route Details (Watopia) Map
Animated map provided by ZwiftHacks

Announced as a Rebel Route in May 2019, Spiral Into the Volcano was created because we were looking for a longer, flat route with a spicy finish. If you follow this route on a map you’ll see how it was named: an ever-tightening counter-clockwise spiral which culminates in the spiral climb up the volcano.

This route was added to the Zwift canon in January 2024 to host the final stage of Tour de Zwift 2024.

Route Basics

Length: 55.8 km (34.7 miles)
Elevation:
336 m (1,102‘)
Lead-In: 0.2 km (0.1 miles)
Map: Watopia

Restriction: none

Achievement Badge: 1030 XP

Announced as a Rebel Route in May 2019, Spiral Into the Volcano was created because we were looking for a longer, flat route with a spicy finish. If you follow this route on a map you’ll see how it was named: an ever-tightening counter-clockwise spiral which culminates in the spiral climb up the volcano.

This route was added to the Zwift canon in January 2024 to host the final stage of Tour de Zwift 2024.

Sugar Cookie

Animated “Sugar Cookie” Route Details (Watopia) Map
Animated map provided by ZwiftHacks

One of the eight routes released with Zwift’s October 2023 southern coast expansion, this loop is the sweeter, shorter sister to Shorelines and Summits

Route Basics

Length: 33.6 km (20.9 miles)
Elevation:
251 m (823‘)
Lead-In: 5.6 km (3.5 miles)
Map: Watopia

Restriction: Level 10+

Achievement Badge: 660 XP

One of the eight routes released with Zwift’s October 2023 southern coast expansion, this loop is the sweeter, shorter sister to Shorelines and Summits

Tair Dringfa Fechan

Animated “Tair Dringfa Fechan” Route Details (Watopia) Map
Animated map provided by ZwiftHacks

Designed by Zwifter Bryan Culliford (CLS), this route won the ZRL 2024/25 Round 2 design contest, earning it the right to be added to the game and raced for the final race of the round.

Here’s how Bryan describes the route:

Tair Dringfa Fechan (translated from Welsh as Three Little Climbs) is a route determined to test riders before reaching the finish at the mighty Titans Reverse segment banner. The route tackles two short climbs first. The first climb is a tough one without any powerups, but a long downhill offers chasers a chance to catch up. The second climb follows, where you might receive a feather or an aero helmet powerup, depending on your luck – one for the breakaway or the chase. For the final climb, you’ll have three chances to get a feather powerup. Do you gamble and use it early, or save it for the push to the finish?

Route Basics

Length: 31.5 km (19.6 miles)
Elevation:
349 m (1,145‘)
Lead-In: 0.5 km (0.3 miles)
Map: Watopia

Restriction: none

Achievement Badge: 625 XP

Designed by Zwifter Bryan Culliford (CLS), this route won the ZRL 2024/25 Round 2 design contest, earning it the right to be added to the game and raced for the final race of the round.

Here’s how Bryan describes the route:

Tair Dringfa Fechan (translated from Welsh as Three Little Climbs) is a route determined to test riders before reaching the finish at the mighty Titans Reverse segment banner. The route tackles two short climbs first. The first climb is a tough one without any powerups, but a long downhill offers chasers a chance to catch up. The second climb follows, where you might receive a feather or an aero helmet powerup, depending on your luck – one for the breakaway or the chase. For the final climb, you’ll have three chances to get a feather powerup. Do you gamble and use it early, or save it for the push to the finish?

Temple Trek

Animated “Temple Trek” Route Details (Watopia) Map
Animated map provided by ZwiftHacks

Looking for an easy route badge? The shortest of the eight routes released with Zwift’s October 2023 southern coast expansion, Temple Trek is also the most downhill route in game. It begins with a descent through the Jungle, then levels off for the second half. 

Route Basics

Length: 6.5 km (4.0 miles)
Elevation:
25 m (82‘)
Lead-In: 4.1 km (2.5 miles)
Map: Watopia

Restriction: Level 10+

Achievement Badge: 128 XP

Looking for an easy route badge? The shortest of the eight routes released with Zwift’s October 2023 southern coast expansion, Temple Trek is also the most downhill route in game. It begins with a descent through the Jungle, then levels off for the second half. 

Tempus Fugit

Animated “Tempus Fugit” Route Details (Watopia) Map
Animated map provided by ZwiftHacks

“Tempus Fugit” is Latin for “time flees (or flies)”, and this is certainly a flat, fast route. Released as part of Zwift’s Fuego Flats desert expansion, it is designed as an out and back TT race course, with the lead-in from the desert start pens making the course come in right around 20km in length for one lap.

Route Basics

Length: 17.3 km (10.7 miles)
Elevation:
26 m (85‘)
Lead-In: 2.3 km (1.4 miles)
Map: Watopia

Restriction: none

Achievement Badge: 380 XP

“Tempus Fugit” is Latin for “time flees (or flies)”, and this is certainly a flat, fast route. Released as part of Zwift’s Fuego Flats desert expansion, it is designed as an out and back TT race course, with the lead-in from the desert start pens making the course come in right around 20km in length for one lap.

The Classic

Animated “The Classic” Route Details (Watopia) Map
Animated map provided by ZwiftHacks

The route that started it all! When Zwift launched its initial beta on September 30, 2014, the only road in game was Jarvis Island. And we could only ride in one direction!

“The Classic” brings back this original road, in the original direction, but this time as part of Watopia. (Curious about the original road? Here’s the Strava segment which saw just over 120,000 attempts before Jarvis closed.)

Route Basics

Length: 4.7 km (2.9 miles)
Elevation:
49 m (161‘)
Lead-In: 4.1 km (2.5 miles)
Map: Watopia

Restriction: none

Achievement Badge: 100 XP

The route that started it all! When Zwift launched its initial beta on September 30, 2014, the only road in game was Jarvis Island. And we could only ride in one direction!

“The Classic” brings back this original road, in the original direction, but this time as part of Watopia. (Curious about the original road? Here’s the Strava segment which saw just over 120,000 attempts before Jarvis closed.)

The Magnificent 8

Animated “The Magnificent 8” Route Details (Watopia) Map
Animated map provided by ZwiftHacks

“The Magnificent 8” route was rolled out with Zwift’s October 29, 2019 update, and was used as the route for the Halloween dinosaur costume scavenger hunt. It was released as an event-only route, and became an open route in January 2025. It’s a mostly-flat route, with the only significant climb being the reverse Hilly KOM.

Route Basics

Length: 28.9 km (18.0 miles)
Elevation:
156 m (512‘)
Lead-In: 0.2 km (0.1 miles)
Map: Watopia

Restriction: none

Achievement Badge: 580 XP

“The Magnificent 8” route was rolled out with Zwift’s October 29, 2019 update, and was used as the route for the Halloween dinosaur costume scavenger hunt. It was released as an event-only route, and became an open route in January 2025. It’s a mostly-flat route, with the only significant climb being the reverse Hilly KOM.

Three Sisters

Animated “Three Sisters” Route Details (Watopia) Map
Animated map provided by ZwiftHacks

The “Three Sisters” route covers Watopia’s three oldest climbs (Hilly KOM, Epic KOM, and Volcano KOM) in a forward direction. While not as punishing as The Pretzel and some of Watopia’s toughest routes, it’ll still put you in the hurt locker with almost 3000′ of climbing!

Route Basics

Length: 48 km (29.8 miles)
Elevation:
897 m (2,943‘)
Lead-In: 0 km ( miles)
Map: Watopia

Restriction: none

Achievement Badge: 950 XP

The “Three Sisters” route covers Watopia’s three oldest climbs (Hilly KOM, Epic KOM, and Volcano KOM) in a forward direction. While not as punishing as The Pretzel and some of Watopia’s toughest routes, it’ll still put you in the hurt locker with almost 3000′ of climbing!

Three Little Sisters

Animated “Three Little Sisters” Route Details (Watopia) Map
Animated map provided by ZwiftHacks

Originally published as a Rebel Route by Zwift Insider in February 2020, “Three Little Sisters” was suggested by Zwifter Gene Kruger. He named it in homage to Zwift’s official “Three Sisters” route which takes us over the Hilly, Volcano, and Epic KOMs. Three Little Sisters, in contrast, takes us over the Hilly, Titans Grove, and Volcano KOMs – in that order. Each new climb is longer than the one before, and we take the shortest possible route to get from climb to climb. Zwift’s February 2022 update included this route as an event-only route that awards an achievement badge. The April 2022 update then made this route free ridable.

Route Basics

Length: 37.8 km (23.5 miles)
Elevation:
434 m (1,424‘)
Lead-In: 0 km ( miles)
Map: Watopia

Restriction: none

Achievement Badge: 755 XP

Originally published as a Rebel Route by Zwift Insider in February 2020, “Three Little Sisters” was suggested by Zwifter Gene Kruger. He named it in homage to Zwift’s official “Three Sisters” route which takes us over the Hilly, Volcano, and Epic KOMs. Three Little Sisters, in contrast, takes us over the Hilly, Titans Grove, and Volcano KOMs – in that order. Each new climb is longer than the one before, and we take the shortest possible route to get from climb to climb. Zwift’s February 2022 update included this route as an event-only route that awards an achievement badge. The April 2022 update then made this route free ridable.

Three Step Sisters

Animated “Three Step Sisters” Route Details (Watopia) Map
Animated map provided by ZwiftHacks

The third in a series of “Three Sisters” Watopia routes (see Three Sisters and Three Little Sisters), Three Step Sisters takes us on a progressive journey over three climbs the other two routes don’t touch: the Jarvis KOM Reverse, the base of the Epic KOM Reverse, and The Grade.

This was added to the game as an event-only route in early December 2025, for use in Zwift Games 2026. If Zwift sticks to recent patterns, this route will become free-rideable soon after that series ends.

Route Basics

Length: 37.9 km (23.5 miles)
Elevation:
586 m (1,923‘)
Lead-In: 0.2 km (0.1 miles)
Map: Watopia

Restriction: none

Achievement Badge: 755 XP

The third in a series of “Three Sisters” Watopia routes (see Three Sisters and Three Little Sisters), Three Step Sisters takes us on a progressive journey over three climbs the other two routes don’t touch: the Jarvis KOM Reverse, the base of the Epic KOM Reverse, and The Grade.

This was added to the game as an event-only route in early December 2025, for use in Zwift Games 2026. If Zwift sticks to recent patterns, this route will become free-rideable soon after that series ends.

Tick Tock

Animated “Tick Tock” Route Details (Watopia) Map
Animated map provided by ZwiftHacks

“Tick Tock” is a clockwise loop covering Fuego Flats and portions of the Ocean Boulevard tube. Released as part of Zwift’s Fuego Flats desert expansion, this route is flatter than Watopia Flat or Volcano Flat, with the only pitchy bits being in and out of Fuego Flats, and in and out of the ocean tunnel.

Route Basics

Length: 16.8 km (10.4 miles)
Elevation:
53 m (174‘)
Lead-In: 2.3 km (1.4 miles)
Map: Watopia

Restriction: none

Achievement Badge: 388 XP

“Tick Tock” is a clockwise loop covering Fuego Flats and portions of the Ocean Boulevard tube. Released as part of Zwift’s Fuego Flats desert expansion, this route is flatter than Watopia Flat or Volcano Flat, with the only pitchy bits being in and out of Fuego Flats, and in and out of the ocean tunnel.

Tides and Temples

Animated “Tides and Temples” Route Details (Watopia) Map
Animated map provided by ZwiftHacks

Start flat. Climb. Descend. End flat. Even though the roads themselves twist and turn through a variety of landscapes, this route’s overall profile is pretty straightforward and could make for good racing. Can the climbers get away on the mountain? And if they do, can they stay away to the finish?

Route Basics

Length: 36.5 km (22.7 miles)
Elevation:
460 m (1,509‘)
Lead-In: 2.6 km (1.6 miles)
Map: Watopia

Restriction: Level 10+

Achievement Badge: 730 XP

Start flat. Climb. Descend. End flat. Even though the roads themselves twist and turn through a variety of landscapes, this route’s overall profile is pretty straightforward and could make for good racing. Can the climbers get away on the mountain? And if they do, can they stay away to the finish?

Tour of Fire and Ice

Animated “Tour of Fire and Ice” Route Details (Watopia) Map
Animated map provided by ZwiftHacks

Watopia’s “Tour of Fire and Ice” begins in the lava and ends in freezing snow above the treeline. It’s a tour of Watopian extremes!

The route begins at the Volcano banner, then takes you to where the Road to Sky route begins. Therefore, this route is basically Road to Sky with ~7 miles and a few hundred feet of climbing added.

Route Basics

Length: 25.3 km (15.7 miles)
Elevation:
1167 m (3,829‘)
Lead-In: 2.7 km (1.7 miles)
Map: Watopia

Restriction: Level 6+

Achievement Badge: 500 XP

Watopia’s “Tour of Fire and Ice” begins in the lava and ends in freezing snow above the treeline. It’s a tour of Watopian extremes!

The route begins at the Volcano banner, then takes you to where the Road to Sky route begins. Therefore, this route is basically Road to Sky with ~7 miles and a few hundred feet of climbing added.

Triple Flat Loops

Animated “Triple Flat Loops” Route Details (Watopia) Map
Animated map provided by ZwiftHacks

Originally published as Zwift Insider’s first Rebel Route in April 2019, “Triple Flat Loops” covers all three of Watopia’s “flat” routes, including Fuego Flats’ Tick Tock, Volcano Flat, and of course the classic Flat route.

Zwift’s February 2022 update included this route as an event-only route that awards an achievement badge. The April 2022 update then made this route free ridable.

Route Basics

Length: 33.9 km (21.1 miles)
Elevation:
134 m (440‘)
Lead-In: 2.3 km (1.4 miles)
Map: Watopia

Restriction: none

Achievement Badge: 680 XP

Originally published as Zwift Insider’s first Rebel Route in April 2019, “Triple Flat Loops” covers all three of Watopia’s “flat” routes, including Fuego Flats’ Tick Tock, Volcano Flat, and of course the classic Flat route.

Zwift’s February 2022 update included this route as an event-only route that awards an achievement badge. The April 2022 update then made this route free ridable.

Triple Twist

Animated “Triple Twist” Route Details (Watopia) Map
Animated map provided by ZwiftHacks

Released in Zwift’s November 2024 Jarvis expansion, Triple Twist gets its name from the three loops you complete as you ride around Jarvis Island, the Volcano, and the downtown/Hilly KOM area.

Route Basics

Length: 19.8 km (12.3 miles)
Elevation:
180 m (591‘)
Lead-In: 4.5 km (2.8 miles)
Map: Watopia

Restriction: none

Achievement Badge: 400 XP

Released in Zwift’s November 2024 Jarvis expansion, Triple Twist gets its name from the three loops you complete as you ride around Jarvis Island, the Volcano, and the downtown/Hilly KOM area.

Two Bridges Loop

Animated “Two Bridges Loop” Route Details (Watopia) Map
Animated map provided by ZwiftHacks

Introduced in Zwift’s December 2020 update, Two Bridges Loop is the first route to use the new KOM Bypass – a short stretch of road which connects the Hilly KOM forward with the Hilly KOM reverse approximately halfway up each climb, effectively shortcutting both KOM segments. This route is simply an abbreviated version of the event-only Hilly Route Reverse, since we remove 2.1km of road and 20m of elevation gain by taking the KOM bypass.

Route Basics

Length: 7.1 km (4.4 miles)
Elevation:
81 m (266‘)
Lead-In: 0 km ( miles)
Map: Watopia

Restriction: none

Achievement Badge: 140 XP

Introduced in Zwift’s December 2020 update, Two Bridges Loop is the first route to use the new KOM Bypass – a short stretch of road which connects the Hilly KOM forward with the Hilly KOM reverse approximately halfway up each climb, effectively shortcutting both KOM segments. This route is simply an abbreviated version of the event-only Hilly Route Reverse, since we remove 2.1km of road and 20m of elevation gain by taking the KOM bypass.

Über Pretzel

Animated “The Über Pretzel” Route Details (Watopia) Map
Animated map provided by ZwiftHacks

First came The Pretzel at 72km long and 1,333m of elevation. Then the Mega Pretzel arrived, 107km long with 1,642m of elevation. Now there’s a new king of the hill: “The Über Pretzel”.

Released as part of Zwift’s Fuego Flats desert expansion, this route covered every bit of tarmac available in Watopia at the time of its release – sometimes in both directions. It is most similar to the Mega Pretzel, but adds the Fuego Flats desert roads, the Radio Tower climb, and an Alpe du Zwift finish. Wow!

Route Basics

Length: 128.3 km (79.7 miles)
Elevation:
2335 m (7,661‘)
Lead-In: 0.5 km (0.3 miles)
Map: Watopia

Restriction: Level 6+

Achievement Badge: 2560 XP

First came The Pretzel at 72km long and 1,333m of elevation. Then the Mega Pretzel arrived, 107km long with 1,642m of elevation. Now there’s a new king of the hill: “The Über Pretzel”.

Released as part of Zwift’s Fuego Flats desert expansion, this route covered every bit of tarmac available in Watopia at the time of its release – sometimes in both directions. It is most similar to the Mega Pretzel, but adds the Fuego Flats desert roads, the Radio Tower climb, and an Alpe du Zwift finish. Wow!

Volcano Circuit

Animated “Volcano Circuit” Route Details (Watopia) Map
Animated map provided by ZwiftHacks

Watopia’s “Volcano Circuit” route takes you around and through the volcanic island in a clockwise direction.

Route Basics

Length: 4.1 km (2.5 miles)
Elevation:
20 m (66‘)
Lead-In: 2.7 km (1.7 miles)
Map: Watopia

Restriction: none

Achievement Badge: 80 XP

Watopia’s “Volcano Circuit” route takes you around and through the volcanic island in a clockwise direction.

Volcano Circuit CCW

Animated “Volcano Circuit CCW” Route Details (Watopia) Map
Animated map provided by ZwiftHacks

Route Basics

Length: 4.1 km (2.5 miles)
Elevation:
20 m (66‘)
Lead-In: 4.8 km (3.0 miles)
Map: Watopia

Restriction: none

Achievement Badge: 80 XP

Volcano Climb

Animated “Volcano Climb” Route Details (Watopia) Map
Animated map provided by ZwiftHacks

Route Basics

Length: 23.1 km (14.4 miles)
Elevation:
203 m (666‘)
Lead-In: 0 km ( miles)
Map: Watopia

Restriction: none

Achievement Badge: 460 XP

Volcano Flat

Animated “Volcano Flat” Route Details (Watopia) Map
Animated map provided by ZwiftHacks

Watopia’s “Volcano Flat” route is similar to the “Flat Route” except it turns at the Italian Village, bypassing the Esses and taking you around half of the volcano circuit clockwise.

Route Basics

Length: 12.3 km (7.6 miles)
Elevation:
50 m (164‘)
Lead-In: 0 km ( miles)
Map: Watopia

Restriction: none

Achievement Badge: 240 XP

Watopia’s “Volcano Flat” route is similar to the “Flat Route” except it turns at the Italian Village, bypassing the Esses and taking you around half of the volcano circuit clockwise.

Waisted 8

Animated “Waisted 8” Route Details (Watopia) Map
Animated map provided by ZwiftHacks

This route gets its name from Watopia’s Waistband since both routes cover the “waistband” encircling Watopia’s Volcano, Downtown, and Fuego Flats areas.

Waisted 8 traverses this loop in the opposite direction, though, and includes a loop of Jarvis Island for good measure. 

Route Basics

Length: 30.7 km (19.1 miles)
Elevation:
144 m (472‘)
Lead-In: 0.2 km (0.1 miles)
Map: Watopia

Restriction: none

Achievement Badge: 615 XP

This route gets its name from Watopia’s Waistband since both routes cover the “waistband” encircling Watopia’s Volcano, Downtown, and Fuego Flats areas.

Waisted 8 traverses this loop in the opposite direction, though, and includes a loop of Jarvis Island for good measure. 

Watopia's Waistband

Animated “Watopia’s Waistband” Route Details (Watopia) Map
Animated map provided by ZwiftHacks

Originally created as a “rebel route”, Watopia’s Waistband was launched in game as an event-only route, then became an open route in the December 2022 update. It’s called “Watopia’s Waistband” because it’s a perimeter route that nicely encircles key landmarks in Watopia proper including downtown Watopia, Fuego Flats, the Italian Villas, the Volcano, and the Fishing Village.

Route Basics

Length: 25.4 km (15.8 miles)
Elevation:
96 m (315‘)
Lead-In: 2.3 km (1.4 miles)
Map: Watopia

Restriction:

Achievement Badge: 555 XP

Originally created as a “rebel route”, Watopia’s Waistband was launched in game as an event-only route, then became an open route in the December 2022 update. It’s called “Watopia’s Waistband” because it’s a perimeter route that nicely encircles key landmarks in Watopia proper including downtown Watopia, Fuego Flats, the Italian Villas, the Volcano, and the Fishing Village.

Watts of the Wild

Animated “Watts of the Wild” Route Details (Watopia) Map
Animated map provided by ZwiftHacks

Released in October 2025 to host Zwift Unlocked events, Watts of the Wild maps out as three interconnected loops encompassing Jarvis Island, Fuego Flats/Titans Grove, and Watopia proper.

Route Basics

Length: 42 km (26.1 miles)
Elevation:
309 m (1,014‘)
Lead-In: 0.2 km (0.1 miles)
Map: Watopia

Restriction: none

Achievement Badge: 840 XP

Released in October 2025 to host Zwift Unlocked events, Watts of the Wild maps out as three interconnected loops encompassing Jarvis Island, Fuego Flats/Titans Grove, and Watopia proper.

Whole Lotta Lava

Animated “Whole Lotta Lava” Route Details (Watopia) Map
Animated map provided by ZwiftHacks

Watopia’s “Whole Lotta Lava” began as an event-only route on Zwift, meaning it was only available for use in events and could not be ridden on a freeride or individual workout. But that changed around May 11, 2019, when Zwift released an update which made this challenging route available in-game.

Route Basics

Length: 12.3 km (7.6 miles)
Elevation:
160 m (525‘)
Lead-In: 4.8 km (3.0 miles)
Map: Watopia

Restriction: none

Achievement Badge: 240 XP

Watopia’s “Whole Lotta Lava” began as an event-only route on Zwift, meaning it was only available for use in events and could not be ridden on a freeride or individual workout. But that changed around May 11, 2019, when Zwift released an update which made this challenging route available in-game.

ZG25 Queen

Animated “ZG25 Queen” Route Details (Watopia) Map
Animated map provided by ZwiftHacks

Released as the final route for Zwift Games 2025, ZG25 Queen is certainly the Queen stage for the series, boasting a length and elevation much greater than the other four Zwift Games 2025 routes.

Route Basics

Length: 44.6 km (27.7 miles)
Elevation:
896 m (2,940‘)
Lead-In: 0.2 km (0.1 miles)
Map: Watopia

Restriction: none

Achievement Badge: 895 XP

Released as the final route for Zwift Games 2025, ZG25 Queen is certainly the Queen stage for the series, boasting a length and elevation much greater than the other four Zwift Games 2025 routes.

Zwift Games 2024 Epic

Animated “Zwift Games 2024 Epic” Route Details (Watopia) Map
Animated map provided by ZwiftHacks

Created to support the “Epic Championships” in the inaugural Zwift Games, this long route includes 5 KQOM and 5 sprint segments!

Route Basics

Length: 79.6 km (49.5 miles)
Elevation:
821 m (2,694‘)
Lead-In: 1.9 km (1.2 miles)
Map: Watopia

Restriction: none

Achievement Badge: 1594 XP

Created to support the “Epic Championships” in the inaugural Zwift Games, this long route includes 5 KQOM and 5 sprint segments!

Event-Only Routes

The following routes are only used for events. You cannot choose these routes from your ride screen, but instead must join an event using the route in order to ride it.

Bambino Fondo

Animated “Bambino Fondo” Route Details (Watopia) Map
Animated map provided by ZwiftHacks

The Bambino Fondo is one of three fondo routes Zwift unveiled in January 2019 for its Zwift fondo series. Currently these are event-only routes, meaning they are only available for use in events and cannot be ridden on a freeride or individual workout.

Route Basics

Length: 52.1 km (32.4 miles)
Elevation:
581 m (1,906‘)
Lead-In: 0.5 km (0.3 miles)
Map: Watopia

Restriction: Event Only

Achievement Badge: none

The Bambino Fondo is one of three fondo routes Zwift unveiled in January 2019 for its Zwift fondo series. Currently these are event-only routes, meaning they are only available for use in events and cannot be ridden on a freeride or individual workout.

Big Loop Reverse

Animated “Big Loop Reverse” Route Details (Watopia) Map
Animated map provided by ZwiftHacks

Route Basics

Length: 42.5 km (26.4 miles)
Elevation:
663 m (2,175‘)
Lead-In: 0.2 km (0.1 miles)
Map: Watopia

Restriction: Event Only

Achievement Badge: none

Flat Route Reverse

Animated “Flat Route Reverse” Route Details (Watopia) Map
Animated map provided by ZwiftHacks

Route Basics

Length: 10.2 km (6.3 miles)
Elevation:
61 m (200‘)
Lead-In: 0.2 km (0.1 miles)
Map: Watopia

Restriction: Event Only

Achievement Badge: none

Gran Fondo

Animated “Gran Fondo” Route Details (Watopia) Map
Animated map provided by ZwiftHacks

The Gran Fondo is the longest of the three fondo routes Zwift unveiled in January 2019 for its Zwift fondo series. These are event-only routes, meaning they are only available for use in events and cannot be ridden on a freeride or individual workout.

Route Basics

Length: 97.3 km (60.5 miles)
Elevation:
1196 m (3,924‘)
Lead-In: 0.5 km (0.3 miles)
Map: Watopia

Restriction: Event Only

Achievement Badge: none

The Gran Fondo is the longest of the three fondo routes Zwift unveiled in January 2019 for its Zwift fondo series. These are event-only routes, meaning they are only available for use in events and cannot be ridden on a freeride or individual workout.

Handful of Gravel

Animated “Handful of Gravel” Route Details (Watopia) Map
Animated map provided by ZwiftHacks

Introduced for Tour of Watopia 2022, this route covers the upper half of the Jungle Circuit and is one of the few routes in Zwift which offers a route badge while being event-only.

Route Basics

Length: 6.1 km (3.8 miles)
Elevation:
75 m (246‘)
Lead-In: 4.1 km (2.5 miles)
Map: Watopia

Restriction: Event Only

Achievement Badge: 125 XP

Introduced for Tour of Watopia 2022, this route covers the upper half of the Jungle Circuit and is one of the few routes in Zwift which offers a route badge while being event-only.

Hilly Route Reverse

Animated “Hilly Route Reverse” Route Details (Watopia) Map
Animated map provided by ZwiftHacks

Watopia’s Hilly Route was the only loop that existed when Watopia launched. Hilly Route Reverse was later added, but as an event-only route.

Route Basics

Length: 9.3 km (5.8 miles)
Elevation:
109 m (358‘)
Lead-In: 0.2 km (0.1 miles)
Map: Watopia

Restriction: Event Only

Achievement Badge: 180 XP

Watopia’s Hilly Route was the only loop that existed when Watopia launched. Hilly Route Reverse was later added, but as an event-only route.

Hot Laps

Animated “Hot Laps” Route Details (Watopia) Map
Animated map provided by ZwiftHacks

Released in November 2025 to support stage 3 of Zwift Camp: Build, this route is simply four laps of the well-known Volcano Circuit with a finish up the Jarvis KOM.

Route Basics

Length: 23.3 km (14.5 miles)
Elevation:
149 m (489‘)
Lead-In: 0.2 km (0.1 miles)
Map: Watopia

Restriction: Event Only

Achievement Badge: 465 XP

Released in November 2025 to support stage 3 of Zwift Camp: Build, this route is simply four laps of the well-known Volcano Circuit with a finish up the Jarvis KOM.

Jungle Circuit Reverse

Animated “Jungle Circuit Reverse” Route Details (Watopia) Map
Animated map provided by ZwiftHacks

This is a lollipop route, meaning you start with a lead-in then remain on the circuit portion until your legs fall off. This is the event-only reverse version of the popular Jungle Circuit route.

Route Basics

Length: 7.9 km (4.9 miles)
Elevation:
83 m (272‘)
Lead-In: 6.3 km (3.9 miles)
Map: Watopia

Restriction: Event Only

Achievement Badge: none

This is a lollipop route, meaning you start with a lead-in then remain on the circuit portion until your legs fall off. This is the event-only reverse version of the popular Jungle Circuit route.

Medio Fondo

Animated “Medio Fondo” Route Details (Watopia) Map
Animated map provided by ZwiftHacks

The Medio Fondo is one of three fondo routes Zwift unveiled in January 2019 for its Zwift fondo series. Currently these are event-only routes, meaning they are only available for use in events and cannot be ridden on a freeride or individual workout.

Route Basics

Length: 72.9 km (45.3 miles)
Elevation:
1010 m (3,314‘)
Lead-In: 0.5 km (0.3 miles)
Map: Watopia

Restriction: Event Only

Achievement Badge: none

The Medio Fondo is one of three fondo routes Zwift unveiled in January 2019 for its Zwift fondo series. Currently these are event-only routes, meaning they are only available for use in events and cannot be ridden on a freeride or individual workout.

Road to Ruins Reverse

Animated “Road to Ruins Reverse” Route Details (Watopia) Map
Animated map provided by ZwiftHacks

This event-only, reverse version of Road to Ruins still takes you out to the Mayan Jungle on the same road, but has you loop the Jungle Circuit in the other direction.

Route Basics

Length: 29.6 km (18.4 miles)
Elevation:
276 m (906‘)
Lead-In: 0.2 km (0.1 miles)
Map: Watopia

Restriction: Event Only

Achievement Badge: none

This event-only, reverse version of Road to Ruins still takes you out to the Mayan Jungle on the same road, but has you loop the Jungle Circuit in the other direction.

Seaside Sprint

Animated “Seaside Sprint” Route Details (Watopia) Map
Animated map provided by ZwiftHacks

Watopia’s “Seaside Sprint” began as a Rebel Route in August 2019. Zwift made it an official (albeit event-only) route in its February 2020 update.

At only 6.3km (3.9 miles) this is the shortest Watopia loop which includes a sprint segment, making it perfect for races that include sprint points or for group rides with interval efforts like Sprintapalooza. As a route, this is the smallest loop on Watopia apart from Volcano Circuit and Volcano Circuit CCW.

Route Basics

Length: 6.4 km (4.0 miles)
Elevation:
46 m (151‘)
Lead-In: 2.8 km (1.7 miles)
Map: Watopia

Restriction: Event Only

Achievement Badge: none

Watopia’s “Seaside Sprint” began as a Rebel Route in August 2019. Zwift made it an official (albeit event-only) route in its February 2020 update.

At only 6.3km (3.9 miles) this is the shortest Watopia loop which includes a sprint segment, making it perfect for races that include sprint points or for group rides with interval efforts like Sprintapalooza. As a route, this is the smallest loop on Watopia apart from Volcano Circuit and Volcano Circuit CCW.

Three Sisters Reverse

Animated “Three Sisters Reverse” Route Details (Watopia) Map
Animated map provided by ZwiftHacks

Route Basics

Length: 45.5 km (28.3 miles)
Elevation:
884 m (2,900‘)
Lead-In: 0.2 km (0.1 miles)
Map: Watopia

Restriction: Event Only

Achievement Badge: none

Volcano Climb After Party

Animated “Volcano Climb After Party” Route Details (Watopia) Map
Animated map provided by ZwiftHacks

Watopia’s “Volcano Climb After Party” is a custom route introduced for stage 4 of January 2019’s Tour de Zwift

Route Basics

Length: 40.3 km (25.0 miles)
Elevation:
287 m (942‘)
Lead-In: 0 km ( miles)
Map: Watopia

Restriction: Event Only

Achievement Badge: none

Watopia’s “Volcano Climb After Party” is a custom route introduced for stage 4 of January 2019’s Tour de Zwift

Volcano Flat Reverse

Animated “Volcano Flat Reverse” Route Details (Watopia) Map
Animated map provided by ZwiftHacks

Route Basics

Length: 12.3 km (7.6 miles)
Elevation:
50 m (164‘)
Lead-In: 0.2 km (0.1 miles)
Map: Watopia

Restriction: Event Only

Achievement Badge: none

WBR Climbing Series

Animated “WBR Climbing Series” Route Details (Watopia) Map
Animated map provided by ZwiftHacks

This event-only route is basically 1.5 laps of the Mountain Route. It begins in downtown Watopia and heads straight to the Epic KOM, including the lovely “bonus climb” to the radio tower. Then we descend down to Watopia, and come up the Epic KOM again, ending at the KOM banner.

Route Basics

Length: 43.4 km (27.0 miles)
Elevation:
1118 m (3,668‘)
Lead-In: 0 km ( miles)
Map: Watopia

Restriction: Event Only

Achievement Badge: none

This event-only route is basically 1.5 laps of the Mountain Route. It begins in downtown Watopia and heads straight to the Epic KOM, including the lovely “bonus climb” to the radio tower. Then we descend down to Watopia, and come up the Epic KOM again, ending at the KOM banner.

Zwift Bambino Fondo 2022

Animated “Zwift Bambino Fondo 2022” Route Details (Watopia) Map
Animated map provided by ZwiftHacks

Released in Zwift’s December 2021 update, the 2022 Bambino Fondo route was created to host the monthly Zwift Fondo Series 2022. It’s similar in length to the original Bambino Fondo route, but with around 30% less elevation covering a very different set of roads.

Route Basics

Length: 53.1 km (33.0 miles)
Elevation:
398 m (1,306‘)
Lead-In: 0.2 km (0.1 miles)
Map: Watopia

Restriction: Event Only

Released in Zwift’s December 2021 update, the 2022 Bambino Fondo route was created to host the monthly Zwift Fondo Series 2022. It’s similar in length to the original Bambino Fondo route, but with around 30% less elevation covering a very different set of roads.

Zwift Medio Fondo 2022

Animated “Zwift Medio Fondo 2022” Route Details (Watopia) Map
Animated map provided by ZwiftHacks

Released in Zwift’s December 2021 update, the 2022 Medio Fondo route was created to host the monthly Zwift Fondo Series 2022. It’s similar in length and elevation to the original Medio Fondo route, but covers lots of new roads along the way.

Route Basics

Length: 79.2 km (49.2 miles)
Elevation:
922 m (3,025‘)
Lead-In: 0.2 km (0.1 miles)
Map: Watopia

Restriction: Event Only

Released in Zwift’s December 2021 update, the 2022 Medio Fondo route was created to host the monthly Zwift Fondo Series 2022. It’s similar in length and elevation to the original Medio Fondo route, but covers lots of new roads along the way.

Zwift Gran Fondo 2022

Animated “Zwift Gran Fondo 2022” Route Details (Watopia) Map
Animated map provided by ZwiftHacks

Released in Zwift’s December 2021 update, the 2022 Gran Fondo route was created to host the monthly Zwift Fondo Series 2022. It’s very similar in length and elevation to the original Gran Fondo route, but covers lots of new roads and ends on the Epic KOM Reverse instead of Epic KOM Forward.

Route Basics

Length: 92.5 km (57.5 miles)
Elevation:
1116 m (3,661‘)
Lead-In: 0.2 km (0.1 miles)
Map: Watopia

Restriction: Event Only

Released in Zwift’s December 2021 update, the 2022 Gran Fondo route was created to host the monthly Zwift Fondo Series 2022. It’s very similar in length and elevation to the original Gran Fondo route, but covers lots of new roads and ends on the Epic KOM Reverse instead of Epic KOM Forward.

Run-Only Routes

11.1 Ocean Blvd

Animated “11.1 Ocean Blvd” Route Details (Watopia) Map
Animated map provided by ZwiftHacks

Route Basics

Length: 11.15 km (6.9 miles)
Elevation:
0 m (‘)
Lead-In: 0.5 km (0.3 miles)
Map: Watopia

Restriction: Run Only

5k Loop

Animated “5K Loop” Route Details (Watopia) Map
Animated map provided by ZwiftHacks

Route Basics

Length: 5 km (3.1 miles)
Elevation:
0 m (‘)
Lead-In: 0.3 km (0.2 miles)
Map: Watopia

Restriction: Run Only

Chili Pepper

Animated “Chili Pepper” Route Details (Watopia) Map
Animated map provided by ZwiftHacks

Route Basics

Length: 7.95 km (4.9 miles)
Elevation:
0 m (‘)
Lead-In: 0.3 km (0.2 miles)
Map: Watopia

Restriction: Run Only

Chili Pepper Reverse

Animated “Chili Pepper Reverse” Route Details (Watopia) Map
Animated map provided by ZwiftHacks

Route Basics

Length: 7.3 km (4.5 miles)
Elevation:
46 m (151‘)
Lead-In: 0.2 km (0.1 miles)
Map: Watopia

Restriction: Run Only, Event Only

Italian Villas Circuit

Animated “Italian Villas Circuit” Route Details (Watopia) Map
Animated map provided by ZwiftHacks

Route Basics

Length: 1.92 km (1.2 miles)
Elevation:
11 m (36‘)
Lead-In: 0.8 km (0.5 miles)
Map: Watopia

Restriction: Run Only, Event Only

Epic Run

Animated “Epic Run” Route Details (Watopia) Map
Animated map provided by ZwiftHacks

Added to the game in August 2024, Epic Run begins at the top of The Grade and takes runners up to Radio Tower KOM and back through the Epic KOM banner for the finish.

Route Basics

Length: 6.2 km (3.9 miles)
Elevation:
296 m (971‘)
Lead-In: 0 km ( miles)
Map: Watopia

Restriction: Run Only

Added to the game in August 2024, Epic Run begins at the top of The Grade and takes runners up to Radio Tower KOM and back through the Epic KOM banner for the finish.

Jon's Route

Animated “Jon’s Route” Route Details (Watopia) Map
Animated map provided by ZwiftHacks

“Jon’s Route” is named after the game’s creator/head developer Jon Mayfield, who is an avid runner himself. At 12.5km it is the longest run route available at the time of the September 30, 2018 update.

Route Basics

Length: 12.53 km (7.8 miles)
Elevation:
0 m (‘)
Lead-In: 0.3 km (0.2 miles)
Map: Watopia

Restriction: Run Only

“Jon’s Route” is named after the game’s creator/head developer Jon Mayfield, who is an avid runner himself. At 12.5km it is the longest run route available at the time of the September 30, 2018 update.

Mayan Bridge Loop

Animated “Mayan Bridge Loop” Route Details (Watopia) Map
Animated map provided by ZwiftHacks

Originally designed by Zwift Insider as a Rebel Route, the Mayan Bridge Loop became an official run-only route in February 2022.

Route Basics

Length: 5.27 km (3.3 miles)
Elevation:
47 m (154‘)
Lead-In: 5.7 km (3.5 miles)
Map: Watopia

Restriction: Run Only

Originally designed by Zwift Insider as a Rebel Route, the Mayan Bridge Loop became an official run-only route in February 2022.

May Field

Animated “May Field” Route Details (Watopia) Map
Animated map provided by ZwiftHacks

Route Basics

Length: 0.4 km (0.2 miles)
Elevation:
0 m (‘)
Lead-In: 0 km ( miles)
Map: Watopia

Restriction: Run Only

Run Path Reverse

Animated “Run Path Reverse” Route Details (Watopia) Map
Animated map provided by ZwiftHacks

Route Basics

Length: 5 km (3.1 miles)
Elevation:
0 m (‘)
Lead-In: 0.3 km (0.2 miles)
Map: Watopia

Restriction: Run Only, Event Only

Achievement Badge: none

Splash and Dash

Animated “Splash and Dash” Route Details (Watopia) Map
Animated map provided by ZwiftHacks

Route Basics

Length: 5.92 km (3.7 miles)
Elevation:
26 m (85‘)
Lead-In: 0.323 km (0.2 miles)
Map: Watopia

Restriction: Run Only

Surfin' Safari

Animated “Surfin’ Safari” Route Details (Watopia) Map
Animated map provided by ZwiftHacks

This run-only route began life as an event-only route but became an open route in the December 2022 update.

Route Basics

Length: 9.77 km (6.1 miles)
Elevation:
43 m (141‘)
Lead-In: 0.19 km (0.1 miles)
Map: Watopia

Restriction: Run Only

This run-only route began life as an event-only route but became an open route in the December 2022 update.

That's Amore

Animated “That’s Amore” Route Details (Watopia) Map
Animated map provided by ZwiftHacks

Route Basics

Length: 6.43 km (4.0 miles)
Elevation:
0 m (‘)
Lead-In: 0.3 km (0.2 miles)
Map: Watopia

Restriction: Run Only

That's Amore Reverse

Animated “That’s Amore Reverse” Route Details (Watopia) Map
Animated map provided by ZwiftHacks

Route Basics

Length: 7.4 km (4.6 miles)
Elevation:
0 m (‘)
Lead-In: 0.1 km (0.1 miles)
Map: Watopia

Restriction: Run Only, Event Only

Titans Run

Animated “Titan’s Run” Route Details (Watopia) Map
Animated map provided by ZwiftHacks

Added to the game in August 2024, Titans Run covers a good portion of the northern section of Titans Grove, including climbing and descending the Titans KOM Reverse.

Route Basics

Length: 5.9 km (3.7 miles)
Elevation:
122 m (400‘)
Lead-In: 0 km ( miles)
Map: Watopia

Restriction: Run Only

Added to the game in August 2024, Titans Run covers a good portion of the northern section of Titans Grove, including climbing and descending the Titans KOM Reverse.

Track Meet

Animated “Track Meet” Route Details (Watopia) Map
Animated map provided by ZwiftHacks

More info coming soon…

Route Basics

Length: 6.1 km (3.8 miles)
Elevation:
22 m (72‘)
Lead-In: 0.5 km (0.3 miles)
Map: Watopia

Restriction: Run Only

More info coming soon…

Looking for route details of other Zwift worlds? Jump to:

All About Zwift’s Yorkshire World Championships Week Races

0

All About Zwift’s Yorkshire World Championships Week Races

Next week the UCI 2019 Road World Championships are happening in Yorkshire, and Zwift has gone all-in as an official partner of the event. They created a replica of the Harrogate finishing circuit, set up an alehouse on course, and have now rolled out a week-long schedule of Zwift races.

Each race happens on only one day, but there are 12 time slots to join, so everyone should be able to find a time that fits their schedule.

Kit Unlock

Complete any of the race events below to unlock an in-game UCI Fan kit.

About Race Categories

Each race has 4 categories: A, B, C, and D. A/B race the same distance, as do C/D.

B and D are for women only, so men can only sign up for A or C, while women can join any of the four categories.

Confusing? Maybe a bit, but basically it means men get to choose from a long or short version, while women get that same choice, but can choose to race with women only (B and D categories) or a larger mixed group.

Race Routes and Schedule

Zwift set up these races to somewhat mirror what’s happening outdoors in Yorkshire each day. So, for example, when we race ITT #1, we’ll do the same number of Harrogate laps as the Juniors who race Monday. Cool!

The first half of the week consists of individual time trials (ITT), where you race against yourself. The second half is more traditional road races.

ITT #1

  • Monday, September 23rd
  • Route: 2019 UCI Worlds Harrogate Circuit
  • A/B Groups: 2 laps (the same number of Harrogate laps as the Junior Men), total distance 27.6km, total elevation 480m
  • C/D Groups: 1 lap (the same number of Harrogate laps as the Junior Women), total distance 13.8km, total elevation 240m

ITT #2

  • Tuesday, September 24th
  • Route: Royal Pump Room 8
  • A/B Groups: 30km (the same distance as the Elite Women & U23 Men will cover), total elevation approximately 500m
  • C/D Groups: 15km, total elevation approximately 250m

ITT #3

  • Wednesday, September 25th
  • Route: Duchy Estate
  • A/B Groups: 54km (the same distance as the Elite men will cover–approximately 18 laps), total elevation 666m
  • C/D Groups: 25km, total elevation approximately 308m

Road Event #1

  • Thursday, September 26th
  • Route: 2019 UCI Worlds Harrogate Circuit
  • A/B Groups: 3 laps (the same number of Harrogate laps the Junior men will cover), total distance 41.4km, total elevation 720m
  • C/D Groups: 2 laps, total distance 27.6km, total elevation 480m

Road Event #2

  • Friday, September 27th
  • Route: Tour Of Tewit Well
  • A/B Groups: 4 laps (Just under half the distance the Junior Women will race), total distance 41.6km, total elevation 800m
  • C/D Groups: 2 laps, total distance 20.8km, total elevation 400m

Road Event #3

  • Saturday, September 28th
  • Route: 2019 UCI Worlds Harrogate Circuit
  • A/B Groups: 3 laps (the same amount of Harrogate laps the Elite Women & U23 Men will cover), total distance 41.4km, total elevation 720m
  • C/D Groups: 2 laps, total distance 27.6km, total elevation 480m

Road Event #4

  • Sunday, September 29th
  • Route: 2019 UCI Worlds Harrogate Circuit
  • A/B Groups: 7 laps (the same amount of Harrogate laps the Elite men will cover), total distance 96.6km, total elevation 1680m
  • C/D Groups: 2 laps, total distance 27.6km, total elevation 480m

The Endurance Lab Coaches’ Corner 75 – Getting in stride with the Stryd power meter

The Endurance Lab Coaches’ Corner 75 – Getting in stride with the Stryd power meter

In this episode, our topics include:

  • Deep dive into who Evan Schwartz is. (00:30)
  • Questions for Evan Schwartz
    • What is the Stryd power meter and how does it measure power? (18:30)
    • What are the values of the different metrics that Stryd measures? (18:30)
      • Leg spring stiffness 
      • Ground contact time
      • Cadence
      • Form Power
    • Will Styrd look to put out specific drills to improve data and numbers that it captures? (25:00)
    • Can Stryd be used as a compliance tool and would you expect to see a higher rate of progression in those athletes using it? (27:00)
    • Is there a correlation on the efficiency dat and nutritional needs of an athlete? (29:30)
    • The Real Reason Marathoners Hit the Wall – https://www.outsideonline.com/2399877/critical-power-study (34:05)
    • Evolution of the design of Stryd
      • New version of the Pod (36:45)
        • Accounts for wind now via air resistance
        • Looking to understand the environmental condition better
    • Practical Questions (48:40)
      • Where do people start with data collection
      • Auto calculation of critical power, 2% closer then testing
      • Much less complicated
      • What watches is it compatible with? Garmin, Polar, Suunto, Apple, mobile app (android/iOS)
      • Future integrations for use on a treadmill

Stryd podcast – https://www.stryd.com/podcast 

Contact Evan – [email protected]


Yorkshire Power Up Tour is Underway

0

Yorkshire Power Up Tour is Underway

A 6-stage tour is now underway to celebrate the launch of Zwift’s Yorkshire UCI course. Each stage focuses on a different cycling specialty, with a unique combination of powerups available for each.

Here are the stages:

New to Zwift and unsure how powerups work? Check out our guide to powerups.

Kit Unlock

Finish just 4 of the 6 stages and you’ll unlock the Yorkshire Power Up tour kit! Zwift promises your new kit will be added to your garage by September 29th.

Makeup Day

Sunday, September 22nd will be a makeup day with events on the calendar for all 6 stages.

View series details and event schedule on Zwift.com >


Cadence & Multi-Connection Bluetooth with Wahoo’s Latest Firmware Update

6

Cadence & Multi-Connection Bluetooth with Wahoo’s Latest Firmware Update

Wahoo announced a big firmware update to it’s KICKR 18 and KICKR Core trainers at Eurobike. Here are the details…

Updating Your Firmware

It’s quick and easy via the Wahoo app. Just open the app, tap sensors, then add or tap on your trainer. You’ll get a software update prompt, and the app will walk you through the quick process:

Cadence

With this update installed, your KICKR and KICKR Core trainers will estimate and broadcast cadence for the first time ever. This isn’t a true “cadence sensor” (these are typically done using magnets, accelerometers, or optical sensors), but in my tests so far it has proven quite accurate and steady (except in one situation, mentioned below).

Estimated cadence from smart trainers has historically been a bit wonky, relying on the trainer sensing slight variations in power at different points in your pedal stroke. Got a really smooth pedal stroke? That wasn’t a good thing, when it came to cadence estimation.

My first smart trainer was a Tacx Vortex, and the cadence readings on that machine would often drop to half or suddenly double. (I wrote a post about it over three years ago.) The good news is, manufacturers have improved their firmware over the years so that today, trainer-based cadence generally works quite well.

Wahoo was the last big holdout regarding built-in cadence sensing. Tacx has done it for years, Elite and CycleOps/Saris do as well. For some, the cadence thing isn’t a big issue–but if you don’t already own a cadence sensor, or you’re running Zwift on AppleTV (which only supports 2 Bluetooth channels) and also want heartrate, it quickly becomes an issue.

Where the Wahoo cadence isn’t perfect is where most other trainers don’t do well: if you sprint hard (get that flywheel speed up!) then go back to easy pedaling, it takes a few seconds for the trainer to figure out what’s going on. But let’s be honest: for typical Zwift use, it works just fine, and you’ve got one less sensor battery to worry about.

Multiple Bluetooth Connections

From the dawn of Bluetooth on Zwift, we’ve always been told “Bluetooth only supports one connection.” That is, if your trainer is connected to one device via Bluetooth, you can’t connect to it on another device via Bluetooth.

This would often confuse people who, for instance, connected to their KICKR via the Wahoo app to perform a spindown, then couldn’t connect to their KICKR on their iPhone to run Zwift.

With this firmware update, your KICKR and KICKR Core now support up to 3 Bluetooth connections, so you can have it connected to your AppleTV for Zwift, phone for the Wahoo app, and iPad for (*gasp*) TrainerRoad if you want. Lots of cool options, less limitation. We like the sound of that.


Ramp Testing and Optimal Post-Workout Recovery Routines (Never Going Pro Podcast #5)

Ramp Testing and Optimal Post-Workout Recovery Routines (Never Going Pro Podcast #5)

In this episode, Shayne, Chris, and Ken chat about ramp test results, and why they likely over-inflate your FTP. They also discuss optimal post-workout nutrition (hint: what you do post-workout isn’t as important as you think).

Lastly, special guest Chris Schwenker, PT, joins to speak about post-workout body maintenance. Enjoy!

Show Notes:

Carbohydrates are paramount for performance and training adaptation in endurance sports!

Burke et al. (2001) – https://www.ncbi.nlm.nih.gov/pubmed/11310548
Kanter (2018) –https://www.ncbi.nlm.nih.gov/pmc/articles/PMC5794245/
DAILY CARBOHYDRATE NEEDS – 5-7g/kg day for lower intensity days, 7-10+g/kg  per day for moderate to intense days, and 12+g/kg for the really crazy days

DURING TRAINING – Jeukendrup (2013) – https://www.nestlenutrition-institute.org/docs/default-source/global-dcoument-library/publications/secured/43ed8539970e2102171c848956c1a049.pdf?sfvrsn=9642684f_0

Stellingwerff et. al (2014) – https://www.ncbi.nlm.nih.gov/pubmed/24951297

In short duration exercise situations (∼1 h), oral receptor exposure to CHO, via either mouthwash or oral consumption (with enough oral contact time), which then stimulates the pleasure and reward centers of the brain, provide a central nervous system-based mechanism for enhanced performance.

The above strategy was also used during Victor Campenaerts, UCI Hour Record, as you can see him sipping and then spitting it out right before the attempt below.

POST TRAINING – Aragon et. al (2013) https://www.ncbi.nlm.nih.gov/pmc/articles/PMC3577439/
Probably the least important aspect of things IF you get the daily right, especially if the majority of of your training is <90 minutes, which I’d bet most of our listeners is. However, Ingesting 0.3-0.5 grams of protein per kilogram of body weight with 1.0-1.5 grams of carbohydrate per kilogram of body weight improves the absorption of protein 1-3 hours post exercise.

So, in a nutshell, the optimal post-workout recovery routine nutritionally is one that is as minimal as possible. It can be minimal only if you do your job the other 22-23 hours a day though, i.e. you’re not an athlete only when you’re working out, you’re an athlete all day long.

Shayne

D.I.R.T. : Dominance Includes a Ripped Trunk!

Show Transcript

Ken: Hey, you guys want to hear a funny joke?

Chris: Yes.

Shayne: Yep.

Ken: I bet my butcher he couldn’t reach the meat on the top shelf and he refused to bet me, he said the steaks were too high.

Shayne: I’m not laughing. I’m not going to laugh at that.

Ken: Come on, man, that was a good one. One of these days I’m going to get a laugh out of you guys.

Chris: That was real bad.

Ken: Man. The steaks were-

Shayne: That was one of the worst one. Yeah, this is Episode Five. That’s part of the worst ones [crosstalk 00:00:29] but it’s okay, it’s a bad joke.

Ken: All right, good, progress the jokes are getting worse. Welcome, everybody to The Never Going Pro podcast by Dads Inside Riding Trainers featuring GC coaching. It’s a podcast about riding bikes, and parenthood, and trying really, really hard at both. I’m your host, Ken, “the Badger” Nowell and with me is Shayne Gaffney, owner of GC coaching.

Shayne: Hey guys.

Ken: And Chris Gorney fellow DIRT teammate, passionate cyclist and outstanding dad.

Chris: Hello.

Ken: So let’s take a few minutes to catch up with everybody. So how’s everybody doing? Let’s start with you, Chris.

Chris: I’m moving to California next Thursday, so my life is a tumultuous at best.

Shayne: Great word.

Chris: I was a little afraid of messing that word up on a podcast.

Ken: Well, I hope you’re excited about it. I mean, certainly you’re in either what Kansas City or Missouri, Kansas City, Missouri, Kansas?

Chris: Missouri, but I don’t like to talk about the Missouri part.

Ken: Okay, got you. Shayne, how are you doing?

Shayne: I’m good. I’m tired. My six month old is not sleeping through the night consistently, so she’s starting to slowly I think kill us. But otherwise I’m doing great, man.

Ken: That’s good. That’s good. Business is good?

Chris: I think that just gets worse until they’re all 18, they’re just going to slowly and slowly kill you.

Shayne: I think that’s true too. My almost three year old now he sleeps like a champ, he can go down and sleep like 14 hours straight, and he’s been doing that since he was probably three months old. So this is a little bit different for us just being six months, almost seven months and still not really sleeping totally. But yeah, business is great man. Crushing it, so I’m happy.

Ken: Sounds good. You’re crushing it, and helping other people crush it.

Shayne: That’s it, man. Helping it, I love it. Probably you Ken, what’s up with you man?

Ken: So I have been dealing with this ongoing back injury. I injured it and then re-injured it trying to jump off of a high dive. And then I finally-

Chris: What?

Ken: They still have high dives in some areas, right?

Shayne: You can’t just glaze over that, you have to explain that.

Chris: Where were you?

Ken: I was in Greensboro at the country club.

Chris: [crosstalk 00:02:42] islands, what were you doing?

Ken: And I tried to do something called a preacher seat, which does an even bigger splash and a can opener and it jacked up my back. But I’ve been going to the chiropractor, and the physical therapist, and doing yoga every morning.

Chris: Can you describe what a preacher seat is?

Ken: So basically you lean back just like a can opener and you cover your face but both legs are sticking out, and you stick your bottom into the water first and it makes an epic splash.

Shayne: So is that like a cannonball?

Ken: It’s more like a can opener but with both legs extended, and your hands covering your face. Yeah, it’s awesome when you do it right.

Shayne: Both like extended. Oh, I see what you mean.

Chris: Clearly your doctors and chiropractors think it’s awesome.

Ken: Yeah, it’s keeping them in business, that’s why they love it so much.

Shayne: Hey, didn’t you do a FTP test yesterday?

Ken: I did an FTP test and finally broke the 300 mark that was a lot of [crosstalk 00:03:37]. So we did a group FTP test called last man standing. You can find it on YouTube on Dads Inside Riding Trainers page, and so the way it worked is we all did a countdown, we started the ramp test at the same time and since we’re on a flat road, it kept us all together and just one by one riders started falling off the back.

Shayne: Who won, You or Jason?

Ken: I beat Jason.

Shayne: Yes.

Chris: Nice.

Ken: That’s the most important thing.

Shayne: I can’t stand that guy.

Chris: It’s like two of the main founders of DIRT going head to head. And you’ve got to pick a camp, are you a Jason man or are you the Badger fan?

Ken: Yeah, it’s you can’t like his both. So I beat him by about seven watts, I think he got 295, I got 302 I made it just past the… I just completed the 400 watt interval, and when I hit 420, I fell apart.

Chris: As many do.

Ken: As many do.

Shayne: Let me not be that guy, but I’m going to be that guy. So I would argue you didn’t find your FTP, you found what your max aerobic power was because you did a ramp test.

Chris: He just called your effort trash.

Shayne: I didn’t want to be that guy, but that’s what we… we should talk like I think for sure because a ramp test is a great way to judge what your max aerobic power is or VO2 max things like that. But a true FTP test should be a lot longer like 20 to 30 minutes, ideally. And then if it’s a 20 minute tests, you should ideally do some kind of burn out effort, like I think Zwift uses the three or five minute 115% effort before because you’re trying to decrease your anaerobic contribution to the power produced. That’s why people have a ramp test and they have a super high FTP because it’s being over inflated.

Chris: That sounds like episode three or four repeat right there. Like you’re bringing it back.

Shayne: We talked about that a little bit. Yeah, we briefly talked about it, I think in episode two.

Ken: So I do have a question, as long as I’m being considered… like whenever I set up a new training plan, I’ve been using the same… well, using a ramp test to set my numbers is that good enough or am I at a serious disadvantage for having doing it… being done that way?

Shayne: I mean, personally, I wouldn’t use ramp test, I think you’re doing yourself a disservice because you’re training off of an almost vanity FTP instead of a true FTP. So, yeah, personally, I think you’re doing a disservice. But that’s also why things like sweet spot training, I think have been really successful because sweet spot is 88 to 93% FTP. And I’ve noticed that ramp tests tend to overestimate FTP by like five to 10% sometimes, so by training at sweet spot, you’re actually training closer to thresholds.

Chris: So that gives me a couple of thoughts. One, he just basically demolished your “I finally broke 300 on my FTP”, so that means you’re actually like 285, so that’s-

Ken: If even.

Shayne: I think like 220, 230 though.

Chris: You’re talking kilometers an hour, right? Metric?

Shayne: I mean, possibly even. Yeah.

Ken: Well, man, that sucks.

Shayne: But that’s what it means, so like, I don’t want to be that guy.

Chris: But hey, so seriously, Ken and I were having a text conversation yesterday because I was eating lunch, and he was hating his job. And I was talking about doing an FTP test with them, and I told them I didn’t want to do it because I’m always afraid that I’m not going to be as strong as I want to be or as I feel. And I’ve always kind of felt FTP is kind of like a measuring contest, like it’s never really felt very relevant because I’ve had many a time I’ve done like a ramp test. And then I’ve been on a training plan, and it either felt too easy, or too hard, and I ended up messing with my FTP until it felt appropriately difficult. I’d say I’ve probably never gone through a training plan without messing with my FTP a little bit if it’s been based off of a ramp test.

Shayne: Yeah.

Chris: So that’s interesting to think about. So really, FTP ramp tests are trash.

Shayne: No, they’re not… They’re trash for testing FTP, but they’re not trash for testing what your max aerobic power is, which is important to understand too. So like when I do FTP testing for my athletes, I test them in a one minute and a five minute and then in a 20 minute power last. So I’m getting what their anaerobic capacity is at the one minute, I’m getting close to what their VO2 max is in the five minute, and then I’m getting ideally what their FTP is in the 20 minute, but the key is the FTP test is last when their anaerobic capacity will ideally be diminished. So it won’t be just anaerobic revealed.

Ken: So just to feel… go ahead.

Shayne: I was going to say at least threshold the way I understand it is, it’s the point where exercise intensity when the energy source your body is using to fuel the activity changes significantly. That’s I think, a better way to understand what threshold is, because FTP I mean, it’s been debunked plenty of times now, it’s not 95% of a 20 minute maximal power tests, it’s not your normal power for an hour. It’s not your highest power for an hour, because then you have to figure out what your FTP is, and then secondarily, what’s your time to exhaustion is after your FTP, which we talked about as well in previous episodes. So FTP is very hard to, I guess, nail down to one or two things. It’s a very multifaceted thing.

Ken: Right. And so the new thing is using computers to model all this stuff for you.

Shayne: Yeah, I use WKO to do that modeling for me.

Ken: Very cool.

Shayne: And you can also use excerpts and other stuff like that to do that as well.

Ken: Okay, very cool. One thing that amazes me is when you look at the tools that we have now versus what the pro cyclists were using in 2000, the Pro cyclist in 2000 would be killing to use the tools that any amateur could set themselves up with for about $1,000.

Shayne: Absolutely.

Ken: It’s unbelievable. And I think that one of the reasoning that the trainer road guys use the ramp test is that they want something that is repeatable, every cycle that you’re not going to dread to do, and so I kind of get where they’re coming from there a little bit as well.

Chris: Also so I agree with that, because I hate the 20 minute ramp, I hate the 20 minute FTP test. Everybody hates it, it’s literally the worst thing you do ever because it just feels-

Shayne: Bad.

Chris: Bad. Yeah. And so I mean, I love the idea of something that is shorter and easier just grit your teeth. But even that, I wonder like… I mean, the group of guys I ride with there’s always this discussion about power over strength. And we’ve got a bunch of guys who are a little bit bigger, and we hit these quick descendants, and they’ve got so much power, and they just burst the power to weight ratio going down hills, pretty good for them. And they fly down these short hills and pass the lighter guys but then we get on these longer descents, two three mile descents at like three percent. And they just run out of gas, and I kind of think about that with the FTP ramp test versus the 20 minute tests, you can almost just like grit your teeth and force an FTP, like higher number for the ramp test but then the actual 20 minute test to me is like… that’s like just a deeper pain, a much deeper pain.

Ken: Yeah, yeah, definitely. I dread doing that more. And one thing that I will say is the way that we did it the other day where there was like five or six guys doing it together, it really was a lot of fun. It was just like I’m going to hold on just long enough to drop that guy. And so it was a good time, and I think it was repeatable, so I think that what we can do is just say that everything’s going to have an advantage and disadvantage. And depending on how seriously you’re into training and how accurate you need that number to be, it’s going to make a difference in what type of testing you need to do as an athlete.

Shayne: And then please make your FTP tests longer. Gosh, that’s what I would say.

Ken: Okay, fair enough. Fair enough. So let’s go ahead and move on. This week we had some great crowdsource questions from Dads Inside Ridding Trainers, and the first topic that we… the one that hit the top of the queue with the most votes was a discussion about post workout recovery routines and how to get the best recovery in when you are limited on time. Is that a pretty accurate description of what we’re going to be looking into today, Shayne?

Shayne: Yeah, he kind of said, optimal post workout recovery routines when you’re already pressed to finish the workout. So I think, post workout recovery routine is on a time budget or when time crunched. I think I would look at it that way.

Ken: Got it. Now, did this include nutrition and off the bike training such as stretching?

Shayne: I would think so. Yeah. So I took a deep dive into the nutrition aspect of things, and then we have… I know a special guests who will talk about more of the stretching and mobility type stuff off the bike.

Ken: That sounds good.

Shayne: Who is like… what’s his name? I can’t remember his name. Sorry, but maybe you can fill it in.

Ken: Yeah, his name is Christopher Schwenker, and he is a physical therapist.

Shayne: Schwenker?

Ken: Yep. Schwenker, that’s really his name.

Shayne: Schwenker.

Chris: It’s just a name you have to say again, and again.

Ken: You know what it is, it’s a combination of schwing and wanker.

Shayne: Is he a doctor, Dr. Schwenker?

Chris: [crosstalk 00:14:03].

Shayne: I don’t want to [inaudible 00:14:05] him, but Schwenker.

Ken: No, man, he loves being called the Schwenker, so I don’t think he’s going to be offended by this at all.

Shayne: The Schwenker, that’s hilarious.

Ken: Yeah.

Chris: I mean, all I can think of is Wayne’s World now.

Shayne: Of course. Yeah.

Ken: Schwing.

Chris: That’s part of the podcast right here.

Ken: So, before I get all the nitty gritty, why don’t you talk to me about what your guy’s typical post workout routine is? Like what do you do? Why don’t you start Chris?

Shayne: Okay, so all right, I’ll go ahead and start. So as soon as I’m off the bike, I come into the house and I almost always eat the exact same thing which is two packets of instant grits, two eggs made into an omelet with four ounces a ham and a slice of American cheese and ketchup on it.

Ken: Okay. Remind me what are grits again?

Chris: It’s what rednecks eat from the south.

Shayne: It’s a redneck meal between the American cheese, the ketchup on the eggs, it’s a really good traditional Southern breakfast. Grits are made out of corn on that have been soaked and lied to remove the shell.

Ken: Okay, so it’s kind of like oatmeal-ish?

Shayne: Very similar to oatmeal. Yeah.

Chris: I’ve never really liked grits to begin with and now actually hearing the description of it, I want them less.

Shayne: Well, you guys don’t know what you’re missing, because it’s so good. Yeah.

Chris: Soaked then lie, sounds strange.

Shayne: So it’s about a 550 calorie meal, I think it’s about 40% carbohydrate, 30% fat, 30% protein or there abouts. And that’s usually on top of drinking Gatorade while I’m on the bike and usually I have a banana before I ride.

Chris: That’s a good conversation about sugar structure and drinks because I’m very… I’m actually wildly against Gatorade. So let’s make a different podcast.

Ken: Well, Chris, tell us about what you eat.

Chris: Yeah, when I get done ridding, it honestly changes a little bit. It depends on three things. One, How hard did I ride? Two, is my daughter awake yet? And three, what food do we have in the house, because I am the guy who with my wife, if she’s doing the grocery shopping that week. And she’ll go, hey, what do you want from the store? And I’ll go, oh, I don’t care, whatever, and then I’ll actually have opinions later that I forgot to express. So I kind of just deal with what’s in the house. Ideally, if I ride pretty hard, I’ll come in and I’ll usually have a banana, and then I will make a couple of eggs on a piece of toast with some Trader Joe’s everything seasoning and some Irish butter in the pan.

Shayne: That sounds quite good.

Chris: Yeah, and so kind of getting sugars, and then sugars which again, form of carbohydrates, actual carbohydrates and then protein from the eggs. I’ll either mix it up with two egg whites and then one full egg or just two full eggs. Knowing that the protein from the egg whites is not processed as well without actually, yolk as well, I have learned and read. But then if I’ve worked out really, really hard, I’ll actually have like a half a PB&J.

Ken: That sounds good.

Chris: Yeah, so I’m a big proponent of RPE workouts, and just general nutrition like listening to your body. So I kind of really try to listen to my body as silly and granola as that sounds. I feel like I can kind of feel when I need sugar or feel when I need protein. And so it kind of changes a little bit, I make all the jokes about donuts and stuff, but I actually don’t do that. I don’t come in and just eat a short carbohydrate.

Ken: So Shayne what do you usually do for your post workout nutrition chain?

Shayne: I usually do a recovery shake, which is typically a weight gainer shake. So I use Optimum Nutrition pro gainer right now, depending on how hard the workout is, I also just might use an ultra gin which is, I guess, a less calorically, less everything compared to a weight gainer. Because it’s interesting the more I talk to athletes, the more I feel like they’re under feeling. And the under fueling, I think is resulting in a decrease adaptation and just overall performance too. Which I’ll kind of get into with the research I have, to kind of back that up too. But yeah, usually that’s what I’ll do. I’ll get off the bike, I’ll make an actual recovery shake within, typically half an hour afterwards, and then I’ll eat my normal diet otherwise.

Ken: Because I’ll say that’s one of the things in the research you sent out to us in the past few days talking about your diet, and tell me if I’m paraphrasing this wrong, but your diet right off the bike is… less than 90 minutes of working out, typically, your diet off the bike is not as important or right off the bike, your nutrition isn’t as important if you’re actually fueling like an athlete the rest of the day. Is that [crosstalk 00:19:20]

Shayne: Exactly, yeah. So that’s totally right. So that’s kind of in a nutshell and what we can talk about in the next 10 minutes or whatever, because the question was what’s the optimal thing to do after your ride? And my response is it’s what you do after the ride, I think is the least important thing. I think what you do the other 23 hours of the day or 22 hours of the day is more important because if you’re entering a workout in an under fueled situation, you’re going to perform less than you would ideally. And then if you need to really recover after the workout, you’ve done some wrong during the day or over the course of the day. So let me just kind of get into it, I guess I broke it down into carbohydrates are, I think the most important part for any endurance athlete. And I know the keto and all kinds of stuff is becoming really popular and probably going to get some comments on that which is fine, we can talk about that in another episode, but for performance and for high intensity-

Chris: I would love to talk about that in another episode.

Shayne: For sure. But for performance and for high intensity training, you need carbohydrate to actually do what you need to do. So Burke in [inaudible 00:20:34], I’ll link all of his research to the posts… to the show notes as well. So Burke Cantor, they have a daily requirement the most endurance athlete should get, so you’re talking to five to seven grams of carbohydrate per kilo per day for lower intensity or just everyday maintenance days. Seven to 10 grams per kilo for a moderate to more intense days. And then the really crazy days, and we’re talking like World Tour kind of stuff, it’s 12 plus grams per kilo for those days. So I’d say most athletes should be in the five to eight grams per kilo day, if you’re training very intensely.

Ken: So just to put some numbers to that, so you’re 70 kilograms or roughly 150 pound male, it’s 70… it’s seven grams per kilogram a day that’d be seven time seven that’d be 490. Wow, that’s a lot that seems…

Shayne: It’s a lot of carbohydrates.

Ken: It is a lot of carbohydrates.

Shayne: Yep. So it’s 55 to 65% of your daily caloric needs should be from carbohydrate based on the research that I read and that I’ve kind of learned. So high carbohydrate diet for intense training, and for performance is important. For weight loss, it’s a total opposite I think approach, and that’s where things like keto and intermittent fasting, and that kind of stuff comes into play. But for performance carbohydrates are crucial.

Ken: Okay, and so one thing that people seemed to get really dogmatic a number of years ago about, you need to be drinking your shake with so much protein and carbohydrates within minutes of getting off the bike or you’re screwed. And like I said, people were really dogmatic about that, and now it sounding like that’s not so much the case that your glycogen stores are being replenished throughout the day, unless… and you don’t really need to worry about that crucial window minutes after the workout unless you’re going to be doing a double workout that day or something along those lines.

Shayne: Right, exactly. Yeah, I’ll link so Aragon did a nutrient timing revisited article which I’ll link to the show notes too. And he goes into that carbohydrate window, which is what it was coined, so the carbohydrate window was supposed to be 30 to 16 minutes after your workout you want to consume about 0.3 or 0.5 grams of protein per kilo with one to 1.5 grams of carbohydrate per kilo to aid in absorption. That’s been a little bit… I shouldn’t say it’s been debunked completely, but there is some research that says now as long as you were feeding your body, and you’re doing all the things correct, within 24 hours, your glycogen stores should be right back to where they were before. So what you do, again, to push this point further home, what you do right after the workout, isn’t that important as long as you’re doing stuff right, the other times of the day.

Chris: What I love about this is what we’re really telling people is, and I should be clear, we’re talking about performance and not weight loss because… So we’re talking about the guys who they’re already pretty fit or within five to 10 pounds of their ideal weight, weight is not a concern, those things will be true. If we’re saying hey, cycling is the best sport in the world because you can kind of like… encourage you to have a beer at the end of the ride. It encourages you to enjoy some healthy carbohydrates, especially in a world where everyone’s saying carbs are bad. Keto good, carbs bad. I kind of love it. It’s like, oh, yeah, actually I will have those chips with my meal. Thank you. Not eating healthy but…

Ken: And I agree with what you’re saying when I got out of certain circles that were almost again dogmatic about the Paleo diet or don’t eat any grains, and sort of got away from that universe, and started enjoying a big bowl of rice. And noticed that I got significantly leaner, my performance on the bike got better. So I think that we’re really speaking to two different audiences here. In the ethos of what we wanted to do with this whole podcast being never going pro, which is simplifying things and saying, guys, it’s going to be okay, if you don’t eat X amount of carbs and protein within 30 minutes of getting off your bike. You’ve got a little bit more wiggle room than that. But when we look at our core audience, it’s one, people trying to lose weight and two, people trying to improve or get faster. So what do we do with a guy… So as far as the folks that are trying to lose the weight, where are we at with them?

Shayne: I think we should push that to another episode.

Chris: I agree.

Shayne: Yeah, because that’s going to be more about energy deficit, keto, carb, all that kind of stuff. Fasting, that’ll be more about that stuff, so I think we should push that off.

Ken: So Shayne, we’ve been kind of talking loosely and on our kind of planning you put everything into three categories of daily, during, and post. And I think we really covered the daily of the fact that if you’re not trying to lose weight, you need to fuel like an athlete all day long regarding carbohydrates and then afterwards what you’re eating doesn’t matter as much, but we haven’t really talked about during. So you posted some really cool articles, there’s a 2013 article, and a couple really interesting examples. Can you talk to us about during fueling because I have quite a few stories being in some Iron Man races and some other races where I have quite literally seen people fall off their bikes passing out from under fueling. And so I know it’s not usually that extreme, but I’d love to hear what the research says like even just as a normal Dad, what can I do that doesn’t require a professional degree or coach to help me during my ride?

Shayne: Yeah, so I like to refer to Juke [inaudible 00:26:39]. He had an article chosen 13, which I’ll link to the show notes as well. Essentially, the shorter the workout is, the less important the fueling during is, and then you seem to get the breaking point once you get past two hours, that’s when the fueling becomes more and more important. So he broke it down into 30 to 75 minute workouts, there really isn’t any need for fueling as long as I said before you’re getting your daily carbohydrate intake, and your glycogen stores are full before you get on the bike. After 75 minutes to two hours, they recommend about 30 grams of carbohydrate per hour.

Ken: Can you put that in terms of like… because I think it’s easier to say 30 grams per kilo or 30 grams per hour.

Shayne: Per hour.

Ken: Yeah, per hour. What kind of food would fit in those categories? Like make it stupid for me? That’s like a power bar, that’s a… you know what I mean?

Shayne: So power bar, yeah, but I think better foods… so when you’re eating off the bike, you want to have ideally complex carbohydrate. And when you’re eating on the bike, I think simple is better, or like more refined carbohydrate. So that way your body can absorb it rapidly.

Ken: So give me an example of each one of those.

Shayne: Like on the bike, it would be a gel or a shot block or a date or something like that, a very easy to digest food. Typically, most of the carbohydrate is in 25 gram increments. So like if you look in like a goo, or a shot block or whatever most serving size is around 25 grams, and the same thing with like a scratch bottle mix, it’s about 25 grams of carbohydrate. So most of the time it’s easy to break it down into one bottle or one gel or one shot block or whatever, it’s about 25 grams of carbohydrate, so you can break it down easily. If you’re aiming for 30 grams an hour, it should be one bottle of mix or one bottle and mix plus one gel, which is 50 grams an hour or one bottle of mix plus two gels which is 75 per hour. You can kind of break it up that way.

Ken: Can I ask have you ever seen someone on a bike pull out a packet of dates and start eating them?

Shayne: I do all the time. For sure.

Ken: Seriously? You pull out some nice Turkish dates?

Shayne: Turkish dates, yeah. Really, really ripe dates that are almost like gelatinous, so there’s really little to no…

Ken: You’re very classy, very classy cyclist.

Chris: Well, I never would have thought about that, I would [crosstalk 00:29:12] with my grits and American cheese.

Shayne: Yeah, it’s because you’re stuck on your daily routine.

Chris: So usually what I do when I’m on the bike is I drink about… once I hit about a half an hour, I’ll start drinking Gatorade and for an hour to 90 minute workout, I’ll drink about a half a bottle to a bottle of Gatorade, which is I think somewhere in line with that, those guidelines that you were talking about.

Shayne: And yeah, so for our audience, it’s mostly going to be working parents busy, busy, so 90 minutes or less is typically going to be the workout window. So really, during the training itself, you don’t really have to worry much about anything in terms of fueling, aside from just keeping yourself hydrated. And then what you do before and afterwards is what matters. So once you get over two hours, two to three hours then you want to ideally consume about 60 grams per hour. Now you start to get into the tricky area of where you have to train your gut to absorb, so you don’t get GI distress, and you can also use different forms of carbohydrate, like fructose and glucose, so different pathways of absorption in your gut. So 60 grams an hour, typically you can get away with just a one source just with glucose.

Shayne: But once you get to two and a half hours plus that’s when you ideally want to aim for about 90 grams per hour, and that’s when you want to have multiple carbohydrate sources. So fructose and glucose being the two most popular ones. So a fruit and then a gel or whatever.

Ken: Perfect. That’s exactly what I was going to say is give us examples of all those, both of those I can buy at the store.

Shayne: Yeah, so you can get like a fruit gel, or you can get baby food in the containers that you can fit in your jersey pocket to do those things, plus a gel or whatever.

Chris: Just like get… not the glass ones [crosstalk 00:31:05].

Shayne: No, not the glass ones.

Ken: Hey, so I think that’s interesting. Even just looking at this graph, it’s like… and I feel this too, it’s if you’re going to go out and punch an hour and a half ride in the morning with some friends, no big deal, wake up, eat a banana, and go. And then eat well when you get home, but it’s the longer you ride, the more you need per consecutive hour. So if I know we’re riding three hours, I need to be fueling more hour one, hour two, and hour three to finish strong. Whereas if I know I’m only riding an hour and a half, there’s much less maintenance that needs to happen. Is that kind of summary, simplified summary?

Shayne: Yeah, I think so. And that’s why you see people kind of bonking at the end of an Iron Man because they may have only consumed 30 to 45 grams per hour. But if you extrapolate that out into 10 on plus hours, you can have enough glycogen on board to fuel the effort and you’re going to bonk and crash.

Ken: Well, and I always like the comparison of like your body is… like in endurance sports, your body is an engine, and if you keep it fueled properly and running right, you can go all day. And this is just kind of putting some numbers to that for me. So I think this is really helpful.

Shayne: Yep. And then I think more just kind of an offshoot and very interesting thing was the… which I didn’t really understand quite why this works. But I’m going to link a video to Victor [inaudible 00:32:24] and it’s our record, and you can see him consuming a liquid, and then spitting it out. So the theory is that the oral receptors and their exposure to carbohydrate via mouthwash or an oral consumption where it stays in contact with the taste buds long enough, it stimulates the pleasure and reward center of the brain. And that provides an actual performance enhancements. So I think if you really into like, [crosstalk 00:32:52]-

Chris: [crosstalk 00:32:52] and stuff.

Shayne: Or whatever, you can kind of take like a swig of something, hold it in your mouth a little bit, and then swallow it or spit it out afterwards, but you don’t have to worry too much about wait, where it was Victor was worried about his watt per kilo the whole time he was over there. So I think that’s why he spit it out, so he wouldn’t have to take on any more liquids. But yeah, it’s kind of cool.

Chris: That seems crazy.

Ken: Yeah, it does seem crazy. But hey, if it works… Any hack will work when you’re trying to break a world record.

Shayne: I think that’s down to just the dopamine response in the brain as a great painkiller. So I think if you have dopamine in your brain at a high level, you can push into that pain threshold a little bit more. But I can’t prove that by science and nobody can at this point, but that’s something that they’re working on right now, which is kind of cool. And yeah, that kind of brings us back to the posts, that kind of the running of the conversation where as long as you do stuff right, I think pre and during, posts shouldn’t really matter that much at all. But to give you some ideas, ideally ingesting 0.3 or 0.5 grams of protein per kilo, with one to 1.5 grams of carbohydrate per kilo will improve the absorption and the recovery.

Ken: Got it. Well, Shayne, this has been very informative. I appreciate you doing all the research and giving us some guidelines to focus on for making sure that we get the best out of whatever experience that we’re looking for as far as our performance. Yeah, our interview this week is with Chris Schwenker physical therapist. He recently wrote a core workout for our team titled DIRT Dominance Includes a Ripped Trunk. Chris and I got to chatting about a month ago on discord when I was talking about a back injury and was remarking how I’ve only become fit at one thing which is cycling. And I really enjoyed my conversation with Chris and I hope you will as well. So here we go. Chris Schwenker.

Ken: Chris, thanks for joining us today. How are you doing?

Chris Schwenker: My pleasure. It’s an honor.

Ken: Yeah, well, so tell us where you’re joining us from.

Chris Schwenker: I’m speaking to you from the East End of Long Island.

Ken: East end of Long Island. Fantastic. How’s the weather up there today?

Chris Schwenker: The weather is beautiful. It’s a little bit humid, but nice here on the beach, a little bit isolated for a climber in this flatland area.

Ken: So that’s your dominant aspect as a cyclist, is a climber?

Chris Schwenker: Yeah, and it’s a little bit tough to train on sand dunes and bridge overpasses.

Ken: Yeah, I feel you, so all the better for having Zwift in our arsenal of tools to get faster.

Chris Schwenker: Absolutely.

Ken: And I think you and I have very similar attributes as far as cyclists. I see us both hanging out in similar places when we race together. So for our audience, Chris is a physical therapist. He was actually a valedictorian of his high school and went on to Brandeis. And so tell us a little bit how you got interested in physical therapy.

Chris Schwenker: Well, I was always into sports, and I was blessed with the ability to do fairly well in school, so I went to Brandeis was able to get a full scholarship, which was very fortunate because I came from very meager upbringing and I wouldn’t have been able to go to college if I hadn’t worked to achieve that. So I just figured that the next logical step for me would be to go to medical school, so I got into medical school. I was one 10th of the one percent of the applicants to get into the school that I went to. And when I got there, I realized that it really wasn’t for me. So I took a leave of absence, which I’m basically still on which I doubt that they’ll take me back, but then I looked into other ways to get in the health field while also remaining active in sports way of things. And that’s what drew me to physical therapy. And I’m so happy that I did, and I love every minute of every day that I work.

Ken: That’s fantastic because I know a lot of us can’t say that, I definitely have a job that pays the bills, but it was never anything I’m passionate about. So kudos for you for getting in and you have your own practice now, right?

Chris Schwenker: I absolutely do. I own a practice, we have about 20 employees now, it’s not a huge practice, but my wife is a registered nurse. And when my children were born, she stopped practicing as a nurse. She was able to stay home, which we all know that’s the whole genesis of DIRT, I started training really early in the morning, and that’s where I found you guys because I didn’t want to train in the evenings when the kids were home doing things. So she and I built up the practice together and now it’s basically on a cruise control, so I have the opportunity to sit back and watch my staff do things, and get the opportunity to work with my wife, which is also really special.

Ken: That’s fantastic. So in your practice, you work with a lot of athletes and specifically you are a bike racer, and you work with competitive cyclist. And so I think that gives you a really great insight both being somebody that does a lot of riding yourself, but what are the types of injuries, and shortcomings that you see with cyclist?

Chris Schwenker: Well, there’s a myriad of injuries that cyclists get, and the majority of them are overuse injuries, which are based largely in improper positioning. And I’m not talking about like acute injuries from crashes or running your mountain bike into a tree. I’m talking about overuse injuries, because in the course of a 50 mile ride, you might turn the pedals 100,000 times. So if you’re not properly positioned, then that wears on you. So, as cyclists we’re in prolonged periods in one static position, and that’s basically in a flex position, so your hip flexors get really tight, the musculature around your lower back becomes overly stretched. The hip rotators, such as the Piriformis get overworked, there are structures around your knee that if your saddle isn’t correct, become an issue.

Chris Schwenker: So there are a myriad of issues and it’s a matter of identifying them, and then recommending the proper fit and going from there.

Ken: Got you. And that’s really something that I noticed this recent injury was a lower back injury and then it sort of gravitated around into my right hip crease. And when I’ve gone to a physical therapist and a chiropractor, they were really digging into my Solaris, and my obliques, and some of those muscles. So what’s happening to those muscles that makes them so painful?

Chris Schwenker: When you’re maintaining a static position, and when I mean a static position when we’re riding, we’re hunched over, we’re flexed, so those muscles are shortening over time. And when you activate a muscle it actually causes it to shorten at a more rapid rate. So what we are doing in effect by our positioning on the bike is basically training that muscle to be shorter and shorter and shorter. So if you don’t actively stretch it when you get off the bike, if you don’t actively do things to break up any adhesion, anything that’s in there such as… through rolling or otherwise, then those muscles are just going to get shorter and shorter and shorter. Whilst the reciprocal muscles, the muscles on the other side, the lumbar paraspinal, the hip flexors, and the hip rotators those will get longer and longer, and will create imbalances, and that’s where injuries occur.

Ken: Got you. So one of the things that we see with a lot of our riders is they feel so much pressure to spend every minute on the bike that they can because they are time crunched parents. And so they may have seven hours a week, and they don’t want to spend an hour of their seven hour exercise window stretching and strengthening. What would you have to say to them or what are some exercises that you would have them do, that don’t take a lot of time, but they could help with some of those propensities to repetitive use injuries?

Chris Schwenker: Well, I’m certainly from the same mind frame is that when I first started cycling, I just figured that the longer and harder I rode, the better I would get. And I eventually plateaued, I burned out. I was extremely upset about it, and the best advice I got was to speak to a coach. And the coach basically has taught me how important recovery is, that recovery is as equally as important as your workouts. And I joke that my coach basically protects me from myself. He’s there to make sure that I don’t do anything stupid, right? So, prevention and recovery are the-

Ken: Sure, yeah, that makes sense.

Chris Schwenker: Yeah, so prevention and recovery are essential, so when you say you don’t have time if you don’t have 15 minutes a day to maintain through core training, through stretching, through rolling, and that causes you to spend one day, two day, three day, four day, five days, a week, or two weeks, or a month off the bike, then are you really saving any time? So what I recommend to people is you set up a core training program, you set up a daily stretching program, and when you streamline it, you can do that in 10 or 15 minutes. And that’s what I do every day. It’s not like you have to do an hour of it after you train, it’s just a matter of being consistent because consistency is where you’re going to get your gains. And they’re going to be minimal gains, which for a lot of us is basically all that we can ask for.

Ken: Right. Now you wrote a workout program for us DIRT Dominance Includes a Ripped Trunk. And so I’ve looked over this thing, and done some exercise on it, and it’s good stuff. And it doesn’t take a lot of time. Now, one thing I do notice with these types of routines is, the more you get into them, the faster you can get through them, without having to take long rest from moving from one exercise to the other. And you don’t have to look down at your piece of paper for every single bit of nuance that’s been put into the workout, you just sort of flow through it faster over time.

Chris Schwenker: I agree. And I’ve been doing it forever, because I’ve… eventually, through my profession and having a whole host of injuries, which as a physical therapist, I’m almost embarrassed to say, but I never stop. I work through everything. That’s just my mentality. So I will work through the pain and I will figure out what is the best formula for me. And that’s what I have figured out, that I need to do at least 15 minutes of stretching and core strengthening after each training session in order to maintain the level of fitness and ability to keep pushing the pedals every day.

Ken: Got you. So what are your thoughts about like sort of general yoga workout and maybe… the internet is full of 10 minute yoga videos versus something more specific for cyclist?

Chris Schwenker: I don’t know too much about yoga because that was never something that I got into, I’m a science based empirical thinker, so yoga wasn’t something that I was ever attracted to, I was more inclined to just set up a stretching routine, and to streamline it, and to just do it every day. And when I first started doing it, I was as tight as… to use a Long Island phrase as a clam’s ass. But I’ve since then become very flexible, and I’m extremely flexible now it’s just a matter of making minimal gains, and over time they become maximal gains. And that’s some of the best advice that I could give.

Ken: Got you. Well, Chris, I really appreciate you writing that workout for our team. And also, being somebody to bounce some questions off of as I’ve been going through this recovery from my back injury, I had dry needling this morning. And so that’s a fun and painful experience. But I think that your advice here really will resonate with a lot of our athletes. So yeah, thanks for joining us today.

Chris Schwenker: I hope it does. And I want to tell everybody on the team if they ever have any specific questions that, we have a number of different ways that we can reach each other and I’m more than happy to help out.

Ken: All right, that sounds great. Well, thank you for joining us, and we will see you… I will see you online here in a couple of days I’m sure.

Chris Schwenker: My pleasure Ken, I really enjoyed it.

Ken: I hope you enjoyed the interview and thanks again to Chris Schwenker for taking the time to be on NGP. Chris and Shayne thanks and great catching up with you as well. Thank you everyone for listening to Never going pro, ride on, and I will see you in Watopia.

About the Podcast

Never Going Pro is a new podcast about riding bikes, being parents… and trying super hard at both. Hosted by Shayne Gaffney, Ken Nowell, and Chris Gorney. See all episodes on Soundcloud. Also available on Sticher and iTunes.


Nathan Thomas on Life as a Physio for Team Ineos (Zwift PowerUp Cycling Podcast #36)

Nathan Thomas on Life as a Physio for Team Ineos (Zwift PowerUp Cycling Podcast #36)

When victory is often a matter of inches, mobility on the bike matters. Matt Rowe sits down with Welsh wizard Nathan Thomas, physio for Team Ineos, to discuss what mobility work is best for Zwifters, who works the hardest at Team Ineos, and which countries love physio.

Also covered: Kev checks back in after France, Kristen on coaching Colorado Classic winner Chloe Dygert, and an exciting podcast announcement!

About the Podcast

The Zwift PowerUp Cycling Podcast features host Matt Rowe (Rowe & King), with regular co-hosts Greg Henderson (Coach Hendy) and Kev Poulton (Powerhouse Cycling). The hosts share tips on how road races can get faster in-game and outdoors.