Tiny Race Series – February 14 Routes –
See zwiftinsider.com/tiny for current Tiny Race details.
")
After leading the Thursday Pizza Burner 100km for over a year (sign up at zwift.com/events/tag/blameeric), I’ve started wishing for longer Zwift routes that are also fairly flat.
Here’s the thing about Zwift’s current route library, though: all the long routes have too much climbing.
The mega-flat Tempus Fugit has only 1.5 meters of climbing per kilometer of distance, and routes typically feel “flat” to me if they have around 5.5m/km or less. But all of Zwift’s truly long routes (100km+) are over 12m/km (save the France Classic Fondo at 7.6km, which has two Petit KOM climbs early on, so that’s a no-go). And even if I wanted to do multiple laps of a shorter ~50km circuit, these medium-length routes typically have way too much climbing as well, or a key longer/steeper climb that would break up my group ride. (Watopia’s only exception is The Big Ring, and even that route takes us up through the Jungle each lap.)
So I got to thinking: surely we could piece together a 100km flat route using Fuego Flats, the Southern Coast, and the rest of Watopia’s flatter roads. We could pull various tricks to make it happen, including starting from a higher elevation and riding big flat sections in both directions.
What I’ve settled on is a non-loopable route with only 489 meters of elevation gain over 102 kilometers (so 4.8m/km). That makes this the 13th-flattest route in Watopia, and by far the least climby “long route” in the entire game.
Or looking at it another way: there are flatter routes in Zwift, but they are all much shorter (the longest is around 36km). Unless you include Litus Fugit, a 60km 4.4m/km loopable Rebel Route I created which hasn’t yet been added to the game but really should be.
I hope you enjoy The Marvelous Metric. And I hope someday Zwift adds it to the game, so I can lead The Pizza Burner on it!
“Rebel Routes” are Zwift rides not available on Zwift’s routes list, thus requiring manual navigation.
The reward for your rebel ride? Exploring a new route, knowing you’ve gone where few Zwifters have gone before. And a Strava segment rank in the tens or hundreds instead of the thousands! Rebel Routes are also included as a separate category on our Veloviewer Route Hunter leaderboard.
A complete turn-by-turn tour of this route would be too much, so I’ll summarize it instead.
You can set yourself up easily by selecting the Mountain Mash route. This puts you at the route’s start point near the Jungle start pens, heading toward Watopia. (Starting from here is a tricky move on my part, as it lets us start with a bit of descent, making the start more gentle. It also gives us a faster overall speed, since we’ll descend more than we’ll climb.)
Cut across the Epic KOM Bypass (one of my favorite stretches of road in Watopia), then head down to Ocean Boulevard and out to Fuego Flats for a ride through the desert in the “forward” direction.
At the LAX Roundabout we’ll turn onto the long Southern Coast road for an out and back which quickly racks up 45 rolling kilometers. We use the bottom of the Jungle, and the Mayan Bridge Cutoff, road, for a quick turnaround at the end of the Southern Coast, allowing us to come back the other way.
When we arrive back at the LAX Roundabout, we’ll head up the Col du Saddle Springs and get onto Ocean Boulevard for a trip through the Marina and out around the Volcano into Downtown Watopia.
Head back out Ocean Boulevard and up into the edge of Titans Grove to hit Fuego Flats once more, this time in the “reverse” direction. By the end of the Fuego Flats road you’ll be over 95km in.
Wanting to make the final ~5km interesting, I’ve routed us across The Esses, down the Dirty Sorpressa, and out to the Volcano. Turn the first right to head into the Volcano for the route’s finish at the Volcano Circuit arch.
Begin by choosing the Mountain Mash route, which starts you at the Jungle Pens, heading in the right direction.
Route details:
Distance: 102km (63.4 miles)
Elevation Gain: 489m (1604′)
Strava Segment
See on ZwiftMap.com
Got an idea for a great Rebel Route? Share it below and maybe we’ll publish a post about it!

The SISU Racing Club Championships return for their third edition in March, and this year they’re taking the fight to the brand-new roads of Zwift’s New York map.
Riders will be tested across four disciplines: an individual time trial, a criterium, a climbing route, and an endurance road race. Every stage matters and every second counts, as winners in each category will be decided based on combined time.

Registration is now open. To be included in the final results, fill out the registration form, join the SISU Racing Club in the Companion app (where the race events can be found), and make sure you’re registered on ZwiftPower.
All Zwifters are welcome to race. While this is a Club Championship for SISU (meaning the top-placed SISU rider will be crowned Club Champion), everyone is welcome to compete.
The championships kick off with a true test of focus and pacing. Toefield Tornado is all about riding the knife-edge between power and precision as racers face the clock alone. Smooth lines, disciplined pacing, and mental toughness will define the early leaderboard—and set the tone for the battles to come.
Fast, furious, and relentlessly tactical, the Avon Flyer brings pure criterium chaos to the streets of New York. Expect tight racing, constant accelerations, and decisive moments in the blink of an eye. Positioning is everything, and only the sharpest racers will survive the speed and sprint for glory.
Points in each grade will be awarded as follows:
Powerups: Draft, Ghost, Aero
Events will be held in multiple time zones, with the total points determining the Club Championships (should there be a tie on points, the fastest time will determine the winner).
The championships turn uphill on Stay Puft Pursuit, where raw watts meet resolve. This is a climber’s proving ground—no hiding, just sustained effort and inner strength. Gaps open quickly here, and contenders will need to dig deep to stay in the championship fight.
Powerups: Draft, Feather, Aero
It all comes down to the Fuhgeddaboudit road race—longer, tougher, and packed with opportunity for bold moves. Endurance, teamwork, and race IQ collide on this iconic New York route. Championships will be won and lost here as riders empty the tank in one final showdown.
Powerups: Draft, Feather, Aero, Anvil
With the championships in March, February is about sharpening—not smashing yourself.
Riders enter using peak Zwift Race Score from the last 30 days for category enforcement. Race categories will be:

Yesterday, Zwift rolled out a much-requested upgrade to the Fitness Trends feature, adding running as a second activity type. This means that, effective immediately, your Zwift runs and outdoor runs will count toward Fitness Metrics, Week Streaks, and (optionally) Weekly Goals. Read on for details…
Everyone’s Fitness Trends now include Zwift running activities back to January 2025, as well as outdoor runs tracked on Garmin or Wahoo. Runs show up as pink bars in the weekly Fitness Trends chart in the Companion app:
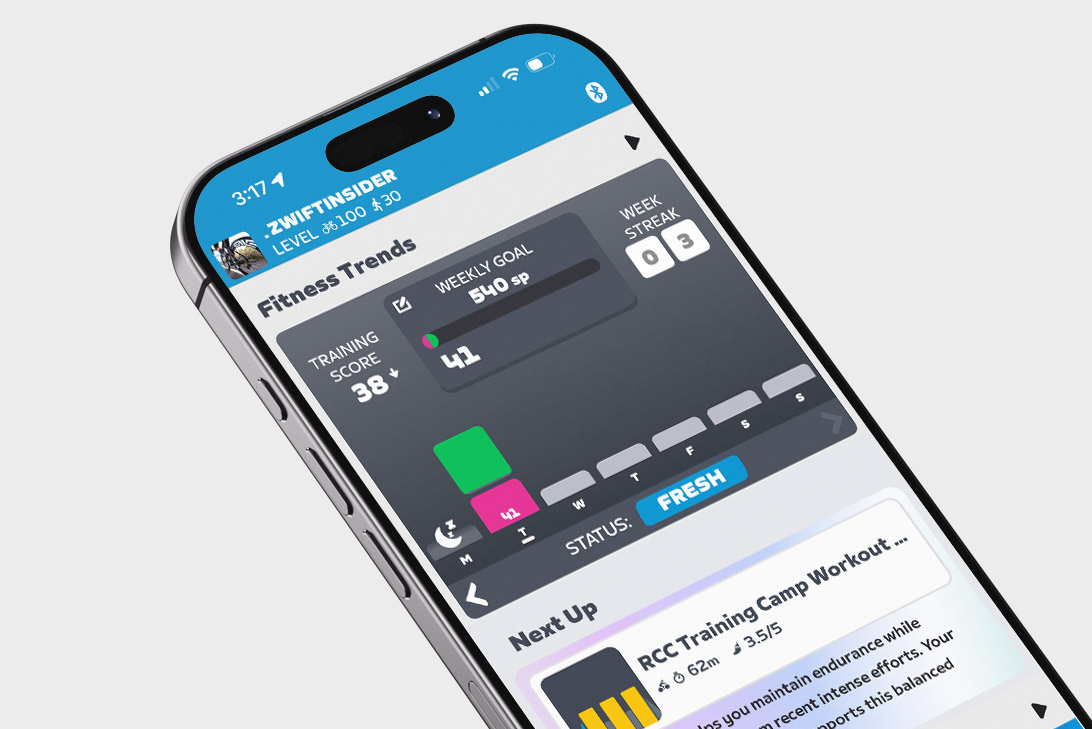
(Not seeing it? You need to be running Zwift Companion version 3.78 or later, so you may need to force the update from your app store.)
This means your current Training Score is now a combination of Stress Points (SP) accumulated via riding and running. If you’re an athlete whose primary training consists of riding and running, your Training Status (Fresh, Overreaching, etc.) should now be more accurate, whereas it was previously understated.
Related: All About Zwift’s Fitness Trends Metrics: Training Score, Training Status, Stress Points, and More
Zwift uses industry-standard algorithms to compute SP for your virtual and outdoor runs:
Many runners track their outdoor runs using a Garmin watch. If you haven’t yet connected your Garmin account to Zwift, you’ll want to do so, as it allows those outdoor rides to automatically sync to your Zwift account!
To do so, go to Settings>Connections in the Companion app. You can also do it via the web by signing into your account at zwift.com, then going to Connections. Tap on Garmin, walk through connecting your account, and you’ll be all set.
The past 90 days of runs are “backfilled” into Zwift’s Fitness Trends system when you connect your Garmin or Wahoo account. If you connected Garmin or Wahoo back in April when the Fitness Tracker was first released, that means you’ll have your outdoor runs stored in Zwift’s system going back to early 2025. If you connect it to today, it will backfill 90 days (approximately November 10, 2025).
Outdoor runs, like outdoor rides, now earn in-game XP. Outdoor runs earn 8 XP/km, which is 1/5 the rate of XP earned for Zwift runs (40 XP/km).
Some runners who dual-record their Zwift runs on a Garmin watch are already reporting duplicate entries in their Zwift activity lists. There’s a bug in the system currently where runs flagged as virtual runs are still being imported from Garmin to Zwift – this should be fixed soon. Zwift is also working on implementing further de-duping for rides and runs, but have shared no additional info at this time. For now, my best advice is to use Companion to manually delete duplicate activities from your Zwift activities feed to maintain accurate Fitness Trends.
Zwift currently supports syncing outdoor rides and runs from Garmin. Garmin is, of course, a popular platform for tracking outdoor runs, since Garmin’s watches and fitness tracking ecosystem are mature and feature-rich. Zwift also supports Wahoo and Hammerhead, who are less popular with runners, although their phone apps can be used for tracking runs.
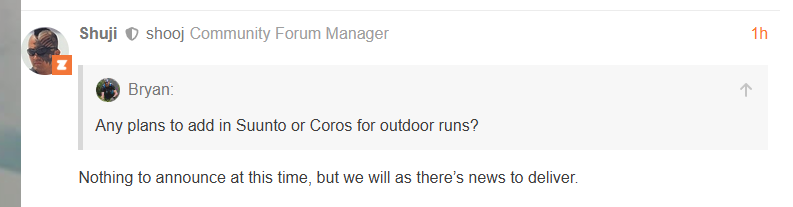
The community of runners on Zwift is already asking for integration with additional popular run-tracking platforms, namely Suunto and Coros. Hopefully Zwift is working with these (and other?) partners to broaden their outdoor activity tracking ecosystem.
You can now choose to include running activities in your Weekly Goal. Do this by tapping the “Weekly Goal” box in the Fitness Trends window of the Companion app:
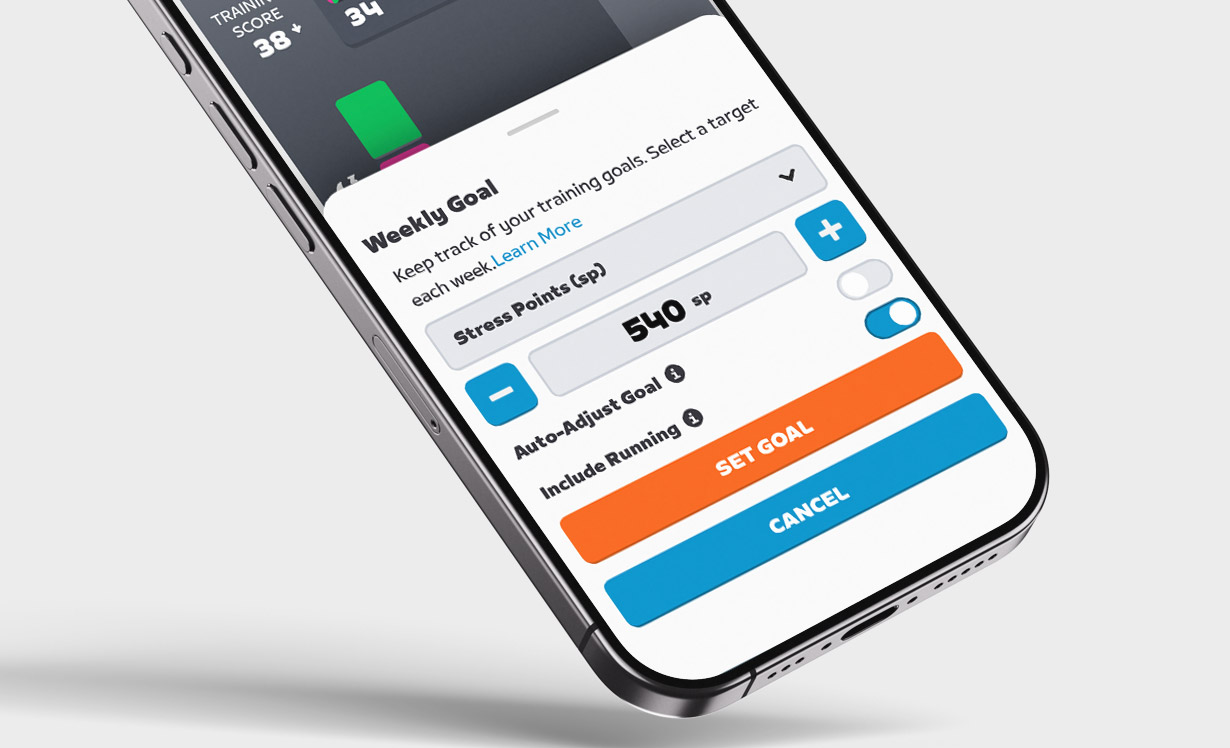
Weekly Goals can be set based on Distance, Kilojoules, Stress Points, Calories, or Time.
Zwift says, “…if the Include Running toggle is on, goals will be a single overarching target covering both running and cycling rather than sport-specific. Expect this to evolve over time.” So it sounds like Zwift is planning to let us set Weekly Ride goals separately from Weekly Run goals in the future.
One last bit of news re: running on Zwift. Beginning at midnight on Monday, February 16 (2026), Week Streaks can now be extended by logging a run!
Share below! You might also want to check the official announcement thread on Zwift’s forum.

Looking to stay fit through the remainder of the winter? In this week’s top video, hear one rider share how he’s been using Zwift to get through the winter slump.
Also included in this week’s picks: elite Zwift racing, an FTP ramp test, a photo finish, and a rider’s first Zwift workout.
Share the link below and we may feature it in an upcoming post!
 Released")
Zwift version 1.107 begins its phased rollout today. This is a minor update containing mostly bug fixes. See details below…
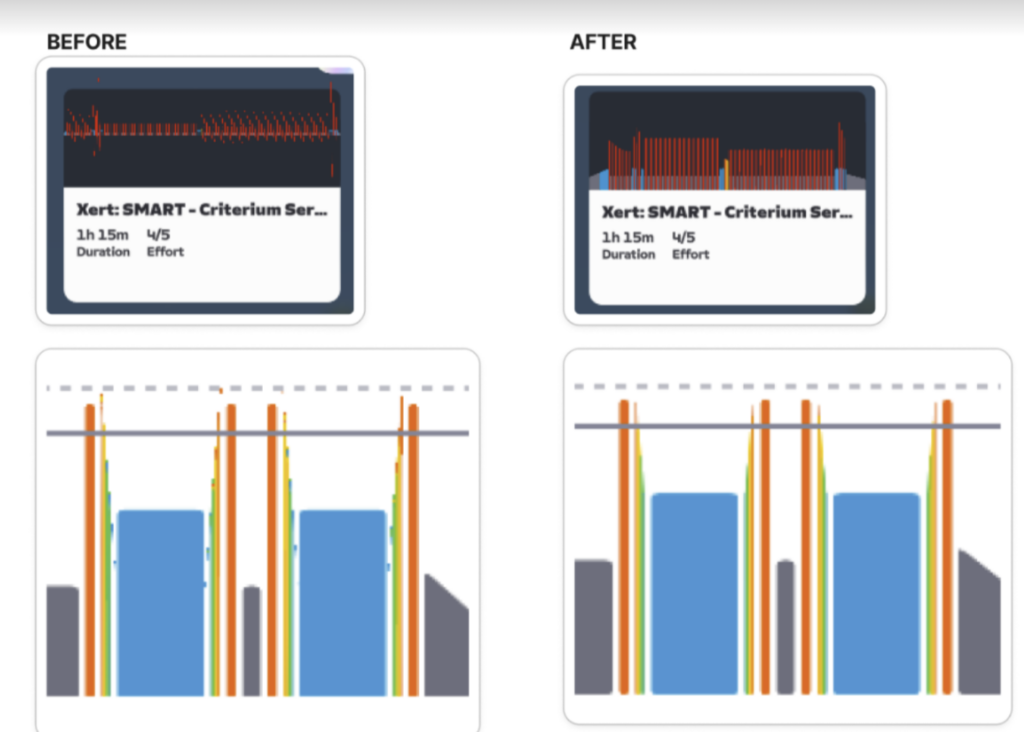
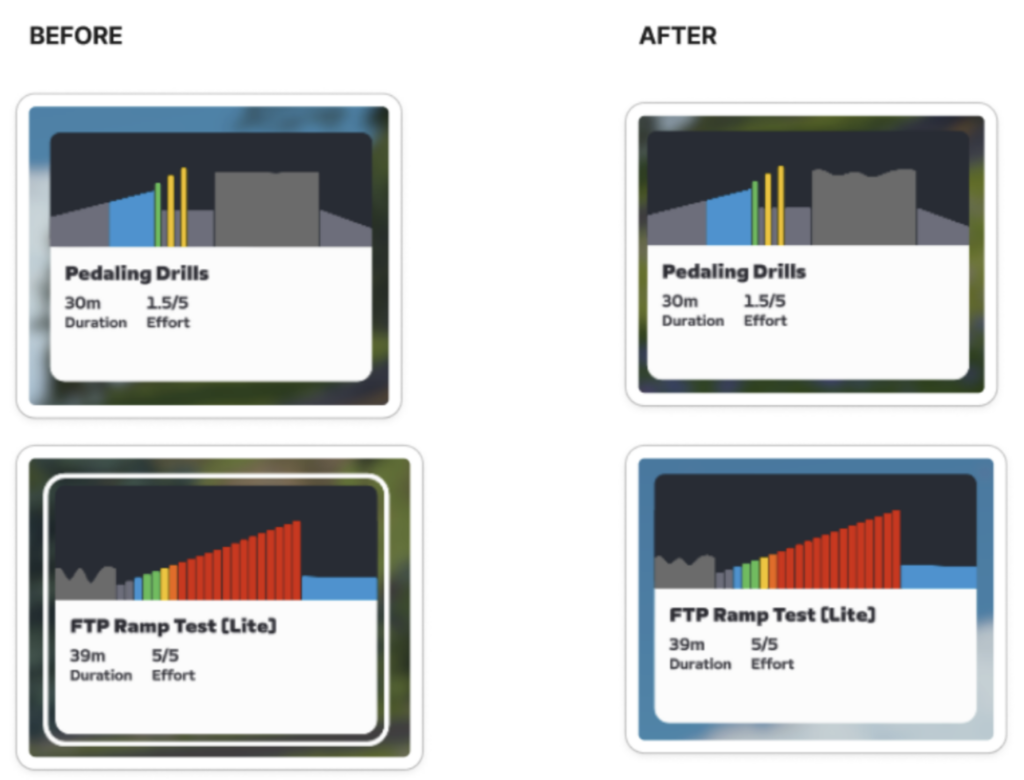
Zwift says this release includes “Various visual improvements to how workout blocks are displayed in workout cards on the Home Screen. These changes include fixes to how small workout blocks, free ride segments, and workouts with many blocks are displayed.”
The more detailed display of the workout that you see when clicking the card has also been modified. Examples below:
Makuri Islands’ Neon Shore Loop route was originally launched as event-only to host TTT races for the ZRL Round 3, which wraps up this week. This update makes the route free rideable, and it can also be scheduled for meetups once it’s added to the list in Companion app.
Note: this isn’t a new badge, it’s just a change from the route being event-only to being open for free rides, meetups, etc. If you already raced the route in ZRL, you’ve already got the route badge.
Zwift supplied the following additional release notes:
Discuss this update in Zwift’s forum >
If you spotted any other changes or bugs in the update, please comment below!

Fast Talk Labs + Zwift have spun up a new weekly ride series featuring Fast Talk Podcast cohosts Trevor Connor and Chris Case, with a new special guest each week.
Sign up at zwift.com/events/tag/fasttalklabs >
Sign up at zwift.com/events/tag/fasttalklabs >

The third edition of Zwift Games, the platform’s most popular stage race series, has just been announced. Racing begins February 16, but related rides kick off today!
Below, you’ll find everything you need to know about indoor cycling’s premier race festival.
Zwift’s learnings from previous Games have been applied to this year’s events, leading to various improvements, including:
Most of these new items are discussed in more detail below. Read on!
Zwift Games is an escalating challenge! Stages get progressively more difficult, with each route both longer and more climby than the one before:
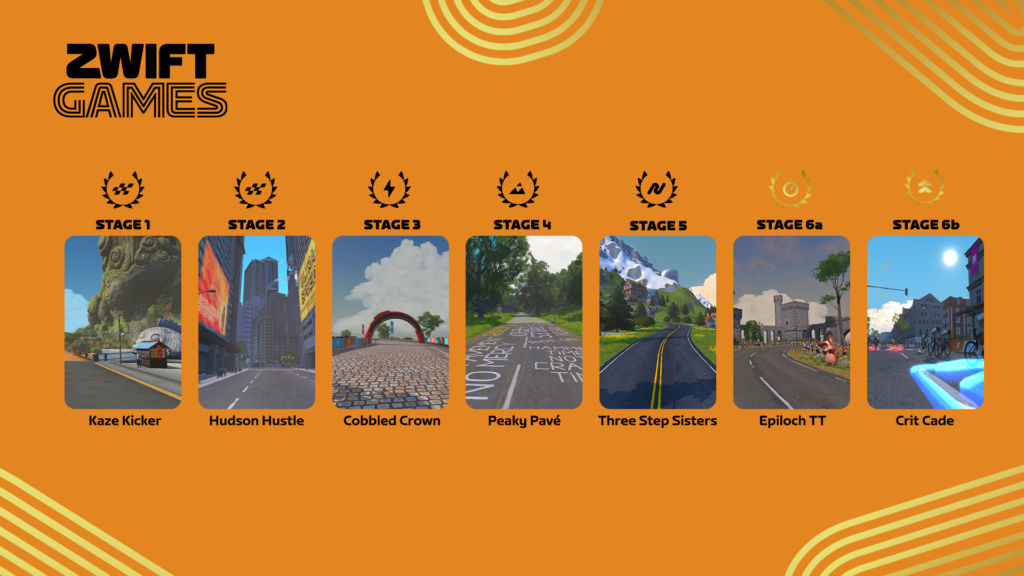
See all upcoming races at zwift.com/events/tag/zwiftgames2026

The largest race fields will be found in the Standard (mixed) events held hourly, 24x daily, at 10 minutes past the hour. These races alternate each hour between two different Racing Score ranges:
The two ranges give racers a choice between a stronger category that may help them get a faster course time (great for the GC competition) or a slightly weaker category that gives them a better shot at a race win.

Racers with a racing score of 650+ can jump into the Advanced Races held every two hours at 15 minutes past the hour.
See Advanced races at zwift.com/events/tag/zwiftgames2026advanced
Women-only races will be held 5x daily at 10am, 12pm, 5pm, 6pm, and midnight UTC.
These races will use their own Racing Score-based bands: 0-199 | 200-299 | 300-399 | 400-499 | 500+.
If you’re a woman who hasn’t raced yet on Zwift, see our Women’s Racing homepage for a bit of inspiration >
Zwift Games race results are delivered via leaderboards on Zwift.com. The following leaderboards are available:
Leaderboard rankings can be filtered by Gender, Racing Score band (buckets of 100), and Country. These filters can be used in combination.
View Leaderboards at zwift.com/racing/leagues/zwiftgames2026
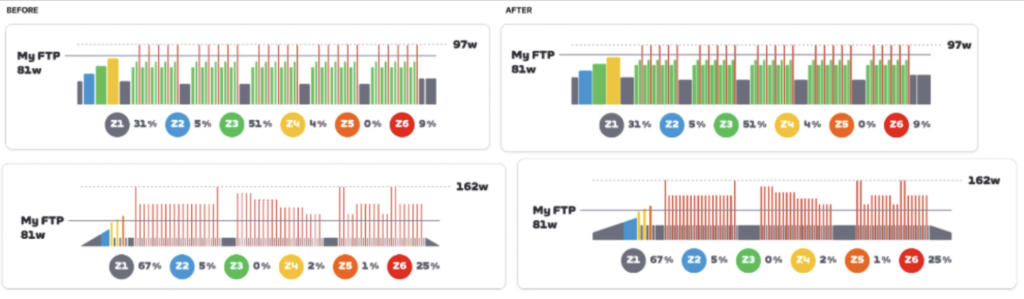
This year, Zwift has added power metrics to the leaderboard, so you can compare your Zwift Games numbers to your 90-day bests. Here’s a mockup Zwift sent, where my League Best numbers may be a bit overstated…

View Leaderboards at zwift.com/racing/leagues/zwiftgames2026

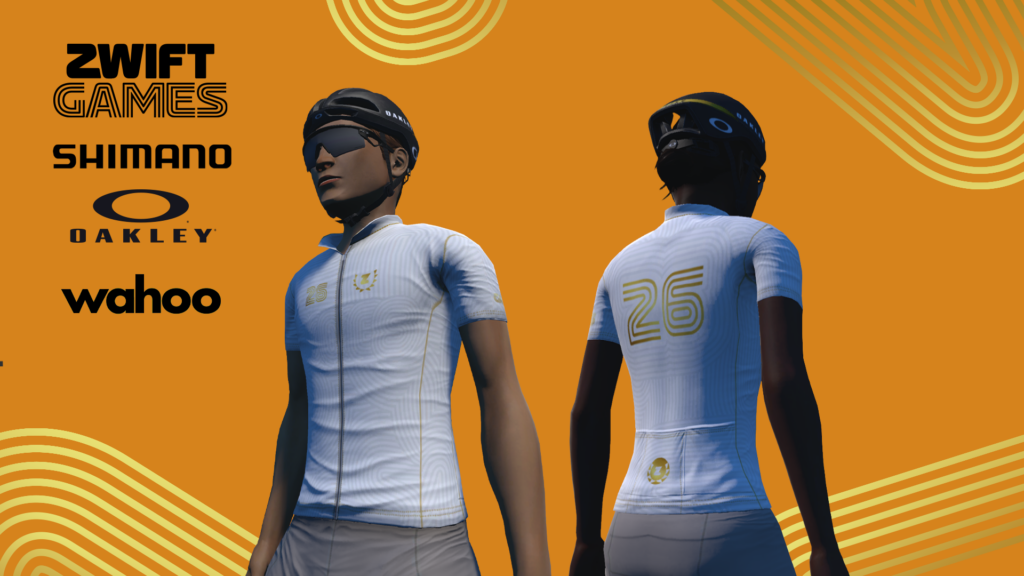
A total of four in-game rewards are available to all Zwifters:
This year, Zwift has spun up special “Road to Glory” events to help newer racers learn the basics of Zwift racing. These group rides feature on-screen text throughout the event explaining powerups, drafting, Ride Ons, particular Watopia course features, and more. Rides are on 1 lap of Watopia’s Triple Twist, which is 24.5km long, with 201m of elevation gain.
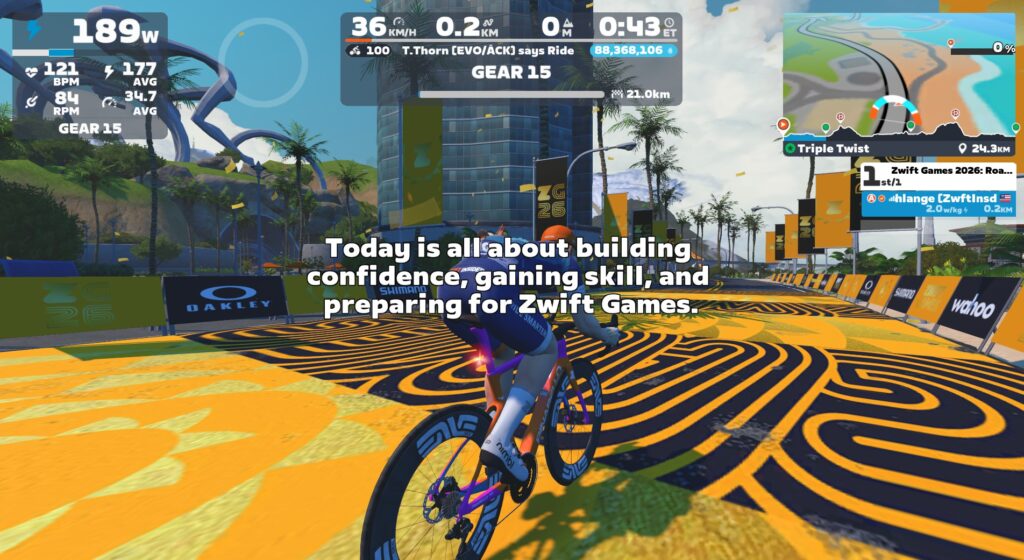
I recently rode a Road to Glory preview event and found it well-planned, with many helpful tips packed into a relatively short time. I highly recommend it if you’re at all nervous about Zwift racing and looking for some hands-on training.
No special registration is required – simply join any Zwift Games event to participate, or ride the courses on demand! Events should be available for signup beginning today (February 9).
See all upcoming races at zwift.com/events/tag/zwiftgames2026

Share below!