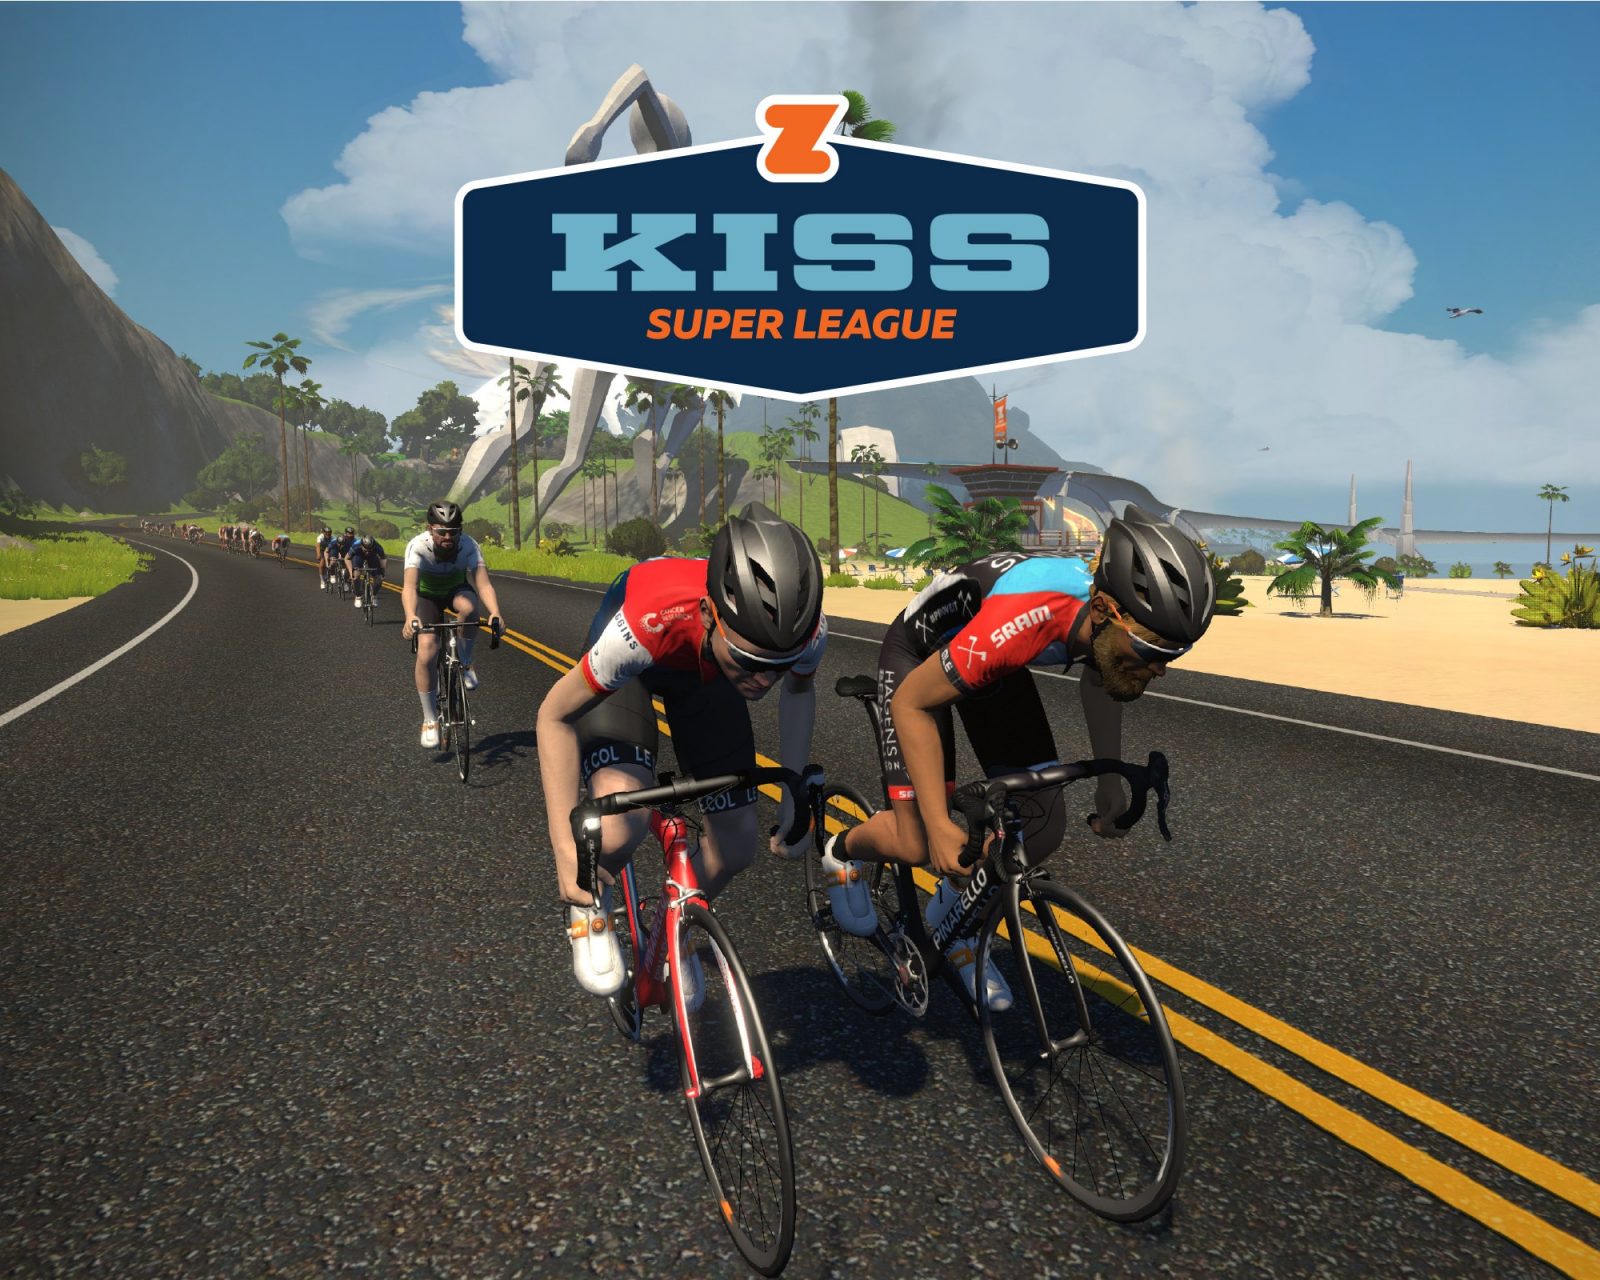
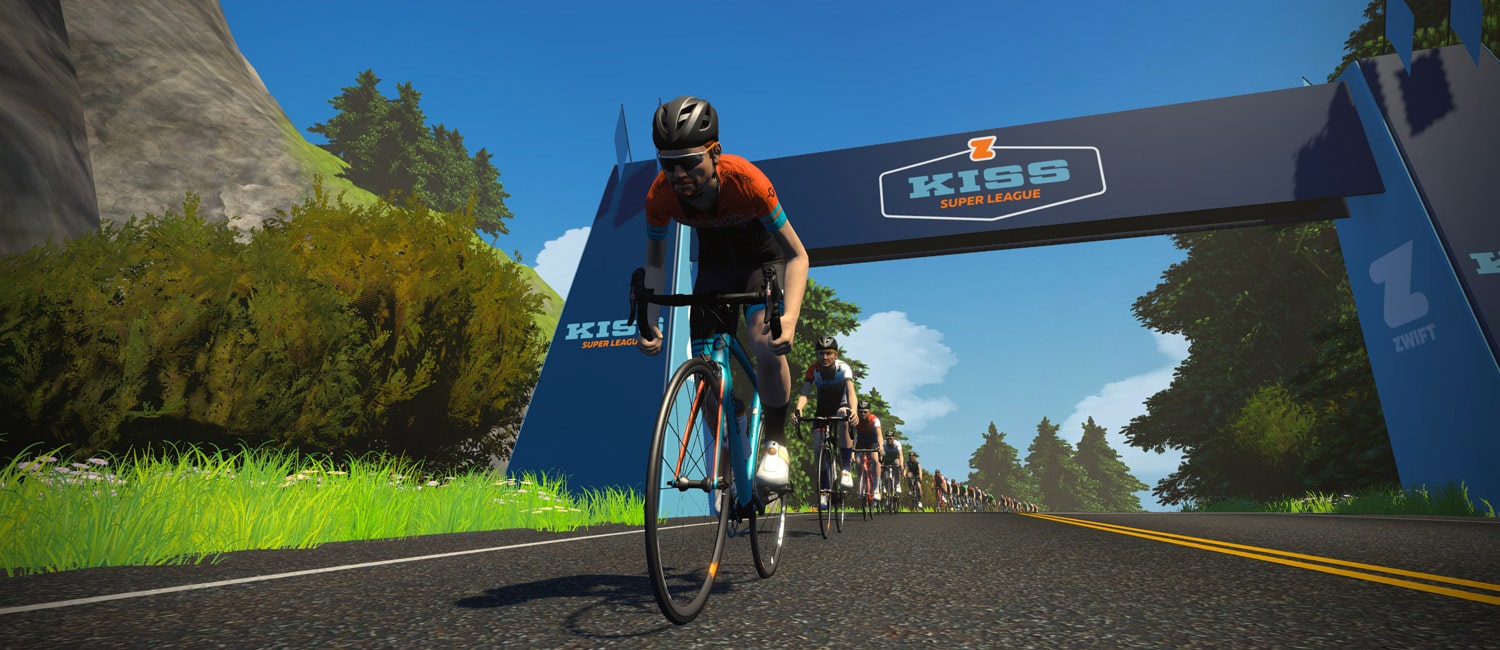
Zwift Community All-Star Justin Purificati Discusses KISS Super League
Editor’s note: Originally posted on the Bereda Training Journal, author Dennis Cottreau interviews Zwift Community All-Star member Justin Purificati about his upcoming participation in Zwift’s new KISS Super League.
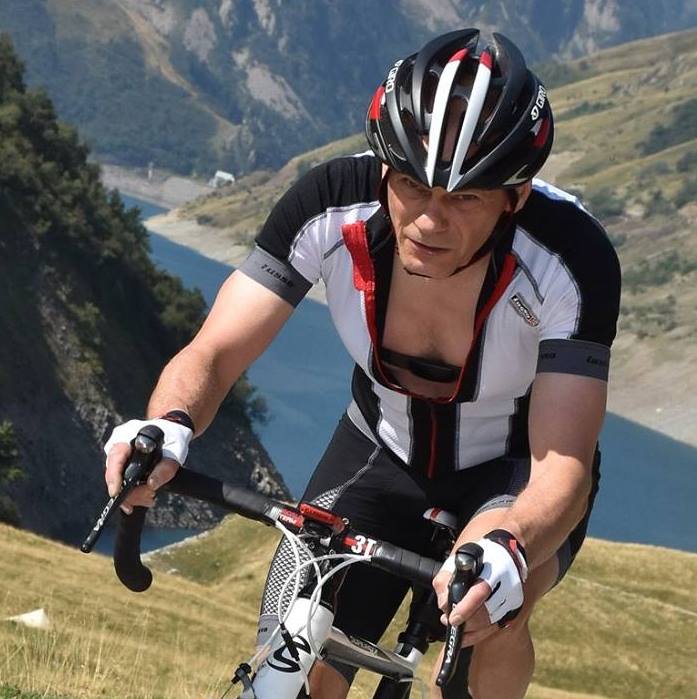
We sat down with prolific Zwift Racer Justin Purificati to discuss his upcoming participation in Zwift’s new KISS Super League series where he’ll race against pros as a member of the Zwift Community All-Star Team.
While they both require horsepower, professional road racing and Zwift racing are a bit different, to say the least, and it’s yet to be seen how the best of the best of everyday Zwift Racers will hold up to the wattage put out by riders on teams like Dimension Data, Hagens Berman Axeon, Team Wiggins, and more.
“It’s definitely exciting!” Justin told us in an interview.
“I mean, when I first heard they were starting up a new league and it was going to be basically all pro teams I was like, ‘okay that’s a bit of a different approach… it’ll be interesting to watch,’ and then I got asked to join!” He laughed.
Zwift decided to include a team of community all-stars in the virtual racing mix. For Justin, it’s not an all-new experience.
“Alright here we go again!” he said.
Justin’s Progression to the Pros
This hasn’t come out of the blue for Justin, he’s been working his way through the ranks in the Zwift racing world over the past few years, having already been invited to race in live events.
“Yeah, it’s definitely been a journey,” Justin reflected. “ The first time I got asked to go to one of these events was two years ago in Las Vegas…”
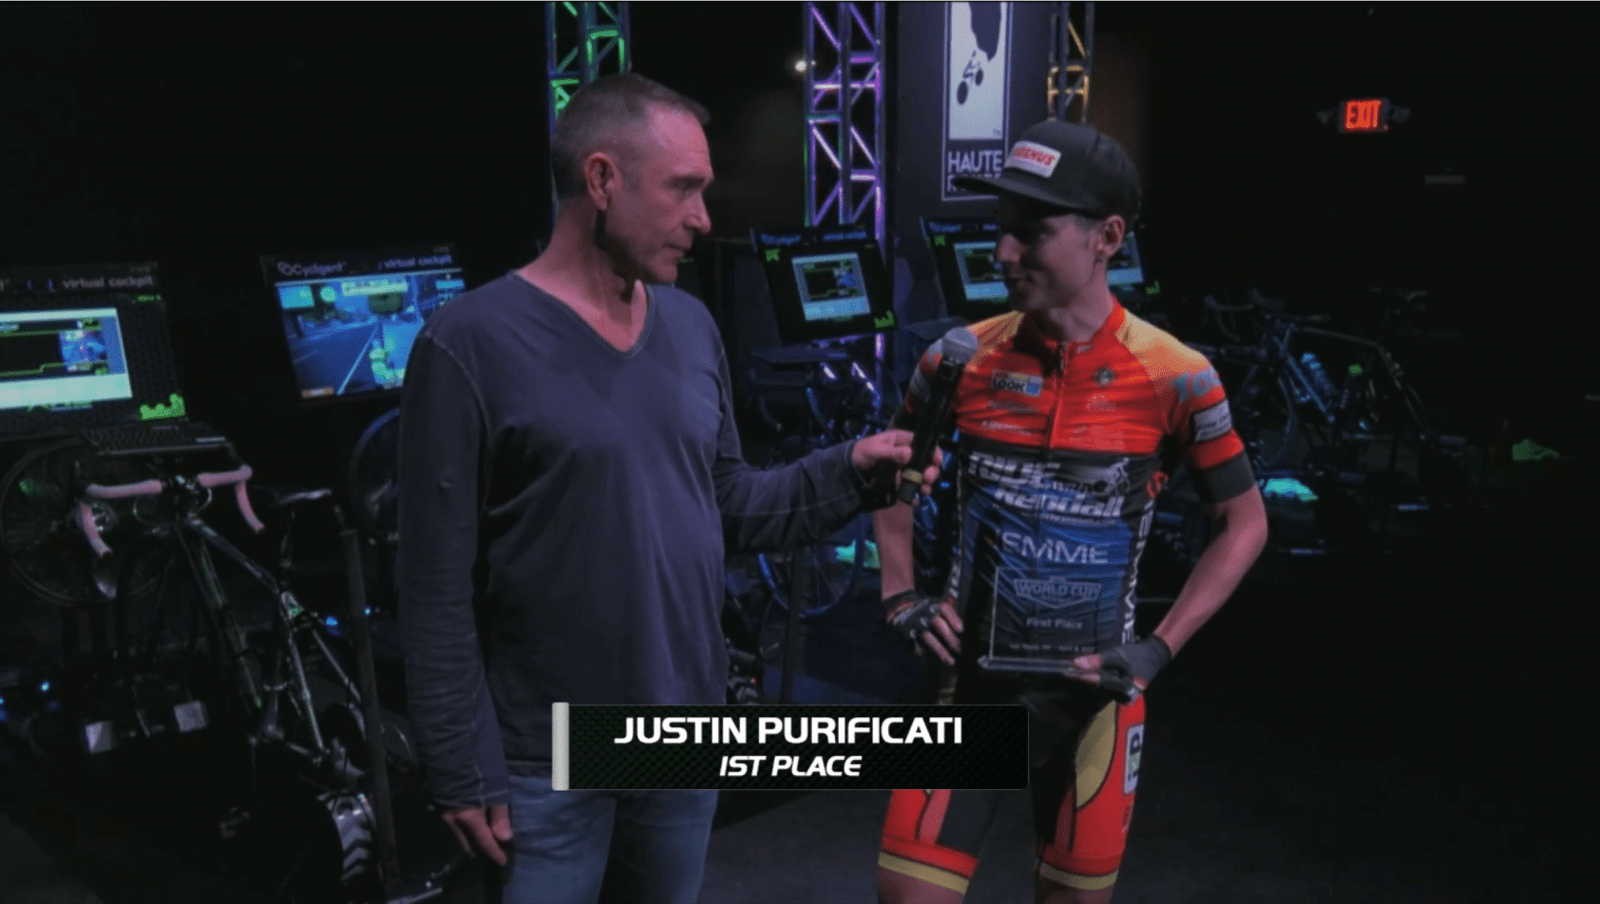
“And you won one of these things before, eh?” I interrupted, “was that the first one?”
“That was the one!” Justin laughed.
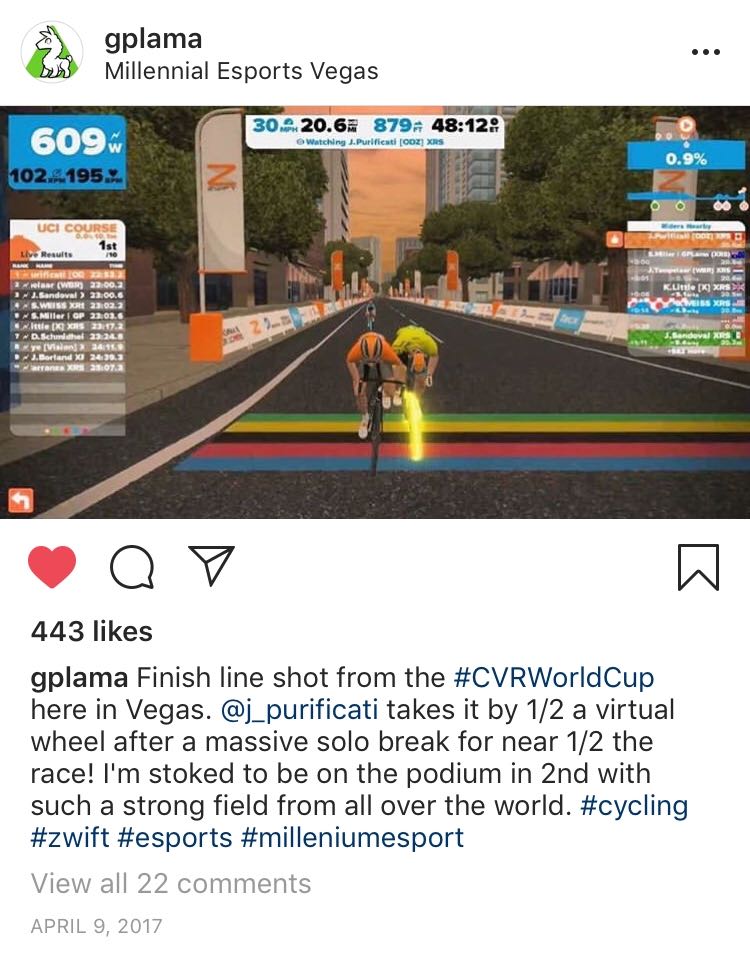
Justin had never been to Las Vegas and got to spend a week there doing some and then getting to meet all the people that he raced against on the computer all the time.

Justin won the race in dramatic fashion.
“Yeah, so, I think I wasn’t feeling the greatest during the race,” Justin recounted. “We hit the Richmond climb pretty hard the first time and I was a bit on the ropes, so I was like, you know, maybe I can’t go really that hard again the next time around and wait to see what happens, so… I kind of got a bit of a gap going into the start/finish to the first lap and it turned into a solo lap then I JUST held off the ‘GP llama’ [Shane Miller] by a tire width.”
KISS Super League Strategy
We asked Justin what he could tell us about the KISS Super League, which, at the point of this interview, was still unveiling news on a weekly basis.
“Well, it’s still so early in the works that we don’t entirely know everything ourselves. I mean, at this point we basically know it’s going to be a weekly series that’s supposed to be on Wednesdays starting the 23rd of January.” Justin said.
Otherwise, not a lot of details had been provided.
Even to the racers.
“They haven’t given us too much details.” Justin said, “I know every race is going to be fielding four riders from each team, so basically, at some point, we’ll sit down and discuss who will be participating in what events, who’s available, and all that.”
Some of that discussion had already started among the Zwift Community All-Star team.
“I mean, also, we had a race earlier today so we just got the guys together and just kind of got each other feeling each other out, you know?” Justin explained.
Even though this team has been assembled from around the world, these teammates are not strangers.
“We all know each other a little bit and we all know how we race, but we always race against each other so it’s a bit of a different dynamic.”
They’re hoping to overcome that difference with communication and time.
Referring to their recent practice race, Justin gave some insight: “we were chatting quite a bit on Discord and just feeling out the race. Right now it’s all about learning my new teammates.”
Horses for Courses
With only four of eight team members racing each week comes the ability to tailor the roster for the specific course each week, playing to racers’ strengths and weaknesses.
“One thing they did tell us was that there wouldn’t be any ‘hilly’ races, so, I don’t know what their definition of ‘hill’ is for the pros but I imagine we’re not going to be racing up the Alpe du Zwift anytime soon.” Justin mused.
But would it actually be boring to watch these professional teams virtually race uphill?
Justin’s thoughts: “No, but I mean, I think they’re just trying to give, maybe, the average guys a bit more of a shot or… they don’t want to just make it a watts per kilo battle, you know?”
Justin’s Zwift Power profile currently has him at 5.32 watts per kilo for 20 minutes and in the 98th percentile of all Zwift racers.
Personally, I know he’s been way higher than that, and would love to see how a peak form Purificati stacks up w/kg wise against pros…
I like his chances.
Justin: “All-Stars have a shot”
But how does Justin like his team’s chances in the KISS Super League series?
“I mean, I think we have a pretty decent chance at putting in some results,” Justin said. “We have guys that can sprint pretty well and, I mean… there are some guys that are former pros and they’re getting beat out on Zwift, right? I mean it’s not… the translation between riding out on the road and on Zwift isn’t the same.”
And that comes to the crux of the issue.
There’s a difference between racing on Zwift and on the road, obviously.
If we took the Zwift All-Star team and the professional racers in the KISS Super League and threw them out on the road, no competition.
But on Zwift?
The All-Stars have a shot.
And it could be exciting as hell.
Secrets of a Prolific Zwifter
Professionals may train more hours, but the All-Star team trains more hours on Zwift.
Without giving too many away, I asked Justin what he knows about Zwift racing that the pros don’t which he’ll use to his advantage.
He offered up this:
“When you’re winding up for a sprint you don’t have to worry so much about positioning. When you’re racing out on the road, you know, you can’t start from the back of the pack and just start sprinting directly through guys but… that’s definitely something you can do [in Zwift]. You just start your sprint from a little further back but then you basically get a full draft riding through the peloton and then just slingshot your way through the front!”
Expect Tactical and Attacking Racing
Stuck together as a group or all blown apart?
Pace-setting or attacking?
“I think it’s definitely going to get blown apart in the sense that there’s gonna be a lot of teamwork involved. Guys will definitely be attacking, counter-attacking, putting guys up the road,” Justin predicts.
“You don’t see as much of that in Zwift. It tends to be what’s known as “the blob effect” where everyone’s just kind of riding together as a group, hard, and everyone’s just stuck together.”
But that isn’t how he thinks things will unfold with the pros involved.
“I think with this it’s gonna be a little more reserved in the sense that you’ll see a lot more fireworks and guys attacking, going way harder, trying to break up the group, so that should be interesting.”
I asked if, with the professionals involved, he thought the tactics would be elevated.
“Oh yeah,” Justin said with no hesitation. “That’s what the pros are used to. I’m sure that’s what they’re going to do on Zwift.”
Tactical Race, Tactical Communication.
If attacks are flying, the All-Star team needs to know how to respond.
They’ll be relying heavily on Discord.
Justin told us, “Yeah! We worked on it a bit today so we’re just working out the kinks, but it seems like everyone’s pretty comfortable with that already, so…”
Overall, this KISS Super League is an experiment in seeing how racing virtually compares to racing in real life.
The same experiment extends to communication.
The professional riders could be traveling together to and from races and team camps over the course of the series, so they might have a chance to race altogether in the same room, speaking in person, while the All-Stars are scattered around the world in their basements, using Discord.
“There was talk of getting team Wiggins together [for races in the series] and have a Zwift booth set up,” Justin told us. “Then they can all race together side by side like we would have a live event.”
But unlike other live Zwift racing events that have happened, where all racers are lined up side by side but racing as individuals, the KISS Super League series will feature riders lined up with their teams.
Where previous events had a quiet line up of racers, there could be discussions happening in this series.
They’d be discussing their tactics.
“Oh yeah! Communication is going to be huge. They’ll definitely be at an advantage compared to the other guys if they’re not like on Discord, or not in the same room, or at least communicating with some way.”
Audience Engagement and the Future of E-Sports Racing in Cycling
In NASCAR there are feeds of drivers talking to their pit crews available to the TV audience. The Zwift world could move in the same direction with their KISS Super League.
Could we get a chance to hear what racers are saying to each other in the heat of competition?
“Possibly!” Justin thinks.
“I mean, it’s definitely been done before where guys like Nathan [Guerra, of Zwift Community Live] will have access to our group Discord while we’re doing a race. He usually won’t share it with the public, just because, obviously, we’re discussing race tactics and stuff, but he’ll often chime in and give a bit of a sense of what we’re talking about without giving too much away.”
Zwift Community Live is a social broadcast dedicated to showcasting the Zwift Community in all its forms and has already been leveraging the insights from team discussions in Discord to create a more engaging viewing experience while broadcasting Zwift races.
That insight is already proving to be quite engaging.
“I know in the past, just riding with the ODZ guys, we have had instances where we’ve had people not even racing just on the Discord watching everyone else and basically acting as a DS [director sportif] for the race and just giving us a heads-up of what’s going on.”
Early Opportunity in E-Sports Market
Zwift recently raised $120 Million in venture capital to help them set up an e-sport league, specifically the KISS Super League.
Currently, it’s viewed as “an additional opportunity” for professional teams and sponsors to get exposure, but just as cyclists specialize in different disciplines (crit racing, for example) one must wonder whether this could be the beginning of a new type of professional bike racer.
“I think there’s definitely some opportunity to be had,” Justin commented. “I mean, it’s still developing quite a bit… but especially with how the state of affairs is with racing on the road right now, I think this is definitely more of a usable market for the public.”
Cycling is nothing without its fans, after all.
“It’s definitely more inclusive, so I think we can get a lot more people involved and that’s generally been the big problem with racing,” Justin continued. “I think the more people we can get involved, I think there is something to be had here.”
When asked how he’s approaching training for the series, Justin said:
“Well, I’m definitely managing my training around it. I’m definitely not going to try and hinder my chances of doing well in races, so I’m definitely catering my training right now to make sure that I’m in good form during the week for the race, so…”
A bit understated, but knowing Justin personally and as a teammate since our university cycling days through to the elite amateur level, he’s taking this seriously.
Watching it all unfold
Bringing the interview to a close, I wished Justin the best of luck and invited him to return for a follow-up conversation after his first race.
“Yeah, for sure!” he said. “Maybe we’ll see YOU out there racing, too!”
Once I composed myself after bursting out in laughter, Justin probed further: “What are we on, come back 2.0 or 3.0 now??”
With so much going on with Bereda these days, I’m not sure a comeback to high-level cycling is in the cards for me in the next few years. We’re too busy trying to be part of the industry’s evolution in our own way with Peer-to-Peer Coaching for Endurance Sports, but everyone at Bereda is keen to watch Justin be part of the first wave of professional e-sport bike racing and can’t wait to see the watts per kilo flow.
Best of luck Justin!
Thanks for the chat 🙂


")


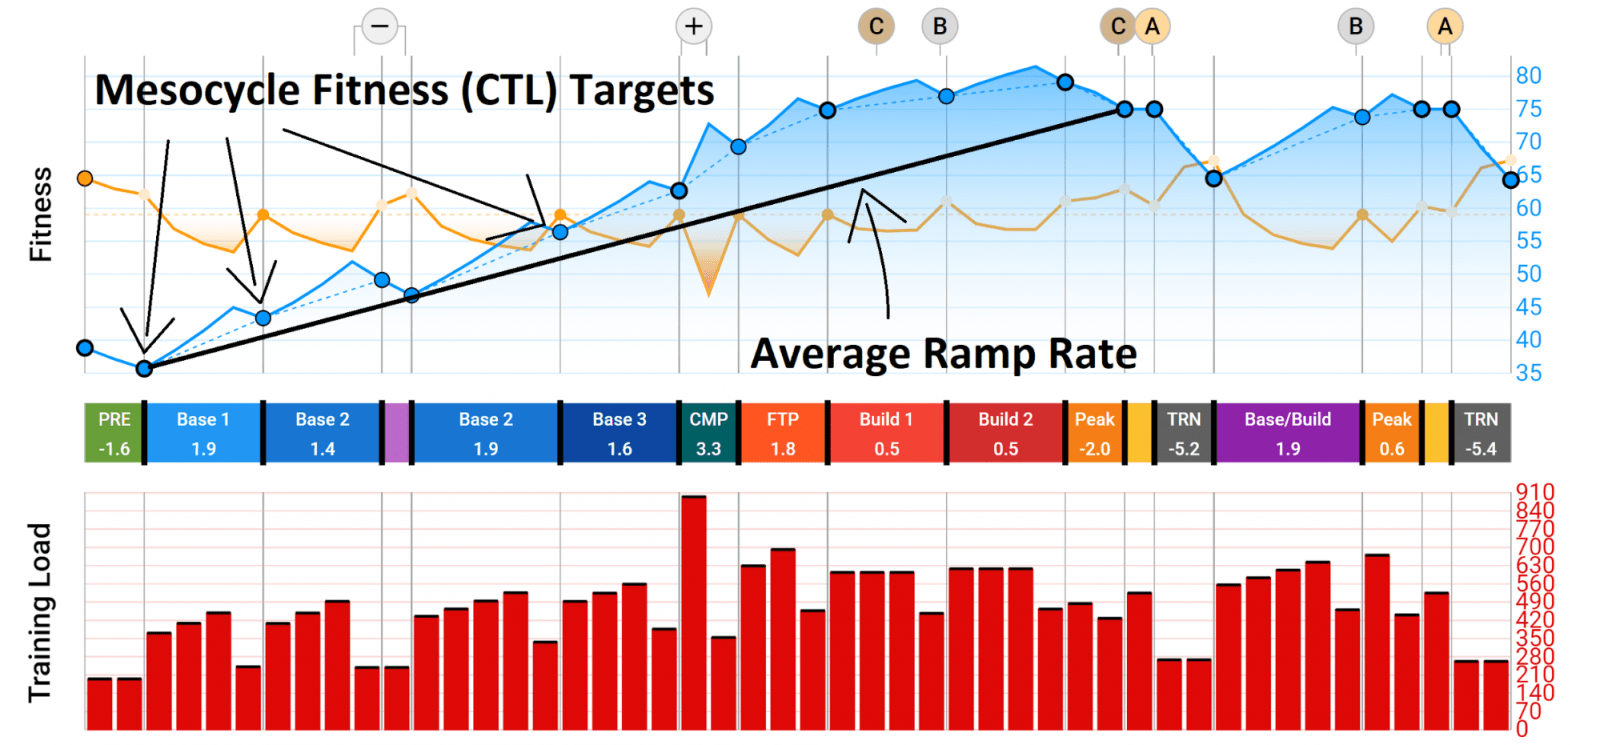
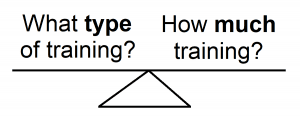 Basically, an Annual Training Plan is just a set of weekly targets that say how much training you’re going to do and what type of training you’re going to do each week in order to achieve some objective you’ve set for the end of the plan.