Like the previous update, this release doesn’t contain much by way of new features. But it does include welcome improvements to the very popular Pace Partners, and new workouts which are always a plus! Let’s dig into the details…
Pace Partner Updates
Thanks to the new Drops Multiplier game and their “always on” nature, Pace Partners have become very popular very quickly. This update includes two small improvements to the Pace Partner experience.
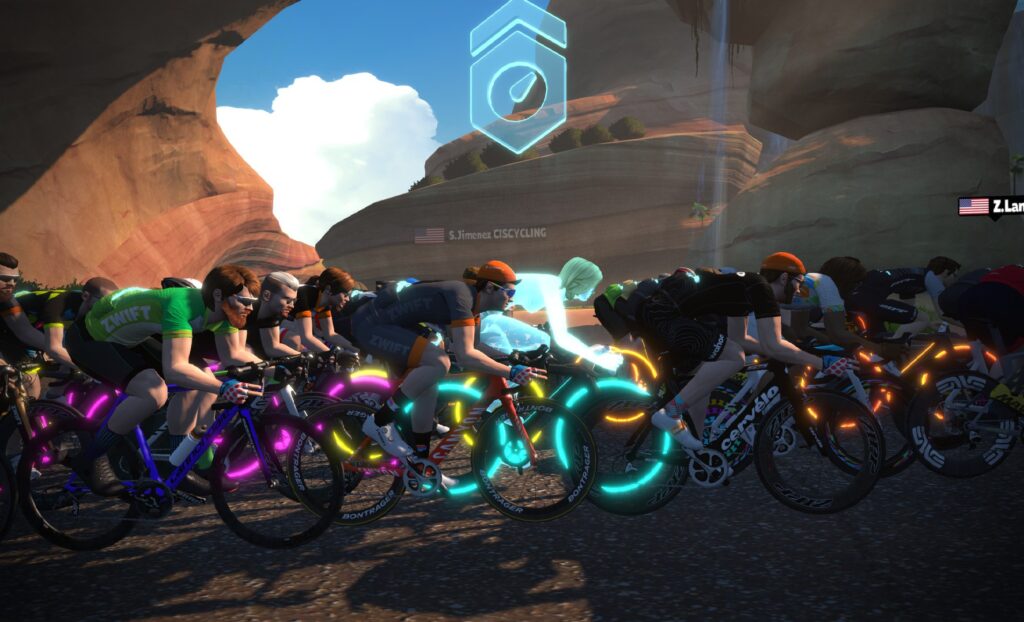
First: Pace Partners now have a beacon over their avatar, so they’re easier to spot in the bunch. If you’re trying to stay close to the Pace Partner in order to earn additional Drops, this is a big help!
Second: if you’re following a Pace Partner but on a different route than that Pace Partner, you may come to an intersection and make a different turn than the Pace Partner! That’s a bummer. So Zwift has added a warning to help you make the right turn.
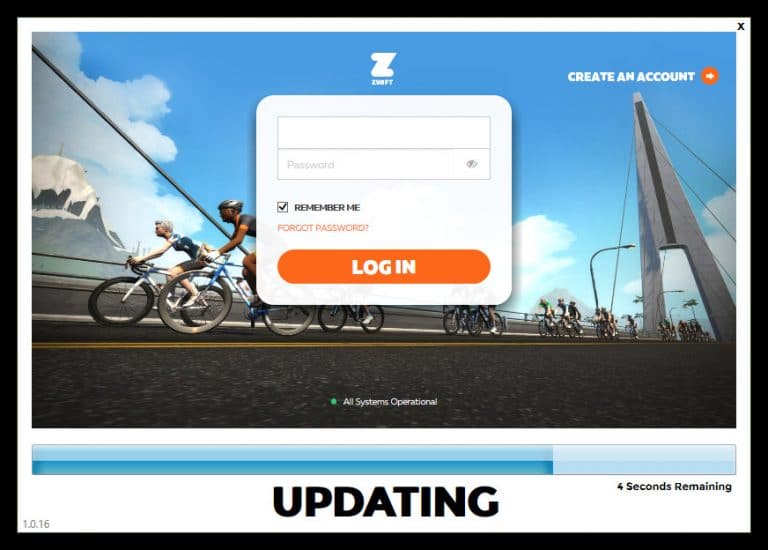
Interesting bit of related triva: Zwift stats show that a lot of people riding with Pace Partners are simply joining them randomly from within a free ride. Did you know you can easily find a Pace Partner from the startup screen, then start your ride and be dropped into the Pace Partner’s pack? Just click Watopia, then choose the Pace Partners box…
New Training Plan + Workouts
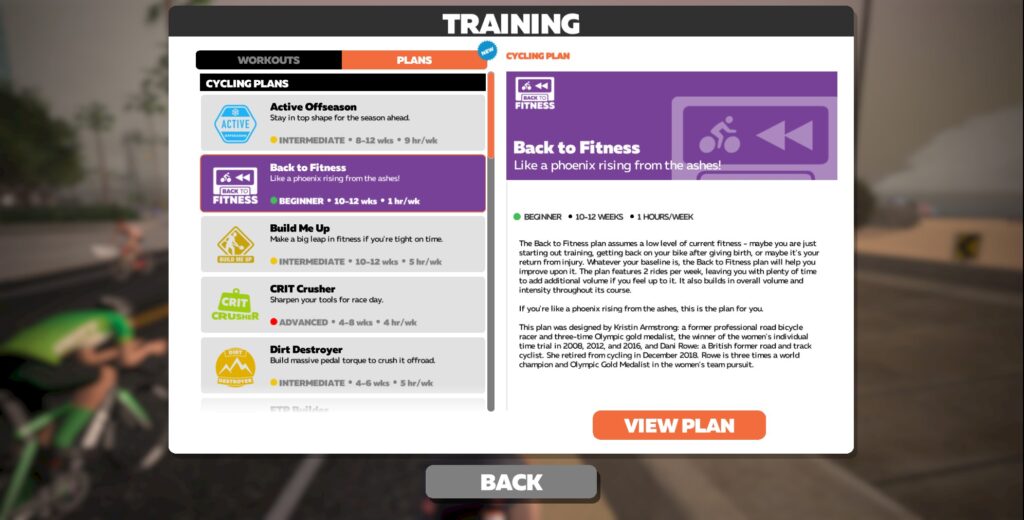
A new Training Plan has been added, called “Back to Fitness”. This plan is specifically targetting those at a low level of fitness who want to kick start their return to cycling after a hiatus.
Back to Fitness plan
Rapha Festive 500 workouts
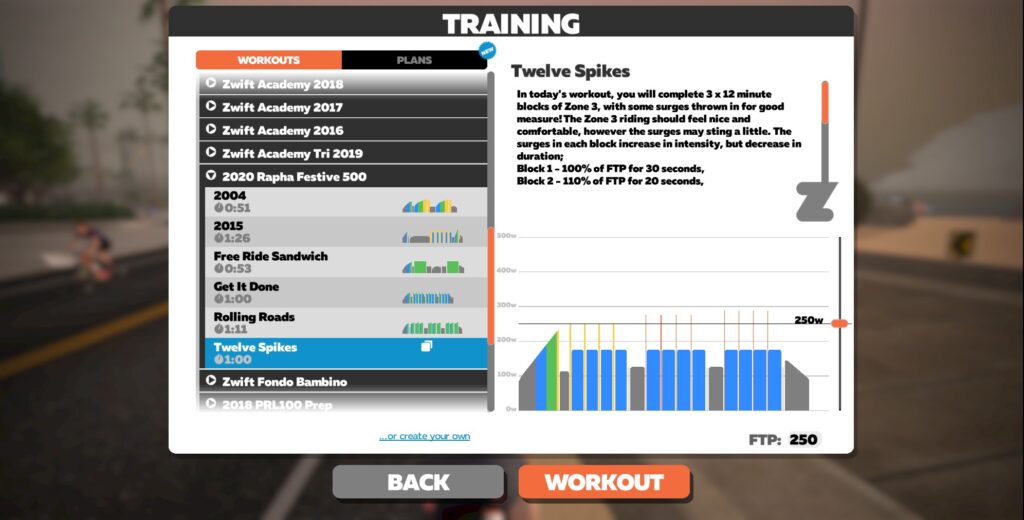
Five workouts have also been added to help Zwifters prepare for the 2020 Rapha Festive 500. This will be the 11th year of this popular challenge (ride a total of 500km between Christmas Eve and New Year’s Eve) and while the challenge isn’t on Strava yet, we expect it to show up soon.
Canyon Aeroad 2021 Tweaks
We received a tip from within ZHQ that this release includes tweaks to the aero + weight settings for the Canyon Aeroad 2021 frame. If you recall, this frame was released in the previous update, and its performance was amazing – making it the best all-around frame in the game as well as the best climber.
Its level lock has been reduced from 23 to 10, price raised from 532,500 to 568,000, and weight rating reduced from 4 stars to 3 (so it’s heavier).
We’re testing it now, but we expect it won’t be the best climber anymore. Stay tuned. #sigh
New Trek Super Caliber MTB
Not mentioned in the update notes: this release includes a new Trek Super Caliber MTB frame in the Drop Shop. We’re testing its performance and will share our findings ASAP.
Halloween Fun
Zwift likes to have a little fun on certain holidays – especially Halloween, Christmas, and April Fool’s Day. Today’s update notes say, “Halloween has arrived in Watopia. Keep a close eye out for some fun surprises.”
Who knows. Certainly it won’t be any scarier than what we’ve already encountered this year!
Bug Fixes and Improvements
Update notes included these various bug fixes (with our notes in italics):
Updated the minimum allowed time for the Yorkshire sprint to reduce incorrect flagging in race events. If you’re lucky enough to have noticed this bug, we salute you!
A steering icon will now appear in the Zwifters Nearby UI to indicate riders who are using a steering device. A welcome change! It will be interesting to take part in ZHQ Steering Races and see who indeed has steering and who doesn’t.
Bluetooth devices should now be easier to pair and reconnect for Windows users. More and more Windows users are utilizing native Bluetooth for connections, so Zwift is investing some resources in making it function better on this platform. That’s great news.
Numerous new assets (decorations and kits) added to support upcoming events and programs.
Fixed a bug on iOS causing a crash when users tried to restore a purchase. Specifically, this has to do with subscribing to Zwift via the Apple store.
Fixed a bug on iOS which would cause an occasional crash on the pairing screen while an Apple Watch was also connected.
Fixed an issue with event kit and bike overrides not appearing for those outside of the event.
Fixed a bug that would sometimes cause the race results screen to appear blank after a race. We’ve seen a lot of blank screens at the end of group rides lately. Hopefully this is fixed!
Fixed a bug that would cause frame rates to drop when taking a screenshot.
Minor fixes and improvements to the Dirt Destroyer and Pebble Pounder workouts.
Fixed a bug making it difficult to pair a Sterzo Smart while using the Zwift Companion Bluetooth bridge function.
Fixed a localization error for the French save screen.
This week was the second race of Zwift Racing League, and the first TTT of the series. My team, the DIRTy Beasts Hellhounds, had some TTT experience as individual riders on other teams – but we had never ridden a TTT together (with riders located in 5 different countries, finding time to practice has been a bit tough).
But we knew enough about TTT races to chat with some intelligence and formulate a solid race plan heading into Tuesday’s big event. One lap of France’s R.G.V. It was gonna hurt so good!
Warmup
I began my pre-race ritual the same as ever: chewed three pieces of caffeine gum, applied PR lotion on the legs, then suited up. I was on the trainer 45 minutes before the race began, and took my time warming up.
The Start
Because Zwift doesn’t have a built-in system for team time trialing, the folks at WTRL have set up a time-delay system which works surprisingly well:
Each team is assigned a start time which is X minutes after the event actually begins
You join the event start pens as you would any race, but when the clock hits 0, nobody goes!
Each team designates a timer who begins their stopwatch as soon as the clock hits 0. When your time comes around, you go!
A bit hacky, yes. But here’s the amazing thing: this race set a new world record (to be confirmed by Guinness World Records) for the largest-ever team time trial, with 5,956 racers! Even with some hoops to jump through, racers want to race.
My team was the very last in our pen to go, so I joined the start pens a few minutes before the event began… then sat around for 13 minutes! Since you’ll be disqualified if you cross the start line early, most racers will open up the pairing screen (which stops your avatar from moving) and spin while they wait for their start time to come around. That’s what I did.
I was on a Zoom call with my six teammates, because one of them is located in UAE, where Discord doesn’t work properly. We chatted strategy and best practices as we waited for our time to come around, then our timer called it out: “1 minute to go!”
Stop pedaling. “30 seconds.” Close the pairing screen. Why is my heart rate already up? “10, 9, 8, 7, 6, 5, 3, 2, 1… go!”
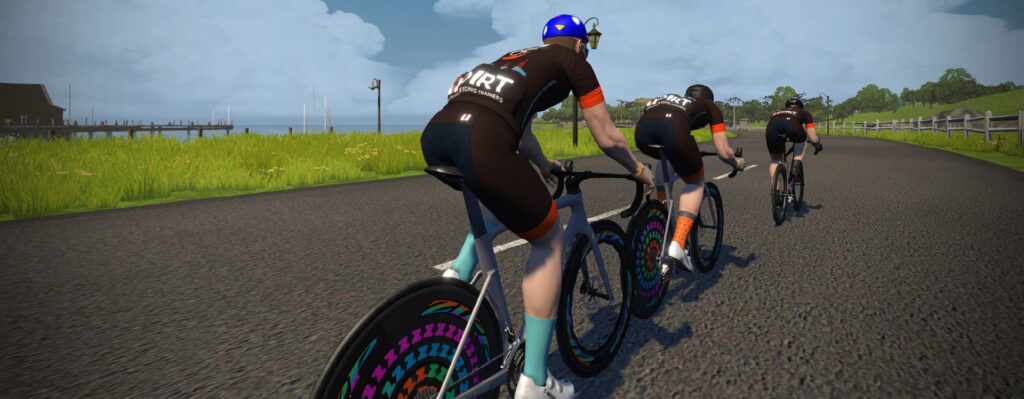
We jumped out of the start pen, quickly getting up to speed and into formation.
Formation/Rotation Notes
We were using a formation suggested by one of our more experienced TTT riders. In this formation, we ride single-file (the most draft-efficient formation), but one strong rider stays at second position for the duration of the race. It’s his job to bring the group up to the front rider if a gap opens up, and when it’s the next rider’s turn to take a pull, they slingshot from behind the 2nd rider and into the front spot.
Basically, that second rider helps to anchor the group and keep things steady. That’s the theory, anyway. But would it work?
The Middle
Our initial formation and rotation were spectacular, considering the fact that our team had never ridden together in a TTT! We had agreed to take 30-second pulls, calling out our “stop time” over the comms each team we got to the front. So I’d rotate to the front and say, “I’m on until 4:30.” If we were feeling extra strong, we could stay on for 60 seconds – just make sure to call it out so everyone knew.
I was feeling good and took some 60-second pulls, but my rotations in and out of the front spot didn’t feel as smooth as they should be. I felt like I was accelerating too much off the front – but I didn’t want to take it easy and go slow, either! Then when my pull was done I would try to drift back, but kept getting stuck in the middle of the group.
Around 11 minutes in, Justin (our second wheel man) drifted off the back, then disappeared. Uh oh! “What happened to Justin?” “I’m not sure, but let’s just keep the rotation going.” No more fancy second wheel formation – now it was just a standard rotation. The best-laid plans of mice and men, right?
Heading into the first little effort of the R.G.V. route, the Aqueduc KOM, I was feeling great. I knew I had plenty more in the legs, but I also knew the last 5-10 minutes would be the toughest of the race. Climbing up the KOM we fell out of formation on purpose, simply blobbing up and hammering our way up the short climb, then reforming on the descent.
The Finish
Soon enough we found ourselves in the twisties near the end of the course. (I call them “Les Intestins” – because they’re twisty, and because the mixture of motion sickness and effort make my guts hurt!)
We had already agreed to just blob up and hammer through Les Intestins, since holding formation through all the turns and rollers would be a fool’s errand. If we were feeling weak we could sit behind a teammate, and if we felt strong we could go into the wind and push it.
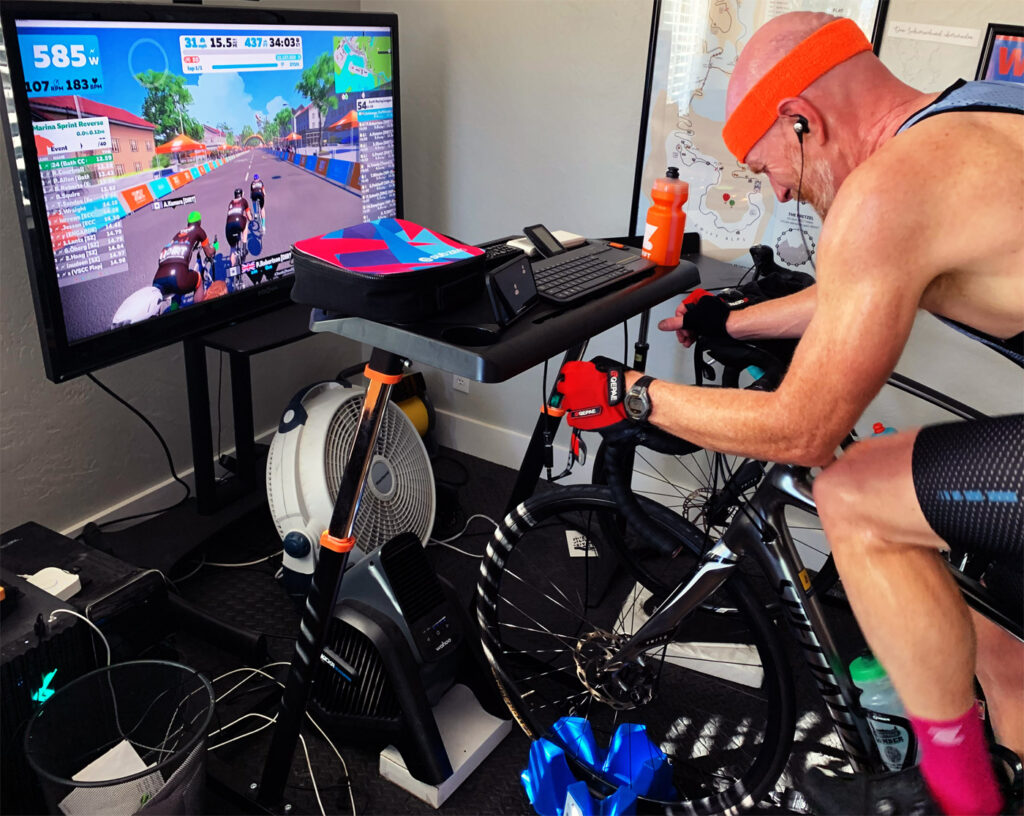
I was feeling good, but my teammates were hammering through the twisties – I could hardly even get to the front! Eventually near the end I was able to get my nose into the wind… by that time, we had less than a minute left. I decided to just hammer all the way in, hoping to provide some draft for any struggling teammates and help us all get across the line just a bit faster. Head down, seated, high RPM – just going all in. It hurt! Monica snapped this shot of me in the final seconds:
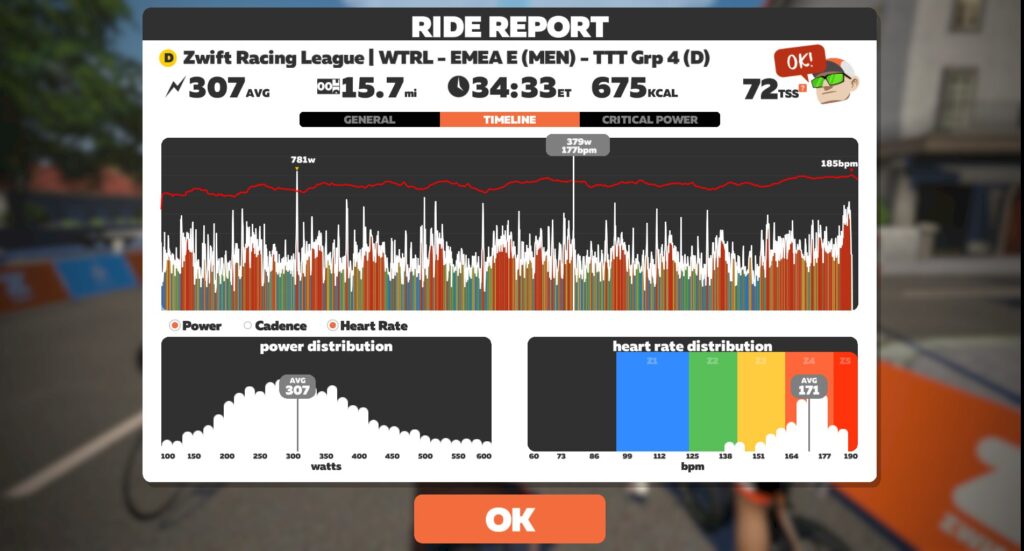
Our official time was 34:28.375, for an average speed of 43.9kph (27.3mph). We had hoped to make it under 33 minutes, but knew that was a big ask. We’ll do better with practice, but my teammates and I seem to all agree that it’s a decent result for our first try.
Our time was good enough for third place in our current division (EMEA E Division B 6), so between that decent result and our first place result in last week’s race, we’ll probably be stuck in a fast division for the remainder of Season 1.
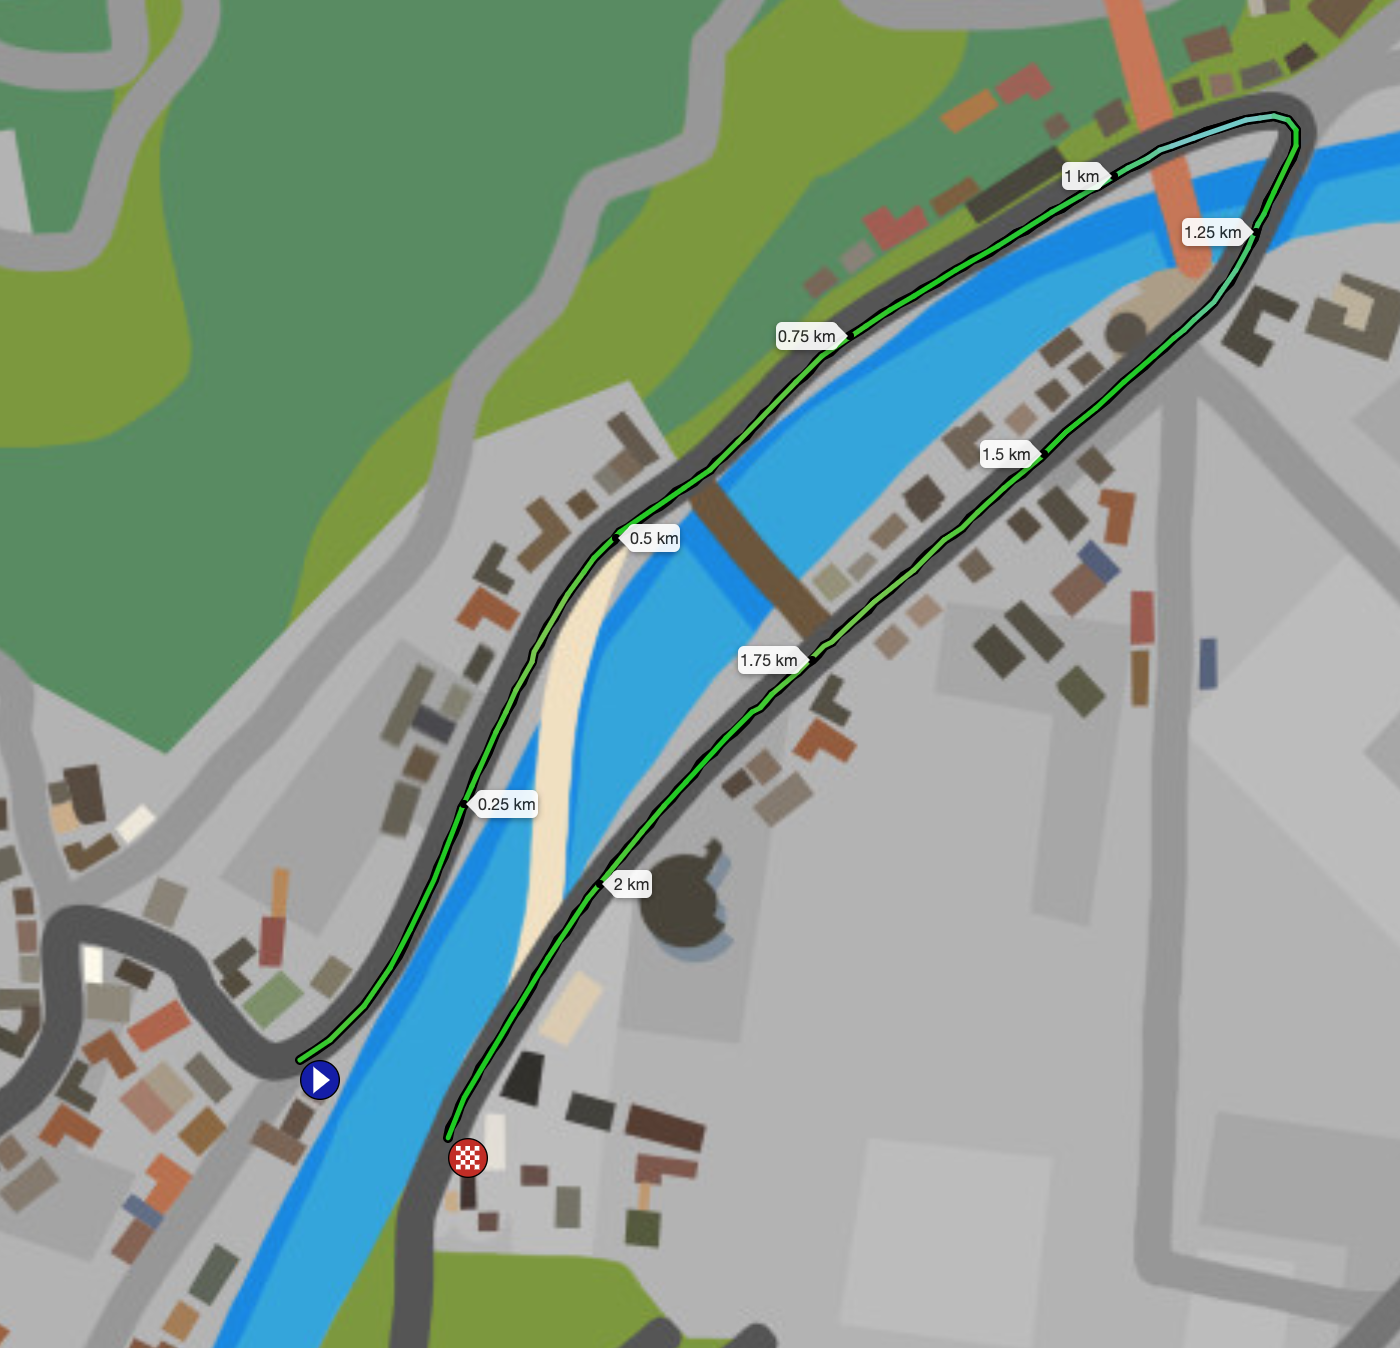
There is some question/controversy regarding teams starting from different start pens. To put it simply: some of the teams we were competing against started in a pen which is further away from the finish line than our start pen. And it appears that WTRL starts their timing when you leave your pen, which means those teams are at a disadvantage of probably ~3 seconds.
Here’s what it looks like on the map:
Since this race was only a “qualifying heat” for division seeding, I’m not too concerned about this issue. I’m confident WTRL will figure it all out in fair fashion, and my guess is future TTTs will have competitors all starting from the same pens, to avoid this issue. (I’ve reached out to WTRL for comment, and will update this post if/when I hear back.)
Takeaways
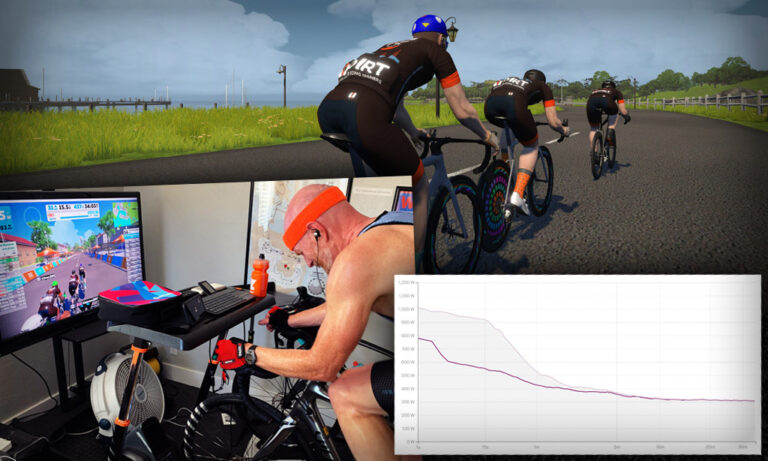
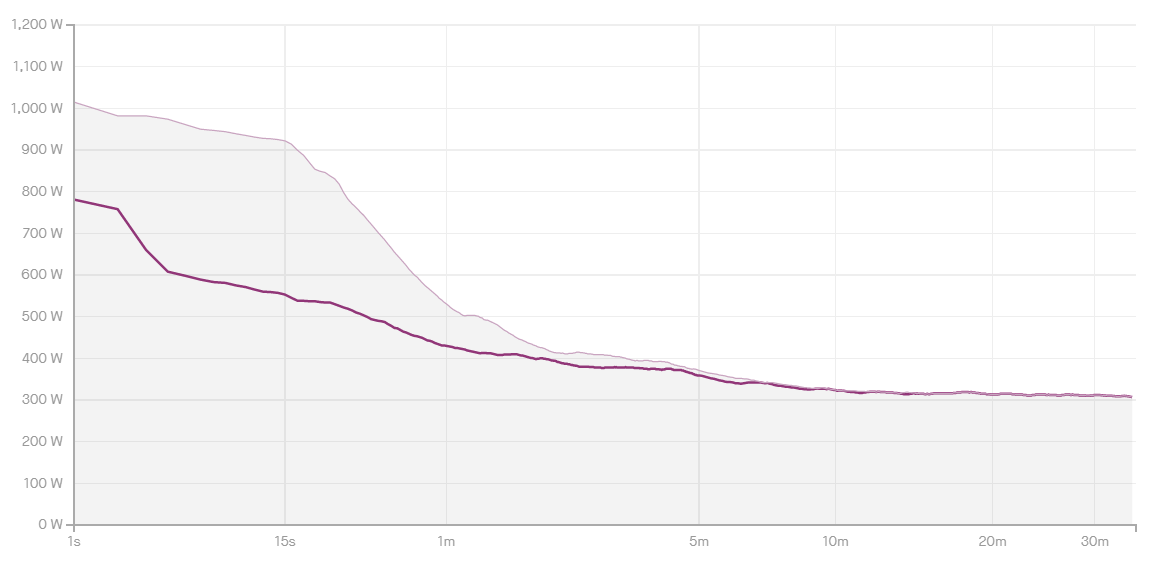
TTT enthusiasts will tell you that it’s the best way to test your FTP, and they’re not wrong! Here’s what Strava showed for my power curve, comparing this race to my last 6 weeks:
Basically, this race updated my power curve starting at 9 minutes and going all the way to 34 minutes! Excellent.
My biggest takeaway from this race is that I’ve got a lot of room for improvement in the TTT. This is definitely a discipline where you can see a lot of improvement as you get to know your teammates better and work on rotation technique. It’s also a discipline that offers lots of options in terms of strategic choice. I’m confident my team will get smoother and faster with each race.
Can you see when I took pulls? Ha!
Your Comments
Did you race Tuesday’s TTT? How did it go for you? Share below!
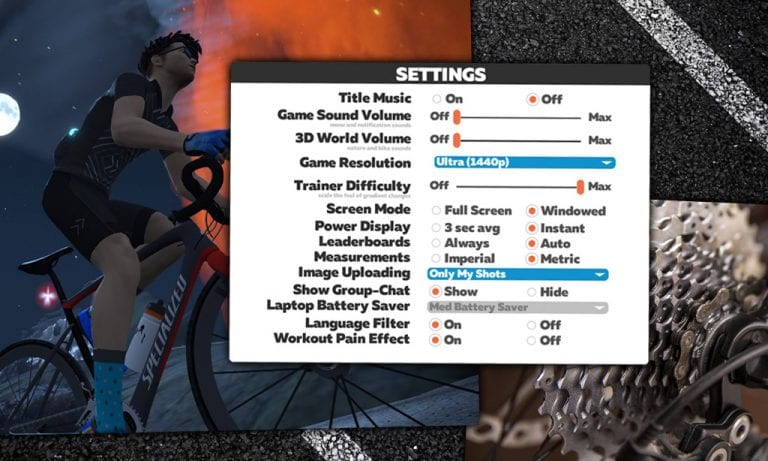
Ah, Trainer Difficulty. Simultaneously the most misunderstood and controversial setting in Zwift’s menu.
What it does is simple enough: Trainer Difficulty scales the gradients sent to your smart trainer. So if the slider is at 100%, your trainer is being sent the same gradient you see on the screen. If it’s at 50% (the default setting), your trainer is being sent 1/2 of the gradient you see on screen. So at 25% Trainer Difficulty on a 10% climb, Zwift is telling your trainer to replicate the resistance of a 2.5% climb.
While explaining Trainer Difficulty to one Zwifter recently, I was asked what’s the best place to set Trainer Difficulty? And I realized that’s not a simple question to answer! So I will answer that question here, instead of burying it in a Facebook thread.
A Multifactorial Problem
There are several factors to consider when choosing your ideal Trainer Difficulty setting. I’ll discuss each below.
#1: Your Trainer
How much resistance can your trainer replicate? And does your trainer have problems with overheating on long climbs?
Higher-end direct-drive trainers can replicate gradients of 20% or more, but lower-priced smart trainers such as the popular Tacx Vortex Flow may only be capable of replicating the resistance of a 6-8% climb. If you set your Trainer Difficulty to 100% and your smart trainer can only replicate a 6% incline, that means the resistance you feel at 6% will be the same at 15%. Which isn’t ideal!
And this is a big reason why Zwift defaults to 50% Trainer Difficulty – because it allows even lower-end smart trainers to continue adding resistance as you hit steeper climbs, even if the trainer is capped at 6-8%.
Overheating is a problem we see in some trainers, even very popular ones. It happens when riding on long climbs at high Trainer Difficulty, which forces the trainer to work hard since applying the resistance brake at low flywheel speeds takes a lot of mechanical force. If your trainer begins to malfunction on long, hard climbs, you’ve got two easily solutions: point a fan directly at the trainer’s flywheel to keep things cool, and/or reduce your Trainer Difficulty so the brake doesn’t have to work so hard.
#2: Your Weight
When is max incline not max incline?
The heavier you are, the more resistance your trainer must apply in order to replicate climbs. In fact (and this is a bit of a rabbit hole), most smart trainer companies use a 75kg rider when calculating their estimated maximum incline. If you’re a 100kg rider, your trainer can’t replicate the gradient listed in the specs – but if you’re a 60kg rider, it can actually replicate a higher gradient than specified.
So how should your weight affect your Trainer Difficulty setting? Just know that the heavier you are, the more resistance you’ll feel on the climbs. If you’re running out of gears and having to grind your way up hills, it’s probably time to lower your Trainer Difficulty so you can at least pedal at a cadence that doesn’t make your knees sore.
#3: Type of Route and Race
Are you racing on a flat route, or up a big climb? Is your race a TT, or a draft-enabled event?
It may seem odd, but many Zwift racers turn Trainer Difficulty up for flat races, and down for climbing races. Why? Because they want the gearing flexibility of low Trainer Difficulty on long climbs, while high Trainer Difficulty lets them “feel” slight changes in gradient on flat routes such as Fuego Flats.
High Trainer Difficulty on flat routes makes even more sense if you’re racing a time trial, because it lets you feel those false flats and apply a bit more power to keep your speed high. Without having your Trainer Difficulty set high on a flat route, you may be on a slight incline and not even notice the difference – until you realize your speed has dropped by 2kph!
#4: Outdoor Training Goals
Does your Zwift training replicate your outdoor target event(s)?
Many Zwifters train indoors for big events or races outdoors. That race may be a pan-flat criterium in Florida, or a massive multi-day Haute Route event in the Pyrenees. It wouldn’t make sense to set your Trainer Difficulty to 100% and attack major climbs in Watopia in order to prepare for the pan-flat crit. But it also wouldn’t make sense to ride flat routes or set your Trainer Difficulty to 20% if you’re training for massive climbing days!
Use Trainer Difficulty to replicate your event. If your event is flat, leave Trainer Difficulty low and enjoy that high-inertia feel of spinning along a flat road. But if it has a lot of climbing, you’ll want to keep Trainer Difficulty high, so you’re feeling similar gradients and riding at low inertia just like the outdoor climbs.
#5: Indoor Bike Gearing vs Outdoor
How does your indoor bike compare to your outdoor one?
Now that Zwift has been around for 9+ years, many Zwifters have a dedicated indoor bike as well as outdoor bike(s). Often the gearing on the two bikes doesn’t match, (especially if you use an old ride for your Zwift bike like I do). Trainer Difficulty can help this, though! If you’re concerned about replicating the feel of particular climbs which you might be riding outside, you can use Trainer Difficulty to make your indoor bike’s cassette “narrower” or “wider” to match your outdoor bike’s climbing gearing.
There’s probably a mathematician-physicist out there with a formula to figure this all out, but I would just do it by feel. Perhaps your indoor bike is an older rig with a 10-speed 11-25 racing cassette, but your outdoor bike has an 11-speed 11-32 for climbing. Assuming the climbs you’re choosing on Zwift mimic those you’re training for outside, simply reducing your Trainer Difficulty down to 75% or so should give you a similar feel on climbs as your 11-32 cassette would if you were using your outdoor bike on Zwift.
#6: Spinning Out on Descents
Do you need more to push against on the downhills?
Trainer Difficulty banter often ignores the fact that the setting affects the feel of downhills as well as uphills! If you’re spinning out on descents, reducing Trainer Difficulty and/or changing your gearing are the only fixes. (Well, that or just going slower…)
Little-known fact: Zwift only sends half the descent gradient to your trainer. So at 100% Trainer Difficulty on a 10% downhill, your trainer is replicating a 5% downhill. At 50% Trainer Difficulty, it’s replicating a 2.5% downhill.
#7: Lower for Draft-Enabled Racing
How much shifting can you handle?
I don’t have access to the stats, but my guess is the majority of Zwift racers run their Trainer Difficulty below 50% when racing. Why? Because it keeps their effort more even, reduces the need to shift gears, and ensures they won’t run out of gears on descents.
Some racers are purists (or perhaps are training for hard climbing races outdoors) and ride at 100% Trainer Difficulty. But more racers are pragmatic, and a lower Trainer Difficulty should generally result in a lower VI due to less resistance fluctuation. For many riders, this means the overall effort might feel easier at lower Trainer Difficulty since maintaining steady power is easier than doing intervals.
#8: Training for vEveresting
Training for the big one?
The official vEveresting rules state that you must complete your effort at 100% Trainer Difficulty on an electronically controlled smart trainer. So if you’re doing a vEveresting effort, or just training to do one… you’ll want that slider set all the way to the right.
What Do I Do?
So how do I handle my personal Trainer Difficulty setting? It generally stays around 30%, except when I’m doing a flat TT and remember to bump it up to 70-100%.
With these settings I never spin out on descents, I never run out of “easy gears”, and I can feel slight changes in gradient during TT races where it matters most. (I’m fortunate to ride a nice Wahoo KICKR in an air-conditioned space, so I don’t need to worry about overheating or maxing out the simulated gradient.)
Your Thoughts
What’s your Trainer Difficulty philosophy? Do you set it and forget it? Change it for racing on various routes? Share below!
ZA coaches Dan and Stephen are back with tips for workout #4. We hear from 71-year-old community rider Roger Uttley, who shares his story: “It’s up to the youngsters to decide whether they can cope with having an older person get one over on them. But I’ll be going as hard as I can.”
And Leah is back to give you a group ride etiquette lesson!
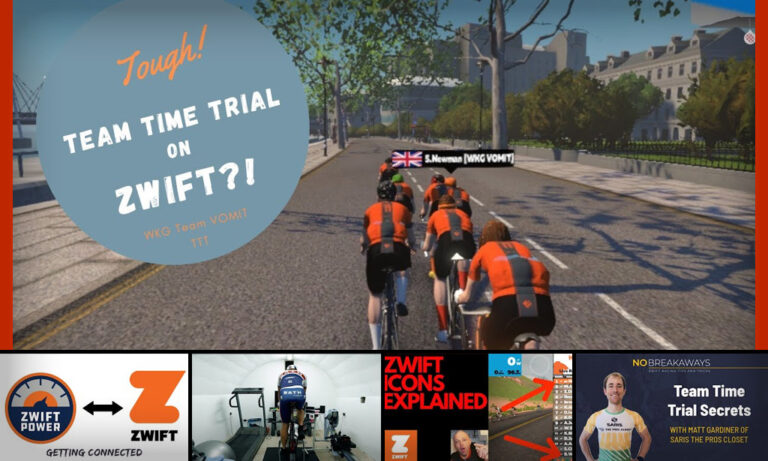
We’re highlighting some of the best videos you may have missed in the world of Zwift. This week we’ve got a couple of TTT tip videos, a longer-form documentary, and a couple videos just for those starting up on Zwift. Enjoy!
A Team Time Trial on Zwift – How Does It Work?
Here’s more on team time trials, from the perspective of new TTT racer Lewis Bradley. He goes over the basics, gives a short clip of a TTT race, and shares lessons he’s learned and advice he would give others.
How to Find, Register, and Connect ZwiftPower
New to Zwift racing? Crit Whit will show you how to make sure you’re in the results that count by registering and connecting with ZwiftPower.
Zwift Power Racing – Documentary
In this well-produced 25-minute video, follow six stories from members of Bath Cycling Club as they talk about their passion for cycling, how they use Zwift, and why they race on Zwift. You may recognize your own story in theirs!
What is on the Zwift Screens (Zwift Icons Explained)
New to Zwift altogether? What are all those funny icons on the screen and the Zwift Companion app? Brian Davis breaks it down with easy visuals and explanations.
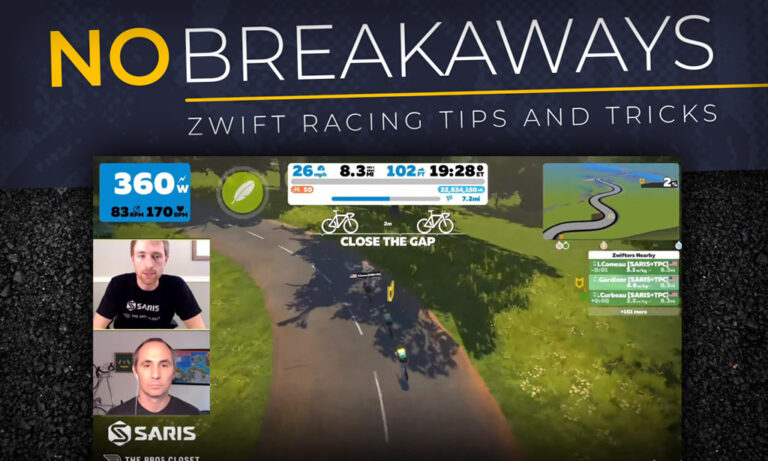
Team Time Trial Secrets with Matt Gardiner from Saris The Pro’s Closet
“No Breakaways” is back, and this time with some advice from Zwift veteran Matt Gardiner about how to race a Zwift team time trial. Video clips from a practice TTT play along with each tip, so that you can see exactly what he’s talking about.
Got a Great Zwift Video?
Share the link below and we may feature it in an upcoming post!
Author’s note: A stationary indoor bike will be accurate in Zwift with a power meter. This article is about comparing a “spin bike” (which is a trademarked term) with a power meter to the same bike with a simple speed/cadence sensor.
From time to time I see questions on using a stationary bike in Zwift. More often than not, the advice given is “grab a cadence and speed sensor and you are good to go”. The well-intentioned suggestion utilizes the option Zwift provides of using a speed and cadence sensor with a non-smart classic trainer.
Essentially Zwift has tested certain non-smart classic trainers and those supported trainers have a lookup table in Zwift. Basically. for X speed, you’re doing X watts. It’s a power curve table. For Unlisted/Untested trainers they have another lookup table, but probably based more on averages that may or may not be accurate. There’s a lot more to it, but I’ll invite you to read the excellent Zwift Insider post about virtual power vs going over it here again.
The Challenge with Stationary Bikes
Connecting a stationary bike as a trainer on Zwift can be a problem, though. Here’s why: a trainer has a set resistance (the pressure of the roller on the back wheel) and your speed increases with your wattage via gear changes and cadence, whereas a stationary bike has speed that is dependent only on cadence (no gears). You can change resistance manually with a knob, but if you maintain the same cadence, you will maintain the same speed and thus, the same Zwift estimated power, regardless of where the resistance knob is set.
To put that a different way, as long as you pedal at the same cadence on a stationary bike, your flywheel will spin at the same given speed. The way you increase the wattage on a stationary bike is by putting resistance on the flywheel, resulting in more wattage to keep the flywheel going at the same speed.
It’s worth mentioning here that resistance on a classic trainer can also be highly variable depending on how tight or loose the roller is against the tire. Classic trainers have to have the roller tightened against the wheel to the trainer’s spec in order to be anywhere near accurate in terms of wattage. So it can basically be as variable as a stationary bike would be, although you can’t just reach down and tweak it on the fly. Anyone who has experimented with that knows that the looser a wheel is against the roller, the higher the reported watts will be, and vice versa. Hence the reason proper tightening is so crucial.
Back to the stationary bike. When Zwift is estimating power solely by a speed and cadence sensor and knows nothing about the resistance knob, that estimated power number will be wrong. It will be wrong because it’s missing an enormous part of the equation, the resistance, something it knows for a trainer, but can not know on a stationary bike.
Spindown for Stationary Bikes
How could Zwift know resistance and have accurate zPower with a stationary bike? The only way I can theorize it working is to have a spindown test within Zwift. Set the stationary bike resistance to where you want to ride, do a spindown to determine resistance, then keep the resistance at that setting the entire ride, using only cadence to make changes in power.
Not a great way to ride, and Zwift would also need to know the stationary bike gear ratio (or use the speed which the stationary bike displays) for its calculations.
Testing Stationary Bike Power Accuracy
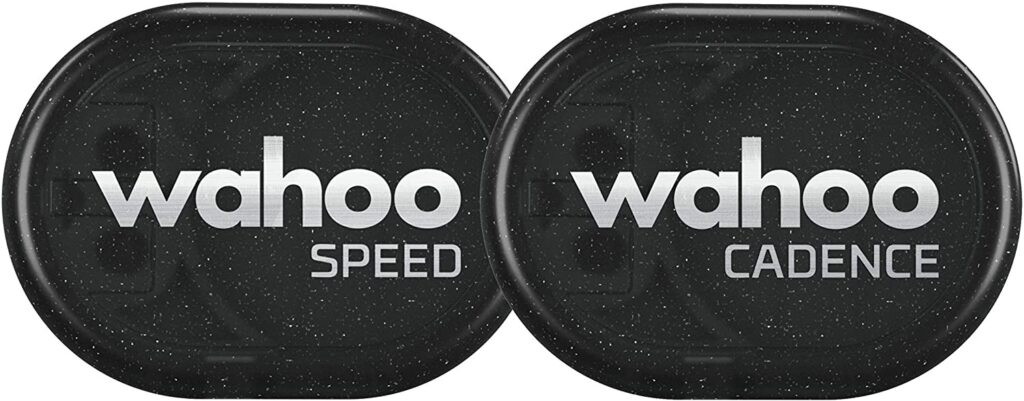
Enough explanation, let’s see it in practice. To illustrate why a stationary bike isn’t accurate in the Not Listed trainer setting, I set up a few testing scenarios. I set up a single Freemotion stationary bike with a Stages power meter and a Wahoo speed sensor. I then set up two Zwift sessions, with exactly the same height, weight, bike, wheels, gender, FTP, etc. I paired the speed sensor, HR sensor, and cadence sensor to one session via ANT+. I then paired the power meter, the same HR sensor and the same cadence sensor to the other session via Bluetooth. The same pedalling effort would go into both sessions, power would just be output via different sensors.
Note: the FTP setting was lowered to see if either of the tests would result in an FTP gain that wasn’t warranted.
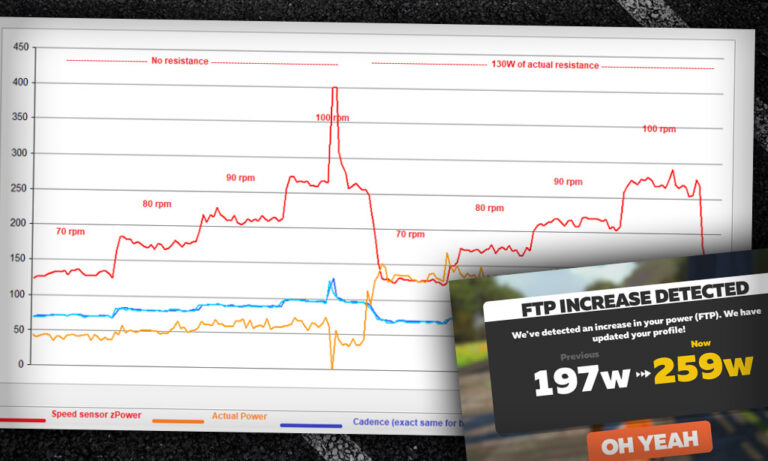
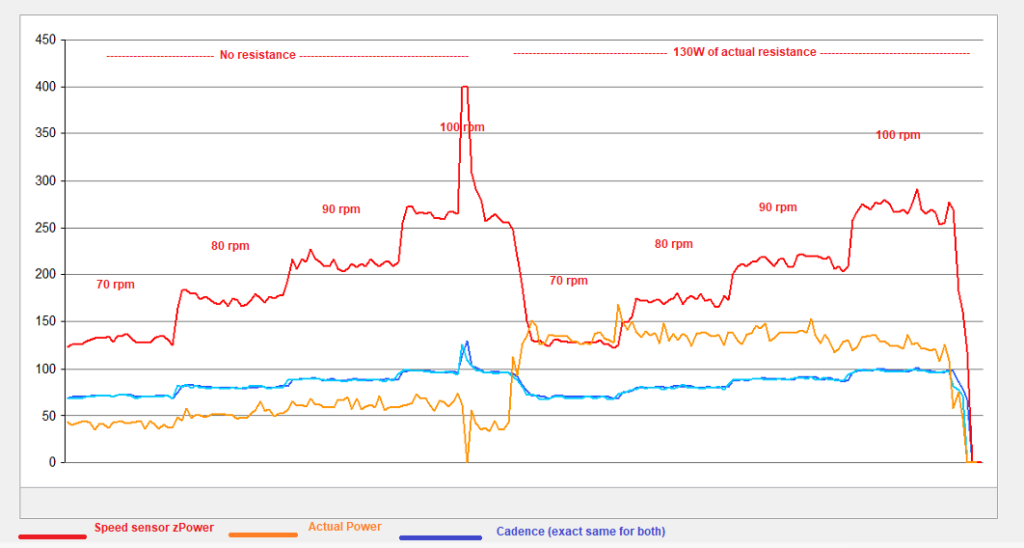
For the first test I set up a MeetUp on Watopia Flat between myself and my identical twin nemesis Harry Legz. I configured the MeetUp to include only the two of us so variables like drafting did not come into play. My first test was a cadence test. I would do 2 minutes with no resistance at all at 70 rpm, 80 rpm, 90rpm, and 100rpm. Then I would repeat these same 70, 80, 90, and 100 rpm tests, but with about 130W of resistance on the knob.
The graph below shows the comparison. Cadence was the same as they were coming from the same sensor:
No resistance
No resistance
130W(ish) actual power*
130W(ish) actual power*
Speed sensor zPower
Power meter
Speed sensor zPower
Power meter
70 rpm wattage
130W
41W
128W
134W
80 rpm wattage
174W
51W
170W
136W
90 rpm wattage
209W
61W
213W
135W
100 rpm wattage
276W
54W
270W
124W
*Note: I adjusted the resistance knob on each cadence change to maintain 130W(ish) via the power meter reading.
When I turned the stationary bike’s resistance knob to around 130W(ish) actual power, the results were pretty much exactly the same for the estimated power coming from the speed sensor as they were during the no resistance test. This is expected since the cadence was the same as the first part of the test, and if the cadence is the same, the speed will stay the same. The graph below shows the data comparison visually.
One interesting observation on the no resistance test: true wattage actually went down at 100 RPM. Since the watts are measured with a crank power meter, my take on that is the momentum of the flywheel started to take over, pulling the pedal through. I was pedaling faster, but softer.
As you can see, there is a very large discrepancy in actual power vs estimated power, over 200W at some points in the graph, but what did it do for the ride stats?
Watopia Flat Route, ride time 23 min 24 sec
Speed sensor zPower
Power meter
Distance
5.48 miles
4.03 miles
Avg Power
195W
75W
Max Power
400W
162W
Avg Speed
20.1 mph
14.8 mph
Max Speed
30.5 mph
23.8 mph
For the very same pedaling effort, the speed sensor rider covered a mile and a half additional distance in just 23 minutes! That is almost 30% more!
Just for fun I also tested what would “MAX” out the 400W estimated power on the stationary bike. That happened around 115rpm. As long as I maintained 115 rpm, regardless of resistance, I would peg 400W in my Harry Legz session. (It’s worth noting that I could do 400 estimated zPower watts at around 50W of actual power, if the resistance was dialed down on the stationary bike.)
The cadence test is all fine and dandy, but I wanted to see what difference this made during an actual ride. Maybe one with an interval workout incorporated into it to see actual larger power hills and valleys and how they would track between both setups. Once again I set up a single Freemotion stationary bike with a Stages power meter and a Wahoo speed sensor, then rain two parallel Zwift sessions just like the first test.
For the actual ride I set up a one hour MeetUp on the 5.7 mile Watopia Hilly Route for the two sessions. I set the MeetUp to include only the two of us so variables like drafting did not come into play.
This was my ride format:
20 min warm-up
5 min at 190(ish) watts
5 min rest
5 min at 190(ish) watts
5 min rest
5 min at 190(ish) watts
5 min rest
10 min cooldown
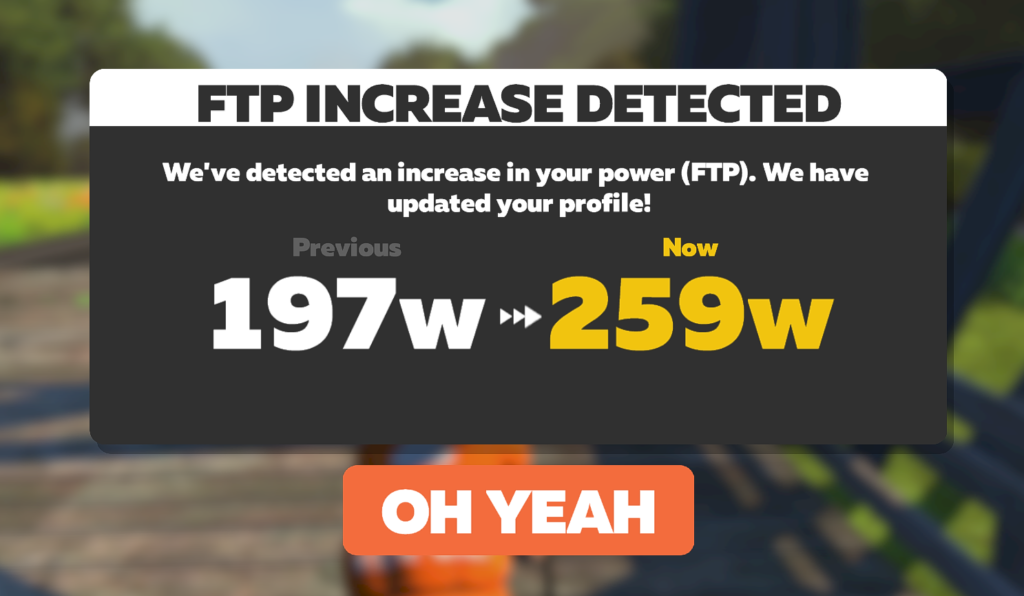
The result of this match-up? Remember this is input from one bike. My nemesis Harry Legz lapped me on Zwift KOM just as I was starting lap 3 of Hilly Route, rocketing past me at the finish banner. He also took second fastest time (I honestly felt bad about that) on Hilly Route. At the end of the ride/workout, he received a nice fat FTP gain, despite only about 15 minutes of a moderate 190W effort.
Let’s look at the data.
Watopia Hilly Route, ride time 1 hour
Speed sensor zPower
Power meter
Distance
21.73 miles
15.11 miles
Avg Power
254W
132W
Max Power
400W
264W
Avg Speed
21.4 mph
15.0 mph
Max Speed
38.7 mph
36.1 mph
KOM time during 110W 90rpm warmup
3:29.16
6:52.69
Villa sprint time during 110W 90rpm warmup
34.22 sec
44.76 sec
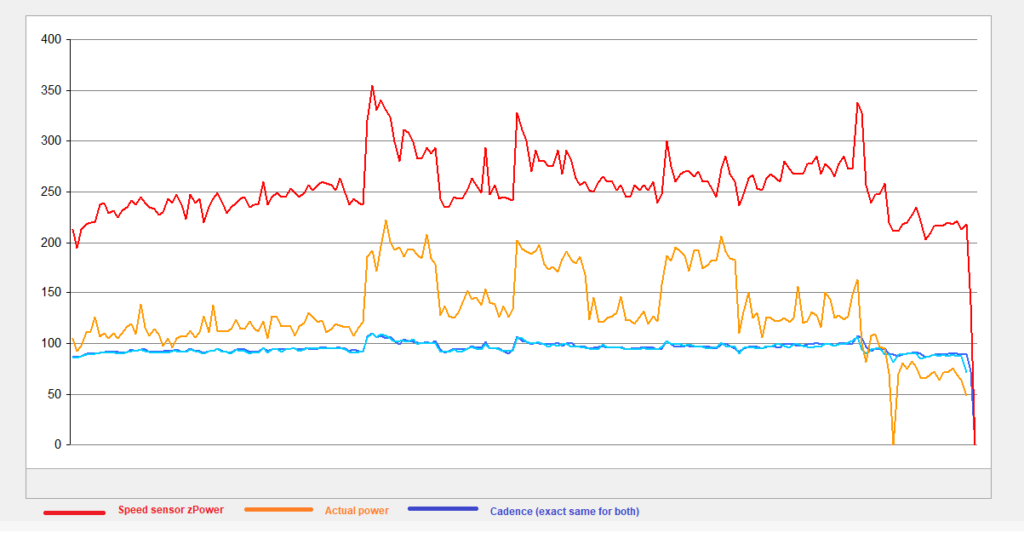
While these numbers look dramatic, the graph of the power difference looks even more dramatic:
This graph does look more interesting at first glance than I thought it would. zPower is about 100-200W high as before, but the power curves parallel each other more than I first expected until I really analyzed the data. Why is that? If you notice the cadence line I was soft pedaling at around 90 or so rpm for the warmup, rest intervals and cooldown. During the intervals themselves my cadence would go higher to 100-105 rpm. Since zPower is being estimated by speed, which is directly related to cadence on a fixed gear stationary bike, this makes perfect sense. A jump in 10rpm made a massive difference in zPower because it was making a big jump in flywheel speed. It was simply a coincidence that my higher true power was done at a higher cadence and that higher cadence gave a higher zPower number.
Searching for Sweet Spot
Discerning Zwifters may wonder if there’s a “sweet spot” on the stationary bike’s resistance knob where zPower and true power converge across a usable cadence range (say, 70-100RPM). Or to put it simply: can we make the zPower number be close to accurate on a stationary bike?
The answer is: not really. Not without actively varying the resistance knob, and having a power meter to check your accuracy. (Of course, if you have a power meter, you don’t need a speed or cadence sensor or zPower anyway.)
On my first cadence test when I had 130W of resistance on the flywheel and was pedaling at 70rpm, the numbers were nearly identical. On the second test, if I had maintained about 85rpm in my 190W intervals power would have tracked closely. I could have also cranked up the resistance to 400w and spun at 115rpm (for the whole minute I could maintain that). But without a power meter I would have been guessing that the numbers lined up and inevitably what would happen is you’d loosen the resistance knob and drop actual power, but zPower would stay at 400W since your cadence isn’t changing.
Conclusions
So there you have it. I had fun doing this test. It might seem pointless, but I wanted some real world data for when the suggestion is thrown out to just use a speed and cadence sensor with the Not Listed trainer setting on a stationary bike. Seeing this data I don’t think it’s a good idea. I get that it’s inexpensive and not everyone has the money for a power meter, but you are missing the resistance part of the estimated zPower equation. Because of that, the power estimates are at best a guess, and a bad one at that.
None of this is to say a stationary bike is a bad idea for Zwift, a stationary bike can be a GREAT tool for Zwift. If you have multiple riders in the family, or just want the simplicity of hopping on and riding, a stationary bike may just be the ticket. But please reconsider the incorrect speed and cadence route and set it up with a power meter such as a Stages crank or power pedals like the Assioma UNOs. There are inexpensive options if you look around.
I agree with the purists when they say a stationary bike won’t get resistance changes from Zwift, but Zwift will use the power you are putting into the bike to adjust your speed up and down in the game, the same as if you were riding a bike outside that dynamically adjusted gears to keep your cadence the same as you hit uphills and downhills. Stationary bike or smart trainer, the true power you put into your pedals is what determines your speed in the game, the gradient feel is icing on the cake.
I wrote another article about an inexpensive stationary bike setup that will work with Zwift that can save some cash over the long haul. I found my entire stationary bike, with power meter, for $200. If you are thinking about going that route, it’s worth taking a look.
Cadence and speed sensors on a stationary bike – summary
Pros:
Inexpensive
Can do rides and give Ride Ons
Breaks up the monotony of indoor training
Could be a gateway to a great Zwift future
Cons:
Not what Zwift intended with the speed and cadence option
Isn’t accurate, missing the resistance part of the equation
Not useful for personal fitness improvement measurements since zPower is only tied to cadence/speed, not how many watts you are actually producing
Can not do training plans as power targets are only tied to cadence/speed, not resistance
Will be very disheartening if you ever go to a power meter or smart trainer
Until last Tuesday, WTRL operated the biggest race series on Zwift – the Thursday Team Time Trial. Since Tuesday, WTRL operates the two biggest race series on Zwift. WTRL TTT and the community side of the Zwift Racing League (Zwift HQ operate the Pro/Am Premier league themselves with tight cooperation from WTRL).
I’ve been an avid fan of WTRL since I started TTTing with the CICC lads out of Paris six months ago. Since then a lot has happened to WTRL, including their latest venture – working with Zwift to deliver the community side of Zwift Racing League, the most ambitious Zwift racing series to date. Last night between results processing and pizza I managed to catch up with Martin Carew – one of the two chaps who created and operate the World Tactical Racing League (WTRL). While I love to josh about WTRL Global HQ and its huge team, it is stunning what two guys have achieved.
By the numbers, ZRL race #1 had 5,295 riders in 1005 teams with participants from 101 countries. There were over 7,000 people live-viewing the results on ZwiftPower and both Premier League and Community races were livestreamed. There were 25 different events throughout the day, spread across timezones to Zwifters could find a workable race time no matter where they live.
In the run-up to the event Martin and Steve had to allocate 1005 teams to pens and send out the invites to captains – then make sure the livestream guys were all set up with graphics and other materials and also test the systems as best they could given there was no practice run possible. And throughout this came the emails: hundreds of league changes, name changes, tag changes (I was one of these) as well as hundreds more questions from racers and team captains sent via email or forums such as Facebook. Martin reckons he had four 22 hour days in a row between Saturday and Tuesday!
The day as it happened
The real work started Monday night – 1:45 AM Martin time was the mad rush ahead of the first Australian race. While the race itself was self-running, the livestream guys at Zwift Community Live (ZCL) were fed real-time results data from Zwift and ZwiftPower systems, which Martin had to coordinate. A few hours sleep between the antipodean races and eastern European was welcome, but then ZwiftPower stalled!
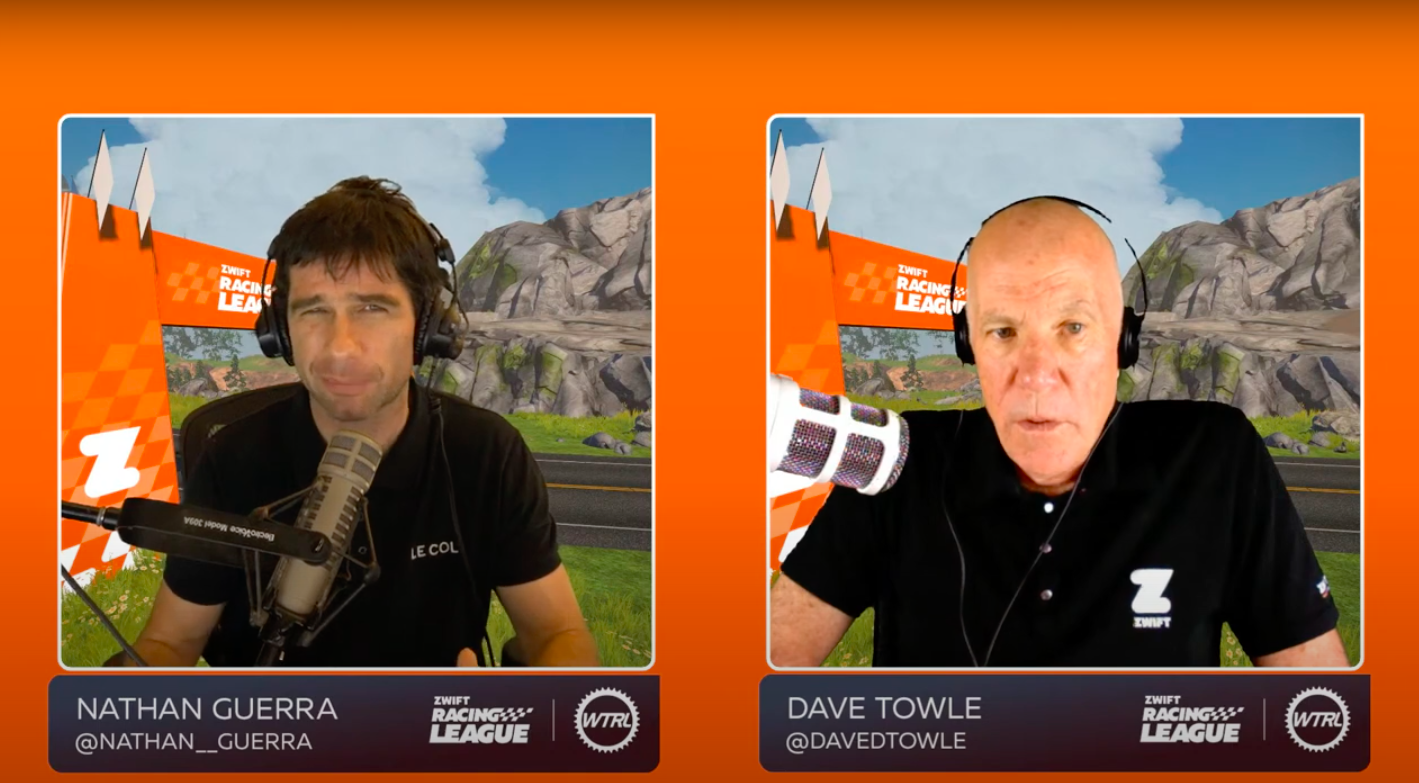
So many riders were hitting the results server that Zwift’s backend results systems (the same ones ZwiftPower uses) ground to a halt. The screenshot below is “that moment when..” Nathan and Dave had to maintain broadcast without data. Perhaps one of the best lemons-to-lemonade spiels ever… if you haven’t seen it, hop over to the ZCL footage and scan forward to around 1:10:00.
My race
Quick sojourn. I am captain of the Rowe and King Ewoks – one of six R&K teams across A, B, and C categories. My race was the C-cat route ending at the top of the volcano. I went hard from the gun and made the front group along with two racemates. I stayed there all the way until I was most of the way up the Titans Grove KOM, but got drifted off the back and spat out.
Despite being dropped I still got a PR up the KOM. I grouped with two Portuguese guys and we pushed on, being caught by a chase group going up the Hilly KOM. I was now in 25th place in a field of 100+ with a tight group of 10 riders. We stayed ahead of the chasers until halfway up the Volcano, when a small group of chasers (including one of my teammates) reached us. I got to the top in 35th position, having pulled a B-class w/k of 3.2 for the ride.
Tactically, I know where it went wrong – too hard at the gun, then when I was dropped, too much time in the wind trying to catch them. I lost my chance at points in the first 15km.
The aftermath
When i spoke to Martin late Thursday he had barely slept in 60 hours – and in that time he also had to run the regular Thursday TTT for 600 teams. While a lot of the challenges of processing 5000 rider results were predicted, the Zwift results engine melting down wasn’t. What most riders don’t know is that Martin had to recreate results from the data – a testament to Martin’s professionalism and dedication.
The other area that consumed energy was sorting through all the results for fairness. Going in the rules were pretty clear – a rider’s ZwiftPower category at the start of their first ZRL race determines which league they compete in, subject to the reality check of Martin’s super-secret algorithms that determine riders behaving outside the normal boundaries of performance for their category.
Out of 5000 riders:
10% were flagged for review (including me).
400 of those were categorized as racers having a great race on the limits, but not past, the bounds of their category (me again).
100 were DQ’d from the race results without prejudice. Perhaps they had no heart rate monitor, perhaps they were re-categorized up one, or even two levels. If you take a look at ZwiftPower you can see if you have one of these tags – all pretty self explanatory. UPG-A, UPG-B, HRM.. you get the idea. These riders are being asked to perform an action (move to a more appropriate race team, get a heart-rate monitor etc).
The tag CONTACT_WTRL during processing literally meant Martin had personally pored over your data and can’t see an obvious explanation of your performance. There were literally a handful of these – maybe 1% of the riders – including my favorite (this is all publicly available information in Zwiftpower), a rider who magically dropped 20kg before the race, then gained it back afterwards.
What shines through when talking to Martin is how he takes all this in his stride. Of course the first real race was going to be a time-consuming test of the underlying systems. Of course it was going to take days of hard work to process. And of course there would be a shake-out of riders who started in the wrong category or tried to game the system.
As an ex-professional athlete himself, Martin knows the temptations and doesn’t judge them. But he has more nous than the average race organizer, and as a professional data analyst he knows how to dissect a rider’s performance to spot the difference between an extraordinary day on the bike and something more sinister.
What next
Tuesday will be race #2 – this time it’s a Team Time Trial on the R.G.V. course in France. A short, fast team ride. The rider pool has been cleaned up, the team captains know what they’re doing now and all the systems have been tested.
Martin and Steve are committed to the success of ZRL – and it’s clear that Zwift themselves want this initiative to be a multi-season success.
I certainly enjoyed race #1. R&K Ewoks will be out there on Tuesday giving it 110%! See you there and Ride On!
Here’s a picture of two chaps at WTRL. Martin is the one looking very GQ (I think his fiancé chose this), and Steve is the one looking very active at the top of a mountain!
Since March I have become obsessed with the weekly Team Time Trial… so I asked Eric if I could share my obsession with you all, in weekly doses.
Each week I will give you a profile of the upcoming route, guidance on bike choice, and some target times if you want to aim for the Premiere League (top-10 in each coffee class get to be in a special race televised on YouTube).
If you can’t ride, or even if you can ride, but want more action, don’t forget to tune in to the live TV show on Zwift Community Live’s YouTube Channel at 6:15 (UK time).
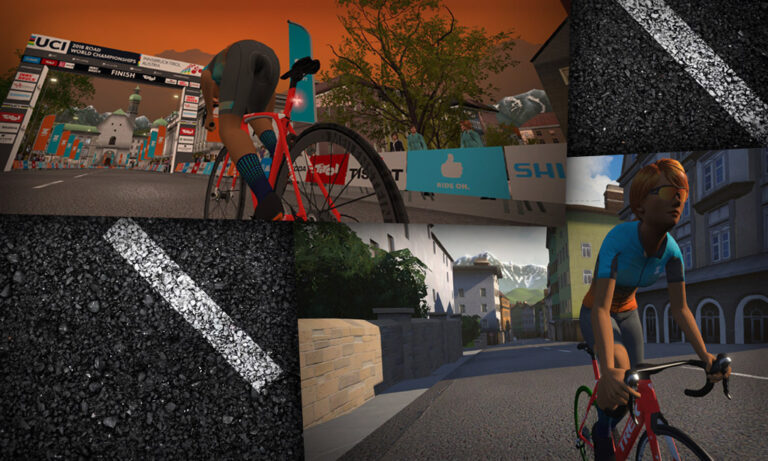
Thursday 22nd October – Three laps of Innsbruckring
After a few weeks of Watopia we are off to continental Europe – this time to Innsbruck, Austria. The name Innsbruck literally translates to “bridge over the river Inn”, which we cross six times in the three laps of the city center map. I’m excited for this race – last time in Innsbruck in a TTT was the first time my team (Rowe and King Hyenas) tried a paceline format rather than the surging blob strategy… it worked perfectly and we have stuck with it ever since.
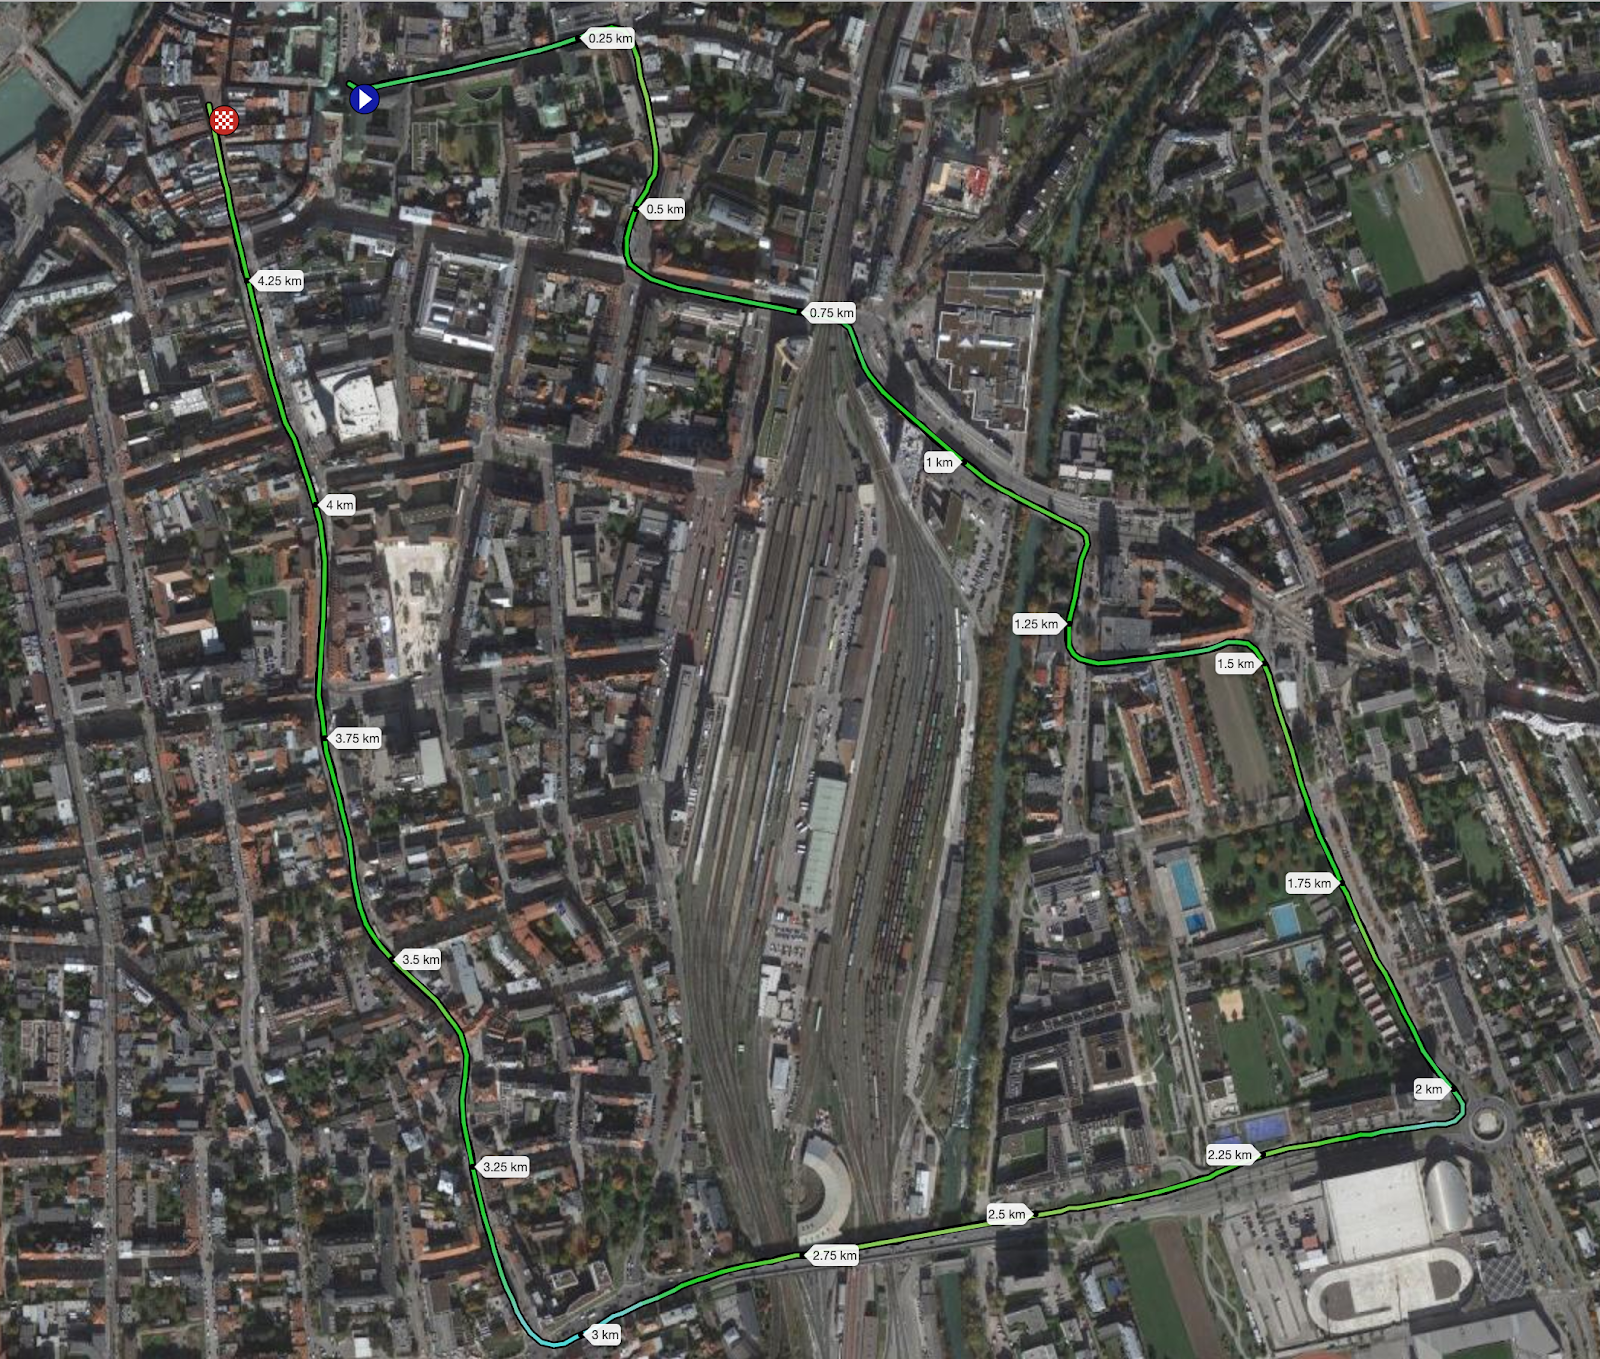
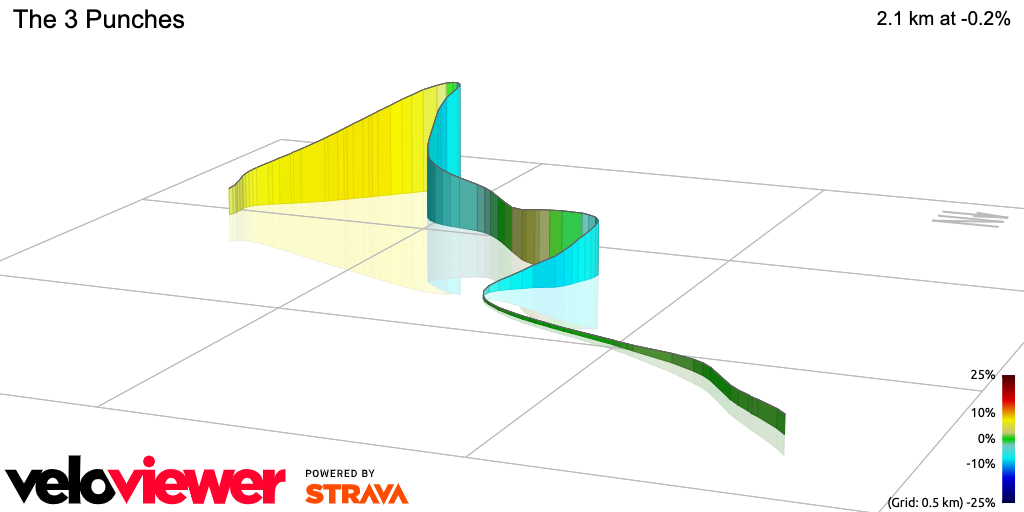
Three laps at 8.8km plus a tiny lead-in make this a short, fast 26.8km with one awkward little bump in the middle of an otherwise flattish (gently rolling) course. Top-flight Espresso teams will be in and out in just over a half hour, while an under-staffed Mocha team will be around 50 minutes. My team is targeting 40 minutes this week – that’s aggressive as it’s 2 minutes faster than last time we tackled the Innsbruckring. Winning here is about being fast on the flat, and not allowing Kleiner Hugel (affectionately known as the Leg Breaker) to slow you down too much.
There is only one tricky stretch on this course. When you cross the Inn (5km, 14km, and 23km) you head up Kleiner Hugel then do a series of bumps down. Obviously, staying together on the main hill is important – but equally important is not getting separated on the descent. Communication alone won’t help you here – you have to have a plan, and ideally time to practice. Once you finish the descent (6.4, 15.2, and 24 kms) it’s all fairly flat again. My fastest time for a lap was in the Tour of Innsbruck at 13:30 – I’ll do better this time.
Bike recommendation on this route is pretty straightforward. Yes there’s a hill… but other than that it’s flat. Aero rules the day. For me it will be my trusty S-Works Venge and Zipp Super-9 disc wheels.
Bike choices are pretty boring of late… the Canyon Aeroad 2021 threw a speedy curveball but aero is a pretty straightforward choice at the various levels. Aeroad is so good I think it beats out the Tron on this course. Here are my recommendations at different levels for Innsbruckring:
Level 45 get those 858/Super 9 wheels and pair them with the S-Works Venge
I know I say it every week but I cannot stress highly enough that if you are racing you need to be working on Tron. It’ll take a while, but just set the Everest Challenge and forget about it for nine months… like having a baby.
Route Recon Rides
If you want to get out in Innsbruck this week you are in luck! You can pop to Austria on Zwift any time you like, as long as it’s Monday, Tuesday, or Wednesday when Innsbruck is one of the guest worlds!
If you want something more organized there are so many rides and races, and even workouts. As always, Zwifthacks has the up-to-date events listing – all you need to do is click here.
Race breakdown
Regardless of how the official race-recon breaks the route up, I only see three sections:
Pen/Gate to the bridge at the foot of the Kleiner Hugel
Leg-breaker and the descent
Along the river, back across the Inn and home
Pen / Gate to the bridge at the foot of Kleiner Hugel
The lead-in is a short 200M – and the distance from the pen to the bridge is 4.7km. This isn’t flat exactly but there’s nothing taxing and nothing that will ruin your momentum if you’re paying attention. The most challenging is the long overpass over the River Sill (a tributary of the Inn) and railyards, but it is just a steady 600M at 1.5%. On the satellite view you can see it – the long straight at the bottom.
Leg breaker and descent
Kleiner Hugel is the only meaningful hill on the loop. It isn’t a brutal climb by any definition, but it’s long enough to grind your heavy sprinters into the dirt. By the time they are at the top they will be gasping! By the numbers it’s 450M long and averages 6.8%, but the hill starts gently and ramps to 9% 100M from the top. You cannot afford to be timid on this bump – pick a speed on the edge of what the team can tolerate, and go for it!
After the hillcrest comes the descent. The problem here is that if you have a split going up the hill, the first guys over the top will accelerate down, while your slower riders can barely turn the pedals. A 2-3 second gap stretches to 10 seconds and you are done as a team.
I can’t emphasize enough – your plan for going up and down Kleiner Hugel will make or break your ride.
Along the river, back across the Inn and home
Through the sprint and along the side of the river to the bridge, sharp turn and back again to the start/finish gate. This isn’t flat – it undulates – but mostly between 1-2%. This stretch is 2.5km long.
The ride as a whole
There are three laps to do. On the first lap you should be fine. By the time you hit the Kleiner Hugel on the second lap your heavier riders will be spent… you may have to choose whether you’re going to leave someone behind on the hill. At this point you’re only halfway through, their help on the remaining 12km might be invaluable… but you will have to slow down for them to catch up. Is it worth it? Only you know!
The third time up Kleiner Hugel will be immeasurably worse! A half hour or more at threshold and everyone is on the edge. Again the heavier riders will struggle. Will you help them or leave them to the wolves?
Target times
Innsbruckring has featured a few times in WTRL’s schedule, but only once before in the three lap format. That was TTT #66 on July 23rd. Here’s how you did (in 11th place) for each Coffee Class then:
Category
Split 1 (6km)
Split 2 (12km)
Split 3 (18km)
Finish
Vienna
9:55
18:41
28:18
41:24
Espresso
8:13
15:37
23:35
34:49
Frappe
8:49
16:48
25:05
36:48
Latte
9:21
17:57
26:53
39:39
Mocha
10:54
19:59
30:19
44:41
R&K Hyenas
9:58
18:59
28:34
41:56
In July one of our Frappe teams, the R&K Gazelle’s set the PL pace in 11th place for Innsbruckring. This week they are heading into the PL again. Let’s hope they beat my time prediction for Frappe!
Last week we were almost back up to 600 teams. I think there will be over 600 this week and competition will be high. Here are my predictions for a PL spot this week:
Category
Split 1 (6km)
Split 2 (12km)
Split 3 (18km)
Finish
Vienna
9:50
18:35
28:00
41:00
Espresso
8:10
15:30
23:35
34:30
Frappe
8:40
16:40
24:50
36:35
Latte
9:20
17:50
26:40
39:30
Mocha
10:50
19:50
30:05
44:30
Wrap up
This race is all about one specific decision, probably played out twice – the second and third time over the Kleiner Hugel. Do you wait, or do you go?
I made Matt Gardiner of Saris the Pro’s Closet an offer he couldn’t refuse and he agreed to spill the best TTT tips from Saris! If you and your team are looking to improve your TTT check out the video below:
Matt delivers six key tips (watch the video for details:
This week we will be starting our live-streamed coaching series (sorry to anyone who tuned in this week – technical malfunction) with Johnny Rocket as the first coach!
Every Thursday we are also releasing WTRL Course Previews for the following week.
We are still looking for more amateur racers who would want to come on the channel… Apply Here!
If you are a pro and want to get involved let me know at [email protected].