Home Blog Page 264

How the (Team) Race Was Won: Hammer, Recover, Repeat – ZRL Week 5 (Two Bridges Loop)

12

How the (Team) Race Was Won: Hammer, Recover, Repeat – ZRL Week 5 (Two Bridges Loop)

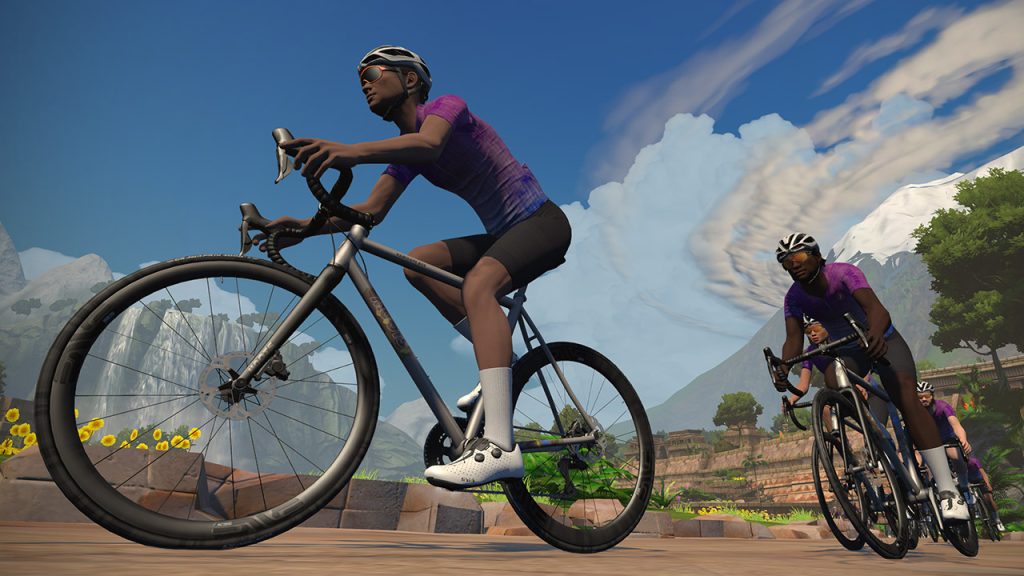
This week’s Zwift Racing League event was the one I’d been looking forward to most this season. It was held on Watopia’s newish Two Bridges Loop route, and I’d raced that route against enough tough fields to know that it suits me well.

I wasn’t sure if I could contest the sprint and also hang on over the climb for 6 laps. But I would do my best to grab intermediate points and finish well. For the glory of the DIRT Roosters!

Here’s how it all unfolded from my point of view, racing in Division B3 of the EMEA W zone.

The Warmup

My typical pre-race ritual was executed as usual. Beet juice (liquid dirt) a couple of hours before the race, then three pieces of caffeine gum (that’s 300mg of caffeine) an hour before, and PR lotion on the legs before kitting up.

Then it was time to kit up and awaken the legs and heart by spinning with the C. Cadence groupies. 30 minutes or so with a few sprints to get the heart rate up and I was ready to go.

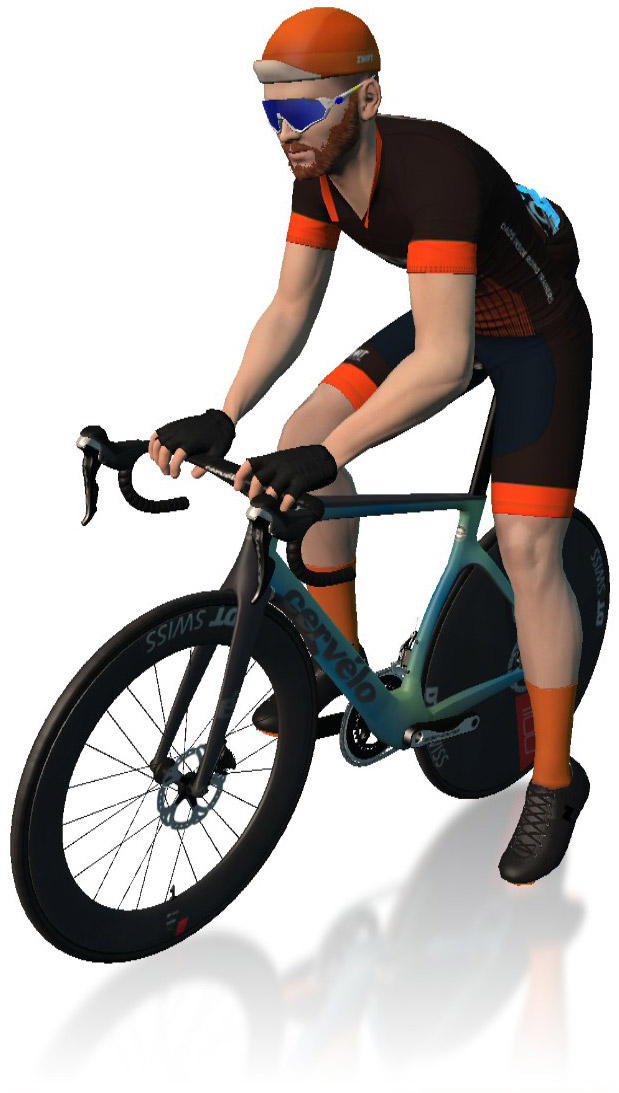
I went with the most aero setup in game for this race, because I wanted every advantage on the sprint points and finish, and figured the slight penalty on the short climb was worth it. Cervelo S5 2020 + DT Swiss disc wheels for me.

Lap 1: All In

In our pre-race Discord chat, the Roosters agreed that most (if not all) of the fastest-thru-segment (FTS) times would be set on the first sprint, with everyone’s legs at their freshest and the group at its largest. If you were going to go for FTS in this race, lap 1 was the time.

But I was undecided. Should I burn a match chasing those points? What if I go for it but don’t set a top-10 time? Or what if I burn my legs up, causing me to get dropped on the climb? Staying in the front group was crucial, because that’s where first-across-line (FAL) points would be earned on later laps.

It’s best not to make decisions mid-race when your brain barely has the oxygen to survive. So I try to make as many decisions as possible beforehand! I decided that if I got an aero powerup at the first banner, I would go for the FTS points on that first sprint. No aero? I would just sit in and make sure I didn’t get dropped.

Why this choice? Because in my unscientific but repeated tests of this sprint, I’ve found the aero powerup gives me a ~0.4s advantage over the van powerup. And that’s probably the difference between being near the top in the FTS and not getting any FTS points at all.

An aero powerup to start. Splendid!

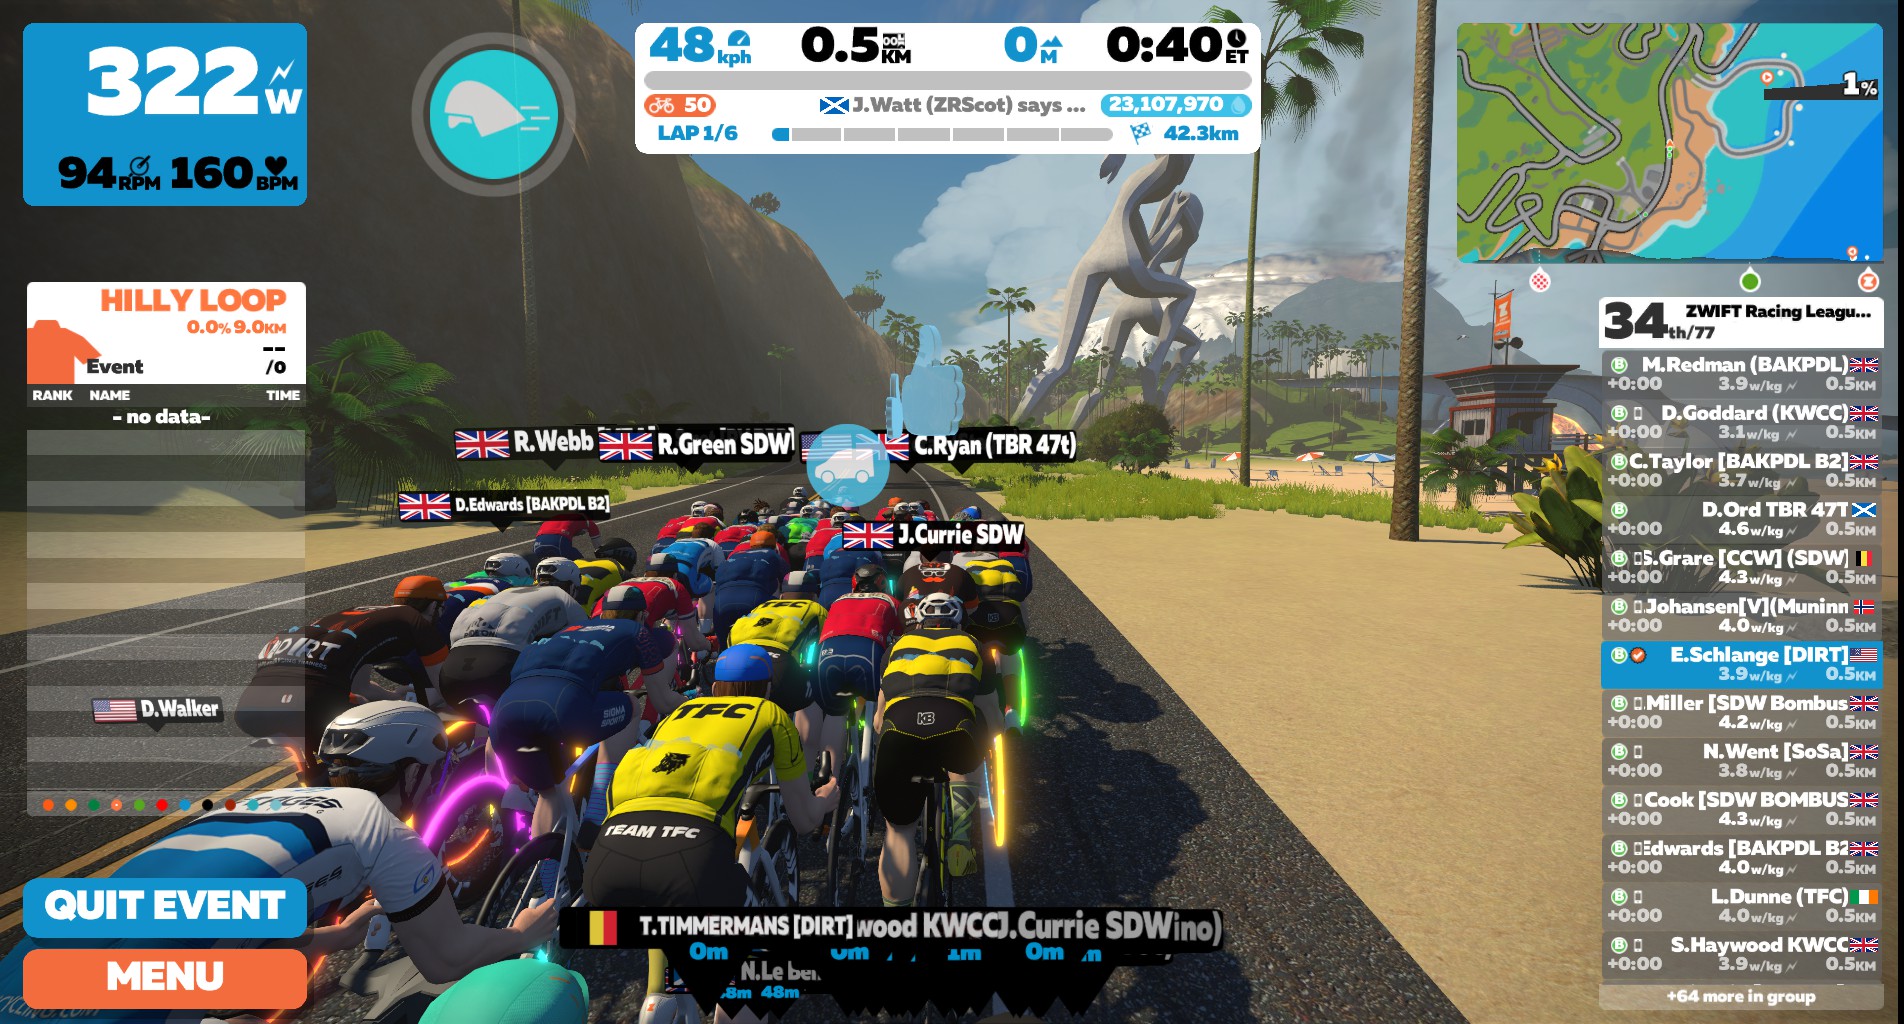
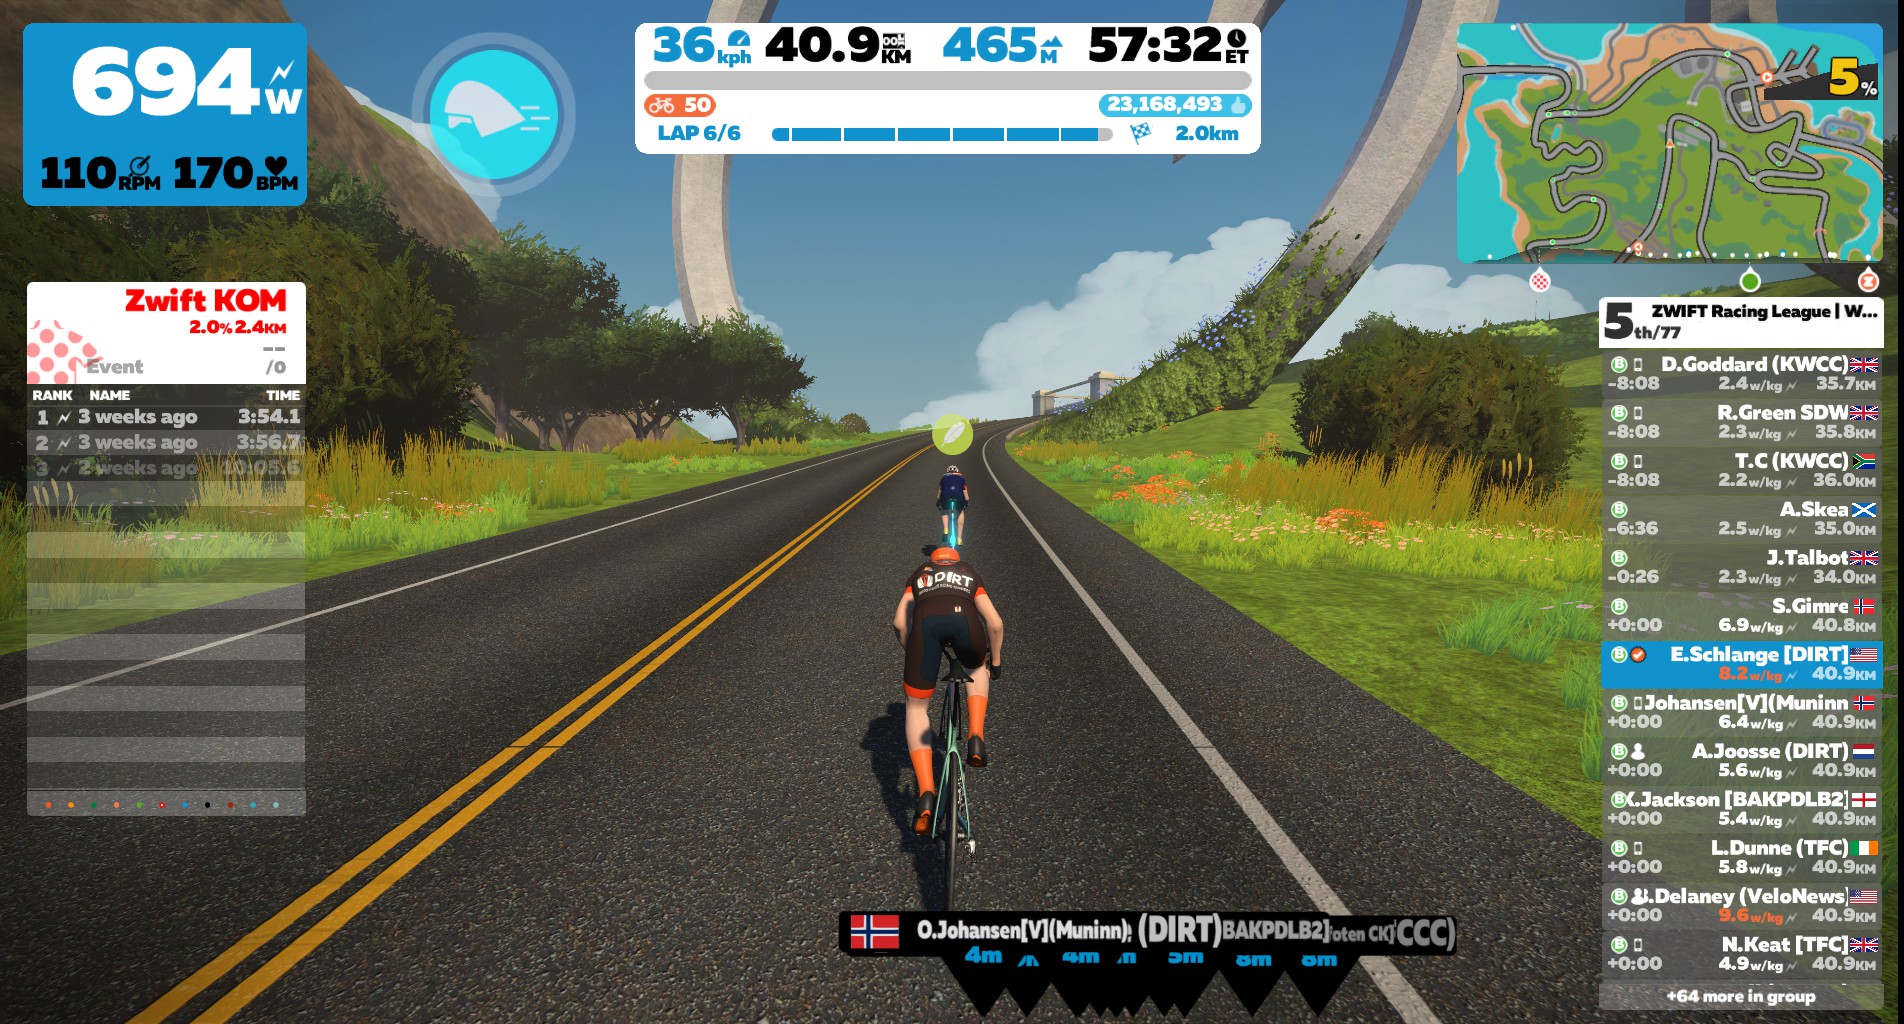
We crossed the start/finish banner, and I got an aero powerup. Excellent! Now I had to time it just right. As we hit the last kicker before the descent to the sprint, I let myself drift back a bit in the pack. I wanted to start the sprint near the back of the group, but finish near the front – giving me a fast time through the segment and placing me in a good position in the group.

Halfway down the descent I was in the back of the group, around position 55 (of 77 total starters). But I activated that aero and started hammering through the pack, finishing around 10th place across the line, but setting the third-fastest time through the segment. 9.88s… a sub 10! Happy with that, as it was faster than I’d done on Friday’s Sprintapalooza.

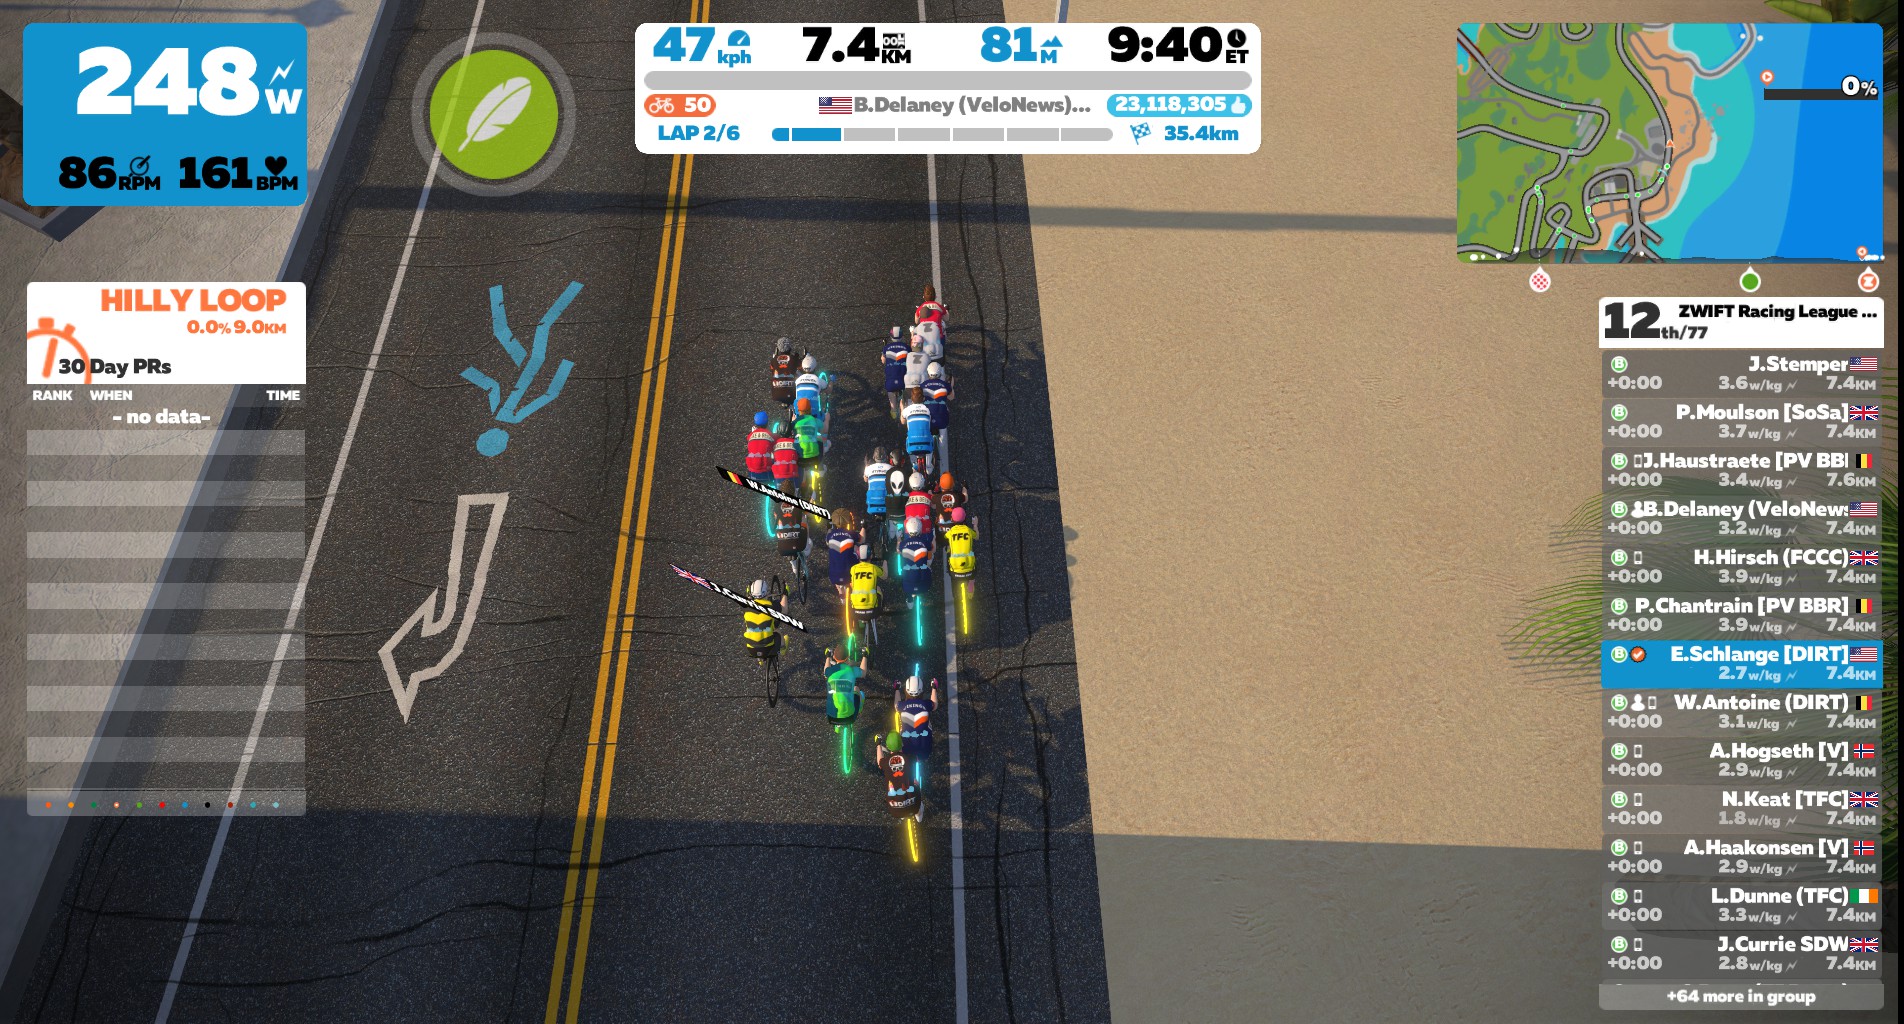
Then it was recover, recover, recover before the crucial climb. I rode as easily as I could while maintaining a safe position in the pack, which had already split up through the sprint. As we approached the KOM start I moved toward the front of the group, then just kept the power steady, holding a position out of the wind but close to it.

Halfway into the ~65s climb is where it really gets going. I had to ramp up my wattage from ~350W to 500-600W for that last 30 seconds. The pack strung out, but I didn’t chase the handful of riders ahead. Instead, I surfed the wheels and let gravity and everyone’s tired legs bring us back together.

Supertuck the descent for a few seconds, then spin easy through the lap line and into The Esses. One lap down. Five to go.

We had around 25 riders in the front group after the first lap, and that included 4 Roosters and 5 Vikings (our closest rivals for the overall league standings). The race was on!

Middle Laps

The front group after one lap

I won’t bore you with the details of each and every one of the six laps we completed, but I’ll summarize what happened. On every sprint the pack got strung out, and although I tried to grab a few first-across-line points, I seemed to run out of steam every time.

Meanwhile on Discord I was hearing a lot of non-English cursing as my teammates got dropped from the front pack – Thomas who was recovering from Covid, then Clem and Dejan. The most painful was our captain Antoine, though, who got dropped on lap 4 descending the climb because he got distracted looking at his phone.

Lots of cursing from Antoine.

Heading into the final lap I was in the front group with teammate Arjen, 4 Vikings, and a smattering of riders from other teams for a total pack size of 16.

Final Lap

Using the van powerup to conserve on the final sprint

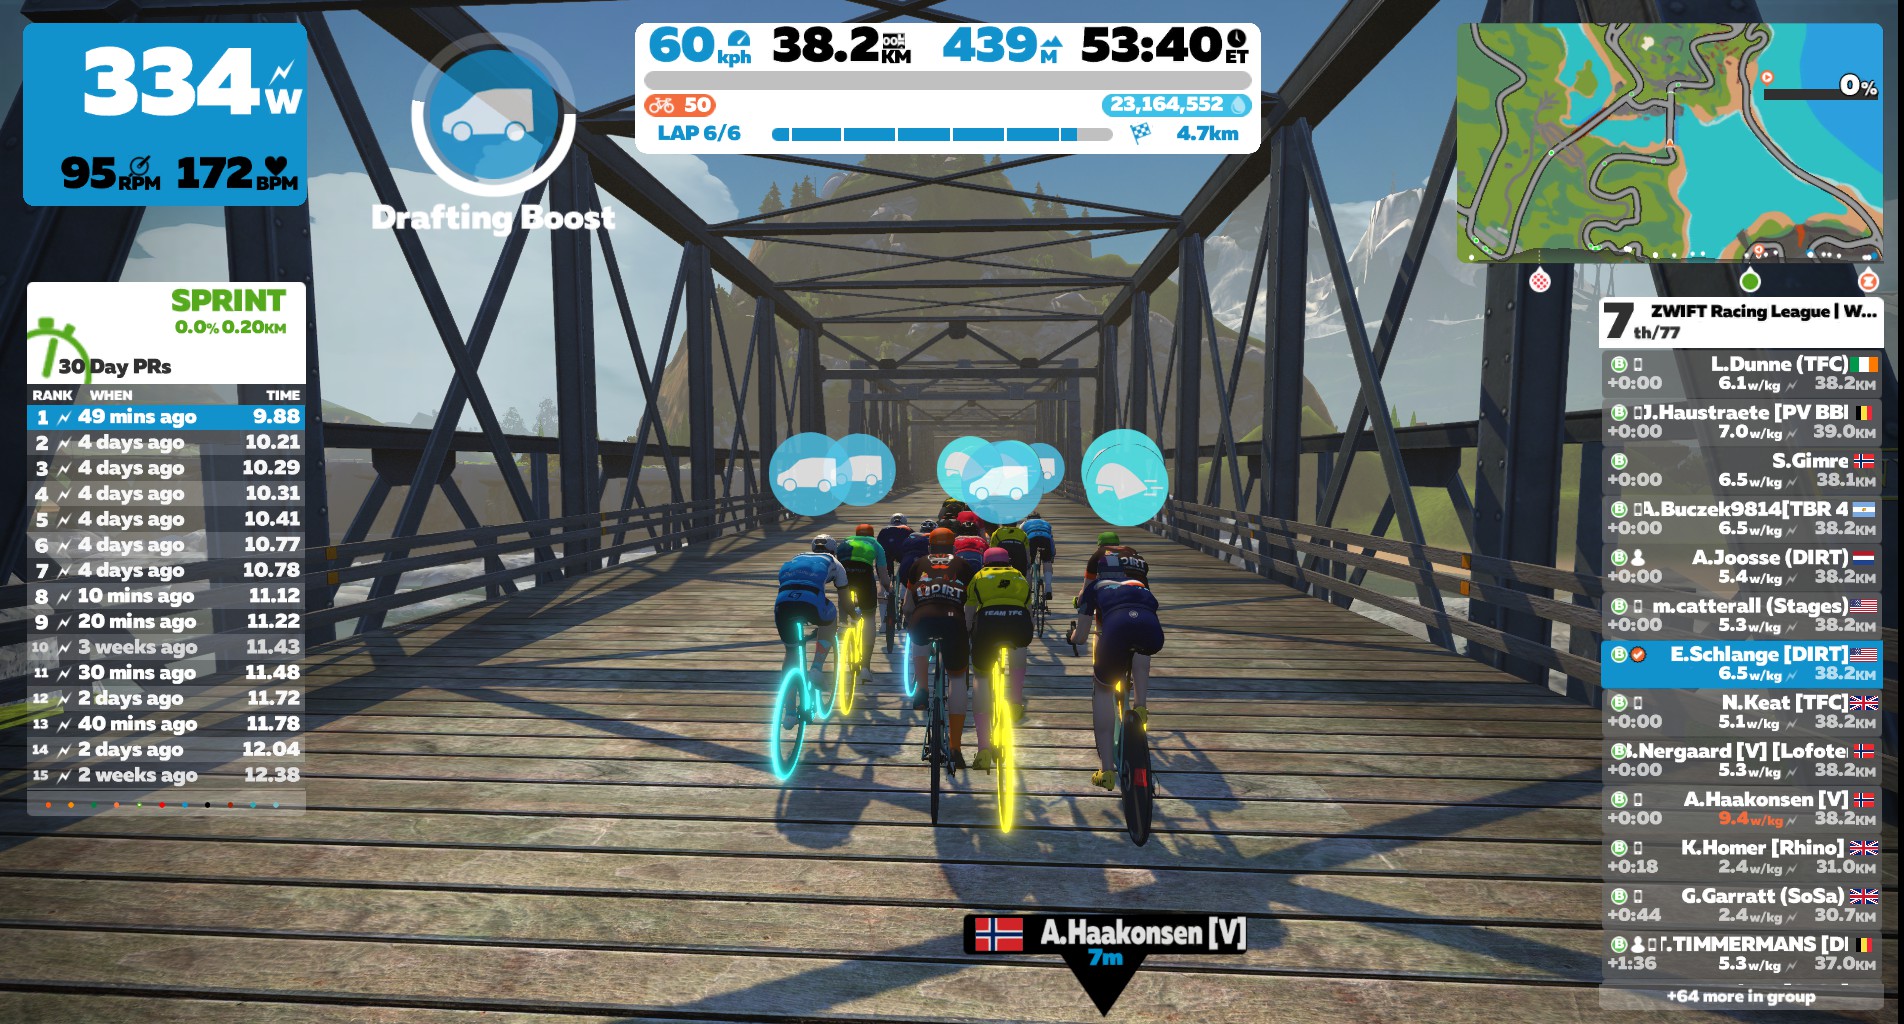
I used my van powerup on the final sprint, not to chase FAL points, but to conserve energy. Then I was stoked to see the Zwift gods smile upon me and grant an aero powerup through the sprint banner, which I would be saving for the final sprint to the line.

As we approached the KOM start, the pack was skittish. Nobody attacking, but everyone on high alert and riding near the front. I had my eye on the Vikings, because I knew if they were smart (and had the legs) they would send someone on a long attack now. And that’s what they did!

Following Gimre’s attack

The Vikings’ Gimre attacked hard with a feather powerup just before the road got steep, and I chased him. I was hammering, but not reeling him in. Then as we reached the top of the climb a few other riders came around me – Ben Delaney from VeloNews (rides for the Stages team), Hirsch with FCCC who’s super strong, Dunne with TFC, and another Viking, Johansen. Our pack of 6 came together on the descent.

We had gapped the riders behind. This was it. The final six. I might just have a shot.

Don’t you love the feeling of reaching the final minutes of a race knowing you’ve got a shot at the podium? I can’t help but think it’s what every Zwift racer lives for.

I tried to stay out of the wind, not pushing the pace at all as we approached the finish. I needed a bit of recovery before the final sprint. Nobody else attacked from way out, so the 6 of us hit the 300m mark together. Then a Viking activated his van powerup, riders started bouncing around, and it was on like Donkey Kong, as Dave Towle says.

I put my head down and sprinted. The legs felt like they had some power left, which was good – but the pack was staying tight. This was going to be close! We all crossed the line within 10 meters of each other. And when the dust settled, I finished in 2nd place.

Well done to Henry Hirsch who took the “W” and a whole lot of sprint points as well. Super-strong riding.

See my ride on Zwift.com >
See my activity on Strava >
See race results on ZwiftPower >

Watch Full Race Recording

Team Result

After the race, the Roosters debriefed on Discord. We weren’t feeling particularly optimistic about our chance at a team win. The Vikings had outnumbered us in the front group throughout most of the race, so we figured they probably edged us out based on earning some extra FAL points and slightly higher finishing positions.

But Antoine “The Human Supercomputer” started crunching the numbers, and suddenly things began to look much brighter. We were only 14 finishing points behind the Vikings, but we had managed to grab a pile of intermediate points. Could we edge them out?

Somehow, we did.

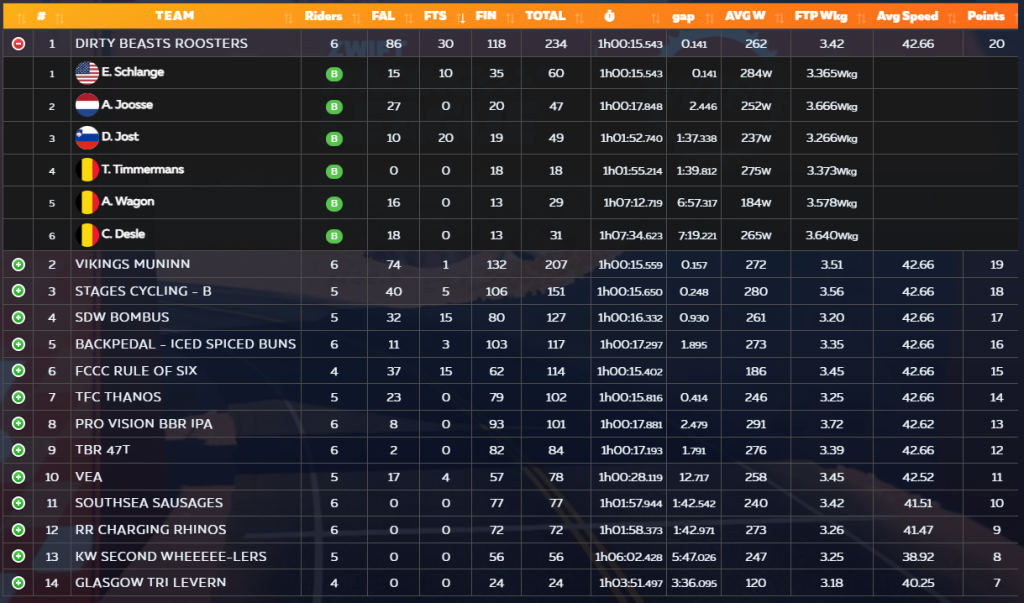
This puts us back in first place overall, just one point ahead of the Vikings. A very close competition!

Takeaways

Once again, those intermediate points proved crucial for our team. Especially the FTS points, where we outscored the Vikings 30 to 1.

Some riders have complained that ZRL scoring is too heavily weighted towards the intermediates. I don’t have a strong opinion on that, but I’ll say this: it is what it is. Adjust your strategy accordingly if you want to win.

For me personally, I’m pleased as punch with my race result. Sure, second place is first loser. But it’s better than third! So I’m going to enjoy it while I can, because what we have left this season is a TTT and two fairly pitchy race courses. I don’t think my results will be pretty in those points races, but I’ll “give it the beans” regardless.

Your Thoughts

Did you race ZRL this week? How did it go for you and your team? Share below!


Zwift Academy Road Finish Line Survey results

7

Zwift Academy Road Finish Line Survey results

Last week we invited Zwift Academy Road finishers to take our “Finish Line Survey” and share how they progressed during the Academy.

Now with over 1000 respondents, let’s talk about the results, which can be browsed live here.

Did You Improve?

For each of the three efforts (sprint, VO2, and threshold) we asked how riders would rate their performance on the Finish Line Ride vs the initial Baseline Ride. Here’s how they responded:

Nearly the exact same number of riders said they improved on the VO2 and Threshold efforts (around 70%). Interestingly, only 48% said they improved on the sprint. Why is that?

One reason: the sprint stats displayed in Companion and Strava don’t show fractional seconds, so if you got 23.4 seconds on your Baseline sprint and 23.0 seconds on your Finish Line sprint, it would still show 23 seconds regardless. So it’s possible people improved, but didn’t have the data to show it.

What about riders who did worse on the Finish Line ride? Approximately twice as many riders did worse on the Threshold effort than they did on the VO2 and sprint. That’s interesting. Is it because riders dug deeper on the earlier efforts and didn’t have enough left for the Threshold effort? Or some other reason? Feel free to share your thoughts in the comments below.

Why Did You Improve?

Riders who said they improved on a particular effort were asked why they think they improved in this area. Here’s what they said:

“Better pacing and/or knowledge of segment start/finish points” was the top reason for Sprint improvements, and this isn’t a surprise. If you weren’t sure where to start your sprint in the Baseline Ride, starting it at the right spot would result in a significant improvement.

Unsurprisingly, “Better Recovery Between Segments” was a significant factor for all three segments (around 30% of respondents chose this as a factor). Based on how many riders we saw riding hard between segments (instead of riding easy and recovering as instructed in the ride description), it makes sense that riders would do a better job of going easy on the Finish Line Ride, recovering between segments so they could hit each section hard.

“Improved Fitness” was by far the most popular reason selected when asked why people improved on their VO2 and Threshold efforts, with around 69% of respondents selecting it.

In the end, due to how the Baseline and Finish Line Rides were set up, figuring how why exactly riders improved their times is next to impossible. There are just too many factors at play. But hopefully this data provides some insight to Zwifters and ZwiftHQ when it comes to judging fitness gains and planning future training.

Your Thoughts

Share below!


Ride with Reggie Announced

6

Ride with Reggie Announced

On 6th November, how do you fancy riding with NBA Hall of Famer, Reggie Miller? 

Reggie retired from basketball in 2005 after an NBA career spanning 18 years. His achievements include being a 5× NBA All-Star, an Olympic Gold medallist, and inclusion in last week’s list of ESPN’s 75 greatest players of all time. Reggie has found a new passion in cycling and will be leading a group ride on Zwift… with special guests!

To sign up, visit https://www.zwift.com/events/view/2374952

As you can imagine, Reggie has an extensive list of sporting contacts, and you can guarantee that he will be supported by an all-star cast of athletes on his ride.

Reggie is also bringing an all-star cast of supporting brands to the ride including Castelli, Moots, ENVE, Fizik, Kask, KOO, and Wahoo. That’s right… there will be prizes!

Purpose

All my life, I’ve had to overcome obstacles, continually proving myself to others…from playing basketball in the backyard to playing in the NBA.

I’ve changed the arena, trading court for road, uniform for kit, but I pedal with intent…to prove I again belong, for self-improvement, for self reflection, and to make this sport I now love more welcoming and more inclusive.

Reggie Miller

“Ride with Reggie” is designed to raise awareness and funding for diversity in cycling, with funds specifically being used to create cycling programs at Historically Black Colleges and Universities (HBCUs). Simultaneously, the goal is to set a World Record for Zwift participation!

Castelli is heavily supporting Reggie, who is a huge fan of the brand, and has designed a jersey specifically for this event.  Money will be raised through the sale of Castelli’s new jersey, and you can easily donate $2 to the cause, with the underlying belief that “together we can make a meaningful difference.” 

For more information, check out Castelli’s page for this event.

Schedule and Route Details

The event takes place on 6th November at 7am PDT/10am EDT/2pm GMT/3pm CEST.

The route will be 3 loops of the 2015 Richmond UCI World Championship course, taking roughly 90 minutes (30.3 miles, 1398′ of elevation). Is this a race? Nope. “All are welcome. We’ll be holding a conversational pace over this ambitious distance, but like racial justice, it’s not easy.”

To sign up, visit https://www.zwift.com/events/view/2374952

Giveaways and Kit Unlock

New Ride with Reggie kit

Complete the event to unlock the new Castelli RWR kit (designed just for this event)! There is also the opportunity to win some incredible prizes, including:

  • a Moots frameset
  • ENVE wheelset
  • Fizik saddles and shoes
  • Kask helmets
  • KOO sunglasses
  • Wahoo trainer
  • and of course plenty of Castelli clothing

Go here to enter the prize drawing. (Winners will be announced the week of November 8th via email.)

About Reggie

Reggie Miller had an 18-year NBA career as a shooting guard with the  Indiana Pacers. He wore #31, which the Indiana Pacers subsequently retired as a mark of respect to Reggie’s achievements which included playing 1,389 games for the Pacers. He is one of only five NBA players who spent an entire career of 18 or more seasons with a single franchise and is widely regarded as the Pacers’ greatest player of all time.

On 7th September 2012, Reggie was inducted into the Naismith Memorial Basketball Hall of Fame, the highest honor for any basketball player. 

Post-NBA retirement, he was voted onto USA Cycling’s Board of Directors in December 2020. Reggie is currently an NBA commentator for TNT, and also an avid cyclist.

Questions or Comments?

Post below!


Review: Cleaning My Drivetrain with Muc-Off

3

Review: Cleaning My Drivetrain with Muc-Off

Following my previous article regarding Muc-Off’s products, I got several queries about the cleaning of your bike’s drivetrain.  It was clear that readers had taken note that a well-maintained drivetrain can gain you a few extra watts and where races on Zwift are won by the tiniest of margins, this could be the difference between winning and losing!

This article is focuses solely on the products that Muc-Off offers for cleaning and optimizing your drivetrain (cranks, chainrings, chain, cogs/cassette, and derailleur) and thus get the most out of your efforts. It includes an overview of their brand-new lubricating oil, which is has a somewhat unique name – Ludicrous AF Lube.

A bit of science

I was never much of a science student, but I will try and summarise why it is important to keep the drivetrain clean.  Basically, there is a certain amount of efficiency lost from a dirty drivetrain.  It is estimated that there is a decrease in efficiency of 3-5 watts when your drivetrain is dirty. 

Another way to think about it is that a clean and lubricated chain consumes 7 watts. If dirty, this increases to 10-12 watts, meaning you use more power to go at the same speed.  The bottom line is that you need to keep your drivetrain cleaned and well-lubricated.

Fundamental tools for the job

There are two different tools that I have tested to clean my drivetrain, the first being the X-3 Dirty Chain Machine and the second the Bio Chain Doc.  Before analysing these products, there are several related items which will make your task much easier.  These are as follows:

Gloves

There are two different types of gloves, the Deep Scrubber gloves or the Mechanics gloves.

Deep Scrubber Gloves – The Deep Scrubber gloves are made of silicone that is highly durable.  These gloves are used for cleaning your bike and have bristles on the palms and fingers that allow you to basically scrub your bike with your hands.  Muc-Off advise that the Scrubber gloves are used for cleaning your frame, bars, saddle, and tyres – none of which covers what I was about to use them for.  However, given that my drivetrain was particularly dirty and not wanting to get my Mechanics gloves covered in oil, I thought I would try to see if I could use the Deep Scrubber gloves, not to clean the chain, but to help me handle the dirty chain and  the X-3 Dirty Chain Machine and Bio Chain Doc.

The truth is, despite using the gloves not as intended, I had good results.  The gloves are extremely durable: I accidentally got them caught in the chain and immediately feared the worst.  I expected there to a be hole in the glove, but there wasn’t, not even a scratch!  The gloves are tough and completely saved me getting oily hands undertaking this mucky task. 

The only negative point is that because the gloves are a little on the thick side, due to the silicone, it makes doing tasks that require a bit of dexterity (like using the Bio Chain Doc) more challenging. However, this is minor because as noted, Muc-Off advises that these gloves should be used for cleaning instead of mechanical work as I tested. 

It is surprising how oily the gloves got, but the great point is that because they are made of silicone, they were easy to clean.  It says on the packaging that they can be put in the dishwasher, but a bit of soap and water was sufficient to make them look like new. They come in three sizes and are on the large side.

Mechanics Gloves – These are essential.  And to be completely honest, it would probably be best to have two pairs – one that you are prepared to get mucky and another for when you are undertaking mechanical fixes.  They have a rubber palm and fingers to facilitate a good grip and are elasticated to fit your hand firmly. Like the Deep Scrubber glove, these come in three sizes, a good guide would be to select whatever your bike glove size is. 

Drivetrain Detailer Brush  

When cleaning your drive train, it’s not enough to think that using the X-3 Dirty Chain Machine or Bio Chain Doc will clean your drivetrain completely, it will get the job done 90%, but that is still half a job in my eyes, and you will need that little extra something to get into the nooks and crannies of your cogs.

The solution is the Drivetrain Detailer Brush.  It consists of stiff nylon bristles and a large handle that allows you to really apply pressure and scrub spots where there may be an excessive build-up of dirt. Muc-Off summaries the functionality of this product best: “it makes it easy to get to those hard-to-reach spots.”

Microfiber polishing cloth

Another necessary piece of equipment.  When you use either the X-3 Dirty Chain Machine or the Bio Chain Doc, the chain cleaner product will break down the dirt. To help remove the grime, a cloth is essential. It’s not sufficient to use paper towels or an old rag because from experience, the paper towels disintegrate and an old rag leaves fibres in the chain that you have just been trying to clean. 

I’ll admit, I was reluctant to use my Microfiber cloth, thinking that I would ‘save’ it to polish my bike with some of Muc-Off’s cleaning products such as Miracle Shine but in the end, I realised it’s better to use that and buy another Microfibre Polishing Cloth.  At this rate, I have concluded you probably need a minimum of 3 Microfibre Polishing Cloths.  One for when you use Muc-Off’s Antibacterial Equipment Cleaner after your intense Zwift sessions, one for when you polish and clean your bike, and one for when you are undertaking, dirty, grimy tasks like cleaning your drivetrain. 

Cleaning my drivetrain

Now onto the main event, cleaning my drivetrain!  The two main products I used to clean my drivetrain were the X-3 Dirty Chain Machine and the Bio Chain Doc.

X-3 Dirty Chain Machine  

The X-3 Dirty Chain Machine is the more expensive of the two products but it is the one which I found easier to use.  There is a really concise video here which details how to use the product, however, I will briefly explain. 

What you do is take the lid off the device, attach the handle, place the base of the device under the lower chain, attach the lid, fill the reservoir which is in the top part of the device with the Drivetrain cleaner product that comes with it, then hold the handle and pedal backwards, pressing the button on the top of the reservoir to release the cleaner.  It’s advisable to have your bike in a Mechanic’s stand as this can get messy.  The bristles in the device will clean your chain and the dirt will pool in the bottom of the X-3 Dirty Chain Machine, which can be easily disposed of, down the drain.  A Microfibre cloth is then used to remove any excess dirt and grim, drying the chain too.  At this point, I also used the Drivetrain Detailer brush to clean the derailleur and other hard to reach parts.    

I was able to operate this whilst using the Deep Scrubber gloves and I got an excellent result.  I liked using this product because it was easy to use, and the bristles in the machine cleaned the chain well.  The machine also minimised oil and dirt going everywhere as it collected it internally.  It did such a good job cleaning my chain that it revealed to me that despite thinking that I had actually been maintaining my drivetrain, the reality was that I hadn’t, as evidenced by the sheer amount of grime that was removed – there were a few watts gained there for sure!  To lubricate the chain afterwards, I applied Muc-Off’s Hydrodynamic Lube. 

It really was that simple, and with minimal mess.        

Bio Chain Doc

The Bio Chain Doc machine is rather unique in its construction and more complicated to use.  It is a pair of brushes in a clamp that connects to a canister of Chain cleaner, you attach a hose from the nozzle of the canister to the brushes.  You spray the canister, whilst simultaneously clamping the device and back pedalling.  It’s as complicated explaining as it is doing! (A video here demonstrates what I am attempting to explain.)

The bottom line is that it is pretty fiddly.  You certainly can’t use the Deep Scrubber gloves for this task as it is impossible to reattach the hose, if it disconnects, which it did in my case.   Not wanting to cover my Mechanics gloves in grime, I used my hands and got completely covered in oil. It was particularly messy because the Bio Chain Doc doesn’t collect the residue from the chain as well as the X-3 Dirty Chain machine, which resulted in a mess on the floor that required cleaning.

Yes this device is more fiddly and dirty than the X-3 Dirty Chain machine, but I must say it certainly was successful in cleaning my drivetrain.  If you want to clean your chain and want to be economical with your expenditure and are prepared for a bit of a mess, then this is certainly worth purchasing.  In the end, to get the desired results, I disconnected the cleaning device and sprayed the Chain cleaner directly onto the areas I wanted to clean, using the Drivetrain Detailer brush.  The chain and other components were wiped clean with a Microfibre cloth and Bike Protect was applied. 

(Bike Protect is an after-wash corrosion inhibitor that drives out moisture, so it is adviseable to spray onto your chain to drive out moisture before you apply any chain lubes. In my case Hydrodynamic Lube was applied.)

I achieved good results by following Muc-Off’s simple process of “clean, protect, lube.”

Cleaning Recommendations

In my opinion, the X-3 Dirty Chain Machine is the product to get if you want to clean your drivetrain.  Granted, it is more expensive of the two, but it is easier to operate and collects the dirt and grime which can easily be disposed of. That being said, the Bio Chain Doc delivered equally as good a result, it’s just I struggled with the setup and felt like I needed an extra pair of hands. But that would explain why it has the lower price point, as it’s probably Muc-Off’s way of providing a product for all. 

Ultimately, if you were wanting to clean your drivetrain on a budget and are prepared for a bit of cleaning, then you wouldn’t go far wrong with buying the Drivetrain Detailing brush and Bio Drivetrain Cleaner.      

Lubricating the chain after cleaning

As explained, after cleaning my drivetrain and applying Bike Protect to the components, I lubricated the chain withHydrodynamic Lube. However, Muc-Off have launched a new lubricant called Ludicrous AF Lube.

When I was working on my previous article, Muc-Off eluded that they had something special in the pipeline. Well, this new lubricant was it!  I don’t know many details about it other than what I have read but the official line is “tested and refined over the last three years by the industry’s leading tribologists, Ludicrous AF has been pro-peloton-approved for taking speed and performance to an entirely new level. Thanks to their state-of-the-art R&D facility, our Muc-Off boffins have created a true masterpiece – an ultra-low-friction, highly durable lube which allows you to go harder and faster for longer than ever before. Basically, it’s fast as f**k!”

The details behind the new lube make for some interesting reading. “When applied to a chain, it penetrates chain link scars to create a sheer plane – which means more speed! The molecules in the formula charge up, which helps to accelerate both chain and rider by reducing friction and power loss. The proprietary additives contain synthetic polymers, which are designed for long-distance performance. This means class-leading low levels of wear on chain components, making it super-fast and super-durable. This provides unbeatable performance in both wet and damp or dry and dusty conditions at a range of temperatures.”

It was developed “with INEOS Grenadiers, EF Education-NIPPO and deployed on the Olympic stage, winning 6 gold medals in 2021. Ludicrous AF has been built to take on all conditions at the highest level of racing. Tested during the 2020 season and perfected for 2021, this badass lube has already taken multiple podiums and an overall win at the 2021 Giro d’Italia.”

So in summary, it sounds very impressive… but it comes at a bit of cost. Having just been released, I don’t yet have this in my hands. But I plan to give it a test, so watch this space.

Does all this really matter?

The short answer is “Yes.” Having spent time cleaning the drivetrains of my Zwift and outdoor bikes for this article, I can honestly say that pedaling felt smoother. Not only that, but gear changes feel more fluid. Considering many of us spend several hours a week on our bikes, I think that this is a simple way to potentially make some performance gains as well as extend the life of our drivetrains.

Right, I’m off to buy another pair of Mechanics gloves, another Mibrofibre cloth and some Ludicrous AF Lube. With new events on the calender like the Mountain Massif TT – Powered by Muc-Off , I need all the gains I can get!  


Kasia Niewiadoma on Her Career So Far (Zwift PowerUp Cycling Podcast)

0

About this Episode

In this episode, recent Road World Championships bronze medalist Kasia Niewiadoma sits down with Matt Rowe to chat about her career, her training, and what her plans are for the offseason. 

About the Podcast

The Zwift PowerUp Cycling Podcast features training tips from host Matt Rowe (Rowe & King), with regular co-hosts Greg Henderson, Rahsaan Bahati, Dani Rowe, and Kristin Armstrong.

Advice For Zwift Academy Tri Workouts 1 and 2 With Dan Plews (Zwift PowerUp Tri Podcast #44)

In this podcast episode, Matt Lieto and Dan Plews take a look at the first run and cycling workouts of the Zwift Academy Tri program and offer their advice on how to tackle it.

About the Podcast

The Zwift PowerUp Tri Podcast is hosted by former pro triathlete Matt Lieto and Zwift Academy Tri mentor Sarah True. Both are passionate about lending their in-depth knowledge of the multisport to the Zwift Tri audience.

Riding with the Women of Colour Cycling Collective (World of Zwift #48)

0

The latest episode of WoZ is out, covering all things great and beautiful in our favorite virtual world.

In this episode, host OJ Borg brings us:

Review: InsideRide E-FLEX Motion System for Wahoo KICKR

Review: InsideRide E-FLEX Motion System for Wahoo KICKR

USA-based InsideRide has been making rollers since 2005, and many Zwifters love their e-motion rollers. But I’ve had my eye on a different InsideRide product for months: the E-FLEX System.

This is a different sort of “rocker plate” in that it’s not a plate at all. It’s two pieces of hardware (one for the front of your bike, and one for the back) which together give you fore/aft as well as side-to-side motion abilities. InsideRide thinks it’s the next evolution of the rocker plate – but we’ll get more into that later.

I reached out to InsideRide a few times about getting a review E-FLEX unit, but they were always out of stock. The E-FLEX has been on the market for a year or more, but availability has been a challenge – they seem to sell out quickly! Finally I asked at the right time, and they shipped one over.

How It Works

The E-FLEX system consists of two pieces:

  • At the back of your bike you have a platform that attaches to your trainer and allows it to move forward and backward as well as tilt left and right.
  • Your front forks attach to a version of InsideRide’s Floating Fork Stand, a product also available for attachment to their rollers. This stand lets your front forks turn left and right (around 30 degress of motion, which will tilt your bike around 6 degrees) while also moving forward and backward.

It’s a system completely unlike any other rocker/motion system I’ve tested (and I’ve tested quite a few). Let’s dig in…

Wahoo KICKR and Core Only

I should mention here at the start: the E-FLEX only comes in two flavors currently: one which supports all Wahoo KICKR versions, and one for Wahoo KICKR Core.

Setup

The two parts arrived together in one box, and upon removing them I was struck by how small they were. I’ve grown used to dealing with full-length rocker plates, and the E-FLEX units are much lighter and smaller.

Setting up the E-FLEX is a bit more involved than a typical rocker plate, but it’s not technically challenging or time-consuming, either.

To assemble the rear unit you’ll need to take the adjustable feet off the end of your two KICKR legs, as well as removing the foot at the end of the middle leg (Phillips screwdriver required). Then lower it to its lowest setting, fold in the legs, set it in the channel on the platform, and secure it by hand with the wingnuts.

No inflating suspension balls or adjusting the tilt. It just worked.

The floating fork stand needs a few Allen screws installed with the included Allen key, then you just mount your front forks to it. My Zwift bike uses a standard quick release, but the stand is also compatible out of the box with most 12mm thru-axle forks. Your levers could be a problem though – InsideRide says, “Thru axles with rigid or non-folding levers will not work and must be replaced with either a folding or rotatable lever, or an axle that uses a hex key to tighten. Does not fit 15mm thru axles without additional hardware. Contact us for more info.”

Once my KICKR was secured to the rear unit, and the front unit had been set up properly, I just attached my bike frame on both axles. Here’s what the E-FLEX looked like completely assembled:

Photo provided by InsideRide

The build quality of the entire system seemed fairly bomb-proof and stable. But how would it feel? Time for a test ride!

Watch My Demo Video

I put together this video after spending several hours with the E-FLEX. The video demonstrates how it all works while riding at a social pace, sprinting in the saddle, climbing out of the saddle, and sprinting out of the saddle.

How It Feels: Side-To-Side

Hopping onto my new setup and joining the C. Cadence roadies on Tempus Fugit, I was immediately struck by how different this setup felt from the rocker plates I’ve reviewed over the years (and use daily). After recently reviewing the full-motion Velocity Rocker Plate, I suppose I expected the E-FLEX to feel pretty similar. Both are full-motion systems, right?

But it felt different. Very different!

Here’s why it’s different: with rocker plates, generally your entire bike rocks back and forth without your handlebars turning at all. Getting the rocker plate to rock requires swinging the bars side-to-side, which tilts them along with the rest of your bike.

With the E-FLEX, your bike only tilts side to side if your handlebars turn. Everything is pivoting on your steerer tube. Turn the bars right, and your bike leans to the left. Turn them right, and you tilt left.

In fact, the floating fork stand includes a locking nut which prevents your forks from turning. If you tighten this down (which you can do while riding), it locks your bike into an upright position – no side to side tilting.

As I spun around Watopia and got acquainted with the motion of the E-FLEX, I found myself conflicted. I thought rocker plate motion was quite natural. Was I living a lie? Was this handlebar-turning motion more realistic and reflective of outdoor riding?

After putting in several hours and a few hundred virtual kilometers atop the E-FLEX setup, I’ve come to a conclusion: the E-FLEX design gets it half-right. And so does the rocker plate!

But they’re different halves. Let me explain…

When it comes to side-to-side motion, the E-FLEX requires you to turn your handlebars in order to tilt the rest of your bike. Rocker plates, in contrast, require you to tilt your handlebars in the same direction as the rest of your bike frame.

Which one is right? For me, the E-FLEX solution is best when you’re in the saddle. And the rocker plate system is best when you’re out of the saddle.

The E-FLEX’s tilting motion feels very natural when in the saddle. I quickly settled into a comfortable rhythm with the bars turning and my frame tilting ever so slightly as I rode in zone 2. As I ramped up the watts this motion would increase – just like outdoors. In fact, I can confidently say that this in-the-saddle motion is the most realistic I’ve felt from any setup I’ve ever tested.

I used the E-FLEX for my Zwift Academy Finish Line ride, and stayed seated throughout, putting in max efforts across three timed segments. Apparently it worked – I improved all my times substantially! (See the video here.)

But here’s the thing: I stayed in the saddle throughout my Finish Line ride because I couldn’t get comfortable with the out-of-the-saddle motion of the E-FLEX. When I’m hammering out of the saddle I need to be able to pull up on the bars, against my pedaling motion, and have the entire bike tilt. But pulling up doesn’t work on the E-FLEX… you need to pull back/push forward, turning the bars, to get your bike to tilt.

So I found out-of-the-saddle work frustrating with the E-FLEX. Despite spending a fair amount of time trying, I just couldn’t generate the power I typically can standing up. It was a frustrating feeling. And that’s why I think rocker plates do out-of-the-saddle movement better.

How It Feels: Fore/Aft

The E-FLEX unit really shines when it comes to fore/aft movement. Compared to the Velocity Rocker I recently reviewed, the motion of the E-FLEX is more natural, and it is also completely silent. Seriously!

The fore/aft movement is managed using what are essentially fancy rubber bands like you would use for resistance training. And the system seems to work very, very well. It would slide forward a bit when I got out of the saddle, slide back a bit when I sat down, and move ever so slightly forward and backward when I was hammering in a seated position.

In short, it moves the way it should, which results in a more natural and comfortable ride feel.

Stability

It’s worth noting that the E-FLEX setup is less stable than a standard rocker plate. Whereas most rocker plates are basically impossible to tilt over, the E-FLEX system definitely can be toppled and you might hit the deck if that happens.

A few different times in my rides, I found myself falling over with one or both of the E-FLEX units lifted off the ground on one side. I never actually went overboard, but the potential was there. It happened most often when I would sit up, hands off the bars, and wipe my face with a towel. This removed my stabilizing points but also effectively closed my eyes, removing the helpful visual input that would say “Eric, You’re falling over!”

The E-FLEX system is dampened so sublimely that, as you tilt over, it doesn’t get “tighter” – so you don’t feel that resistance that says “You’re reaching the edge of your tilt” like you would on a rocker plate. This is a credit to the E-FLEX’s design, but it’s also a double-edged sword.

I wouldn’t say the setup is dangerous in terms of stability, but you just need to know that you can topple your entire setup.

And just in case you’re wondering: the E-FLEX system will not work without the floating fork stand on the front. You can’t just attach your front wheel and enjoy the E-FLEX’s full range of movement. The reason is, the fork stand gives you left/right stability. Without it, you’ll just be flopping left to right… it’s impossible to stay upright. Trust me, I tried!

Pricing

The E-FLEX system is priced at $449+shipping, making it the most affordable full-motion setup on the market today. Buy it here >

Conclusions

Reviewing the E-FLEX system opened my eyes to the shortcomings of a standard rocker plate’s motion. Will there ever be a solution that incorporates the best of the E-FLEX and a rocker plate? We shall see.

Most Zwifters probably spend 90% or more of their time seated, and the E-FLEX system handles seated movement better than any other solution I’ve tested.

So I’d say InsideRide’s E-FLEX system is a highly recommended indoor movement solution, especially for those who simply want a bit of comfortable, natural motion and aren’t looking to get major frame movement in hard out of the saddle efforts.

For me personally, I want that big side to side out-of-the-saddle movement. So I’ll be sticking with a rocker plate for now, although I’ll be wishing it provided the superior seated motion of the E-FLEX.

Questions or Comments?

Post below!


Building JMX Trainer Coach – A.K.A. Zwift (CyclingTips “From the Top” Podcast)

3

Building JMX Trainer Coach – A.K.A. Zwift (CyclingTips “From the Top” Podcast)

Wade Wallace from CyclingTips recently interviewed Zwift co-founders Jon Mayfield and Eric Min to talk about how it all began and what has happened since.

It’s a fascinating interview, and a rare one for Jon Mayfield, the man who in 2010 started building the “JMX Trainer Coach” game that would eventually morph into the Zwift we know and love.

“I still had the Kurt Kinetic box sitting there because I’d just unpacked it, and I see that little graph. And I’m like, I bet you I could write some software to sort of decode my speed and give me realtime power output on the screen…”

Jon Mayfield

Listening to the interview it’s clear that Jon is a gifted and experienced game developer. But he was also admittedly pessimistic in his vision of Zwift’s potential, hedging his bets when it came time to quit his job and go all-in as Zwift’s lead developer.

“I never actually wanted us to get this big. I just wanted to build something cool for people that like bikes.”

Jon Mayfield

Jon also explains that he was an introverted cyclist who preferred riding alone, which may explain why things like clubs and events weren’t baked into the game from the start.

“I never got into the group rides. As odd as it seems, I’m an anti-social cyclist. What I like is my solitude.”

Jon Mayfield

The interview also digs into what happened within Zwift in the first half of 2020 – a crazy time for the company and the world at large. This includes letting go of some senior execs in the company, Jon transitioning out of his leadership position on the development team, and a pivot toward Zwift developing their own hardware.

The hardware side has proved to be a challenge, at least partly due to supply chain problems from Covid. Eric discusses this, and explains why Zwift sees hardware as vital to their business:

“It’s not to take business away from our partners, I just don’t think they’ll make enough. That’s the problem. We’re just trying to grow the pie.”

Eric Min

It’s the story of an unlikely partnership, but one that has changed cycling forever. I think you’ll enjoy listening.

Your Thoughts

Share them in the comments below!


Ride with Castelli – October Epic Announced

6

Ride with Castelli – October Epic Announced

It only seems like yesterday, I was writing about the September Epic ride hosted by Castelli. And here we are, talking about October! Before we know it there will be a Christmas ride to look forward to.

This month’s Epic ride is heading to Innsbruck.  Now the Castelli team do like Innsbruck and in 2018 they were testing their climbing skills in and around the city.  Check out their video which even includes a cameo from 2x World Champion, Italian Paulo Bettini.  It looks like they had real fun, which has left me wondering: will there ever be an IRL Epic ride with Rich and the team? I am confident it would be well attended. 

In an attempt to recapture the fun and magic from their own epic day, the Castelli Team are inviting us to join them on a group ride on the “Lutscher CCW” course on Tuesday 26th October at 7:25pm CEST/6:25pm BST/1:25pm EDT/10:25am PDT.  Sign up here.

For those of you that are not familiar with the course, it’s a climby one where you go up the Innsbruck KOM Reverse, descend the frontside, then do it again. Total distance 22.7km, total climb 826m.

The word Lutscher is German and actually translates as “lollipop.”  This is because the route, when you include the lead-in, is shaped like a lollipop.  

Because this is Castelli’s Epic ride, they are going to be giving away a prize and this month it’s an Unlimited jersey + bibshort combination.  To win these items, be sure to stay close to the beacon and be present when a snapshot is taken, as always – the closest to the beacon wins the prize, which is announced on Catelli’s Strava Club site, which riders are welcome to join.

Unlimited Jersey/Bibshort

The name “Unlimited” is used because these items can be used across all cycling disciplines such as road, mountain, and gravel. 

As a consequence, the jersey is made from fabric that better resists snags from tree branches and is a mixture of fabrics.  The main body is polyester, which stretches and wicks moisture away, whilst the sleeves use stretch woven fabric and are designed to be used in temperatures that range between 18-32C.

Key features include:

  • The all-surface unlimited no-compromise jersey
  • ProSecco Unlimited main body fabric
  • Snag-resistant stretch woven on sleeves and shoulders
  • No-sew flat-edge sleeve finishing
  • 3 rear pockets plus zippered key/money pocket
  • YKK® Vislon® zipper
  • Silicone gripper elastic at waist
  • 18°-32°C / 65°-90°F
  • Weight:166 g

The bibshorts are equally durable and are made from high abrasion and tear resistance fabric.  There is a handy second layer on the side panel that acts as a side pocket with a flap and two mesh pockets on the lower back. 

  • 200 g/m2 nylon/Lycra® fabric with best-in-class abrasion and tear resistance
  • 2 mesh rear pockets built into mesh bib straps
  • Double-layer side panels reduce abrasion if you fall, while also creating 2 useful side pockets
  • Raw-cut leg ending with vertical silicone grip strips to hold leg in place
  • KISS Air2 seat pad for long-distance comfort
  • Weight:200g

This jersey and bib-short combination are part of Castelli’s wider Unlimited Collection.  Within the range there are long-sleeve jerseys, gloves, and other more appropriate winter clothing, but there is one standout item of clothing which I have not seen before in cycling and that is a Puffy Jacket

Puffy Jackets are associated with being a heavy item of clothing, worn on cold and usually dry days, however, Castelli has managed to engineer it as an item of clothing that can be used for cycling.  Having never worn it, or even seen it, I am reluctant to talk more about the product, but from what I have read and in speaking with the Castelli Team, this is a lightweight jacket that packs down small in your seat bag, but is still able to offer a lot of insulation and warmth when you need it.  This is ideal for bikepacking. 

For a chance to win this high-quality set of bibshorts and jersey, join the ride and stay close to the beacon.