
The Endurance Lab Coaches’ Corner 2
In this episode:
- What is really causing your cramps
- The importance of rest and recovery
- High cadence and how much you need it in your life

In this episode:
 My name is Ian, often seen as I. Murray ODZ Endurance Lab on Zwift. I have been an endurance athlete for about 15 years, and I am one of the original Zwift Beta participants. Many of you know me from the TeamODZ SkillZ and DrillZ classes held every Wednesday evening and as the Evil Elf from the TeamODZ Endurance Lab. Now, it is time to embark on another adventure.
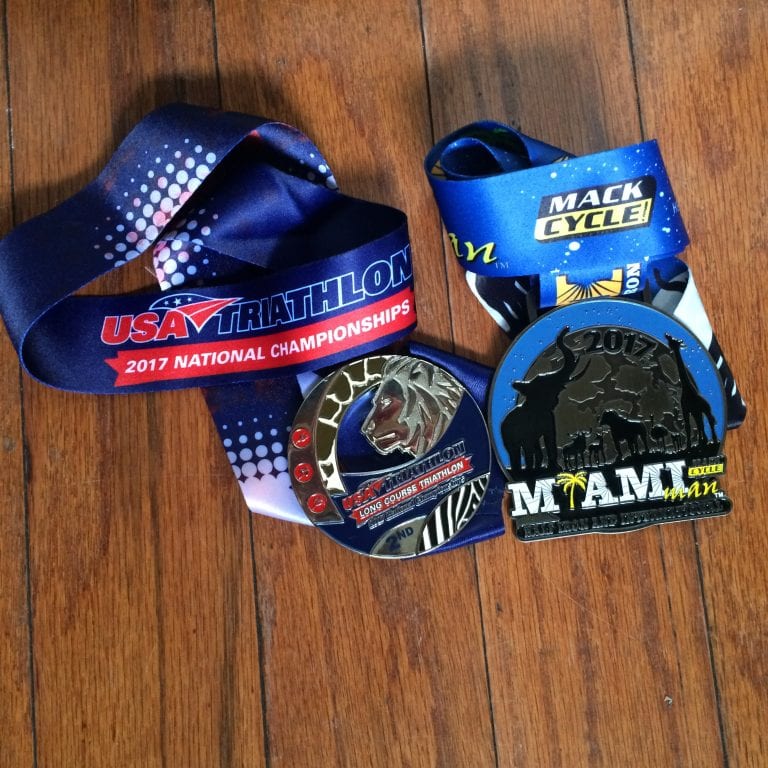
On 12 November, my triathlon season culminated at the USA Triathlon Long Course National Championships held at the Miami Man Triathlon. I had one goal: punch my ticket to the International Triathlon Union Long Course World Championships in Odense/Fyn, Denmark. Mission accomplished.
I now have about eight months to get ready for the race. The race is a bit longer than Miami Man, so the build will be a bit different. This time, though, you will get to see it all, both here and on Zwift. Other than the swim, about 95 percent of my run and bike workouts will be on Zwift. (I will still have to do a little outside, as I cannot get good speed workouts in on the treadmill.)
Each week I will put up the results of the previous week’s training and the plan for the upcoming week. I’ll publish the times of when I plan to do each of my workouts, so I hope that many of you can join me on this journey! Training starts in earnest on 4 December, as I have decided to take a couple weeks off to let the body recover.
Keep tuned in to Zwift Insider for more fun and suffering!
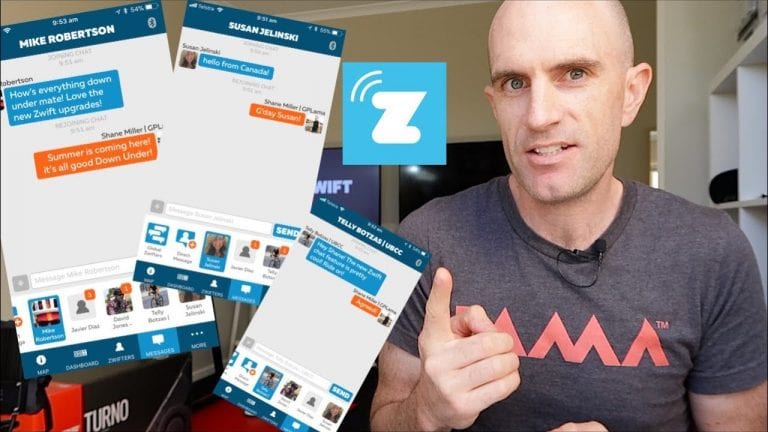
The biggest update for in-game communication to date in Zwift has been the recently revamped messaging within the Zwift Companion App (IOS/Android).
In game messages no longer appear and disappear on your Zwift screen, you’ll be able to see who said what and reply either to the group, or via direct message.
The global messaging works the same as in-game, so it’s global when not within an event and becomes group-only messaging if you’re riding as part of a group ride or race.
NOTE: As mentioned in the video. The Zwift Companion app has to be open and in the foreground (on screen) to receive any messages. It doesn’t operate in the background like other messaging apps you may be familiar with.

ZwiftHQ sent an email blast today announcing an immediate increase in the monthly subscription price, from $10US to $15US. Subscribers from other countries may see their price increase by a greater percentage, with some complaining of an increase of 75% or more. Existing subscribers have the current price locked in for one year.
Why the price increase? Here’s how ZwiftHQ explains it:
We raised our monthly membership in order to continue to make Zwift a bigger, better and more beautiful experience to help you improve your cycling performance and achieve your fitness goals. From a scrappy little team that could all fit around a table and share a meal, Zwift’s staff continues to grow with programmers, artists, designers, testers, community managers, coaches, and an around the clock support staff working to help Zwifters when you have questions…
Here is the complete text of ZwiftHQ’s email:
Three years ago, when we founded Zwift, a lot of people told us we were nuts. There are simply not enough cyclists to build a long term business, they said. But being cyclists ourselves, we knew they were wrong. We knew that there is not a more vibrant, dedicated, passionate group of people in the world than the global community of cyclists. Moreover, we knew that this community was being woefully underserved when it came to riding indoors—remember how boring indoor training used to be? Your continuous feedback and awe-inspiring 147 million miles (237 million km) of riding—that’s 650 roundtrips to the moon—have helped us to shape the product as it stands today and what it will become tomorrow. Thank you.
We have come a long way with Zwift since the beta release, and we have some exciting things planned for the upcoming season. We just rolled out our lush new Mayan Ruins expansion of Watopia—currently my favorite stretch of road on Zwift—and we recently began piloting Group Workouts, which marry the social fun and motivation of group rides with the targeted training benefits of workouts—try one and let us know what you think. You’ll see even more events to choose from and new training plans are being added to our library. But we have so much more that we hope to deliver to you: new gameplay features, more maps and expansions to existing maps, improved social riding experiences, better guidance in reaching your training and fitness goals. The list goes on, and on.
The team too has grown. Every day we work at building the team that can bring you an awesome and constantly improving experience to help you improve your cycling performance and achieve your fitness goals. From a scrappy little team that could all fit around a table and share a meal, Zwift’s staff has grown to over a hundred people including programmers, artists, designers, testers, community managers, coaches, marketers, and an awesome support staff working to help Zwifters when they have questions.
In order to continue to make Zwift bigger, better and more beautiful, we are updating our membership price to $14.99 per month, effective today. As a way of saying thank you, however, to the awesome Zwifters who helped us get here, your pricing will not change for one year. If you happen to suspend your membership during this period and come back, you can still enjoy your current pricing level. (Visit our FAQ for all the details.)
At Zwift, we take seriously our mission to help more and more Zwifters achieve their fitness goals by making training fun, rewarding, and effective — and we take great pleasure doing it. We are grateful to all of you, and we look forward to seeing you on Zwift!
Ride On,
Eric Min
Co-Founder and CEO
The Zwift Riders Facebook group is all abuzz with the news, with a post from Zwift’s Eric Chon currently showing 311 replies in just a few hours. As with any price change, there is no shortage of strong opinion on both sides. Some Zwifters are saying the price increase seems especially ill-timed, given Zwift’s recent outages. Others are taking it all in stride, saying it’s still well worth the money.
Personally, I’m not surprised by the price increase, given Zwift’s user survey a few months back probing our thoughts on various price points. Nobody likes price increases, but I certainly won’t stop Zwifting because of an extra $5/month. Like all Zwifters, my hope is that higher fees can fund more rapid improvement in game features and stability. If that’s what happens, then this price increase is a successful move in my book.
What about you? Chime in below with your thoughts.
Let’s be very clear here, training for any kind of long distance event is straight up difficult. Period. Now, having said this, as a mental skills trainer I am always working with athletes to stay motivated, focused, consistent, and confident in their abilities. I have trained in a slew of applied techniques to facilitate those critical attributes from my Masters at the University of Utah, however, very few were as effective as the combination of training on the Wahoo Kickr and Zwift.
I began my journey in Ironman Training and completion with a call from the Salt Lake Triathlon Club. At this time, my athletic pursuits had slowed to a crawl after a long stint with the game of lacrosse, having played through high school and college, and my body was wrecked. With 2 junk ankles, an ACL repair, and a cracked belief in my body holding up to anything significant I answered a call from Rory Duckwork, the president of the Salt Lake Tri club, who asked if I would come work with some of the elites in a weekend intensive training down in St. George, Utah. That weekend I covered personal distance records in all three disciplines, came home, signed up for the St George 70.3 (just 2 months away) and started training.
As I covered in my Coeur d’Alene Ironman Reflection, as a mental skills trainer I felt that the experience would help me understand what the athletes of long distance events go through. I wanted to understand the mindset so I could get closer to understanding those athletes I worked with. One of the first things I learned is that, when the novelty of training and the excitement of signing up wears off, the mental game comes into play. I am talking about keeping the motivation high to work through 2-a-day training sessions, work, family, and everything else that needs to be done in a day. The long and lonely bike rides on roads notorious for popping tires due to the local bull thorn growth. I am also talking about pushing and trusting the body into places it has never been.
 I completed the 70.3 at St. George and with the energy of the finished race, signed up for the 70.3 at Coeur d’Alene just 4 months later.
This is when things got real for me.
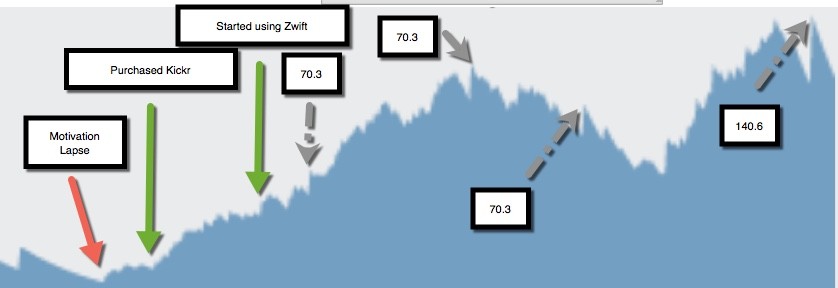
If you have ever been here you might understand how frustrating it is to KNOW what you need to do but have little CARE to actually do it. Even as a sport psych, knowing all of the techniques to get me out of the funk, I didn’t because I simply did not care. This might be a good time to say that throughout my limited experience as an expert in sport psychology, motivation is the MOST IMPORTANT attribute to develop with athletes. If you do not have the motivation, you will fall short of what you are trying to accomplish even while knowing everything about what you need to do to be successful.
After another shopping spree, I had a shiny new Wahoo Kickr and Rory had recommended joining him on this new virtual reality platform called Zwift so we could train together.
Everything changed after this.
Ok, so I will put the research behind this here in a second but the fact is I WANTED to get on the bike day after day after day because it was freaking FUN!
If I were to put the science behind the effect that occurred I would bring in a bunch of research from Ryan & Deci’s self-determination theory which states that there are 3 things we can do to help increase motivation:
The combination of the Kickr and Zwift helped me impact each one of these critical elements. I was riding with virtual Team ODZ, Team SLTC, and about 1000 other riders on the hills of Watopia (Camaraderie). I rode the ‘skillz and drillz’ rides, listened to the experts on a Discord group talk nutrition and strategy (competency). And, I raced at least 2 times a week just because I thought it was fun (choice).
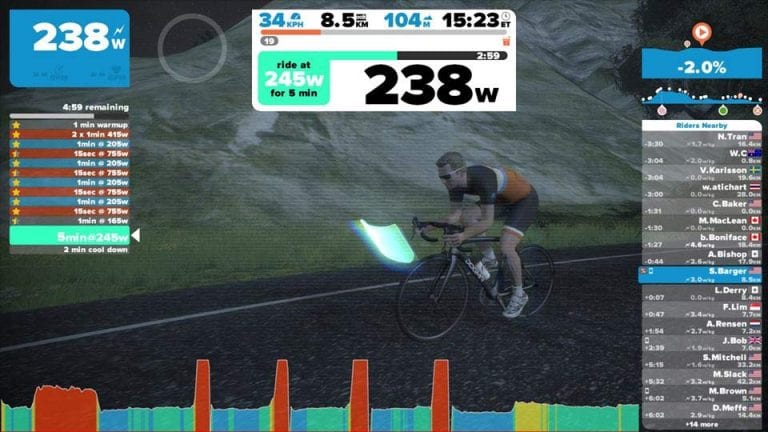
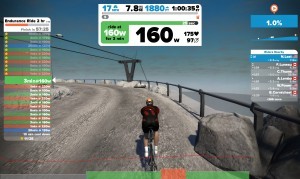 With every virtual race that I participated in, I saw an increase in my FTP. If you do not know what FTP is, just think of it as the max amount of power your body can produce over 1 hour. Before Zwift and the Kickr, my FTP went from 166 to 187 in 6 months. In the 6 months after Zwift and the Kickr, my FTP climbed from 187 to 217. The fact is, I began to trust my training because I knew it was consistent and deliberate. Check out the structured training in the picture. I could also see RESULTS, which (let’s be honest) is what we are really looking for in training. It helps drive us forward no matter how process-oriented our focus is.
Over the winter months, when the snow was thick and the crappy Utah air was heavy I spent hundreds of hours on the bike. This allowed me to continually see progress even when there is a typical lull in training. Without getting into too many details, the first race of the 2017 season was Ironman Oceanside 70.3. At this race, I was able to drop 30 minutes off of my previous best bike split.
The last reason I love Zwift from the perspective of a sport psych is the fact that there is no substitute for race day intensity. I personally was able to get into and train a race day mindset 2 times EVERY WEEK! This is so impactful for long distance athletes because races are so few and far between. These athletes previously didn’t get the advantage of competing every week and now they can! A common mental training assignment that I give the athletes I work with is to have at least 1 day a week of training that they focus primarily on getting in and holding the race day intensity and mindset. This allows the athlete to practice and gain confidence in their ability to control emotion and focus. The difficult part about this is that there is NO substitute for competition energy. It is truly difficult to get into that mindset and energy state without the competition.
Well, as you can guess Zwift solves this problem. I can attest to this because through every race I participated in, I was able to hold an intensity that I never thought to be achievable. I had a whole new ‘gear’ that I was not utilizing and because I was racing, I was not thinking about how my body felt. I simply raced!
I completed the Ironman Coeur d’Alene 18 months after starting the journey. I suffered through 5+ hour rides indoors on a weekly basis and maintained the motivation (again, what I believe to be the most important attribute) to achieve this monumental challenge and I owe a lot of it to my Kickr, by allowing me to stay safe and stay out of the weather, as well as the effects of training using Zwift.
I hope you find it interesting to get a hands on perspective of a trained sport psych as mental skills training can be vague and intangible at times. I personally feel that there is a disconnect between athletes and the experts that they work with in the fact that far to many of ‘experts’ or professionals have little experience in doing the things that they are teaching. Having said this, I personally find that there are new age approaches to helping athletes to train their mental game that can only be seen through participation and engagement.

In 25 days, Zwift Insider will turn 2 years old. In that time the site has gone from being one of many Zwift-related resources to the top Zwift fansite. It has been referenced in GCN videos, ZwiftHQ materials, and various cycling media websites. This site now contains 500+ informative posts and boasts very significant daily traffic numbers. (In fact, I anticipate peaking at around 30k daily visitors this season!)
I’m proud of what Zwift Insider has become, but I know it can be so much more. In fact, to truly serve the growing global Zwift community, Zwift Insider must transition to something bigger. It has to move from being “Eric-powered” to being community-driven. There is just too much going on in Zwift for me to cover it all. Simply put… I need help!
So I’m reaching out to Zwifters worldwide, looking for contributors. If you want to write a post or two, that’s great. If you want to commit to being an ongoing part of the team, with regular contributions, that’s even better.
So far, Zwift Insider posts have focused on these general topics:
My goal is a team of 5-10 regular contributors, each focused on topic(s) they are passionate about. To be a part of this core team contributors will need to write at least one post per month, although I expect many will contribute much more than that.
Team members will also be invited as we collaborate to decide how to strategically position Zwift Insider for future success.
ZwiftBlog has always maintained a positive and mutually-beneficial relationship with ZwiftHQ. I’ve been discussing this transition with them for weeks now, and they have made it very clear that they support Zwift Insider and want to see it thrive even more as it moves into this new phase.
We don’t have all the details in place, but I’ll say regular contributors can expect VIP treatment from ZwiftHQ, including opportunities to receive inside-track info on what’s coming next, and cool Zwift swag.
Email me at [email protected] and let me know more about yourself and what kind of role you’d like to play. I’m open to ideas, so if you’re excited about something let me hear it!
Meet the coaches of The Endurance Lab!
Grab a seat, sit back and enjoy the FIRST Episode of The Endurance Lab Coaches Corner! The Coaches corner is an unscripted, informative podcast covering hot topics in cycling and triathlon training, racing, and nutrition. Hosted by our Coaches and Nutritional Therapist specializing in endurance sports.

The third annual VR Worlds event is happening November 25th, and if you are a Zwift Racer you’ll want to participate.
This is one of the most popular team-based races on Zwift, with all of the major teams fielding at least one team (and often several teams).
There are actually seven different races making up this event. The four team races cover each of the standard Zwift categories (A, B, C, and D) and there are also 3 women’s individual races (A, B, and C/D).
VR Worlds 2017 will be raced on the Watopia Figure 8 route, which is 29.8km (18.4 miles) long with 234m (770′) of elevation gain. This race will be longer than most Zwift races, with A teams riding 4 laps, B teams 3, and C teams 2, and D teams 1.
This is a point-based team competition. The specifics of how the points work are outlined on the rules page.
The race is on November 25th, and the first race begins at 13:00 GMT (9AM Eastern). See the race rules for precise start times for each of the 7 races.
Riders must register on the VR Worlds webpage. Riders not affiliated with a “trade team” on Zwift can form their own team if desired.
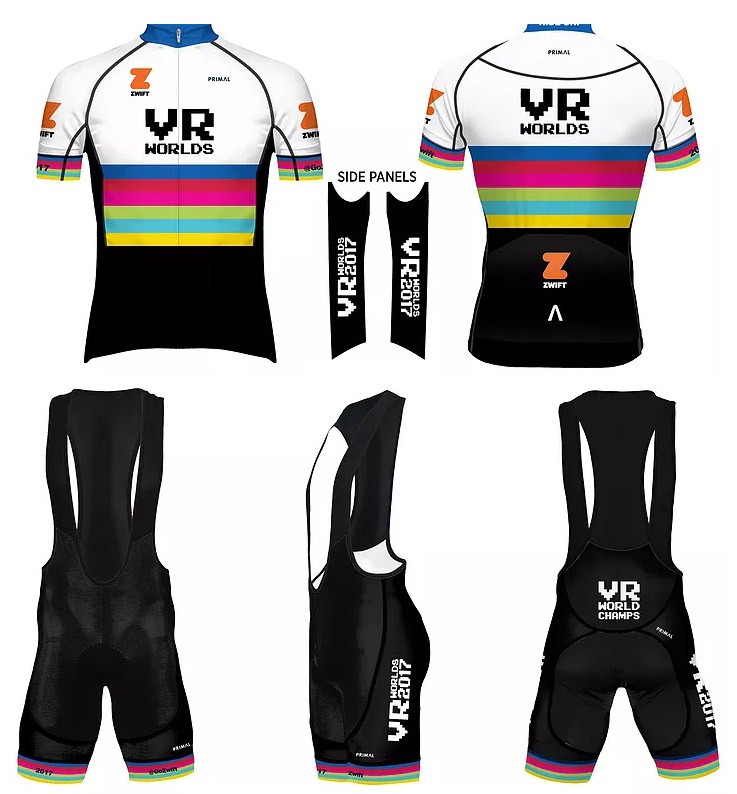
This year’s kit can be ordered through the VR Worlds site. Using the same bars as last year’s design, it’s an eye-catching kit.
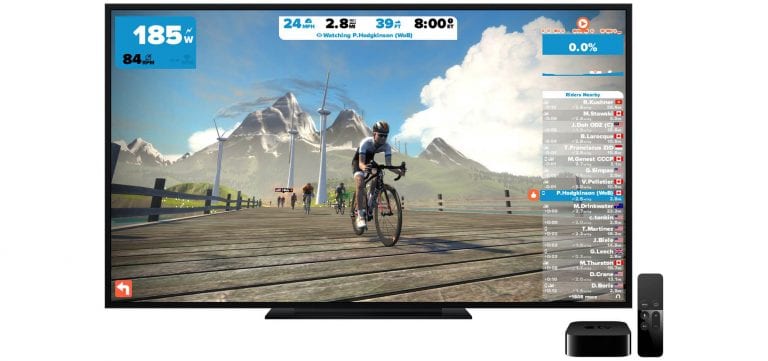
ZwiftHQ has confirmed the imminent release of Zwift on Apple TV, with game master Jon Mayfield putting the estimated release date as “weeks, not months out.” While they are not accepting additional beta testers at this time, a new batch of invites has just been sent out to increase the number of testers. Assuming that additional testing goes well, the release will happen soon.
Zwift releasing on Apple TV is hugely important for the Zwift community because Apple TV will be the lowest-price option available for anyone wanting a quality Zwifting experience. It puts Zwift within reach of many more users.
I asked Jon why there has been such a long delay from the beta release (I’ve been a beta tester since early May) to the live launch, and he explained:
We were focusing on features our current users would enjoy, while we waited to see if a new Apple TV would come out. For all we knew Apple was going to abandon the ATV and leave it with 3-4 year old hardware, which is not really sufficient to run Zwift nicely on a big screen.

Makes sense. And it sounds like Zwift was smart to wait… Apple announced the new Apple TV 4k in September, and it can now be purchased for as little as $179. Shop Apple TV on Amazon >
This version of Apple TV (the 5th generation) sports an upgraded A10X Fusion chip (the same chip used in the current iPad Pro), allowing it to run in Zwift’s “1080 Basic” profile, as opposed to running in the “720 Basic” profile which the 4th generation Apple TV uses. To be more specific, Jon says:
Apple TV 4k runs the 3D part at 1920×1080 and the 2D user interface runs at your native TV resolution (so, that part would be in 4k if you have a 4k tv).
Jon also had this to say in a Facebook post when comparing the 4th generation Apple TV to the new Apple TV 4k:
I think there’s a huge perceptible difference between the two. ATV4k will run smooth the entire time and runs at full 1080P, with a 4k user interface layered on top. It also supports glowing things (think Tron bike wheels) and has room for us to make the graphics even better.
Older Apple TV is an old iPhone 6 blown up to full screen. Gonna look pretty rough.
I’ve tested Zwift on my 4th generation Apple TV, and the quality level is pretty good–like Jon says, it’s the iPhone 6 blown up to full screen. Fairly smooth, but lacking some detail in the graphics.
If there’s a “huge perceptible difference between the two” then I’m sure Zwifters will be very happy with their experience on Apple TV 4k.
Episode 37 of Zwiftcast has been released. This is an extra-special one! Here’s the full episode description:
This episode is devoted to a conversation with Zwift chief executive Eric Min.
It’s a wide-ranging look at where the platform is in terms of fulfilled potential and how Zwift is preparing for growth this winter.
Eric updates Zwiftcast listeners and viewers about the number of customers and how the business is coping with churn. There’s also an illuminating discussion on what’s planned for course updates. Simon and Eric go on to chat about the Draft (nailing a few myths along the way) Racing, the Academies and Voice. In the Quickfire Questions section Eric answers many of the most often-asked questions from the community.
It’s a fascinating insight into what’s planned for the platform and the business – right from the very top.
If you’d like to watch the interview video you may do so below: