Home Blog Page 416

How to Fix ANT+ Dropouts and Other Connection Problems in Zwift

How to Fix ANT+ Dropouts and Other Connection Problems in Zwift

Zwift connects to your sensors (smart trainer, power meter, heart rate monitor, cadence, speed) wirelessly using Bluetooth or ANT+. Usually this works wonderfully well, but occasionally Zwifters encounter the dreaded ANT+ dropout: that frustrating event when Zwift stops receiving data from your sensors. What causes dropouts, and how can you avoid them?


#1 Culprit: Weak Signal or Interference

This is by far the most common reason for ANT+ drops, and it’s due to the inherent weaknesses of ANT+ as a wireless protocol. Fortunately, if your problem is weak signal or interference it is usually fixed quite easily. Here are common causes and solutions.

Too Far Apart

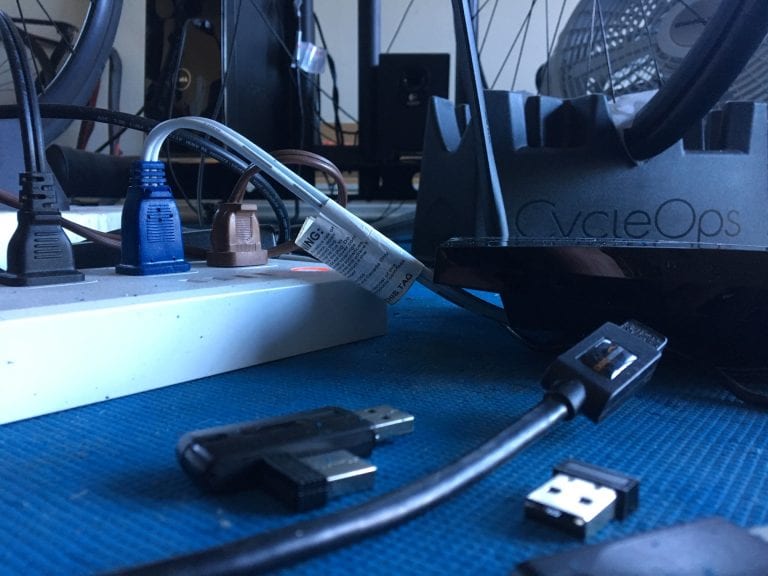
If your ANT+ dongle is more than a few feet away from your bottom bracket, it’s possible the signal from your sensor(s) is not reaching the dongle. Fortunately, this, is easy to fix!  Simply buy a USB extension cable (here is one we recommend from Amazon) then install it with one end plugged into your computer and one end into the ANT+ dongle. Now you can place the dongle wherever you’d like.

If you need a cable more than about 3 meters in length you should purchase an active USB extension cable to ensure a strong signal. Here is one which comes highly recommended on Amazon.

Home Wifi Channels 9-12

Most people set up their wifi routers with default settings, which means the router chooses which channel to use when it boots up. If your router uses 2.4Ghz (which most do) and chooses any channel from 9-12 it could very well cause interference with ANT+. The image below shows the spectrums used by each router channel, with ANT+ labeled in blue.
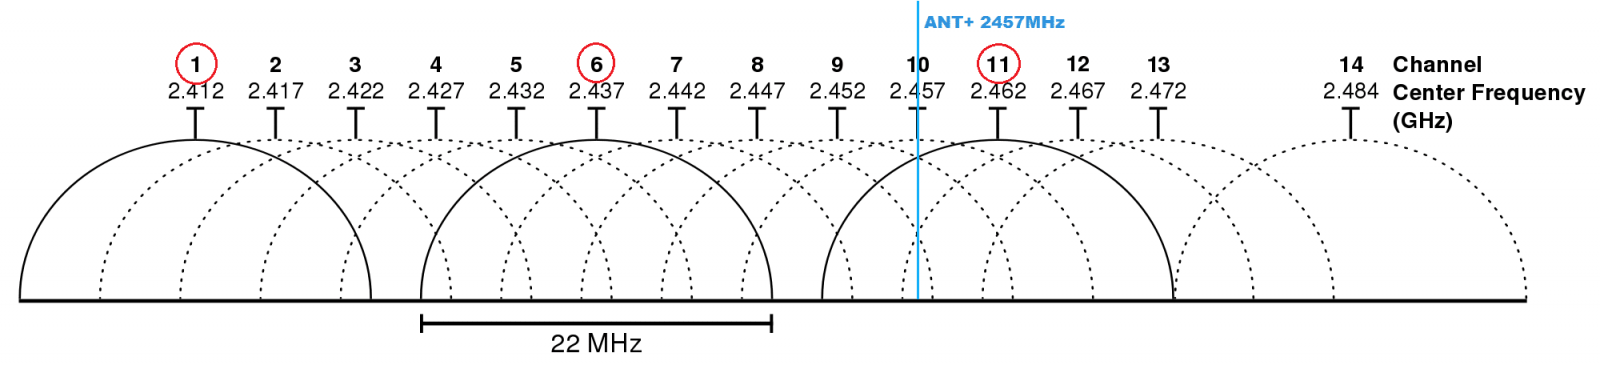
Logging into your router and forcing it to use a particular channel far away from the ANT+ signal will ensure wifi interference is not an issue.

Here’s a video showing how to change your wifi channel >

On a related note: you might consider upgrading your wifi to mesh for faster Internet >

Interference from Other Electronics

Other devices operating nearby may cause interference leading to dropouts. I’ve heard from than one Zwifter who only experience dropouts when their housemates use the microwave!

Fans are another common cause, but any electrical device has the potential to interfere with your ANT+ signals, especially devices which are poorly built. If you are experiencing issues you may need to just unplug items one at a time to see what solves the problem. This includes other wireless devices (such as a mouse or keyboard) on your computer. If you are plugging your ANT+ dongle straight into your computer, using a USB extension cable to get it away from the computer’s electronics is a good idea.
Weak Batteries

While smart trainers are plugged in for power, everything else (including your power meter) uses batteries. As these batteries weaken, the signal strength is reduced.

Installing fresh batteries may just solve your problem, which is why I always keep a pile of 2032 batteries on hand. Buying these in bulk from Amazon is much cheaper than paying a few bucks apiece at your local store.
Kinetic’s Extended Range Dongle

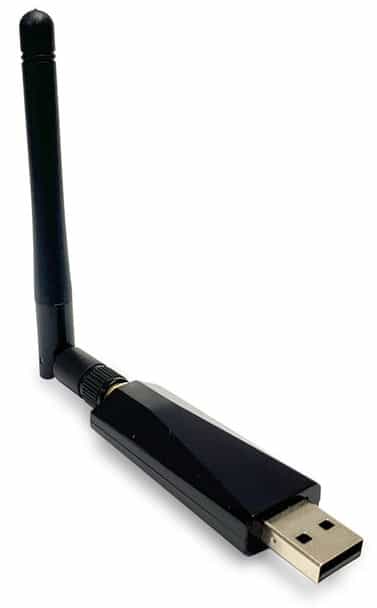
Kinetic’s Extended Range ANT+ dongle has been tested and proven to work better than a standard ANT+ dongle in nearly every possible setup situation. If your ANT+ drops are caused by weak signals or interference, the Kinetic dongle should improve things.

Read more here >


More Causes of ANT+ Dropouts

Other Computer Programs

Only one program on your computer can “own” your ANT+ dongle at any given time, so make sure you aren’t running any programs that use ANT+ dongles. The most common culprit here is Garmin’s software, “Garmin Express”.

USB Port Settings

The vast majority of USB ports will work just fine for your ANT+ dongle, but there are potential issues here:

  • Power saving: especially prevalent on laptops, this turns off or reduces power to your USB ports and can cause problems.
  • USB version: make sure your ports are version 2.0 or higher, as USB version 1 will not work with Zwift. If possible use a USB 3.0 port.
  • Adequate power: some computers only send 100mA of current to certain USB ports, and you need at least 500mA. Purchasing a powered USB hub or switching to a higher-powered port on the computer can fix this. I use and recommend this Sabrent 4-port hub, but any powered USB hub will do!

Sweat Damage

If you’re dripping sweat, water, etc on your USB dongle then it will stop working sooner or later. Simple solution: put the dongle into a small plastic bag so it is sheltered from sweat.

A Special Note about Wahoo KICKR ANT+ Dropouts

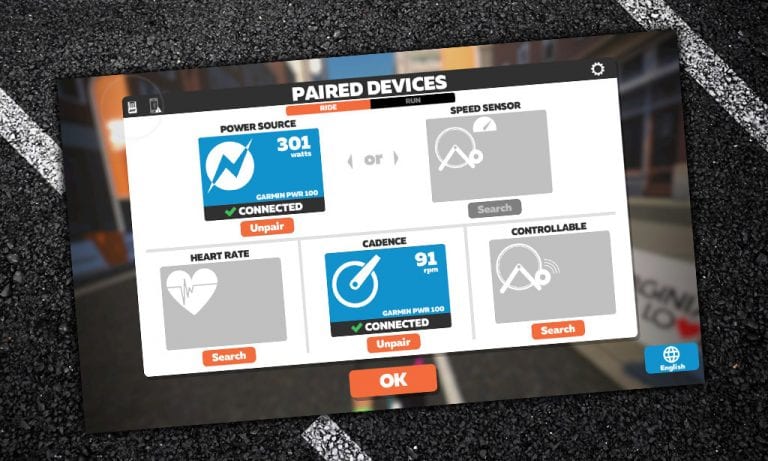
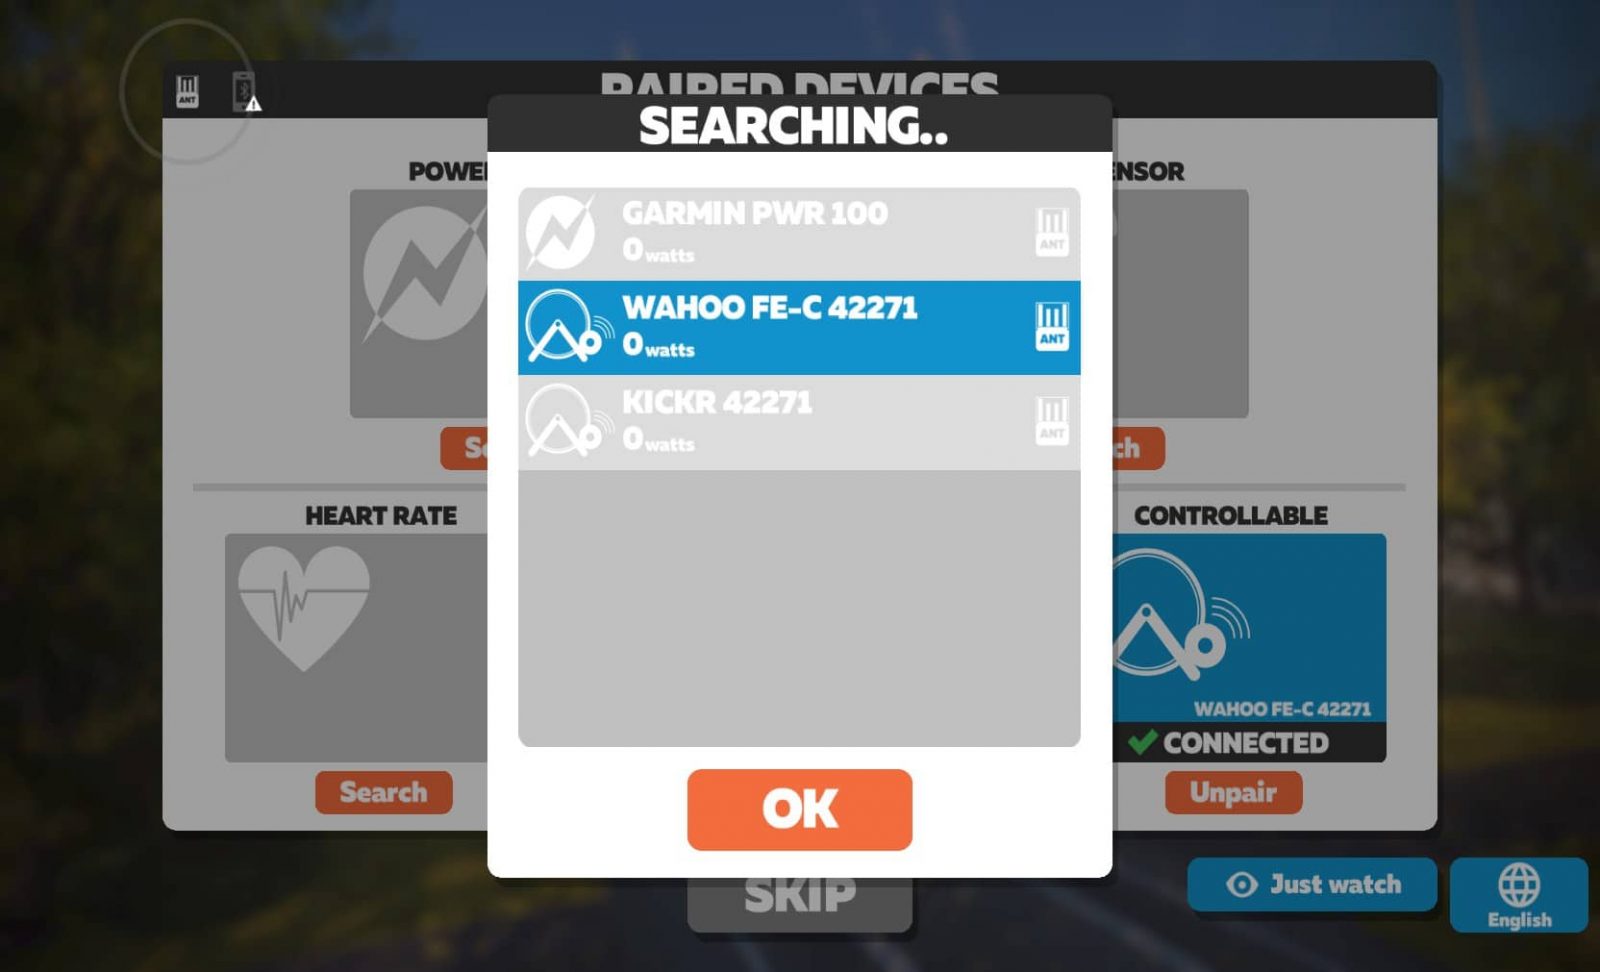
I’ve seen more than a few Zwifters who have had ANT+ dropout problems with their KICKR smart trainers because they paired the wrong profile in the “Power Source” and “Controllable” windows of the pairing screen. If you’re having KICKR power dropouts, pair the profile that has “FE-C” in the name. (The other profile does not use FE-C, and seems to have some problems. Word is Zwift may be removing it from the game in the future.)  Note: this fix may apply to other trainer models as well.

More Resources

Want a detailed look at your ANT+ drops on a Zwift ride? Check out Zwiftalizer >

Need an ANT+ stick? See our list of recommended ANT+ dongles >

Read Zwift’s official support document on ANT+ dropouts >


What about you?

Have you had ANT+ dropouts that you fixed? Share your solutions below!

The Easiest (Legal) Way to Get the Tron Bike in Zwift

The Easiest (Legal) Way to Get the Tron Bike in Zwift

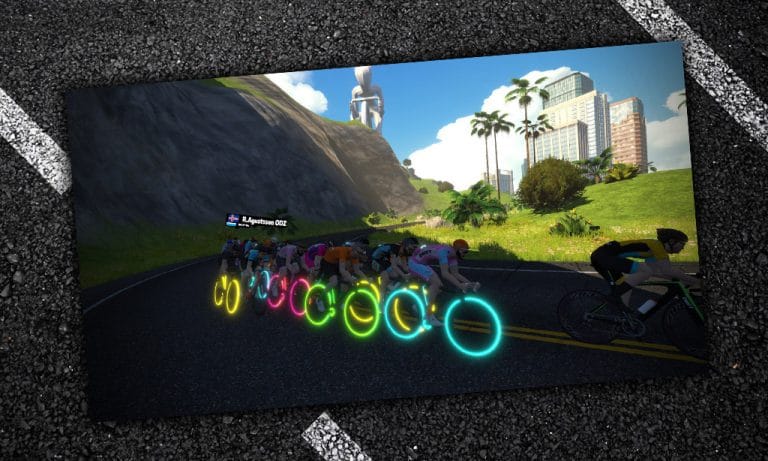
The Tron bike is the most prized ride in Zwift: it’s fast, eye-catching, and difficult to earn.

So of course, you want it in your garage (where it’s called the “Zwift Concept Z1” by the way). But you also want to make obtaining it as painless as possible. There’s no getting around the fact that you’ll have to climb 50,000 meters to earn the Tron bike, unless you’re willing to cheat. But are there ways to do that climbing more efficiently, so your watts result in as much elevation as possible?

Absolutely. Read on!

The Four Climbs

Traditionally, Zwifters have focused on four different Watopian climbs when working toward their Tron bike. Watopia is usually chosen because this map is always available, it has long/difficult climbs, and there are numerous climbs to choose from.

We did some tests with a 75kg rider up these four climbs, where the rider pedaled at 300 watts whenever pedaling was required. Here are the results.

Watopia Hilly Repeats

The Hilly KOM forward climb was Watopia’s first, and many a Tron bike has been earned on it. It’s a short effort (2-3 minutes for most), and riders simply do repeats: ride up, flip a u-turn to ride down, then flip a u-turn and do it all over again.

This climb has the advantage of being easily accessible (the road isn’t level-locked and you begin your ride nearby) as well as short–it’s not an intimidating mountain like Alpe du Zwift.

In our test, we road up the hill at 300 watts (4 w/kg), turned around at the KOM banner, got up to speed, then stopped pedaling for the descent.

Test result: this hill repeat required 242 average watts for 230 seconds to climb 51m

Epic KOM “Bowl Hack”

There’s a “bowl” section at the end of the Epic KOM where riders have tried to “cheat” a bit by using gravity and inertia to do some of the climbing.

The easiest way to find this section is to ride the forward Epic KOM, then turn around once you hit the banner at the top. You can coast down until the road turns up, then begin pedaling once your rider slows. Pedal to the top of that small rise, turn around, descend, then pedal up to the KOM banner where you turn around and do it all again. Lots of coasting, right? Seems easy!

We tried to be as efficient as possible in our tests, only pedaling on the descents to get us up to 30km/hr, then coasting the rest of the way. And when the climbs hit we would coast until we dropped below 30km/hr, then begin pedaling. All pedaling was done at 300 watts (4 w/kg).

Test result: this hill repeat required 254 average watts for 395 seconds to climb 85m

Trekking to the (Radio) Tower

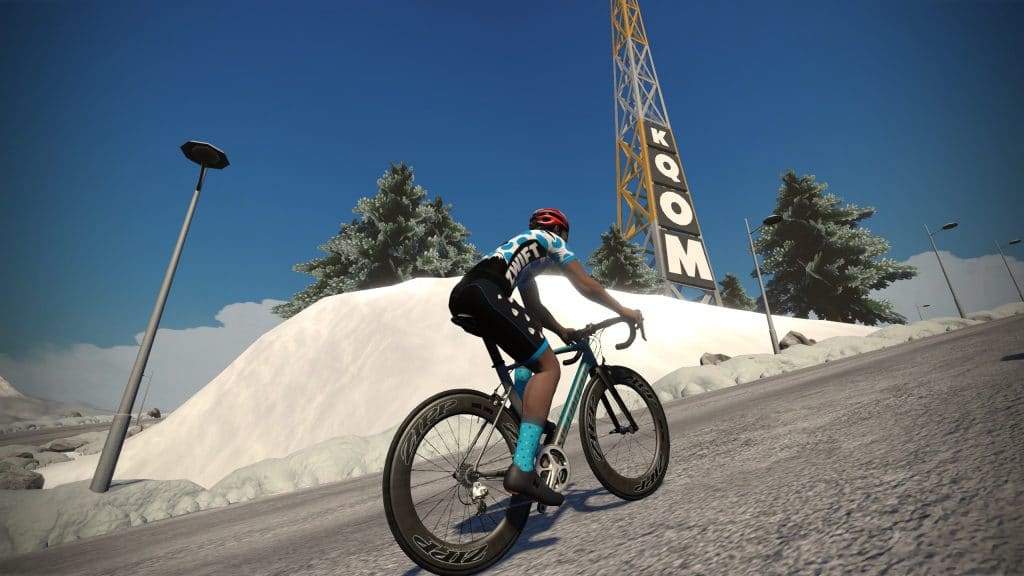
The radio tower “bonus climb” atop the Epic KOM is very steep, so it seems like a brilliant place for elevation seekers. You won’t move fast up the steep road (average gradient is 14%!) but you’ll tick those meters off quickly.

Keep in mind you have to ride up the Epic KOM first, so getting to this climb takes time and effort.

Test result: this hill repeat required 259 average watts for 480 seconds to climb 148m

Alpe du Zwift

By far the biggest climb in Watopia, Alpe du Zwift is a solid hour-plus effort for most riders. The fairly steady grade will have you racking up the elevation quickly, but keep in mind you have to ride out to the Alpe before you can climb it, which makes this approach less efficient in terms of overall time requirements.

Additionally, the Alpe is only accessible to level 6+ riders, unless you access it with others.

Test result: this hill repeat required 245 average watts for 3660 seconds to climb 1035m

Results

Looking at the results of our tests for the four climbs above, we can calculate which gets you the most meters of climbing for the least amount of work (watts). All we have to do is convert the hill repeat effort to kilojoules, then divide that by the number of meters the effort got us. Presto! This tells us how many kilojoules per meter we got–the “cost” of each climb. (Lower is better.)

Avg WattsRide Time (Seconds)KjMetersKj/Meter
Hilly24223056511.09
Epic KOM254395100851.18
Radio Tower2594801241480.84
Alpe245366089710350.87

These results show that the Radio Tower is the “easiest” way to accumulate elevation.

The Big But

But wait. Zwifters don’t ride in a laboratory! We have to get to the climb first, and that needs to be included in the calculations.

So we ran the numbers to learn which of the four climbs above is the most efficient when we talk about starting at the spawn point, riding to the climb, then doing repeats until our ride time hits ~60 minutes.

You’ll notice the increases the per meter “cost” of every climb, which shouldn’t be surprising.

Final Results (including Lead-In)

# of RepeatsKjMetersRide Time (Minutes)Kj/Meter
Hilly15862770591.12
Epic KOM51048861631.22
Radio Tower410611028631.03
Alpe111381142631.00

As you can see, climbing the Alp (using the Road to Sky route) is the most efficient way to accumulate elevation. The Radio Tower comes in 2nd, 3% less efficient. Watopia Hilly is 3rd, 12% less efficient. And the Epic KOM “Bowl Hack” is in last place at 22% less efficient.

If you extrapolate these numbers out to, say, a 90-minute ride, the rankings and % difference between each stay roughly the same.

So there you have it. Going for a 60-90 minute ride and want to get the most meters you can for your effort? Hit the Alpe! Ride the Road to Sky route 44 times and you’ll have your Tron bike.


How Zwift’s “Drops” Currency Works

Drops are Zwift’s virtual currency, introduced to the game when Zwift released the Drop Shop in February 2019. Use them to purchase virtual equipment like bike frames and wheels for your Zwift garage.

So how do Drops work? Or more specifically: how do we get them, and how can we get them faster?

First, the Basics

A Drop is roughly equal to 1 US cent. So a $10,000US bike frame will cost roughly 1,000,000 Drops, while a $1500US wheelset will cost 150,000 Drops. Zwift obviously included some other factors when setting Drop Shop prices, but 1 Drop equalling 1 cent is a good way to understand pricing.

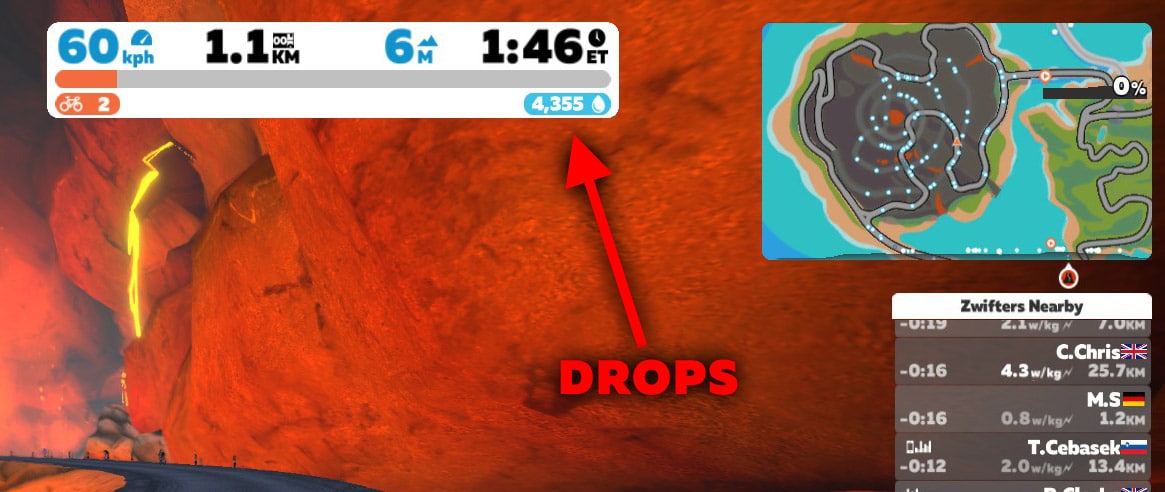
You can see Drops adding up as you ride or run, just beneath your ride timer:

Drops are based on your effort (drops of sweat, get it?) – if you aren’t working, you aren’t earning.

Take a Drops Deep Dive

The specifics of how Drops are rewarded aren’t known (Zwift isn’t sharing the formula), but we can draw some conclusions based on what we do know and what we see in tests.

We know there are six factors affecting your “Drop rate” (how quickly you receive Drops):

  • Calories burned: this is the main factor
  • Your Gender: yep, it matters!
  • Elevation: more incline=more Drops
  • Distance: more distance=more Drops
  • Receiving Ride Ons: the easiest way to boost your Drop rate
  • Drops Multiplier Game: sticking close to a Pace Partner increases your Drops rate

(Apart from steadily earning Drops as you ride around, bonus chunks of Drops are given out as a reward in various situations. For example, you will receive 50,000 Drops each time you level up. You’ll also get bonus Drops if the Alpe du Zwift prize spinner lands on a prize you already own.)

Let’s dig into each of the six “Drop rate factors” a bit more…

Calories Burned

Your rate of calorie burn can be easily calculated based on your current power output. Zwift is constantly adjusting your Drop rate based on your watts. This makes sense, of course: it’s your power levels that determine how much “work” you are actually doing. While there are other factors that figure into the overall Drop rate equation, power to your pedals is the #1 driver.

Want to learn more about how calorie burn relates to wattage? Read this post.

Your Gender

This may be controversial for some, but here it is: Zwift awards female riders 10% more Drops than male riders for the same effort.

If that seems unfair, consider this: it is well-documented that there are performance differences (in watts) between male and female cyclists. One study comparing men and women under identical race conditions found that men averaged 278 watts in the criterium stage while women averaged 205 watts. This popular power ranking table assumes differences as well. (Many other studies show similar results. Google is your friend if you’re curious.)

Without Zwift building in some gender bias, females on average simply would not be able to accumulate Drops at the same rate as males. So Zwift has added this “gender bias” as a way to equalize things a bit.

I think it’s a good move. It’s not perfect, and we all know this is a complicated issue. But it shows Zwift is thinking about gender issues and trying to be fair to everyone.

Elevation

How much does elevation factor into your Drop rate? It’s significant. Our tests up the Alpe with a male holding 300 watts for 1 minute showed he received around 770 Drops on a gradient averaging ~9%.

Hold that same power for 1 minute on flat ground and the same rider receives around 470 Drops.

So climbing increased our Drops rate by 63%. Interesting. Zwift is certainly giving people an incentive to climb.

Distance

This is an interesting factor to consider, and I believe it is another attempt by Zwift to equalize the playing field a bit, as well as encourage more climbing. Let’s look at the effect of the distance factor a bit more…

Equalizing the Playing Field

Let’s look at two riders, Tiny and Biggz. Tiny weighs 50kg, while Biggz weighs 75kg. Both riders are well-trained cyclists at the same fitness level. Both go out for an all-out hourlong race against each other. Who wins?

The answer depends on the course, of course. Just like in pro cycling, Tiny will win if the course has a lot of climbing, because he’s got the power-to-weight ratio to drop Biggz up hills. Biggz will win if it’s a flat course, because his higher watts can make Tiny suffer.

(Obviously, I’m making a lot of assumptions here, but hang with me.)

Larger riders can burn more calories than smaller riders because they’ve got more muscle working to produce power. In a purely calorie-based system, larger riders would have the advantage–big folks would earn more, and the little man would be in the virtual poorhouse.

But the little man rides farther at the same wattage as the big man, because he’s got less weight to move. Tiny may also be shorter, which would mean he would travel further than Biggz at the same wattage since height affects speed.

And this is the equalizer. If Tiny and Biggz both hold, say, 200 watts for an hour on the same course, Tiny will earn more Drops because Tiny will ride further.

In our tests, a 75kg rider starting from a dead stop then holding 300 watts for 1 minute earns around 457 Drops. A 50kg rider doing the same earns around 484 Drops–a 6% increase.

Encouraging Climbing

The distance factor also encourages climbing, as your Drop rate will increase on descents (as long as you are still working!) In our tests, a 75k rider holding 300 watts down the Alpe accumulated around 700 Drops per minute… not far off the Drop rate up the Alpe, and much higher than the Drop rate on flat ground.

Receiving Ride Ons

When you receive a Ride On, your Drop rate doubles for 15 seconds. Receive a Ride on while climbing a steep hill and you’ll really earn those Drops quickly!

This is a stellar idea from Zwift because it encourages us to encourage others. I like throwing out random Ride Ons and knowing that it’s putting some virtual money into Zwifters’ pockets.

Drops Multiplier Game

Zwift rolled out a Drops Multiplier “game” with its Robopacers feature. Basically, the longer you ride near a Robopacer, the higher your Drops multiplier increase, from 1.2x all the way up to 2.5x! This can provide a huge boost in Drops accumulation. Read all about the Drops Multiplier Game here >

How Quickly Do Drops Accumulate?

Quite quickly, really. In a recent 90 minute workout on the Road to Sky route I earned just over 58,000 Drops with an average power of 228 watts for the ride. This calculates out to an hourly Drop rate of around 39,000.

If I ride at that pace for an hour every day of the week I’ll earn ~270,000 Drops weekly, or over 14 million Drops annually.

If you receive a fair number of Ride Ons from friends, ride with Robopacers, and push hard (high watts) you can get over 60,000 Drops per hour, which would work out to 420,000 Drops weekly, or almost 22 million Drops annually!

How Do You Get The Most Drops?

Considering all these factors and our tests to date, the fastest way to get Drops is:

  • Climb. A lot.
  • Make friends who like to give Ride Ons.
  • Ride with a Robopacer to receive a Drops Multiplier
  • Go hard.

Your Thoughts

I would love to hear your questions and comments on Drops. Do they help motivate you? Does the calculation scheme seem sensible? Chime in below.

Rocker Plate Review: SBR ROCKR Pro

Rocker Plate Review: SBR ROCKR Pro

Let me begin by saying: I’m a big fan of rocker plates. At least when they’re built and set up correctly. In fact, I’m constantly surprised there aren’t many more rocker plate users on Zwift today. My assumption is the low number of rocker plate lovers results from a combination of factors:

  • High Cost: obtaining a rocker plate typically costs $400-$600US, although Saris’ MP1 runs $1200US and you can build your own for ~$100US.
  • Negative Reviews: rocker plates have received some mixed reviews, most notably from GPLama. People seem to love them or hate them.
  • Availability: until Saris announced the MP1 a couple months ago, rocker plate makers were smaller outfits with limited marketing and distribution.
  • Perceived as Unnecessary: with so many cyclists doing “just fine” without rocker plates for so many years, there is the perception that a rocker plate is an unnecessary addition to the pain cave.
  • Unable to Demo: you don’t see rocker plates in your local bike shop, so anyone ordering them is doing it without testing one first. That’s always a tougher sell.

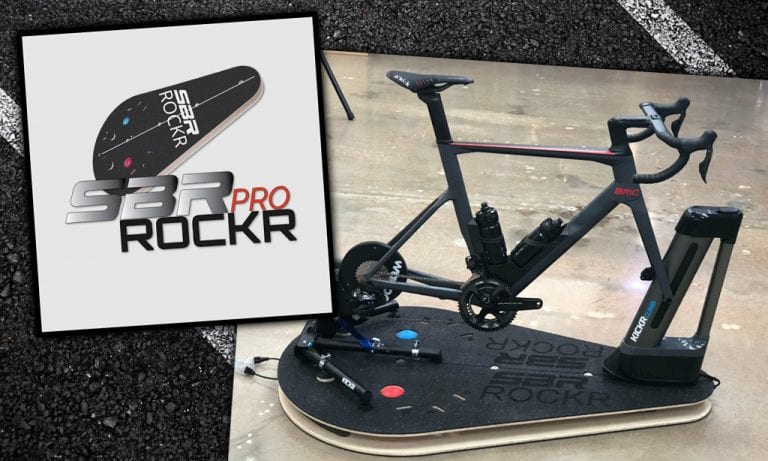
The American-made SBR ROCKR Pro rocker plate aims to answer the challenges to rocker plate adoption. And I’m going to do my part here by delivering a positive review on the test unit I’ve been riding for several weeks.

My History With Rocker Plates

I purchased my first rocker plate in August 2016. It was a CoPlate, made by a Zwifter named Co Boone in the Netherlands. As far as I know, this was the only commercially-available rocker plate on the market at the time.

After setting up the unit beneath my new Neo trainer I become an immediate fan. I love to climb out of the saddle for short bursts, and my rare outdoor race wins have happened from standing sprints. The CoPlate allowed me to do these things in a way that felt quite natural to me. It didn’t replicate outdoor motion perfectly, but it was 90% there, and that’s a big upgrade from a rigid setup.

In addition to letting me ride out of the saddle naturally, the rocker plate gave me a small amount of movement while riding in a seated position, which made everything more comfortable. I could also tell it was much less stressful on my bike’s frame, as the plate suspension took the load instead of my frame twisting whenever I started hammering.

Monica (my wife) loved the CoPlate as well, and immediately noticed a reduction in back and neck pain thanks to the increased movement it allowed. Her chiropractor was impressed.

Soon enough I purchased a KICKR and second rocker plate for myself. Our rocker plates and trainers have been next to each other in the pain cave ever since. I’ve put over 15,000 miles on mine!

Then I got a Wahoo KICKR Climb, and realized it didn’t work well at all with a rocker plate that only rocks the rear of your bike. Everything was way too wobbly. So I began looking for a “full length” rocker plate solution, and that’s how I found the SBR ROCKR Pro.

I tracked down Chip Self (Zwifter and SBR ROCKR creator) on Facebook, we chatted a bit, and soon enough a new SBR ROCKR had arrived from Chesterfield, MO. It was time to put it through its paces! Here’s my full review.

Setting It Up

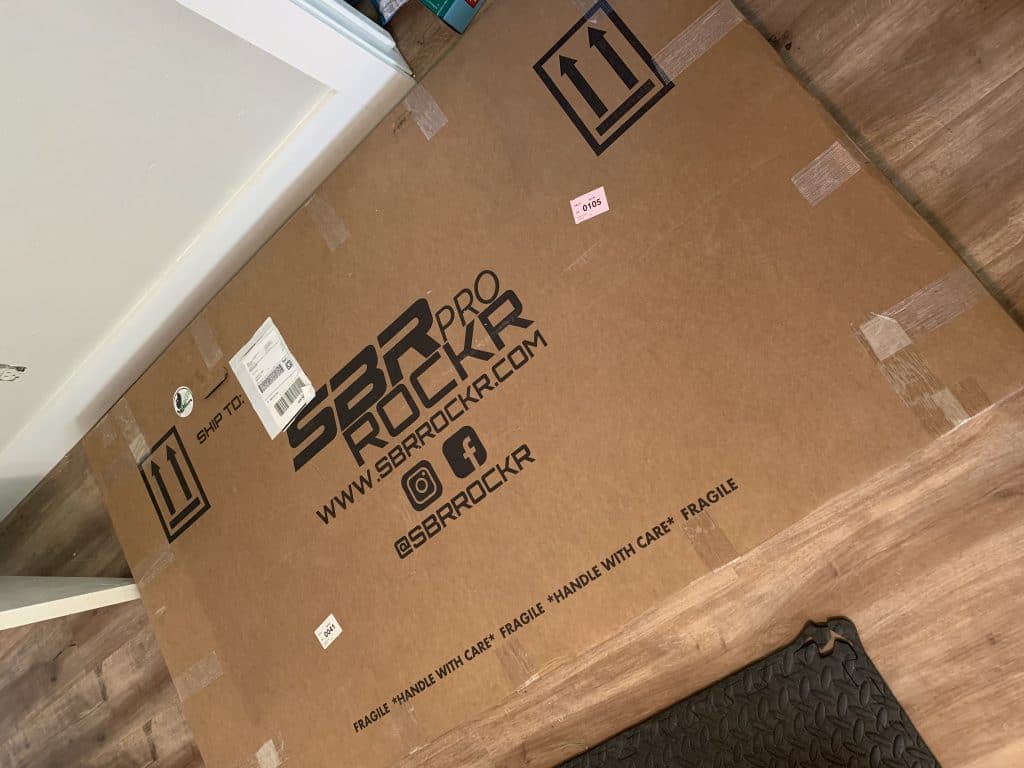
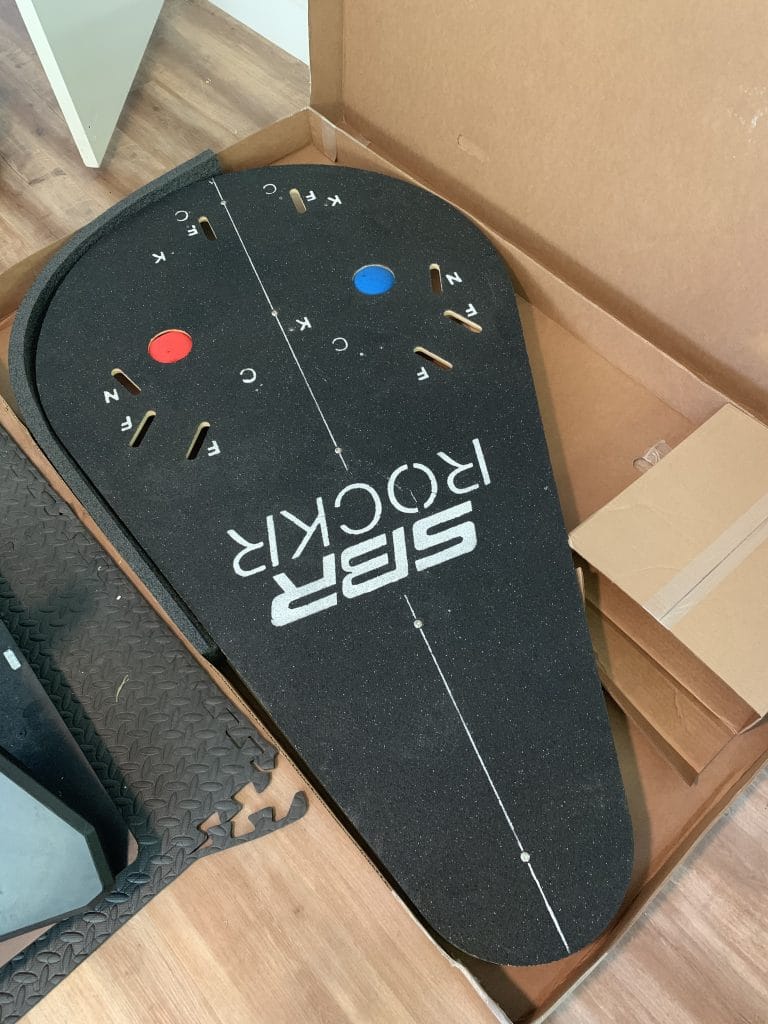
My ROCKR arrived in a nicely-labeled box, neatly packaged and full assembled. I was pleasantly surprised by the weight–being a full-length unit, I assumed it would be much heavier than my CoPlate. But it only weighs 47lbs.

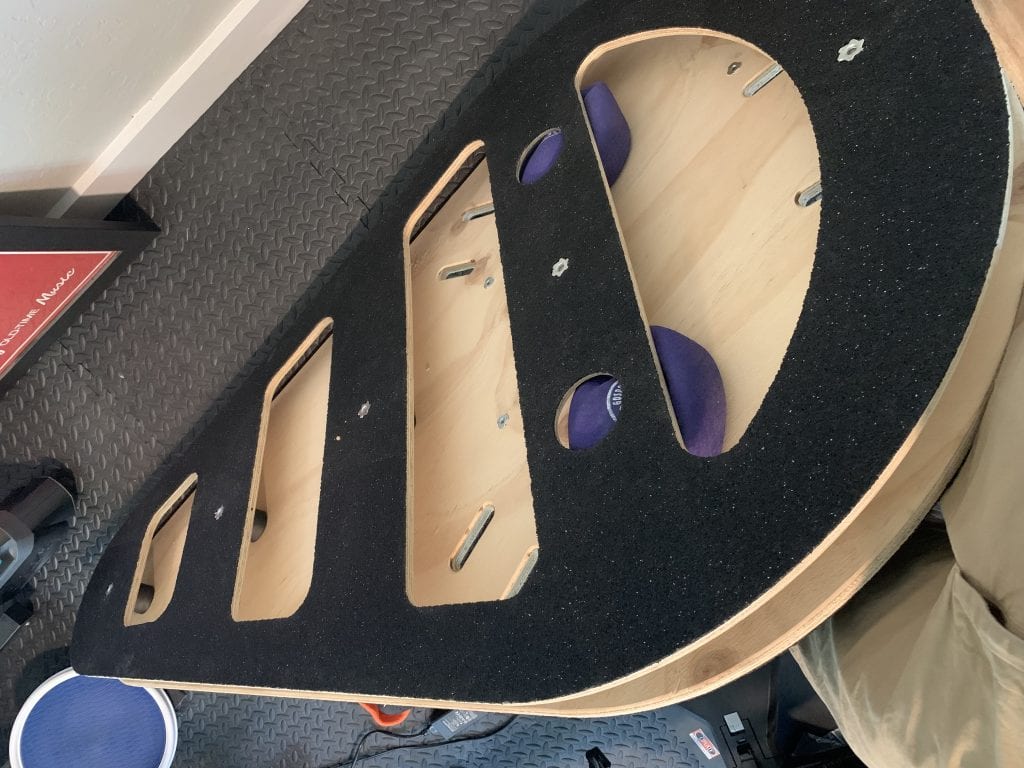
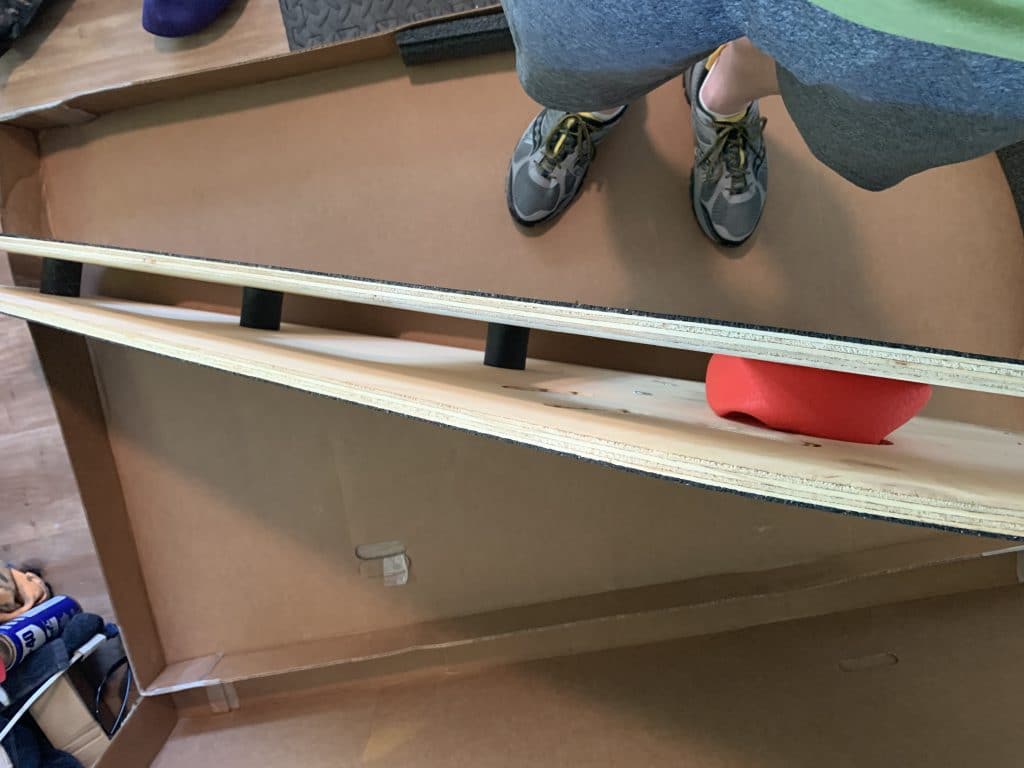
After laying the unit on my pain cave floor I inserted the suspension balls (just a basic rubber kickball) into the cutouts and inflated them to what I thought was a good starting pressure. (You’ll need a pump and needle to do this.)

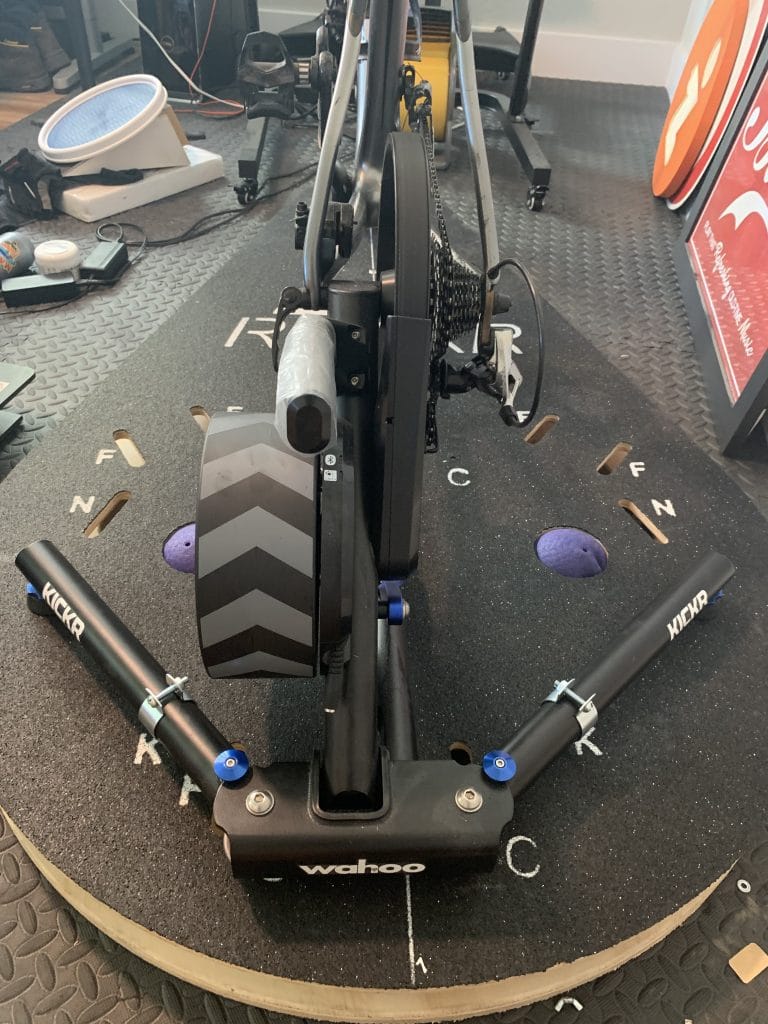
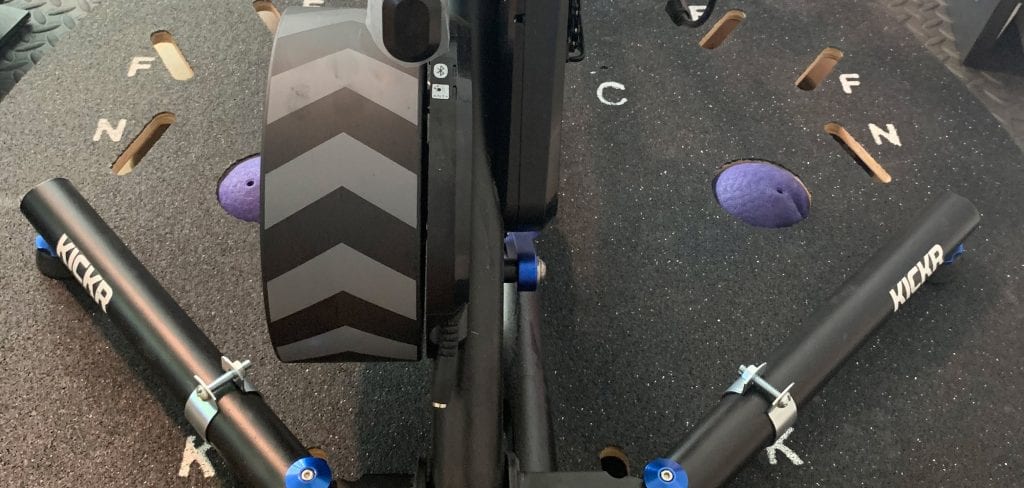
Setting up my KICKR on the unit was quite easy, since the ROCKR ships with cutouts and attachment hardware for the KICKR (as well as Tacx Neo/Flux, CycleOps Hammer, Elite Drivo/Direto, and Wahoo KICKR Snap/Core). How-to videos are available online if you have any questions, but all I needed was 5 minutes and a large screwdriver to get the job done.

A Note About Trainer Compatibility:

The ROCKR should work for every trainer on the market, although it may not have labeled attachment points or included hardware to make your installation simple and easy. A drill, brackets, and some nuts and bolts should work to get just about any trainer firmly attached to the ROCKR.

Key Features

Many of the features designed by Chip for the ROCKR have been copied by other rocker plate makers–so you know they’re good. Here are some of the noteworthy features in the ROCKR’s construction:

  • Adjustable suspension: as you’ll see below, having the ability to easily modify how “loosely” the plate rocks side to side should be a required feature for rocker plates. Rider weights and preferences vary too much for a one-suspension-fits-all solution.
  • Pre-cut trainer mounts: a variety of mounting locations, nicely labeled, make it easy to mount most popular trainers on the plate.
  • 5 elastomers: the 5 central elostomer pivots keep the ROCKR steady as it moves side to side, while allowing for a bit of for-aft movement.
  • Rubber top and bottom coat: according to SBR, adding this coating reduces vibration sound by 5.5 decibels. It also provides for a more grippy surface, which is nice when you’re wearing cycling shoes.
  • Centerline: it’s the little things. Having your bike centered on the plate is important for a proper feel, and SBR has painted a center line to make this easy.
  • Cutouts in base plate: cyclists love a little weight savings! Large cutouts in the bottom plywood plate save significant weight without sacrificing sturdiness.

Dialing It In

With my trainer firmly attached and the suspension inflated, I was ready to rock my first test ride (or ride my first test rock). Booted up Zwift, hopped on, and away we went down Fuego Flats.

I immediately noticed two setup tweaks that needed to be made.

Adjustment #1: Deflating the Suspension Balls

Having used a rocker plate for years, I prefer a very “loose” setup. In talking to rocker plate users, I find this to be a common theme: we start off with a setup that is harder to rock, but progressively loosen it up as we get used to the feeling.

I needed to let a LOT of air out of the suspension so my ROCKR could move side to side in a full range of motion. For me, full range of motion means my handlebars can move side to side ~10” when I’m out of the saddle putting in a decent effort.

Once I deflated the suspension to the point where the rubber balls were quite flat, I had the freedom of movement I wanted, with the suspension still gently bringing me back to center.

Adjustment #2: Balancing the KICKR

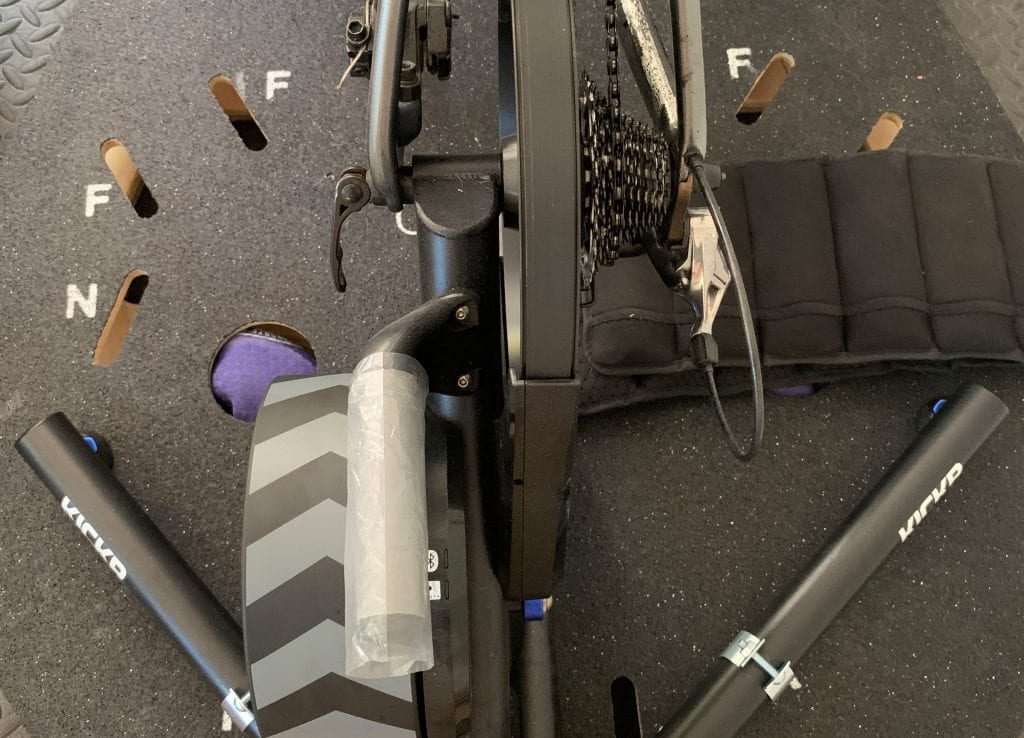
The KICKR (and many other smart trainers) is not evenly weighted side to side. Its heavy 16-pound flywheel hangs off the left side, so if you center the KICKR on a rocker plate, your bike will be leaning left.

One way to combat this is to inflate the left suspension more than the right–but I don’t like the way this feels, since your rocking movement is more restricted to the left than the right.

The better solution, and the one I used, is to place a counterweight on the right side of the ROCKR. I started with a 15-pound kettlebell, but settled on a set of ankle weights I had laying around (why did I buy these, anyway?). They sit securely on the platform and were easily shifted around to find the optimal location for a balanced feel.

Ride Feel

Once I got the suspension and counterweight dialed in, my ROCKR felt great. Very similar to the CoPlate, in fact, but even more “put together” since my front wheel moves with the rest of the bike.

The base is stable, rocking is silent and smooth, and like my CoPlate I even have a bit of for-aft movement (SBR says the ROCKR allows for 15mm of for-aft movement).

Here’s a quick demo video I shot so you can see the ROCKR in action:

Better still, the KICKR Climb fits on the ROCKR platform nicely. I’m still testing the Climb, so it’s not in the video, but suffice it to say it works on the ROCKR like it works on a rigid setup.

(One thing that doesn’t fit nicely is my makeshift steering turntable. The ROCKR would need to be 12″ longer for this to fit!)

Pricing and Availability

The SBR ROCKR Pro costs $499US, with US shipping running $100 for web orders.

If you don’t need a full-length rocker plate, the “trainer only” SBR ROCKR Pod Pro costs only $374.99, and web order shipping is $50.

International shipping pricing is available on request. Call SBR at (314) 305-0078 for a shipping quote and place your order over the phone.

At the time of this article, both SBR ROCKR designs were in stock.

Your Feedback

Have you tried an SBR ROCKR Pro? How was your experience? Perhaps you’re considering a rocker plate, but have questions. Share your comments and questions below!


All About Zwift’s Hidden “Extra Credit” Achievement Badges

All About Zwift’s Hidden “Extra Credit” Achievement Badges

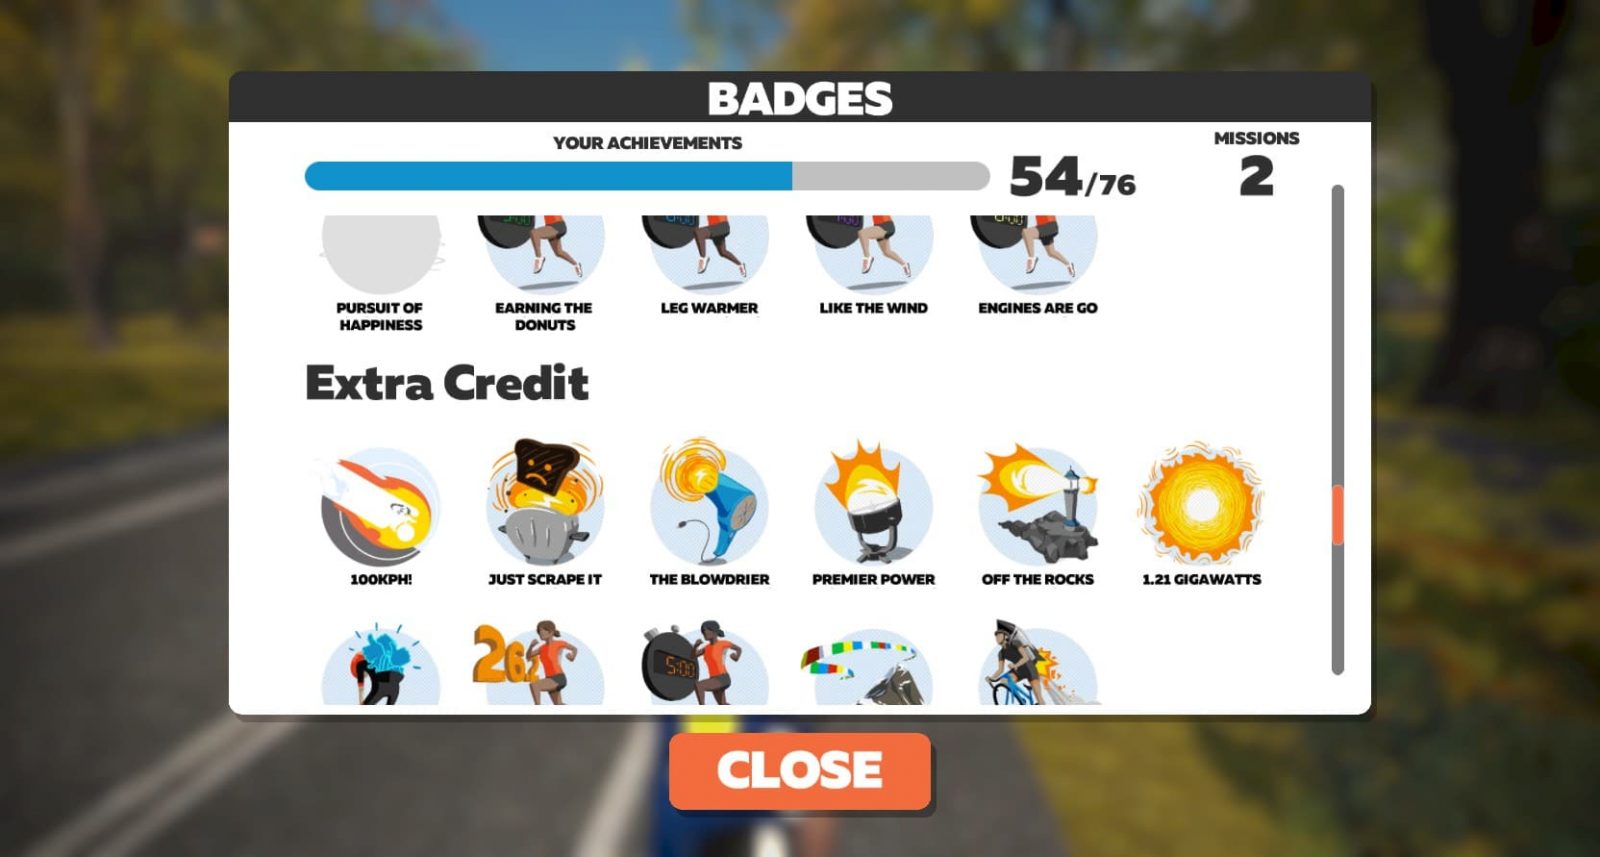
If you click Menu>Badges in game, you’ll find a list of achievement badges you can (or have) earned, including the newly-added Route Achievements.

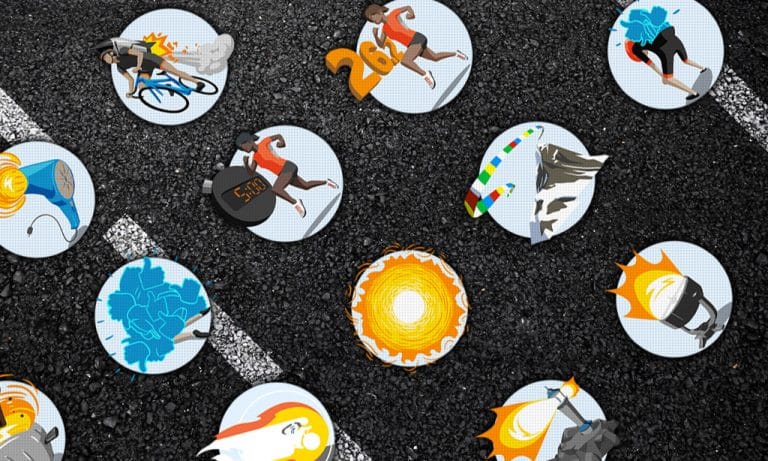
But did you know there is an entire set of “Extra Credit” achievements which are not visible on the list? That’s right, there are additional achievements which are only visible after you do them.

You might ask, “How do I chase the achievement if I don’t know it exists?” And we would answer, “… that’s a good question.”

So here’s the complete list!

When you receive one of these badges, they will show up in the “Extra Credit” section of your badges page:

How Close Are You?

This is the full list. How close are you to completing it? Comment below!


A Power Meter Deep Dive with Special Guest 4iiii’s Scott Cooper – Ask a Cycling Coach 229

A Power Meter Deep Dive with Special Guest 4iiii’s Scott Cooper – Ask a Cycling Coach 229

While many Zwifters use their smart trainers to detect power, many others own power meters which they use outdoors and on Zwift.

TrainerRoad’s lastest podcast episode is a good one for those interested in learning how these magical power meters really work. Featuring Scott Cooper, Product Manager at 4iiii, the short podcast focuses on the following:

  • What is inside a power meter?
  • How are power meters calibrated in the factory?
  • The difference between zero offset and calibration
  • Why is it hard to install a power meter on carbon?
  • How does temperature affect the zero offset of a power meter?
  • The future of cycling power meters

How To Access Level-Locked Portions of Watopia

Certain portions of Watopia are level-locked, meaning you must be at a certain level as a Zwift rider in order to access them. (Learn about levels, XP, and unlocks here.)

Level-Locked Routes/Areas

The Mayan Jungle is locked at level 5+, and Alpe du Zwift is locked at level 6+.

Because these areas are level-locked, routes which access these areas are also level-locked:

Note: these level locks all make sense except for Dust in the Wind, which should be locked at 5+ since it accesses the Jungle but not the Alpe.

If you don’t meet the level requirement, you will be unable to select the routes above from the route picker menu. But there are still ways to ride these routes even if you don’t meet the level requirement!
Accessing a Level-Locked Route

  • Group Event: you can join a group event even if it is held on a level-locked route. Pro tip: if you want to filter events by route, use the ZwiftHacks events tool and enter the route name in the “Search Route Name” field. For example, here are all upcoming events on the Jungle Circuit route.
  • “Ride With”: at the ride startup screen, you can select a rider who is on a restricted portion of the course and click “Ride With” to be placed in the game with that rider. This even works if the rider hasn’t yet entered the restricted portion of the course!
  • Meetup: a rider with access to the restricted route can create a Meetup to ride that route, and invite you to it. You have to be a follower of the Meetup organizer in order for this to happen. Learn more about Meetups >

A note about Meetups: there seems to be a bug in Meetups for certain routes. In our tests, if we chose “Road to Sky” or “Jungle Circuit” as the routes, our riders were placed at the correct spawn points but facing the wrong direction, taking us away from the restricted portions we wanted to test. And there are no u-turns in Meetups!

Some routes seem to work, though: Tour of Fire and Ice started us in the right direction. It just takes longer to get to the restricted Jungle/Alpe from there.

The Best Solution: Level Up!

Of course, the best solution is to just level up. Based on our calculations, it should take less than 8 hours of riding to reach level 6. So stop reading, and start riding!

How to Change Bikes Quickly in Zwift – Bike Swap Hack

With Zwift’s recent-released mountain bike rolling faster over dirt than all the road bikes in game, racers hitting the Jungle Circuit or Road to Ruins routes would be wise to plan a smart bike-choice strategy beforehand.

The mountain bike is significantly slower on tarmac in comparison to road bikes, but the reverse is true on dirt. That leaves us with a few potentially winning strategies:

  1. Ride a road bike, going hard at the start to drop anyone on a mountain bike so you have a significant lead going into the Jungle.
  2. Ride a mountain bike, planning to close any gaps to the road bike riders once things get dirty.
  3. Swap from a road to mountain bike when you hit the dirt, hoping that the time lost in making the bike switch is made up by increased bike speed.

A Brief History of Bike Switching in Zwift

Bike switching is a strategy which appeared in the early “Wild West” days of Zwift racing. Riders might switch to a climbing bike at the base of a long mountain, or a heavy, aero TT bike before a long descent.

Zwifters even began using macros to make the switches instantaneous and simple. Macros allow you to “record” a set of actions (such as mouse movements and clicks) on your computer, then “play” those actions easily. So instead of manually clicking through menus to change bikes, savvy Zwifters could hit a macro shortcut and instantly be on a new bike without ever slowing down.

Zwift put a stop to this eventually by requiring your avatar to stop moving before switching a bike frame or wheelset. (Fair play, since this is how things work in the real world.) This change effectively ended bike switching in Zwift races, because very few race situations existed in which the benefit of a bike swap was worth the time penalty.

How to Switch Quickly

Today, a bike switch can easily be done in 12-15 seconds if you’re a PC, Mac, or tablet user. It involves these simple steps:

  • Stop pedaling
  • Hit “A” to bring up the pairing screen, which also applies the brakes on your rider
  • As your rider slows to a stop, hit “OK” to close the pairing screen, and hit “T” to bring up your garage
  • Select your bike, then start pedaling
  • Hit OK to return to the game

If you aren’t a computer, you can perform similar steps by clicking “Menu” first, then accessing the pairing screen and garage from the menu. It’s a bit slower, but not much.

Here’s a demonstration video showing what this looks like. We recorded two riders chugging along at 300 watts (4 w/kg), so you can see what sort of time gap may be created if you are in a race pack and decide to switch bikes. It appears that time gap will be approximately 20 seconds, but this will vary depending on the speeds everyone is traveling when the switch happens. (Slower is better!)

Note: while a macro program could be used to make this process a bit faster, we did the switch above manually.

Have You Tried It?

Have you tried the bike swap strategy yet in a Zwift race or group ride? How did it work out?

Post World Championship Catch Up (Zwift PowerUp Cycling Podcast #37)

0

Post World Championship Catch Up (Zwift PowerUp Cycling Podcast #37)

As business returns to normal after the UCI Road World Championships in Yorkshire, Matt Rowe, Greg Henderson, and Kristin Armstrong go over a crazy week of podcasting and cycling action.

Just because the big week is over doesn’t mean this episode is any less packed! We chat about the juniors who truly stood out as well as how Mathieu van der Poel could have learned from Greg’s own experiences with bonking (detailed in the Alex Dowsett episode).

Also: Greg gets fired up about one particularly controversial moment in Yorkshire, and Kristin discusses having to follow Chloe Dygert’s explosive TT win from the other side of the world.

About the Podcast

The Zwift PowerUp Cycling Podcast features host Matt Rowe (Rowe & King), with regular co-hosts Greg Henderson (Coach Hendy) and Kev Poulton (Powerhouse Cycling). The hosts share tips on how road races can get faster in-game and outdoors.


Kona Recap Special, Part 2 (Zwift PowerUp Tri Podcast)

0

Kona Recap Special, Part 2 (Zwift PowerUp Tri Podcast)

Kona is done and dusted, so Jordan, Matt, and Tim get back together to go over what was an epic race. The race had some big surprises throughout the day, and the titles ended up with the two Germans, Jan Frodeno and Anne Haug.

We sit down to see whose predictions did the best, and we also talk to two Zwift Academy athletes about their successful Kona experiences.

About the Podcast:

The Zwift PowerUp Tri Podcast is hosted by former pro triathletes Matt Lieto and Jordan Rapp, lending their in-depth knowledge of the multisport to the Zwift Tri audience.