Using Today’s Plan with Zwift Academy
There’s a great benefit when you sign up for the 2018 Zwift Academy: a free premium account at Today’s Plan during the course of the Academy! Your premium account with Today’s Plan will open just before the Academy begins. This is a great perk. It will also power a special feature this year: being able to see and compare your efforts with the top fifty results in the Academy.
Tools for Analysis
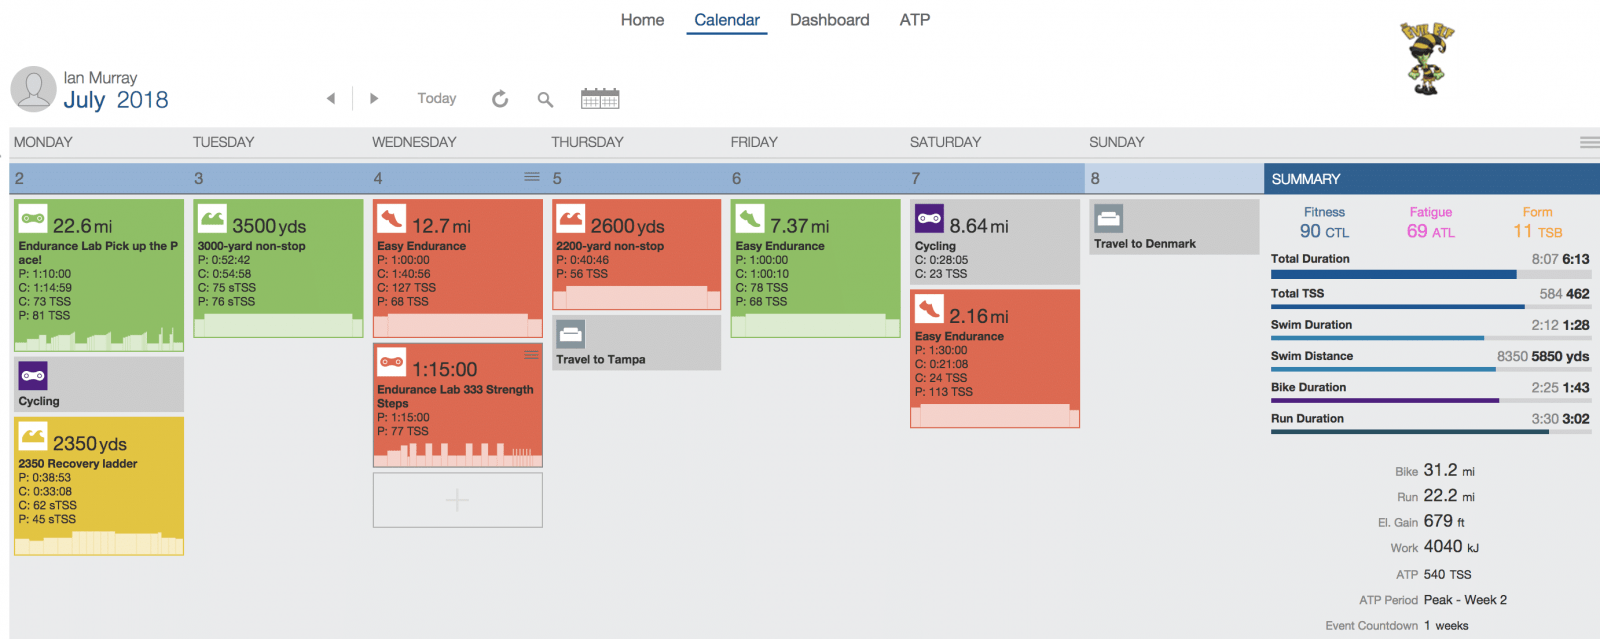
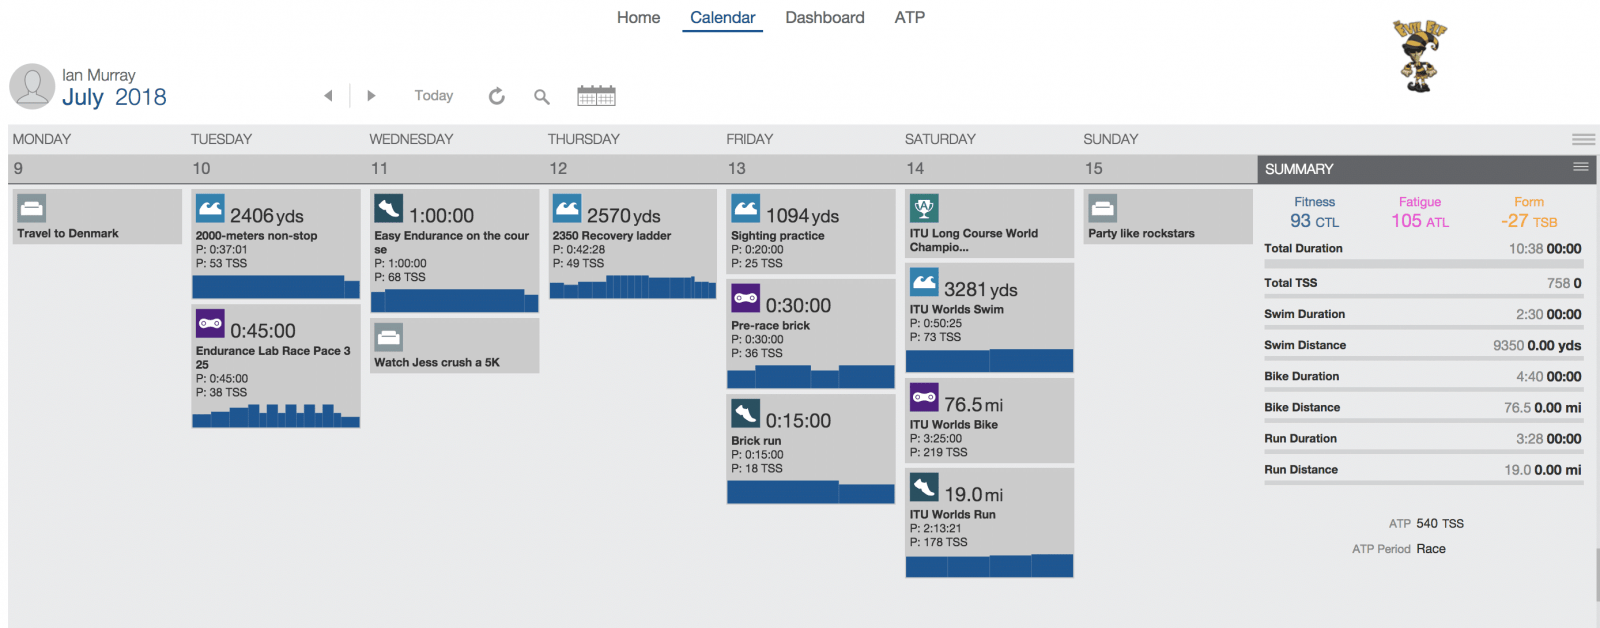
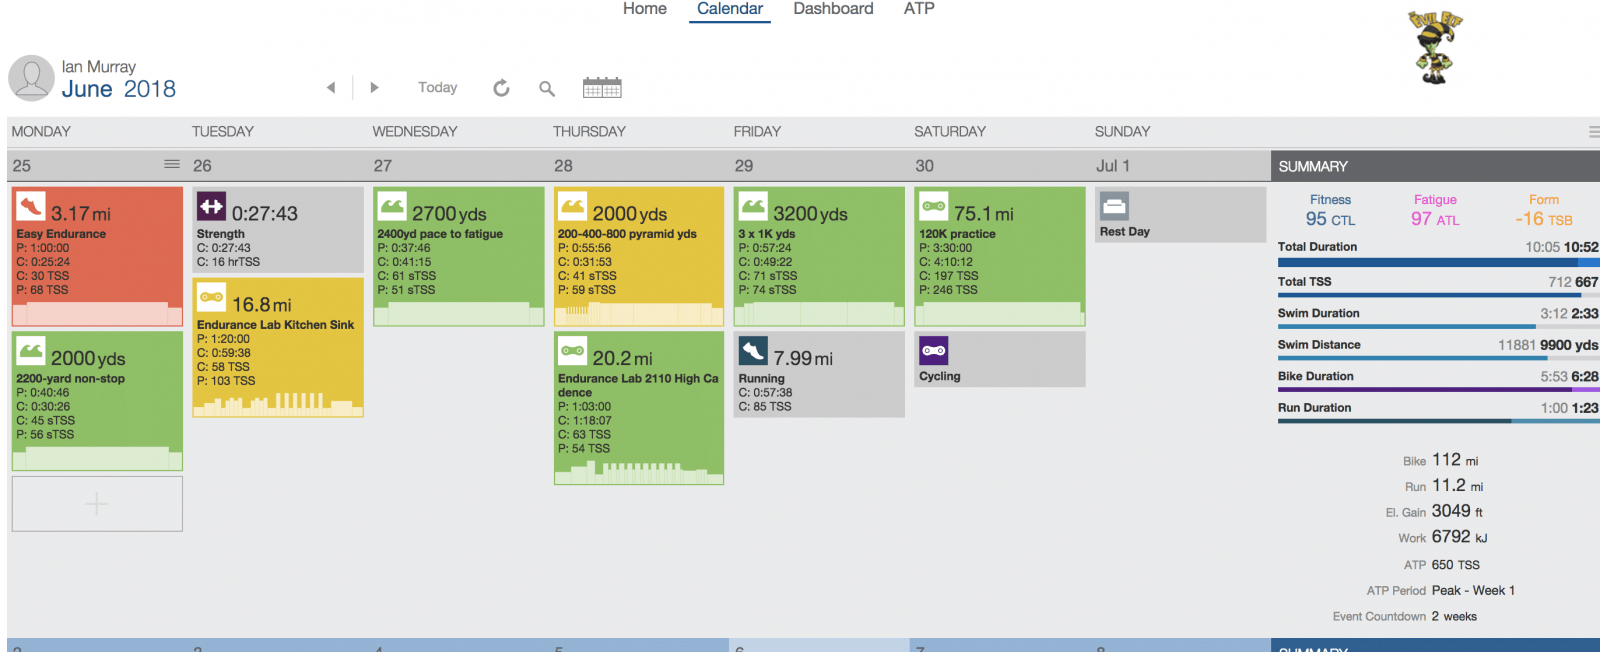
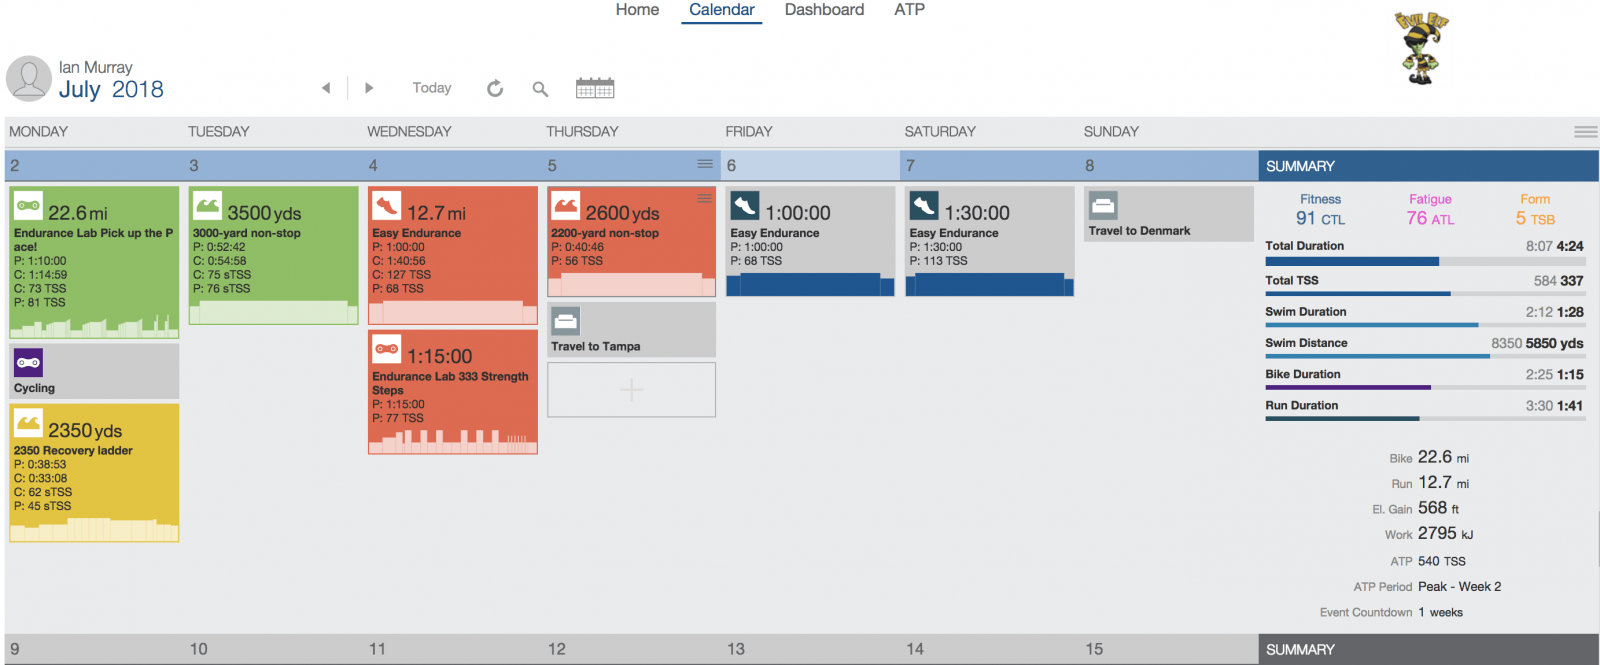
Here is Today’s Plan page for those new to the Zwift Academy and Today’s Plan. There are a lot of unique analysis tools you will have available. You’ll want to familiarize yourself with them, especially if you are serious about the Academy.
When you open your account, you will need to fill in your information of course. You will be able to construct your dashboard. One thing I love is the PI (Performance Index). It is a graph that helps you see your strengths and weaknesses. Here is a video explaining how to use the PI:
My graph shows I do well in the long sprint zone but not in peak power or a short sprints. The zones are Peak Power, Sprint, Long Sprint, Lactate Tolerance, Maximum Aerobic Power, Sustained Aerobic Power, Short Endurance, and finally Long Endurance. It can be quite a challenge to target one of these zones as a max effort. At times you should work on your weaknesses and at times, on your strengths.
Adding Your Activities to Today’s Plan
There are helpful articles on the Today’s Plan blog. I suggest you read how you can understand your activities. Here’s the page: Today’s Plan Blog – Activity Graph. You will also want to see your power curve and best efforts on your dashboard. It will list your best efforts from 3 seconds to 3 hours. To start with your background, you can do one of two things:
- Start a basic account with Today’s Plan, link your account to Zwift, and automatically upload your activities during July.
- Select key rides, races, and workouts and manually upload them to your Today’s Plan account in August. Here’s some help from Today’s Plan: How to import and upload your data.
If you entered the 2017 Academy and opened your account last year, all your Zwift activities will have continued to upload. You can see your activities in the basic account. However, if you chose not to continue premium membership last year, you won’t be able to see the full analysis of your activities with the exception of your heart analysis. When the Zwift Premium access begins in August, your information will be up to date.
It’s Time for an FTP Test
The Academy will undoubtedly begin with an updated FTP test workout. I would recommend doing a twenty minute test in July. Many trainers recommend doing some 5 second sprint efforts, a 20 second, a one minute, and a five minute effort to help in evaluating your abilities. This will start your Academy with a good data background. A twenty minute test in July will also help you successfully pace your August FTP test. Here is a view of the 2017 test: Zwift Academy 2017 FTP Test. Note: To get your first Zwift FTP number, you only need the 20 minute segment. First timers might want to skip the three 30 second sprints as they may take too much of your energy unless you are able to do that kind of a warm up.
Training Plans
Today’s Plan premium access includes training plans. You might not have time to do an entire plan during the schedule of Academy efforts. However, it will be well worth your time to select the type of training you want to do and allow them to show on your calendar. You can view them, watch a brief video introduction provided by Today’s Plan, and download them onto your computer. It is pretty easy to drag the workout into your Zwift ‘workouts’ file. They will stay in the ‘Custom Workout’ section of Zwift, ready any time you are.
I found the support from Today’s Plan to be very helpful last year. It was my first Academy and I needed a little help here and there. I went to my.zwift.com, downloaded a few previous rides, and uploaded them to Today’s Plan with some guidance from one of their videos. Go to your My Zwift Activities and click ‘download’ to retrieve the file you want. If you do email their support crew, please remember, Today’s Plan support team is located in Australia. They may be going to bed when you are sending a question to their support team.
It’s going to be a great summer (or winter) next month.