Rocker Plates: It’s Official, They’re a Phenomenon!
If there’s one thing at which the Zwift Community excels, it’s invention. From hacked reactive lighting systems to 101 uses for a music stand, Zwifters have identified a problem, found a fix and posted a solution from day one in beta.
But the Rocker Plate Revolution is an order of magnitude beyond typical Zwift hacks. The extent to which the DIY-ers have solved the comfort issue of long rides indoors on a bike fixed in a static trainer is mind-boggling.
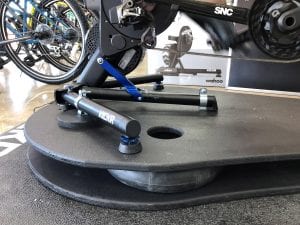
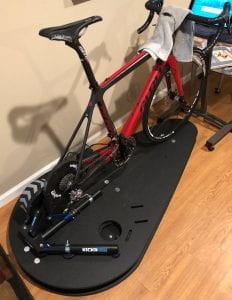
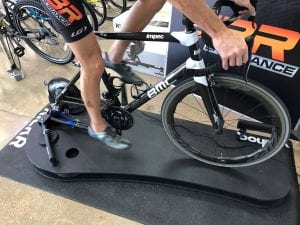
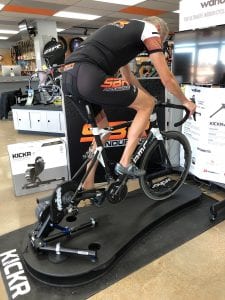
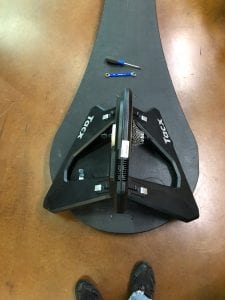
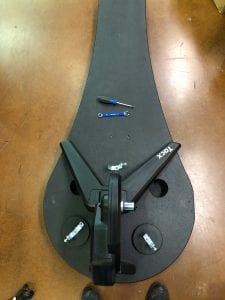
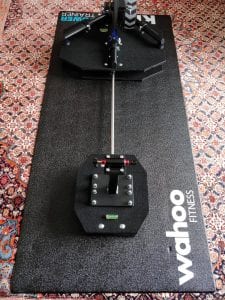
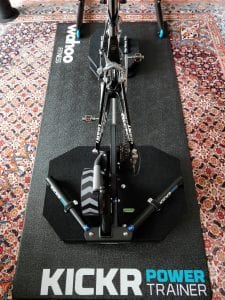
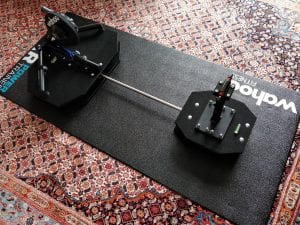
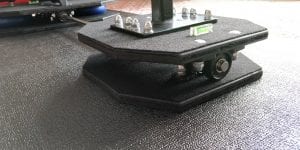
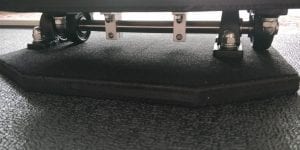
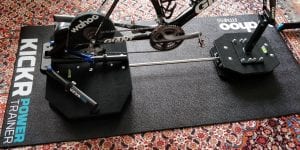
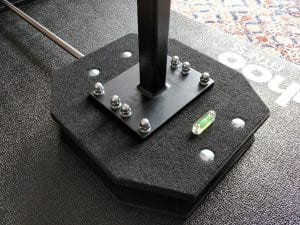
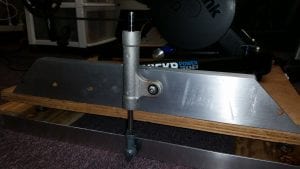
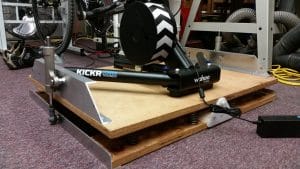
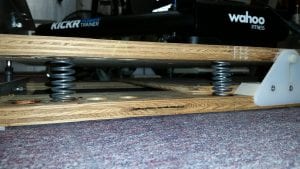
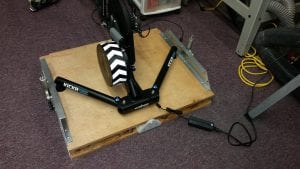
Here’s a photo gallery showcasing some of the latest rocker plate designs:
In essence, a Rocker Plate is a device which allows the trainer and bike to tilt from side to side, more accurately simulating the real life motion of riding a bike. Proponents say it increases comfort and makes long rides more forgiving on those sensitive parts of the anatomy that may be otherwise get a bit of a hard time.
In November, Zwift Insider published rocker plate evangelist Chad McNeese’s “Rockit Launcher” plans. Then in December, the Zwiftcast charted some of the early Rocker Plate solutions. Many of these used tennis balls as the recoil device, which facilitates the movement.
But now things have moved on. I recently decided it was time to return for a second look because of the increasing sophistication of the designs. I was absolutely knocked out by what people were doing!
Not only have designs and build qualities moved on significantly, one Zwifter has even entered commercial production with a CNC machine cutting out the deck of a rocker plate that designer Chip Self has christened the Rockr.
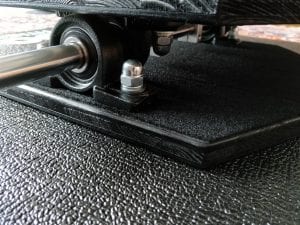
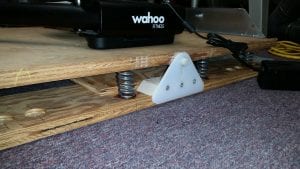
Perhaps the biggest design development I’ve seen has been the use of what people call cushion bearing blocks and a shaft to allow the side to side movement. These are usually combined with air filled bladders, inflated to various pressures, to make the recoil mechanism work.
The Rocker Plate movement has been so fast moving that it can be tricky for Zwifters to keep up, so here is a video roundup of the latest developments.
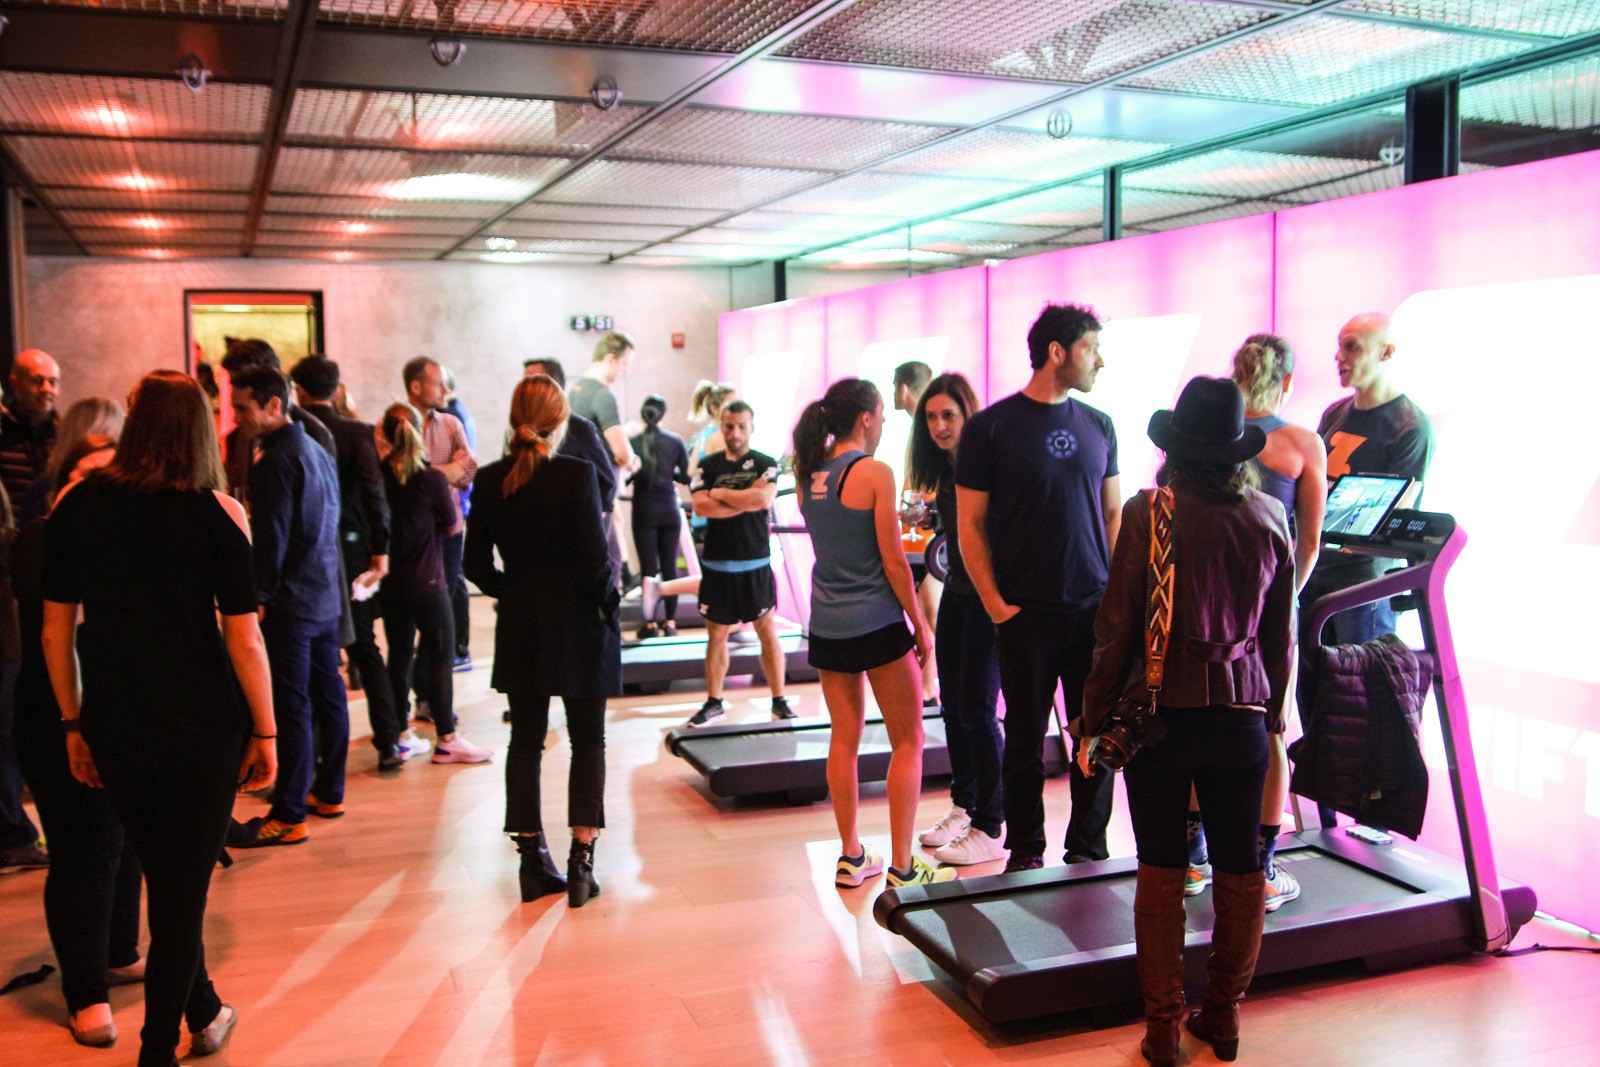
Zwift announced Zwift Run to the world at an event in New York City last Thursday. Held at “fitness incubator” PROJECT in SoHo, the event was designed to showcase Zwift Run to fitness media and expose fitness equipment partners to the Zwift community. Here’s how the night unfolded from my perspective…
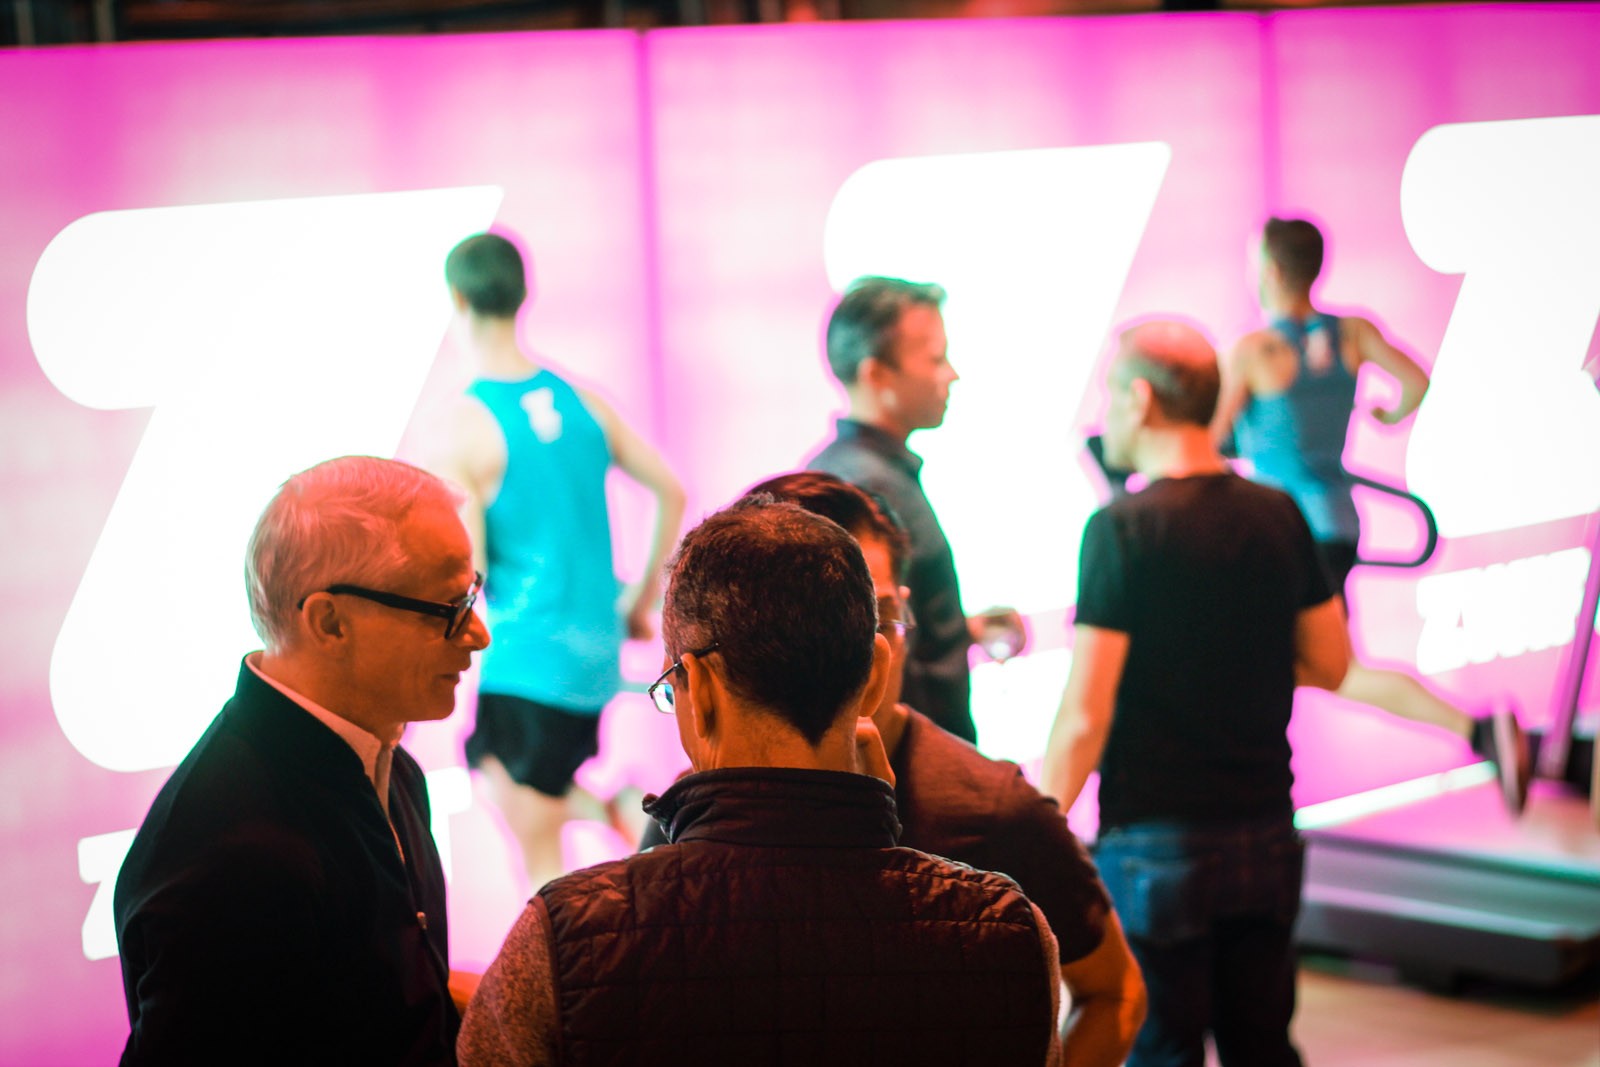
The first thing I noticed after walking through the door was the giant pink Zwift lightbox. Pink: it’s the new orange. But not really. Zwift’s marketing team is using the color to differentiate Zwift Run from Zwift Ride, though, and you’ll see this color used in all Zwift Run materials.
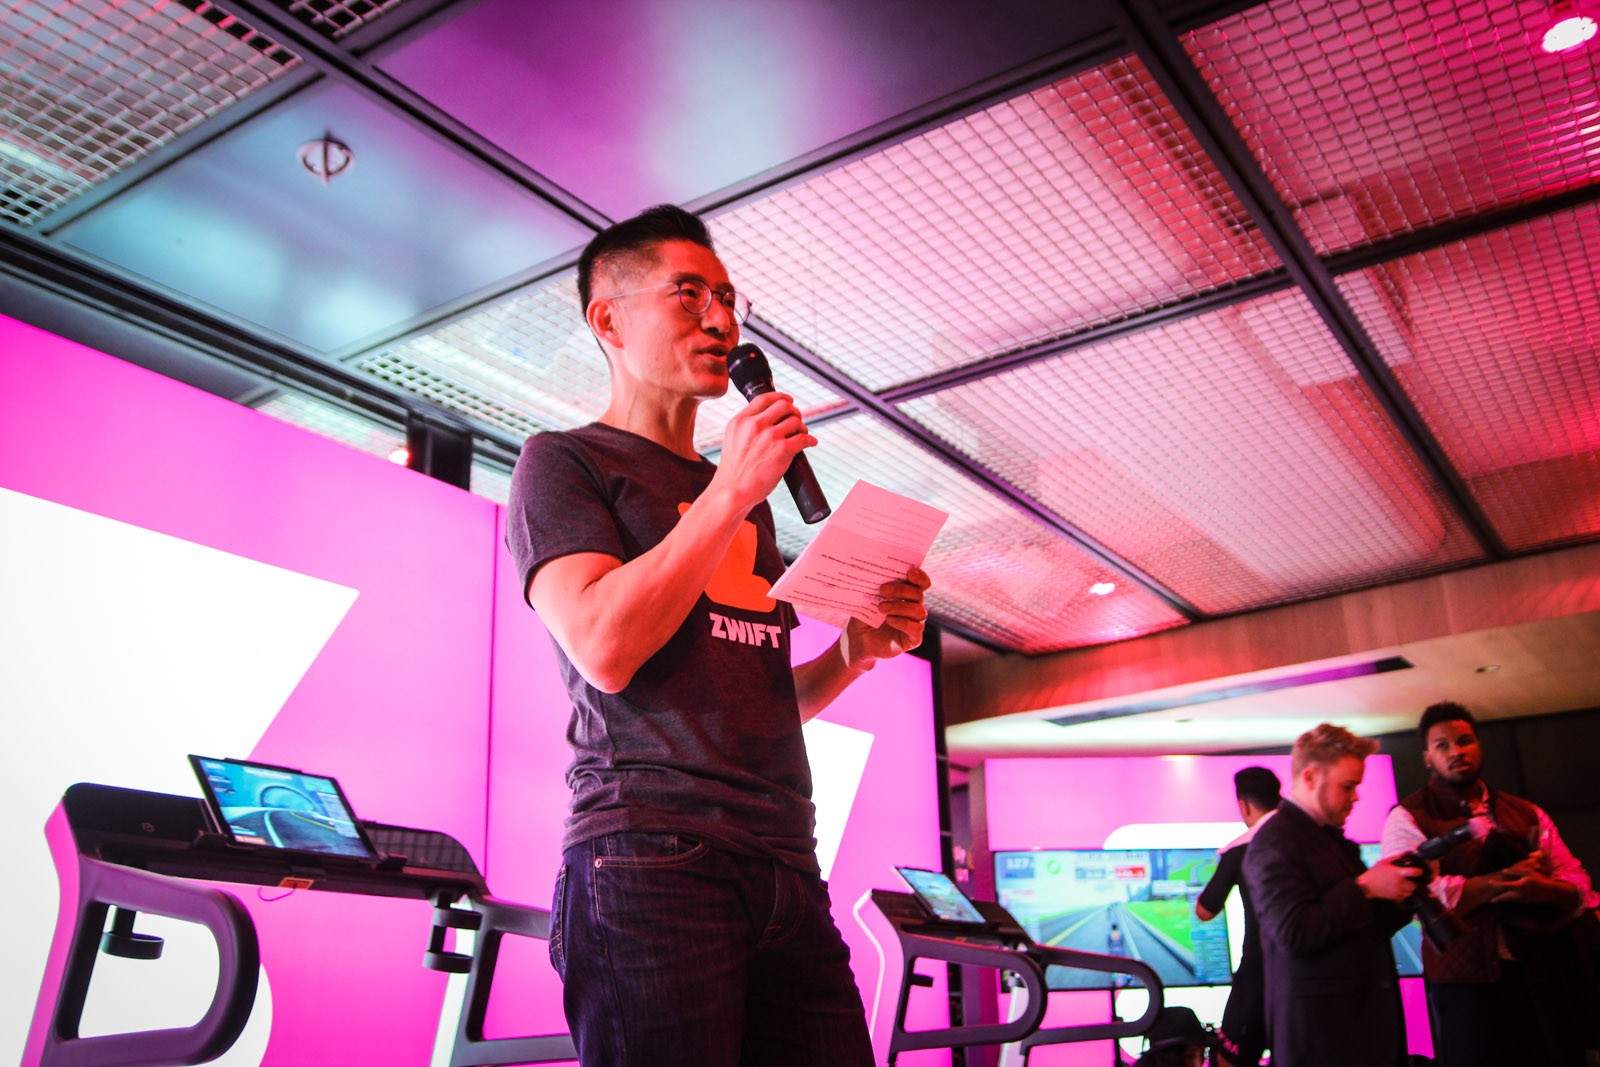
Strolling past the signup table I spotted Zwift CEO Eric Min intently studying some notes, while Game Master Jon Mayfield looked on and chatted with Zwift staffers. Even though I’ve communicated quite a bit with both of these guys via email or private messages, I hadn’t met either in person.
When I introduced myself to Eric and Jon they were both pleasantly surprised that I had made the trip out from California for this event. (Honestly, I had questioned my sanity a bit as well as I left sunny Northern California and stepped off the plane in NYC where the high temperature for the day was 32 °F!)
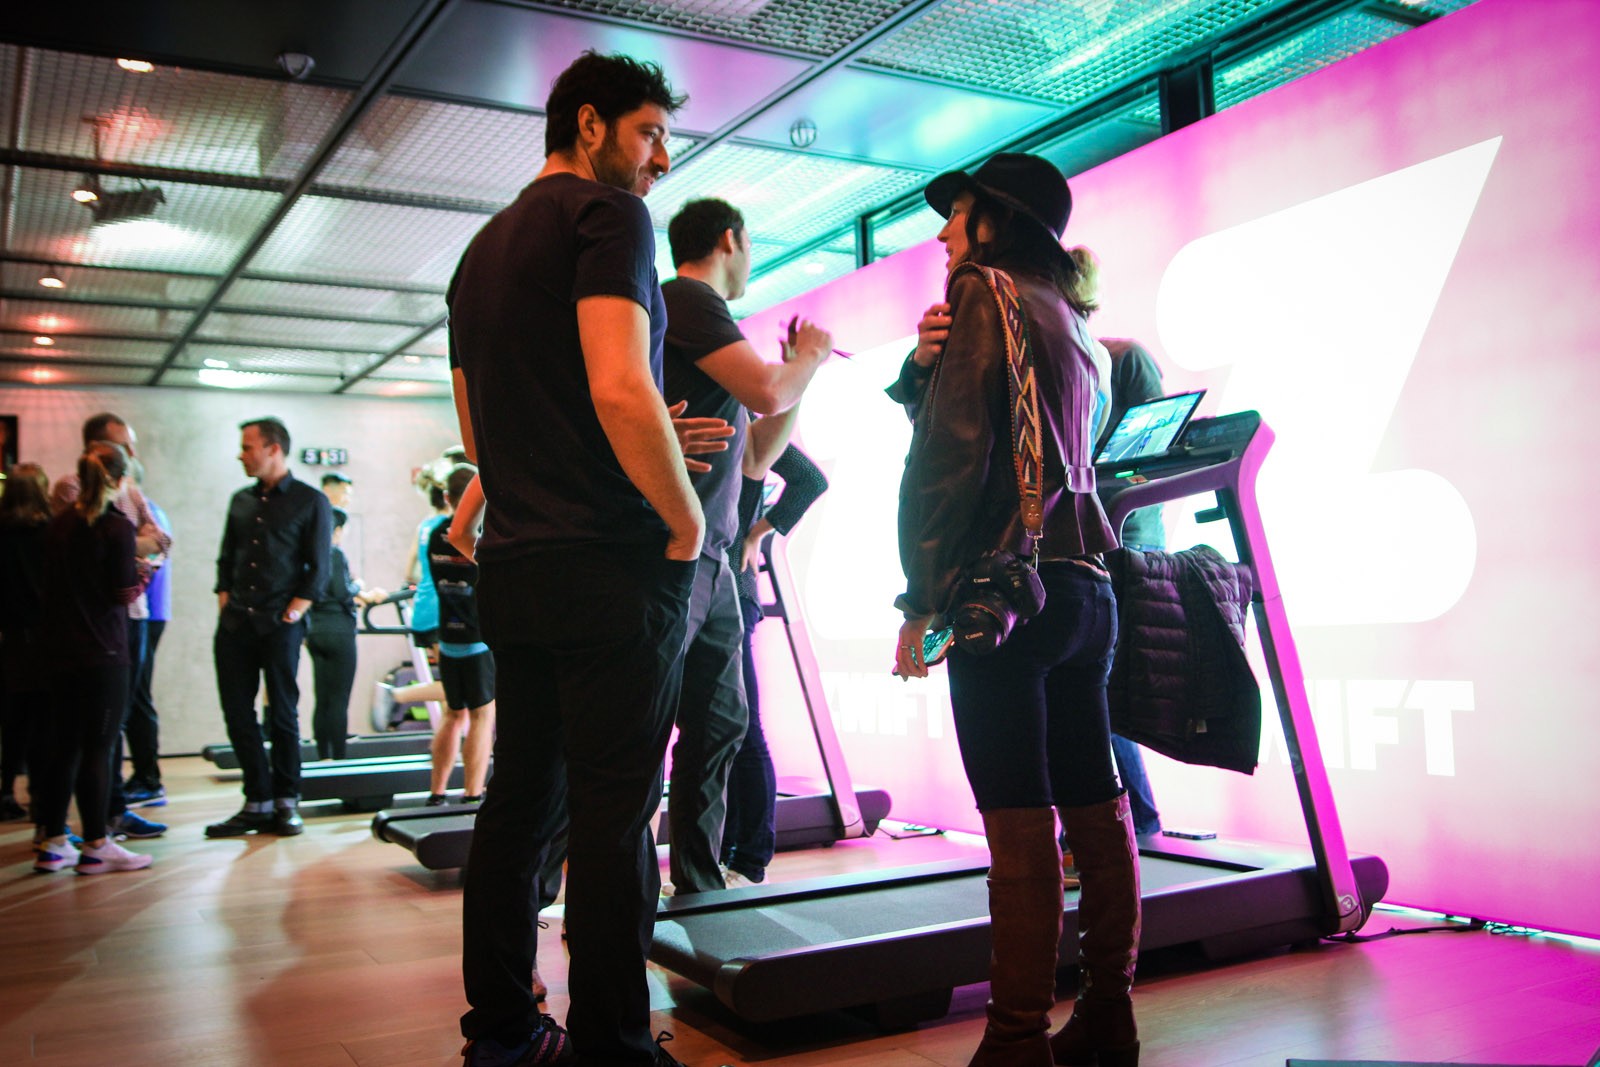
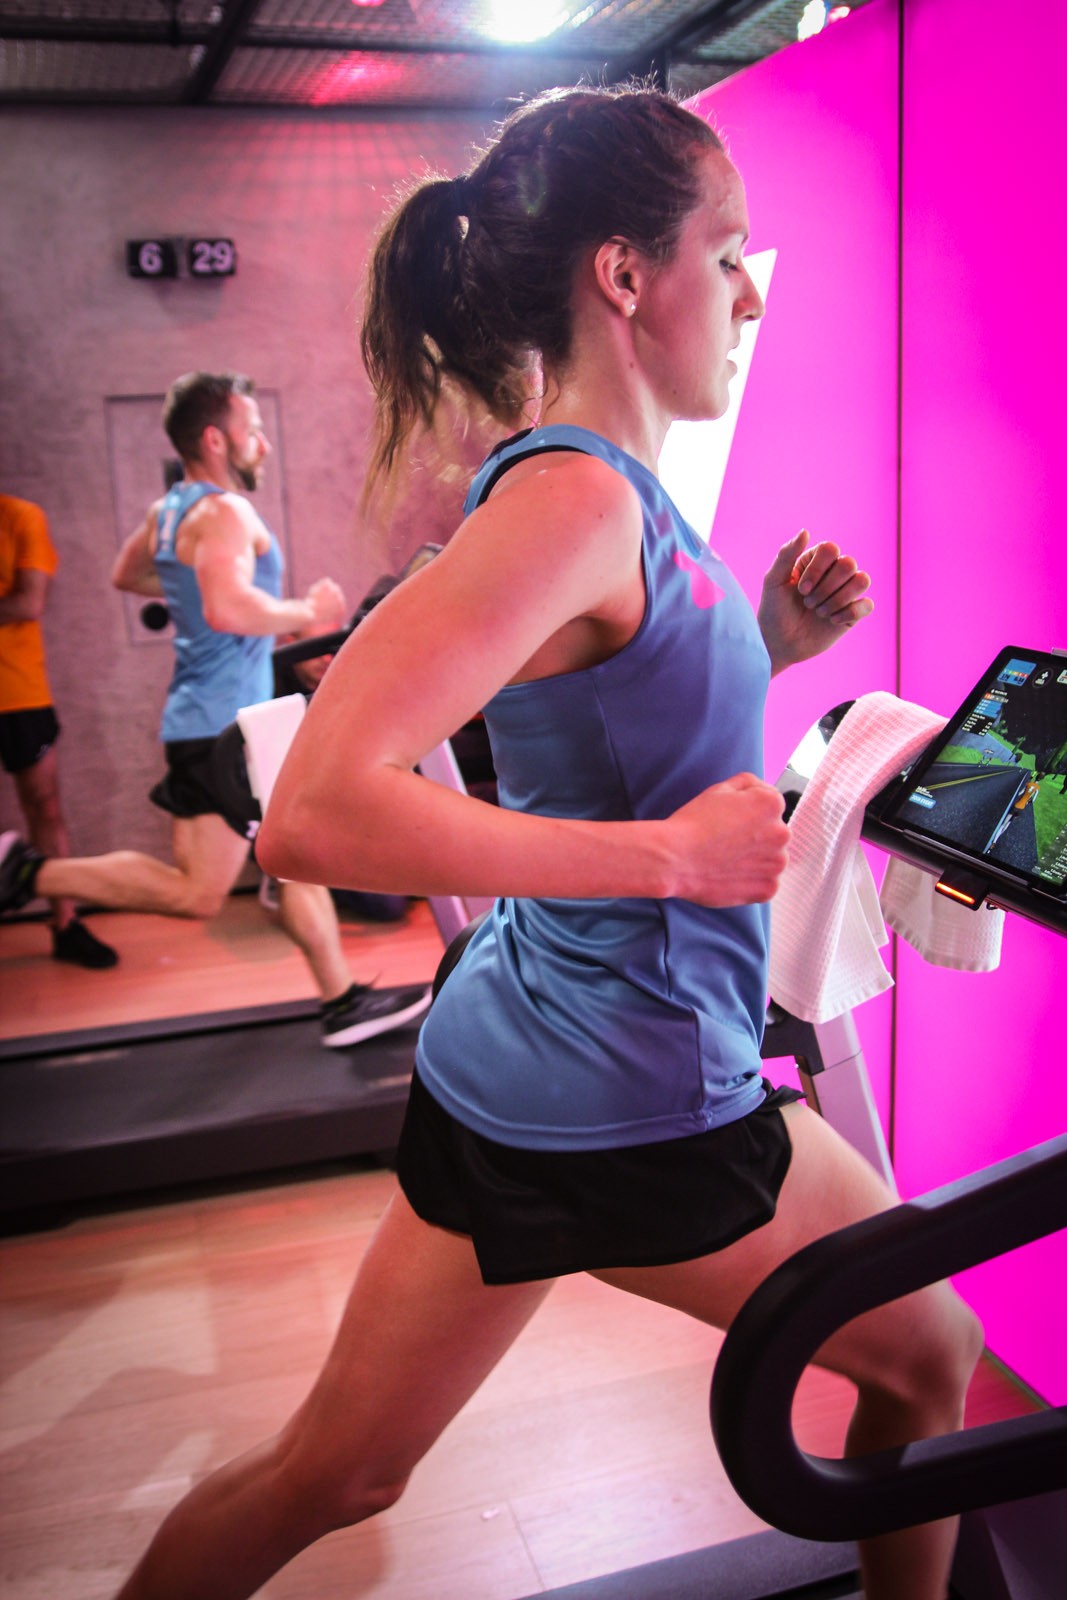
The event’s main room (shown above) showcased four Technogym treadmills open to anyone up for a jog. Zwift ran on iPads mounted to each treadmill, and throughout the night runners much faster than myself put in strong efforts while attendees mingled and observed.
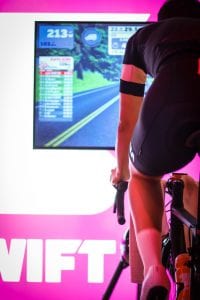
Of course, a Zwift event wouldn’t be complete without a bike or two–and that’s exactly what we had. Two Rapha-bedazzled young guys spent the entire night riding Technogym smart trainers in one corner.
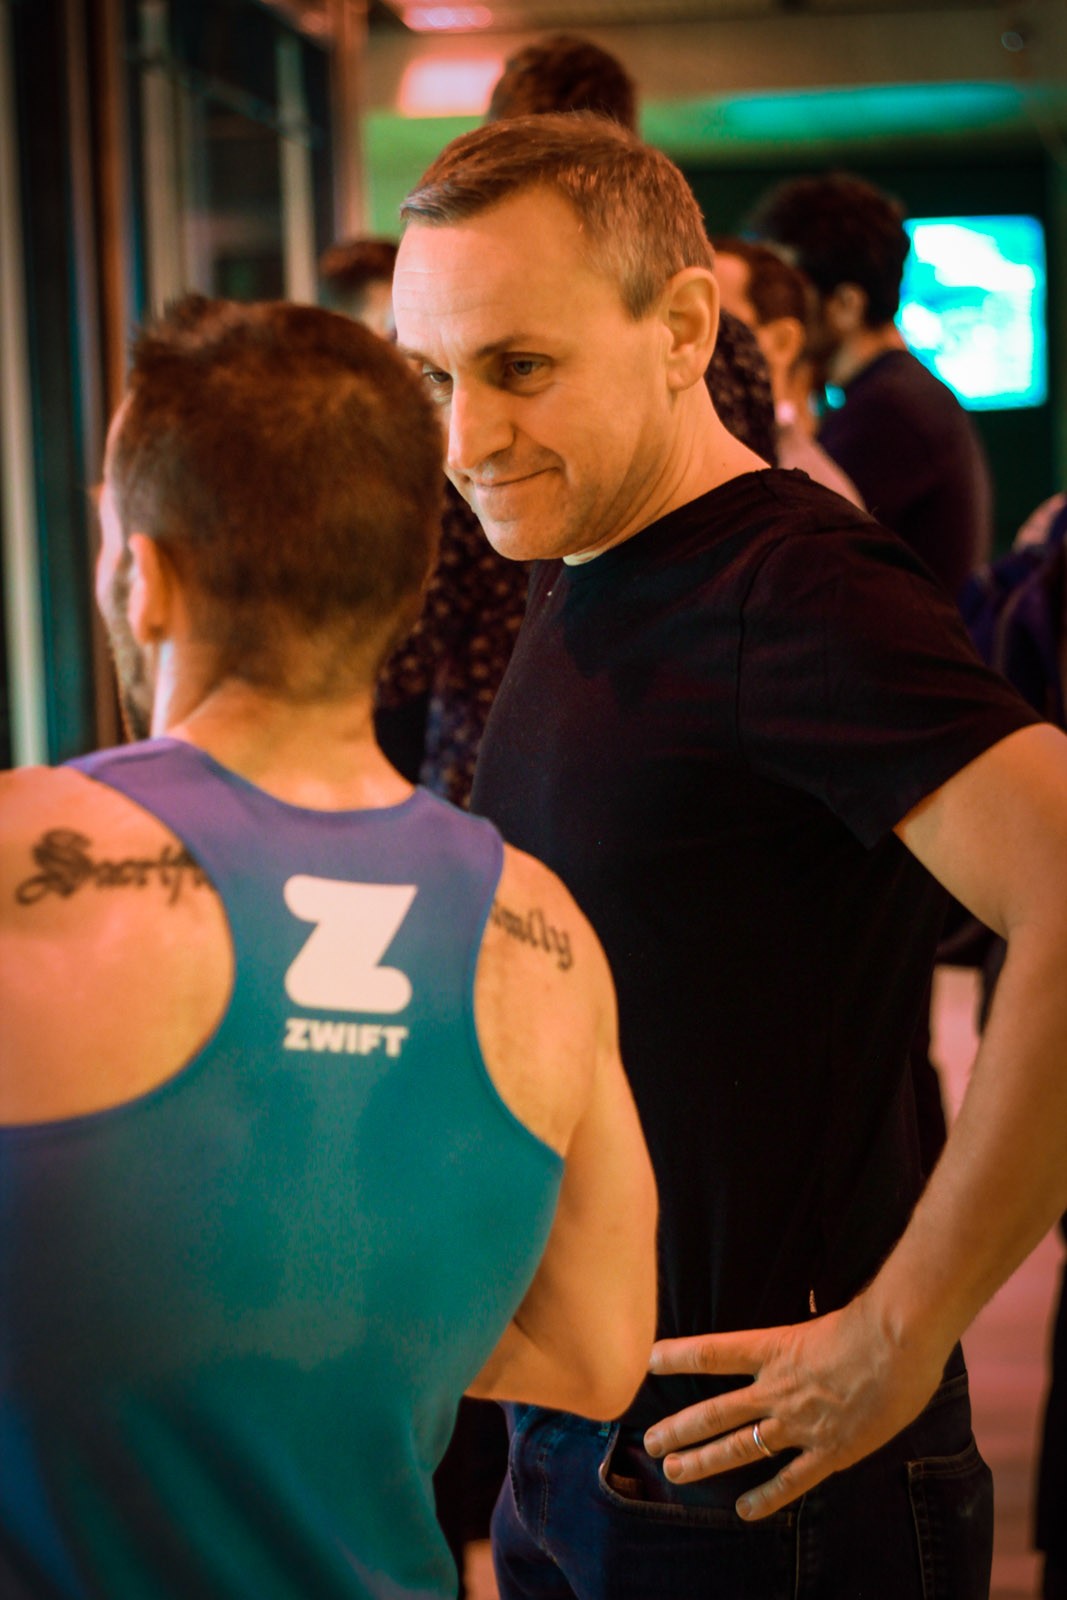
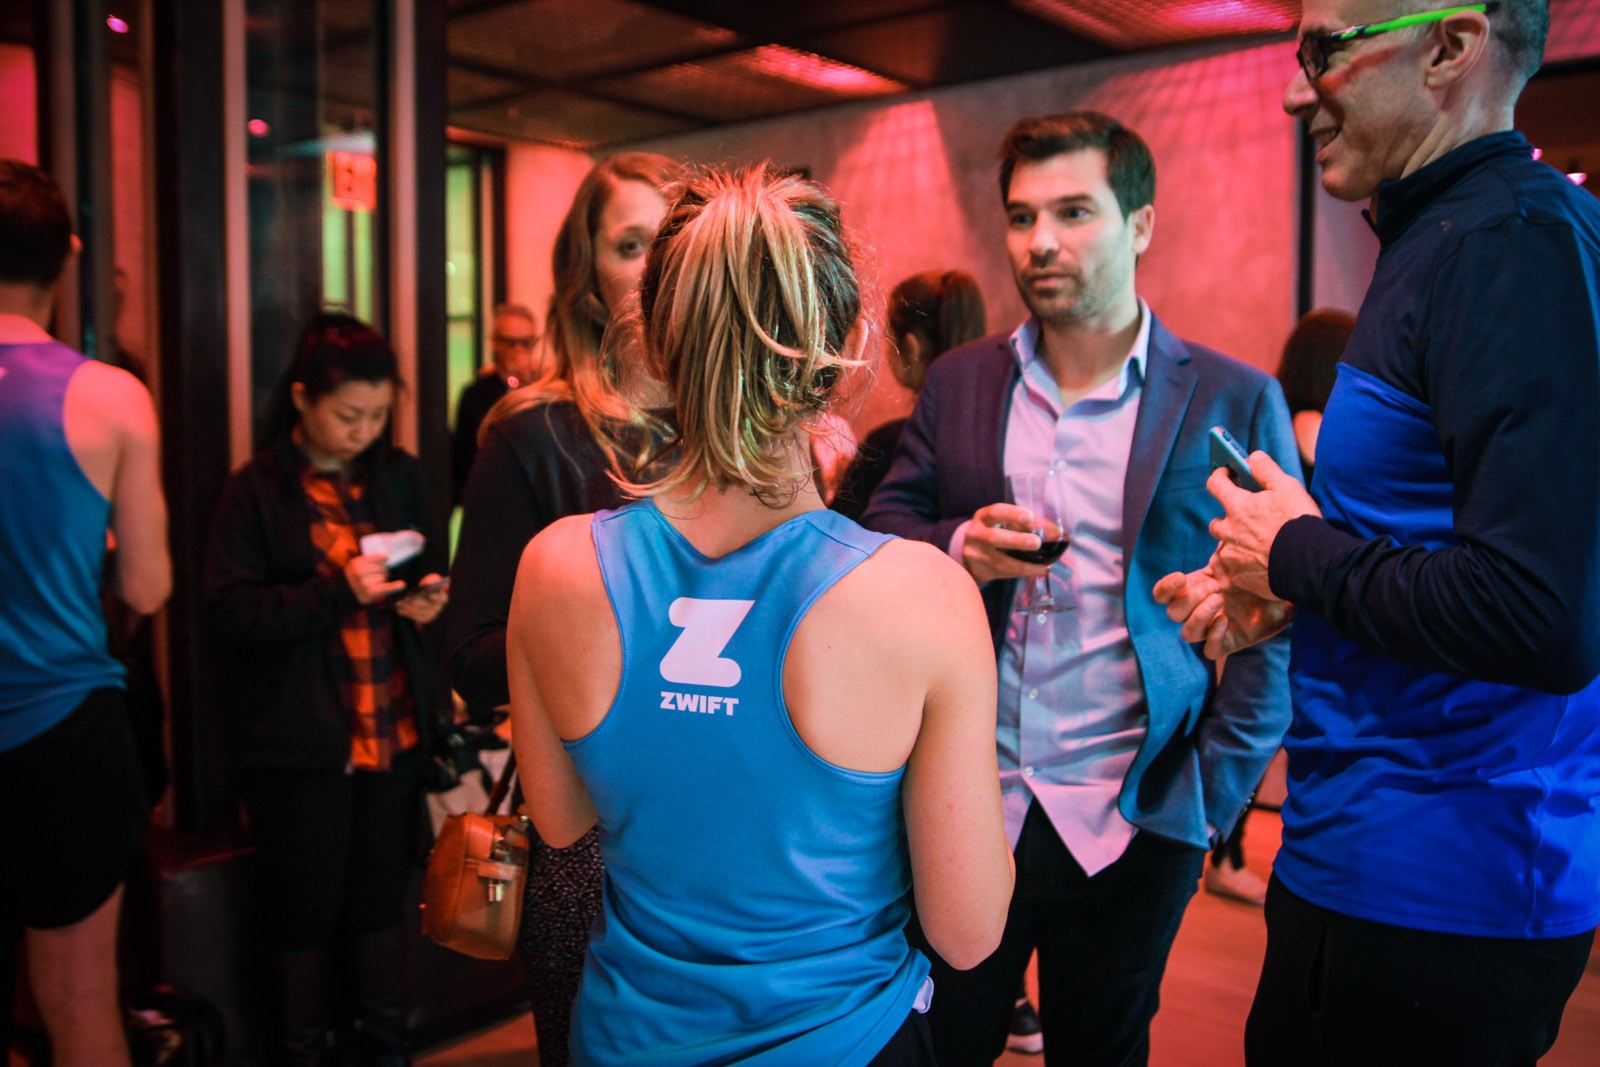
After grabbing a glass of wine with a bite of hors d’oeuvres I made my way around the main room, greeting various Zwift staffers. I met Jacob Fraser, a friendly and towering fellow who heads up North American events at Zwift (and thus was the man behind this event). Charlie Issendorf, VP of Events at Zwift, was also in attendance and I was finally able to meet him in person after lots of emails back and forth.
Zwift CEO Eric Min
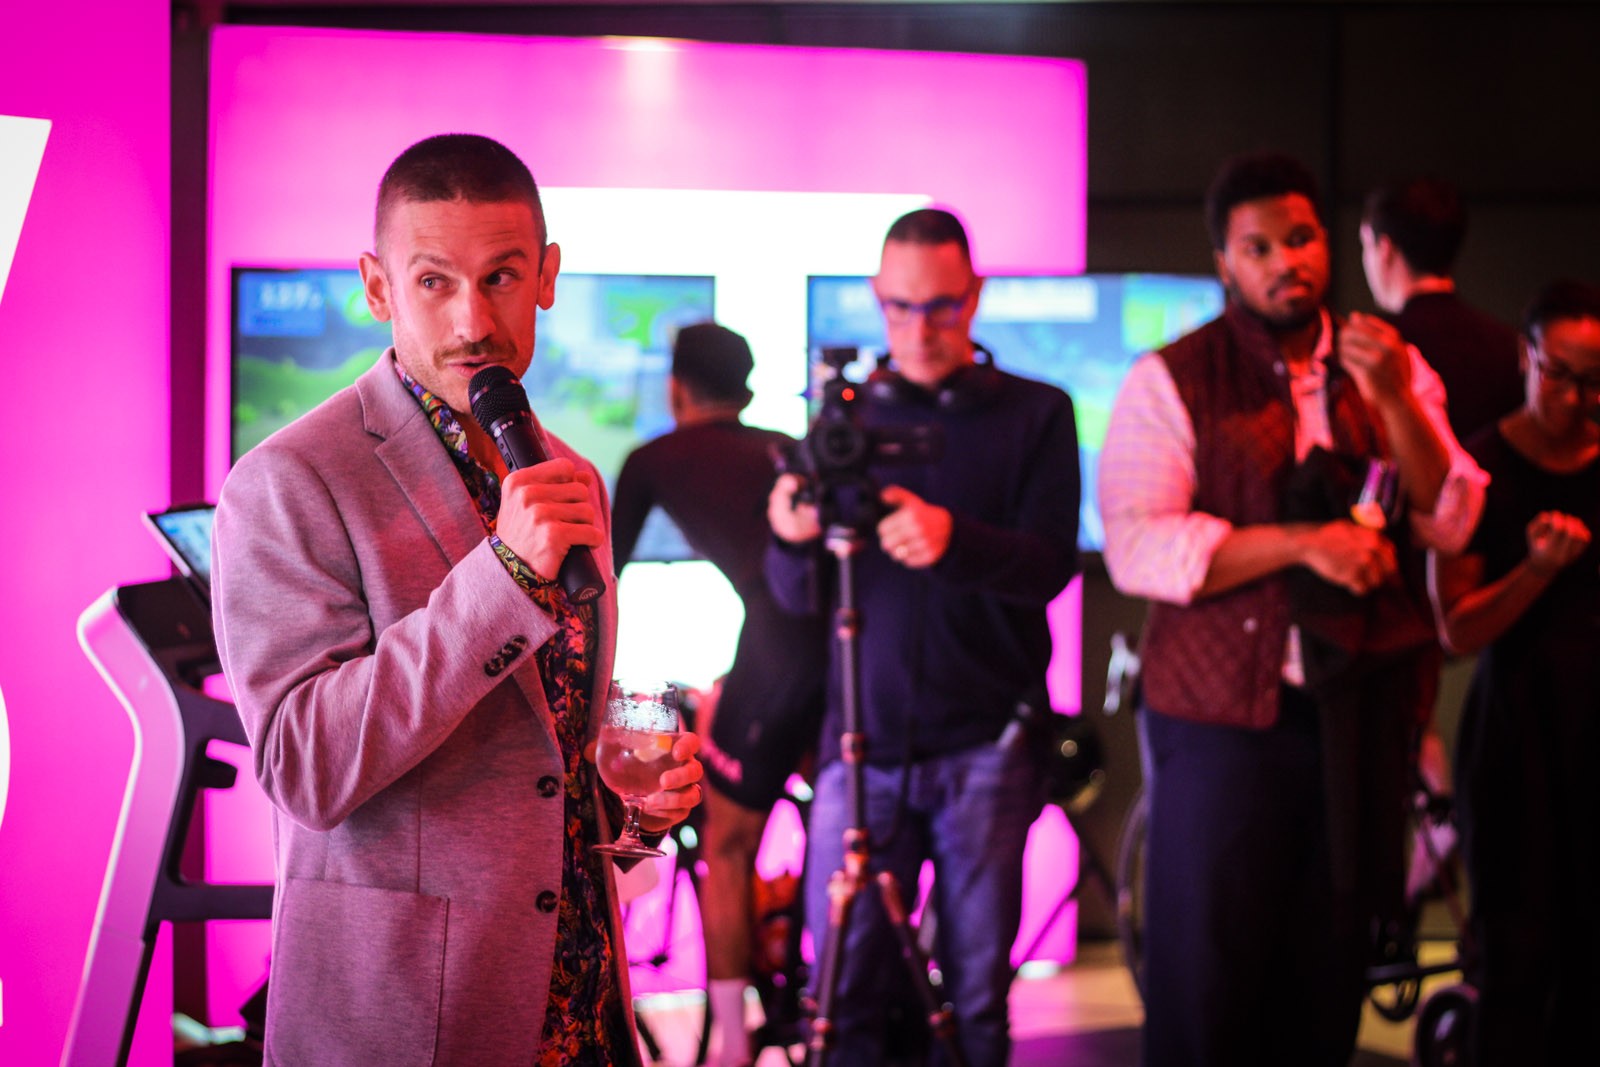
After an hour of mingling, the night’s MC introduced a handful of speakers, beginning with Eric Min. Eric talked about the huge opportunity Zwift has with runners. He explained that, according to Zwift’s research, the running community is eight times larger than cycling, with over 1 million treadmills in US homes and 2 million worldwide.
Eric communicated Zwift’s mission very nicely:
Our mission is to convince more people to be more active more often.
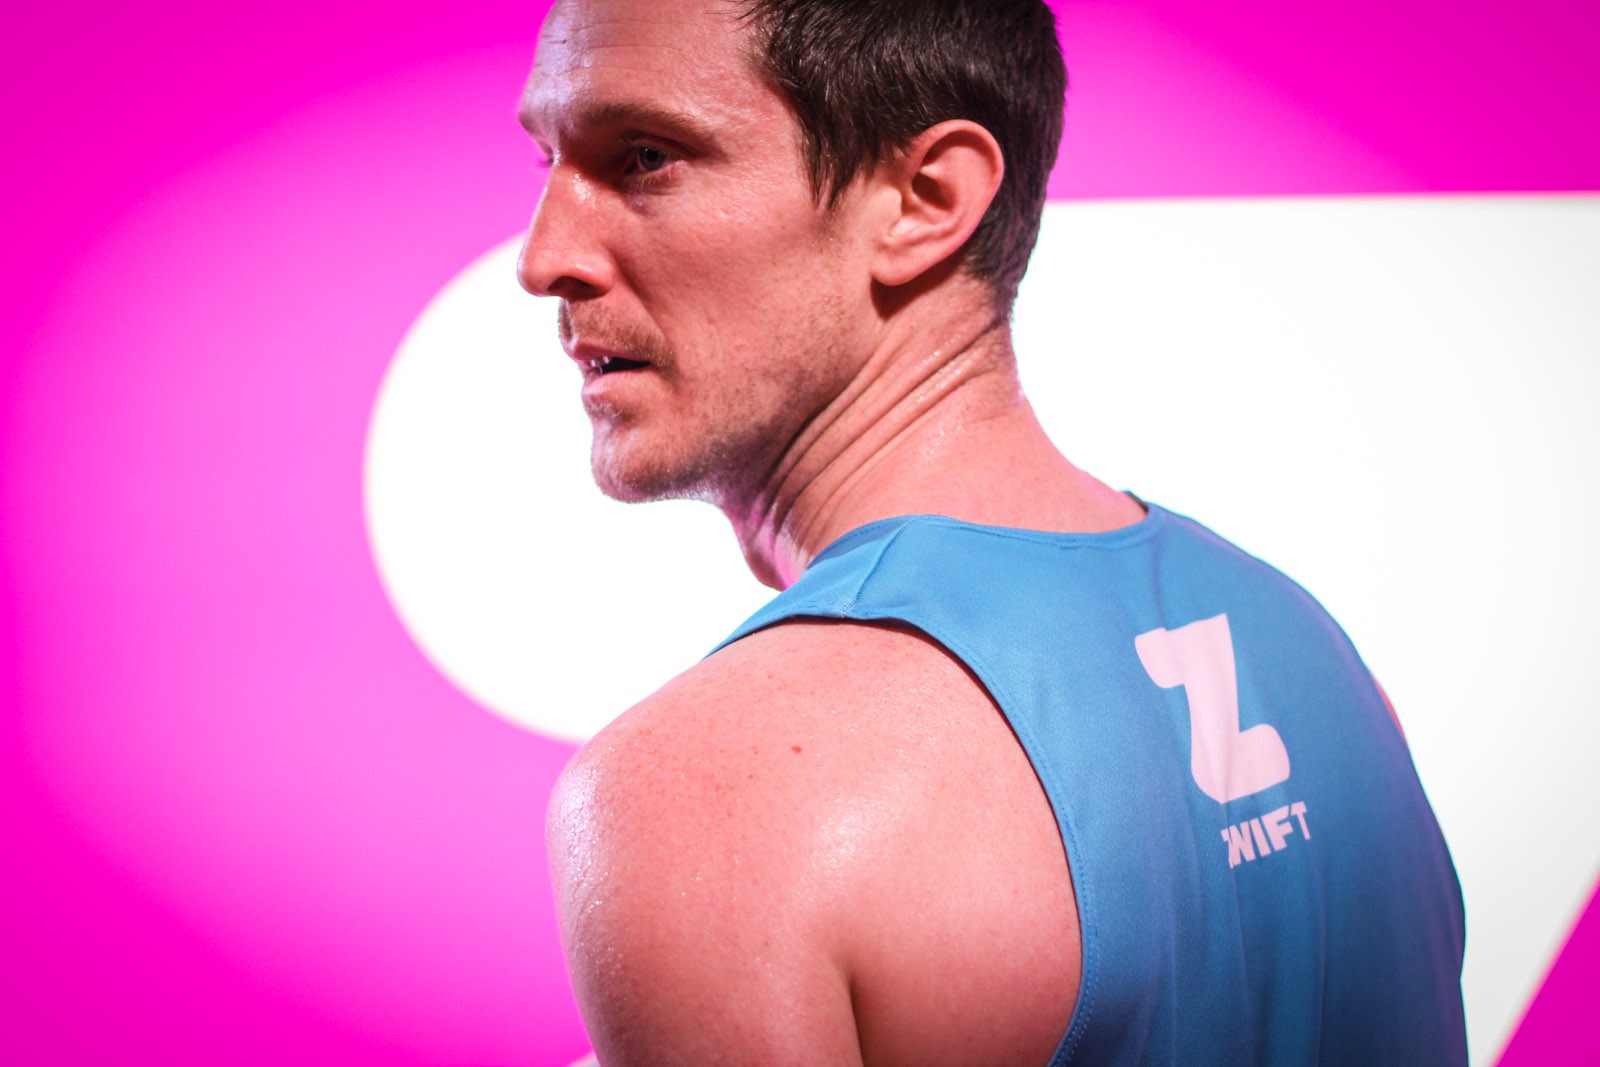
Celebrity guest Lionel Sanders was next, and he delivered perhaps the most engaging talk of the night, explaining how he has used Zwift to come back from four car accidents on the bike to finish in second place (and record time!) at Ironman Kona last year. Lionel is obviously a freakishly talented athlete, able to achieve incredible results despite (by his own admission) rarely training in the TT position and poorly hydrating for his race. I’m excited to see how this year’s Ironman Kona turns out for him.
Lionel Sanders
Lionel told the crowd:
If you ride indoors, you should be on Zwift. If you have a treadmill, you should be on Zwift. Because it makes it that much more engaging.
Next we had a little bit of Q&A with Isabell from Technogym, who talked about how they had worked hard to make their treadmills compatible with Zwift run–an important step because it makes Zwift run even easier to use.
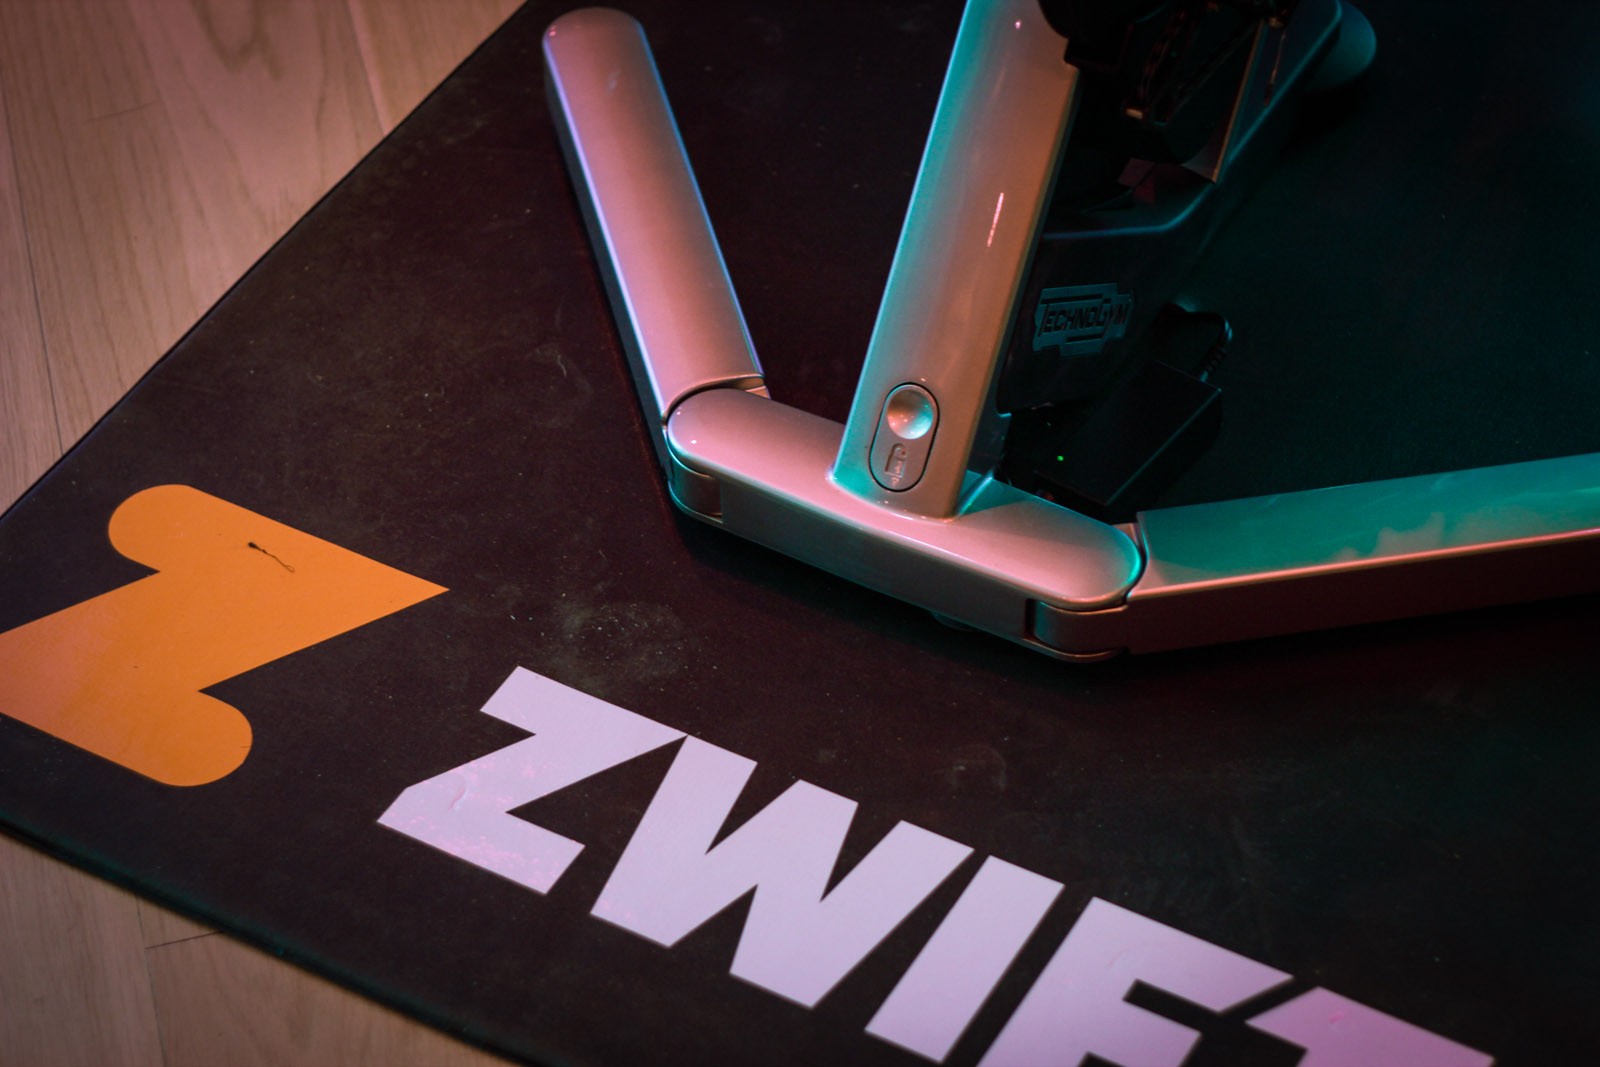
The night featured Technogym treadmills and smart trainers. Beautiful, powerful devices with simple, clean lines!
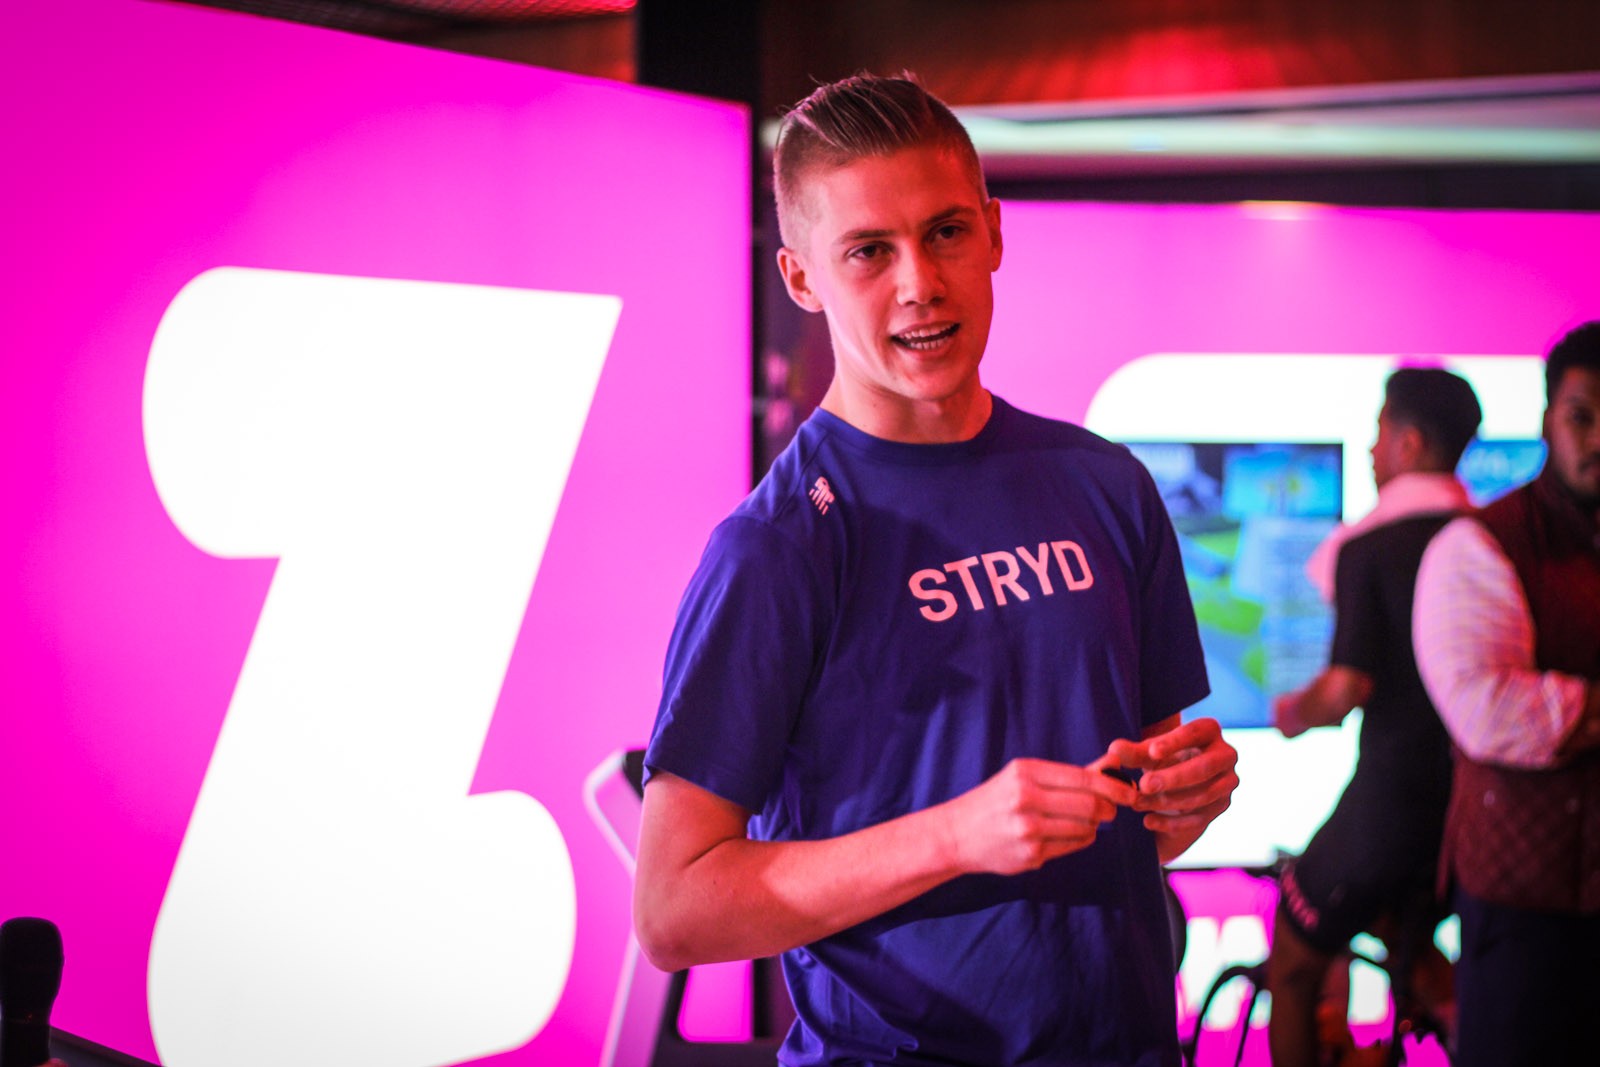
One of Stryd’s top guys spoke next. Stryd makes a high-end footpod which broadcasts super-accurate pace as well power (which is uncommon in the sport of running).
Earlier that day I had enjoyed a sushi lunch in midtown Manhattan with Zwift buddy Kenny Suh. Tagging along were Simon “Zwiftcast” Schofield and Shane “GPLama” Miller. We had discussed, among other things, how inaccurate some footpods are, and how Stryd needed to maintain their accuracy but lower their price from $199. As I talked with the Stryd guys they informed me that they had just released the $99 Stryd Live: a new footpod which maintains the legendary Stryd accuracy while leaving out the power component. That’s smart!
Stryd had a strong presence at this launch event, and I predict that they will be a key partner for Zwift as the running community develops.
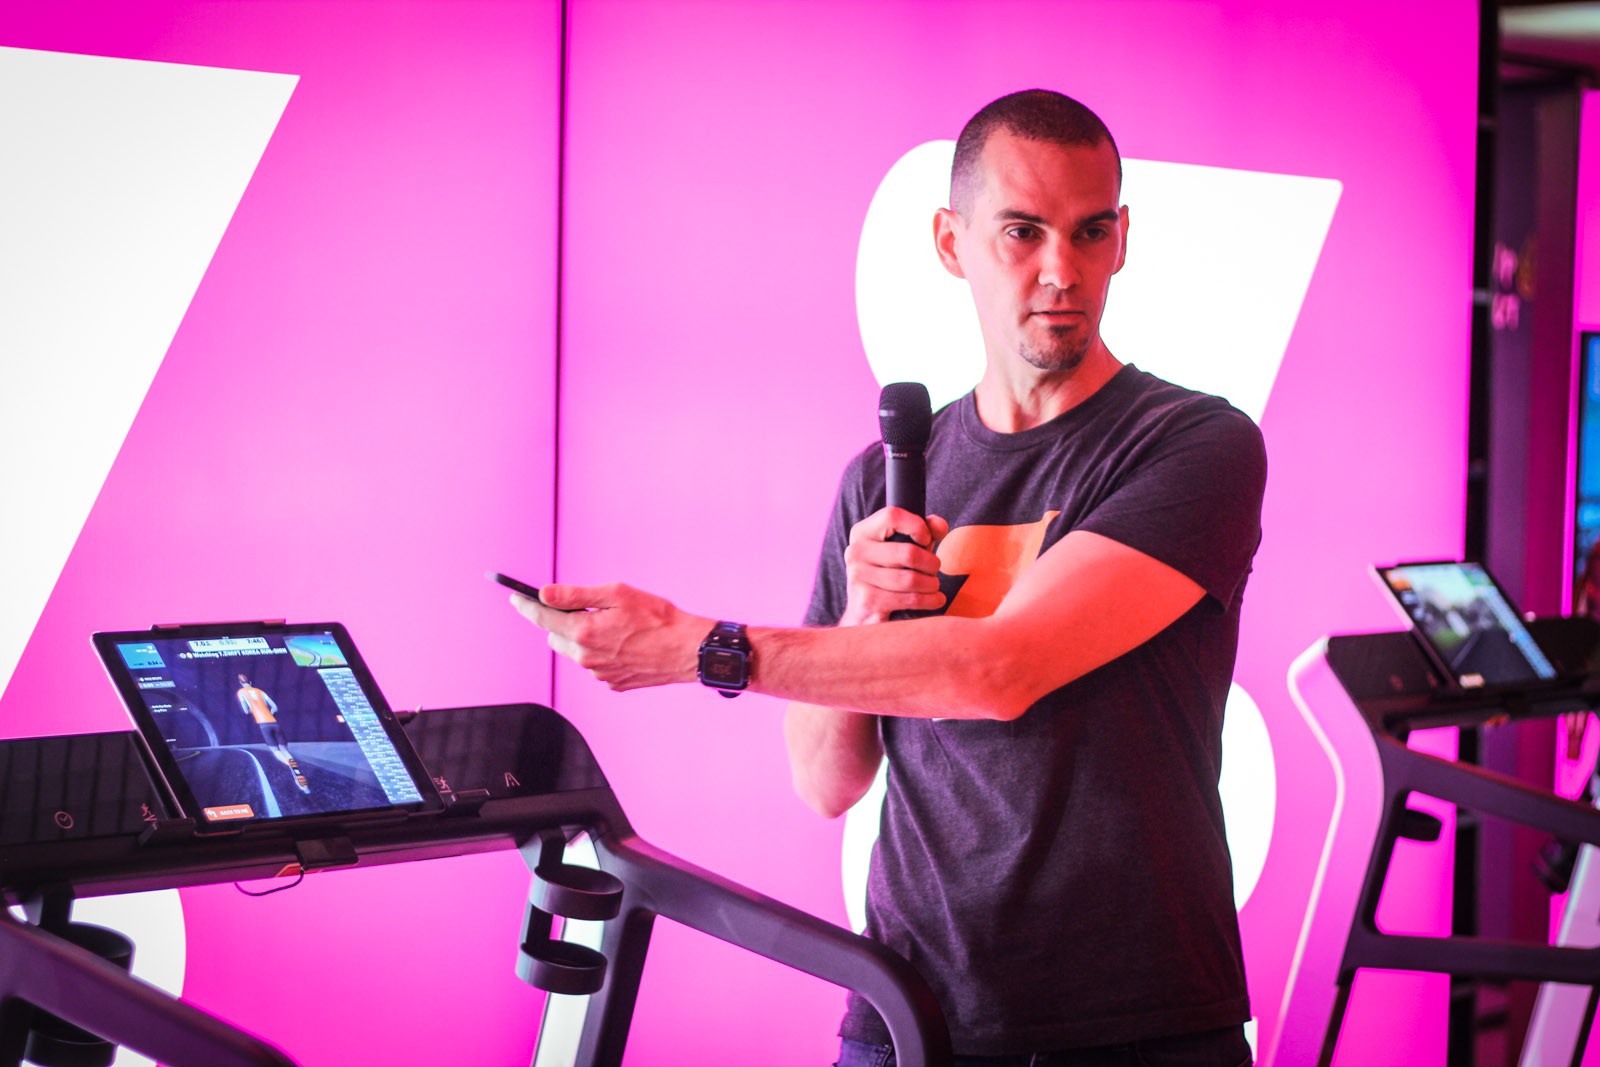
Finally Game Master Jon Mayfield was called up to close things out. He wisely began by explaining what Zwift is… because nobody had really done that yet. People who haven’t used Zwift often don’t grasp how big of a deal it really is to be able to interact in real time with other runners and cyclists across the globe. This is a paradigm shift in the world of fitness, and Jon wants to make sure people understand that.
Jon Mayfield explains what Zwift is all about
Jon went on to discuss future plans for Zwift Run, which include narrow trails just for runners. He recounted how getting devices connected was the hardest part of enabling running on Zwift, because when he started working on it there simply weren’t many smart devices out there to work with.
He also explained the genesis of Zwift Run, and the crowd laughed when he truthfully said:
It actually all stems from me getting a treadmill and my runs not showing up on Strava.
It took him just a week to get running going on Zwift, and once he did he started getting Strava kudos for his runs. Now that’s what I call initiative!
For the rest of the night I was able to hold many in-depth discussions with Zwift staffers including product manager Wes Salmon, an avid Zwifter who migrated from a long career at Microsoft in Seattle to Zwift in Long Beach. I wonder just how many of Zwift’s ~160 employees were Zwifters before they were Zwift? My guess is there are many in that boat.
One recurring theme I’ve heard in talks with Zwift is the challenge they face of hiring qualified game developers. These guys often want to pad their resumes with shorter term projects at big Silicon Valley names like EA Sports or Blizzard Entertainment, but as Zwift has grown in popularity Jon Mayfield told me it has become easier to bring on qualified developers. In fact, they’ve just hired their first game developer who is also an avid cyclist: that’s a good thing! Two new hires are coming on board to work with Jon, in fact, and that’s good news for Zwifters.
Overall Impressions
I enjoyed my time at Zwift Run’s launch event, not so much because of the content but because of the people. Zwift’s team is excited about the future, smart about the moves needed to get there, and appreciative of the community that has grown up around their product.
They may be a large and growing corporation, but their people have the attitude of a lean startup and are willing to do what it takes to make it happen. Ride on, I say.
More Photos
Mike McCarthy (right), Head of Business Development
Jon Mayfield
VP of Events Charlie Issendorf
Zwift fixture “Coach” David Lipscomb
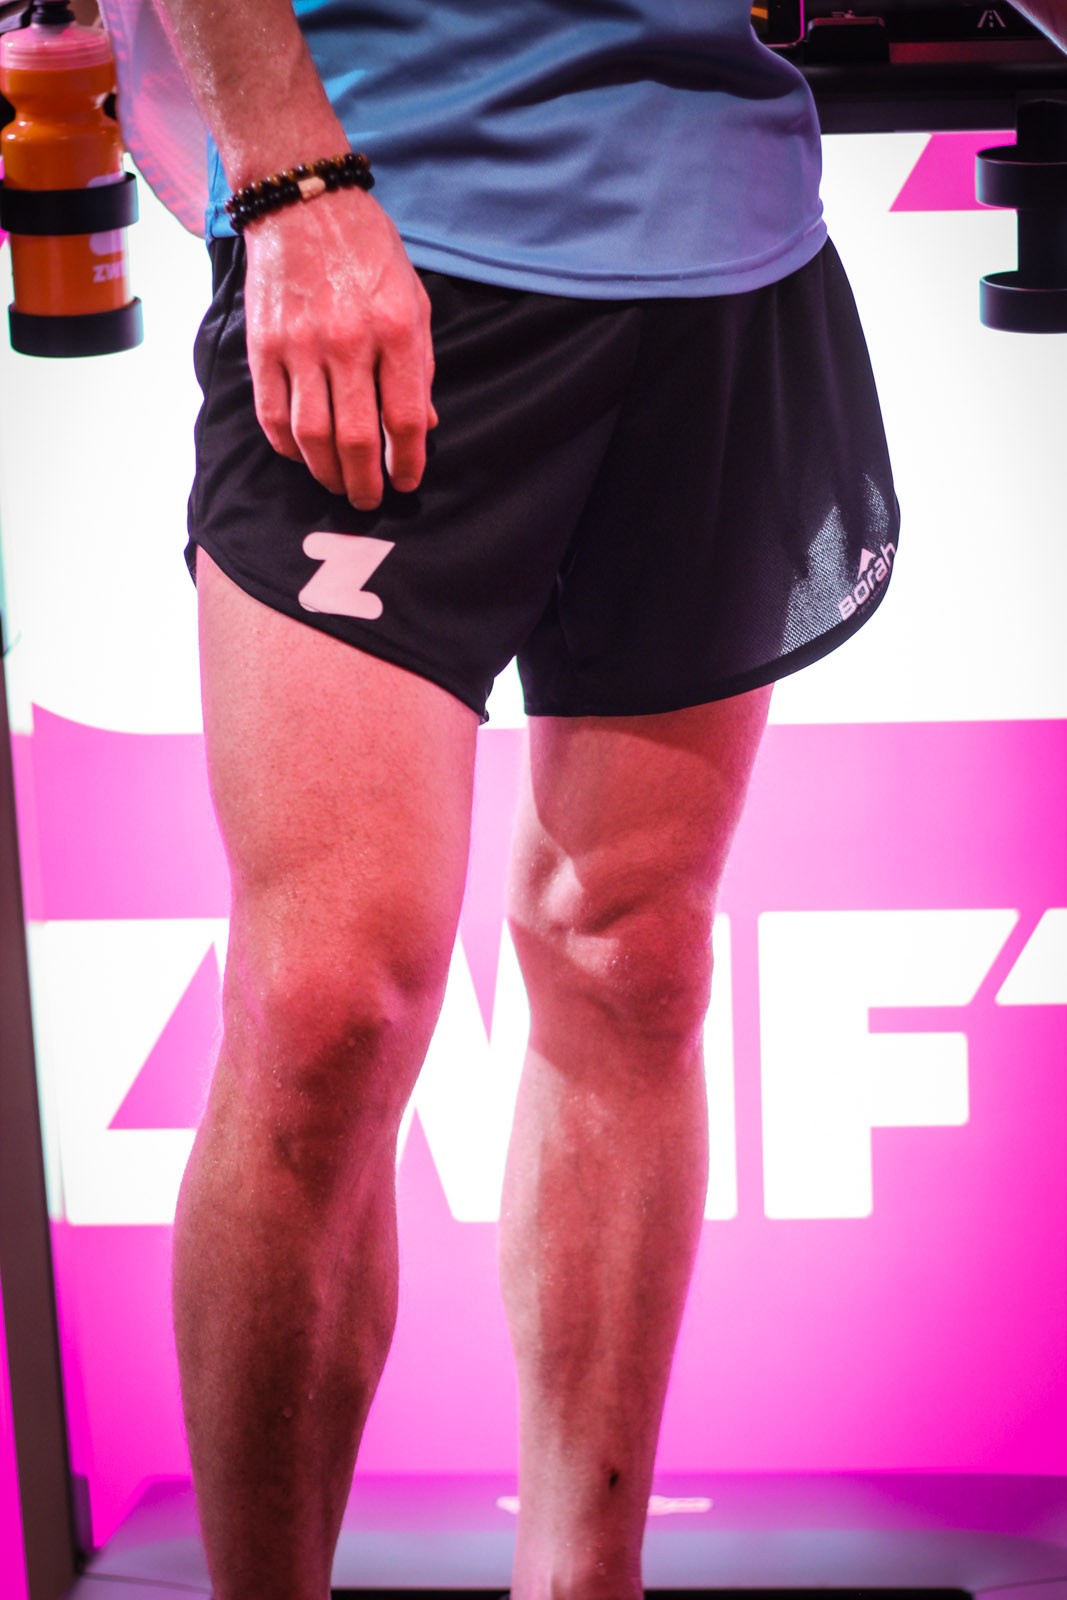
This guy put in a good run!
Eric pitches Zwift Run to the crowd
Videos
Here is Zwift’s main promo piece for Zwift Run:
And here is Shane Miller’s recording of the night. The audio setup, with runners on treadmills in the background, made for a challenging listening experience. But you can at least get a feel for the event!
Zwift 10-in-10 Challenge Announced for Runners On Strava
ZwiftHQ has quickly taken advantage of Strava’s new policy toward virtual miles, rolling out their first-ever Strava challenge soon after announcing the official availability of Zwift Run.
The Zwift 10-in-10 Challenge is simple: Run 10 miles in 10 days, between February 15-24, 2018. Miles can be on Zwift or outside, from one run or multiple efforts.
More Details
Here is the full description of this challenge:
Celebrate the launch of Zwift Run with the first ever Zwift Strava challenge.
Run 10 miles in 10 days and you’ll be entered to win new running gear from Zwift & Wahoo.
Any pace, any place, all you have to do is run ten miles. For an extra challenge, push yourself to go further or go faster than ever before. Try a new route. Maybe even do your fastest mile indoors.
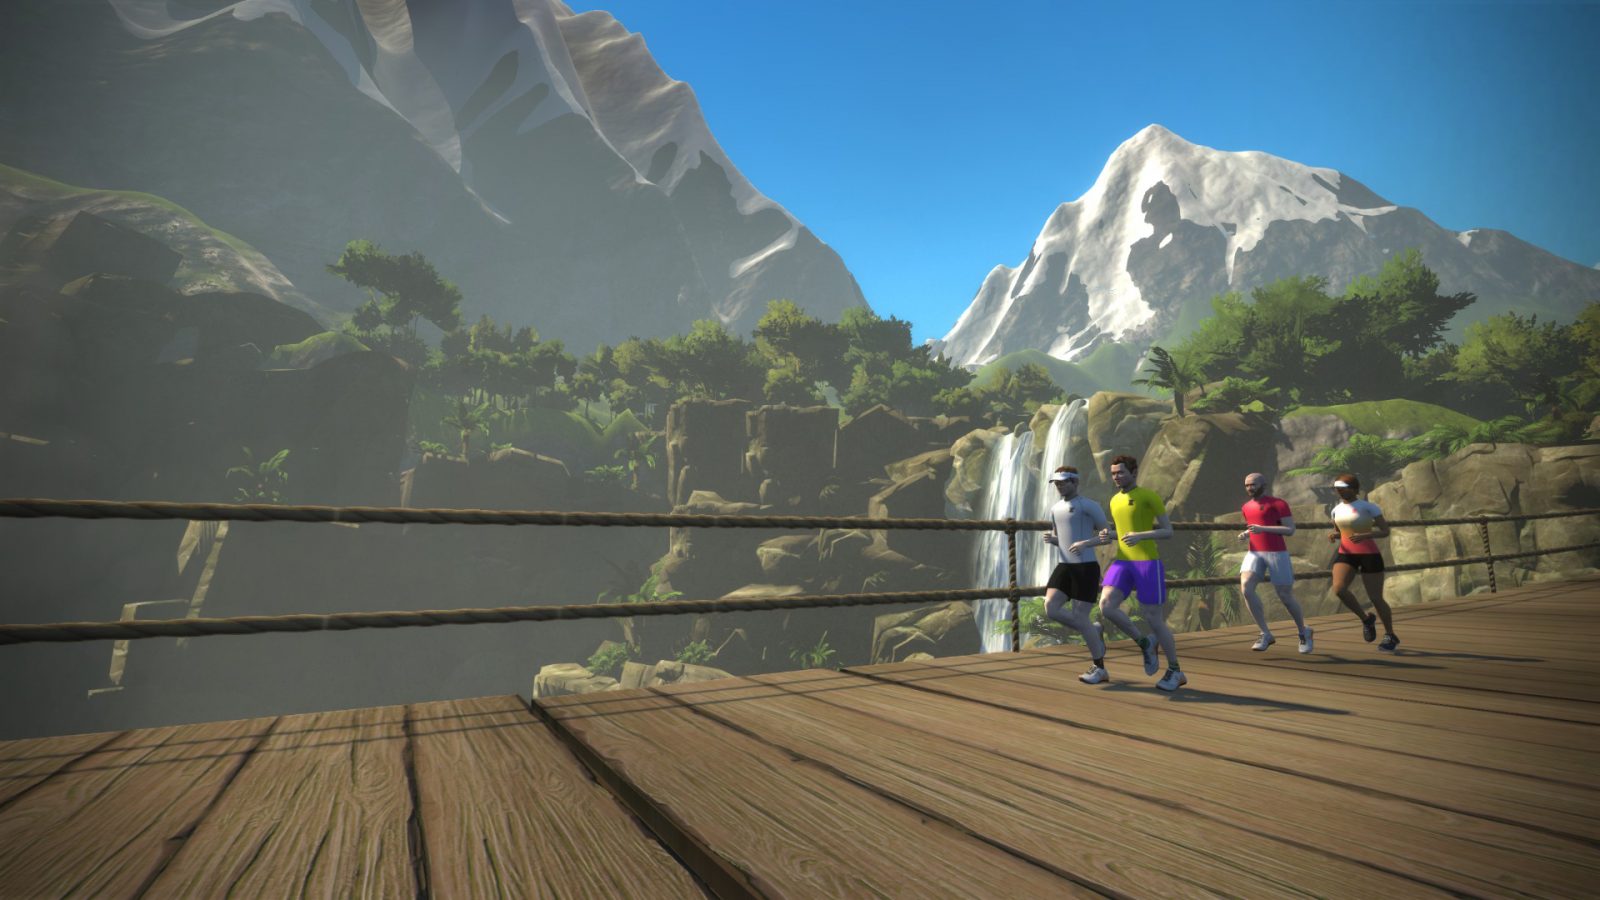
That’s right, virtual miles count just the same as outdoor miles for this challenge. Try running on Zwift and explore new running routes through underwater tunnels, over snowy mountain tops, and even in a Mayan Jungle.
Over 23,000 participants were already signed up at the time of this post!
Prizes
Everyone who completes the challenge will receive the digital finisher’s badge for their trophy case.
Participants who complete the challenge will also be entered to win running gear from Zwift (t-shirt and shorts) and a TICKR FIT heart rate monitor from Wahoo.
Zwift Run is becoming more and more popular, with organized runs and training events now being held regularly. Running workouts created by ZwiftHQ are also available in-game, and I believe distance-based run workouts from Training Peaks are syncing across to Zwift for those TP users with run plans.
But the game’s workout editor does not yet allow us to create our own running workouts. For that, we can use the rather fantastic Workout Creator in Excel (WCE) created by Steve Bateman, or create our own from scratch. Here are more details on each approach.
Workout Creator in Excel
Steve’s WCE includes extensive help documentation. He announced it in the Zwift Runners Facebook group with the following detail:
It can be used to create custom workouts for Zwift Running, and has the following features:
Create running workouts using the four activity types: WarmUp, CoolDown, SteadyState, Intervals
Specify how fast to run a workout activity using Speed (mph/kph), Pace (mins/mile, mins/km) or Power (percent of a given Pace entered on the Edit Paces page)
Specify the duration of an activity using Distance (metres) or Time (seconds or minutes:seconds)
Adheres to the current Zwift constraints for running workout creation: Speed/Pace are converted to Power; Time is converted to Distance; Distance must be a multiple of 200m (with 200m as minimum)
Supports entry of your times (or target times) for the same distances as the Edit Paces page (Mile, 5k, 10k, Half, Marathon); Estimates any time you don’t enter directly (using the Riegel formula); Uses your entered times to convert Speed/Pace to Power and to convert Time to Distance in the ZWO content.
Supports Category/SubCategory and (multiple) Tags in the ZWO so that you can choose how to show your workouts in the Select Your Workout page.
It can ALSO be used to create custom workouts for Zwift Riding, and has the following features:
Create riding workouts using the five activity types: WarmUp, CoolDown, SteadyState, Intervals, FreeRide.
Add messages to your workout to be displayed at specific times during an activity.
Specify the Power (percent of FTP) or Watts and the Cadence for each activity
Specify the duration of an activity using Time (seconds or minutes:seconds)
Supports entry of your FTP. Uses your FTP to convert Watts to Power in the ZWO content.
Supports Category/SubCategory and (multiple) Tags in the ZWO so that you can choose how to show your workouts in the Select Your Workout page.
Create Run Workouts from Scratch
If you want to edit or create your own text file, then you simple create a text file with the ZWO file extension. On a PC create this in Documents\Zwift\Workouts. See details at the bottom of the post for how to copy workout files on other platforms.
Here is a basic sample Zwift Run workout:
<workout_file>
<author>Greg Hilton</author>
<name>2 x 20min</name>
<category>Run</category>
<description> 20 min warmup 20 min interval X 2 with 20 min rest </description>
<sportType>run</sportType>
<tags/>
<workout>
<Warmup Duration="3600" PowerLow="0.20" PowerHigh="0.6" pace="4" />
<IntervalsT Repeat="2" OnDuration="1200" OffDuration="900" OnPower=".78063828" OffPower="0.252" pace="1"/>
<cooldown Duration="3600" PowerLow="0.20" PowerHigh="0.6" pace="4" />
</workout>
</workout_file>
The workout file follows a very simple structure, name, description and type are all fairly obvious in the example above. Category is free form and can be used to group Workouts together on your Zwift screen.
In the workout section you see the warmup duration, with the PowerLow and PowerHigh figures. These are a percentage of your running pace.
IntervalsT Repeat is how many times you want to repeat that interval, with OnDuration being the time in seconds doing the interval and OffDuration being the rest period. OnPower is the percentage of your running pace for the interval and OffPower is the percentage of your running pace for the rest period.
You can also just list a series of steps, for example, this is a pyramid workout created by Steve Bateman:
<workout_file>
<author>S.Bateman</author>
<name>Pace pyramid - jog recoveries</name>
<description>Move up through the paces (Marathon -> 1 mile) and back again with a distance decrease for each pace increase and a 200m jog between each interval. Assumes your paces are setup so that each shorter distance means a faster running speed. Work/Total distance 7.4km/9.8km. Work/Total time 39min/55min using the following paces (~ are estimated): Mile~6:39; 5k~21:53; 10k~46:24; Half Marathon~1:43:46; Marathon=3:40:00</description>
<category>Steves Workouts</category>
<sportType>run</sportType>
<workout>
<Warmup Duration="1600" PowerLow="0.70004497" PowerHigh="0.85004497" pace="4" />
<SteadyState Duration="1000" Power="1.00004497" pace="4" />
<SteadyState Duration="200" Power="0.80004497" pace="4" />
<SteadyState Duration="800" Power="1.00004497" pace="3" />
<SteadyState Duration="200" Power="0.80004497" pace="4" />
<SteadyState Duration="600" Power="1.00004497" pace="2" />
<SteadyState Duration="200" Power="0.80004497" pace="4" />
<SteadyState Duration="400" Power="1.00004497" pace="1" />
<SteadyState Duration="200" Power="0.80004497" pace="4" />
<SteadyState Duration="200" Power="1.00004497" pace="0" />
<SteadyState Duration="200" Power="0.80004497" pace="4" />
<SteadyState Duration="400" Power="1.00004497" pace="1" />
<SteadyState Duration="200" Power="0.80004497" pace="4" />
<SteadyState Duration="600" Power="1.00004497" pace="2" />
<SteadyState Duration="200" Power="0.80004497" pace="4" />
<SteadyState Duration="800" Power="1.00004497" pace="3" />
<SteadyState Duration="200" Power="0.80004497" pace="4" />
<SteadyState Duration="1000" Power="1.00004497" pace="4" />
<Cooldown Duration="800" PowerLow="0.85004497" PowerHigh="0.70004497" pace="4" />
</workout>
</workout_file>
The pace field changes the set pace – note your treadmill cannot automatically change pace, you will need to do so manually.
The options for pace field are based on your pace in Zwift as follows:
0 = 1 mile
1 = 5k
2 = 10km
3 = Half Marathon
4 = Marathon
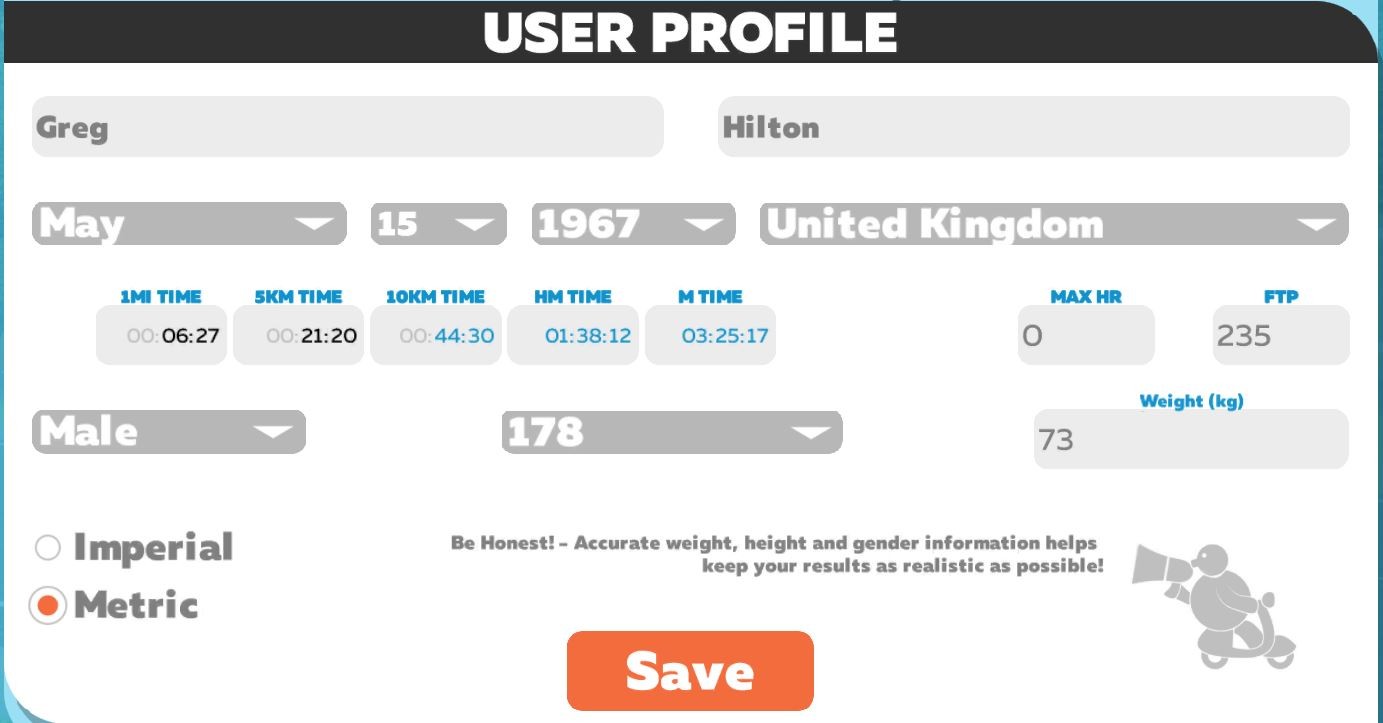
Pace is auto set and adjusted by Zwift as you run, and it tells you if it’s upped your pace after a run. However you can edit the pace from the workouts screen by clicking the small button in the bottom right hand side of the screen.
Click “Edit Pace” to modify your pace.
Your pace numbers can be edited from your main profile page.
Copying Files Across Systems
Once you have created your workout, you may want to share it with others, or copy it to your local Zwift or another installation. Here are instructions for doing so.
Episode 43 of Zwiftcast has been released. Here’s the full episode description:
Simon and Shane are in New York City for a big moment in the history of Zwift – the launch of running. The expansion of the platform was marked with a splashy launch event and as well as Simon and Shane’s views, there’s comment from Zwift Insider editor Eric Schlange and pro triathlete Lionel Sanders.
The huge flowering of innovation and ingenuity from the Zwift community has seen designs for rocker plates mushroom. Simon rounds it all up and gets expert comment from inside the trainer industry.
Many Zwifters work (a little) while training or riding, but the staff of a cycling website have taken Zwifting-while-you-work to a whole new level. Editor of Cycling Tips website Neal Rogers talks about how the virtual lunch ride has become a forum for company bonding and brainstorming.
And there’s a new Zwifty podcast coming along – Simon gets the lowdown on the Training Podcast featuring big names in the Zwift world.
Due to a bit of a mechanical in the production of this episode, this Zwiftcast is a little shorter than usual. We hope you still enjoy it!
Weeks 8 and 9 – Returning to Normal, a Valiant Attempt
Editor’s note: Ian Murray is using Zwift to train for the International Triathlon Union Long Course World Championships held in Odense/Fyn, Denmark July 2018. His weekly Zwift Insider series discusses the previous week’s training and the plan for the upcoming week.
It’s weird how work and life get in the way of training. I never thought that a government shutdown would have such an impact on anything other than work, but I thought wrong. Shortly after submitting the last installment of the training update, I got word that my trip to San Diego was back on. Two long plane trips, a trip up Mt. Baldy, and trying to recover from the chaos meant that the last two weeks were a bit off, to say the least.
Week 8 – p’alla, p’aca
On Monday of week 9, I flew back home as my work trip was canceled due to the government shut down. Literally 20 minutes after my flight departed, Congress reached a deal. A few hours after arriving back at the house, I got word that I would make the trek to San Diego the following day. So much for the hard week that I had planned. I quickly unpacked my bags, took out what I would need for the trip, and repacked. The best part of the change in the schedule was that I would get to ride with my TeamODZ pals.
On Tuesday morning, I headed into work early to take care of some paperwork from the previous week’s travel and answer some critical emails that I had pending. Traffic being the normal bane of my existence here, I did not get to work in time to use the pool, meaning I would have three straight days of no training. Boo! At noon, I headed to the airport for the long trip. I landed in San Diego late and got to my hotel room around 11 PM. Not super happy about the late arrival, but I still set the alarm to get up at 5 AM. My body didn’t really like the early hour even though that is my normal wake up time, and it certainly did not like the treadmill setup. No fan and a non user-friendly platform made my run a little less enjoyable than normal. (Yes, I did have Zwift going, but it wasn’t the same.)
Thursday turned out to be something different all together. I woke at my normal time and took a look at the weather. Wow, 48 degrees! Yeah, no way was that going to happen. Fortunately, I found some time in the conference schedule where I felt I could break away for my long run. At about 11 that morning, I was out the door and heading toward the ocean. Man, what a great feeling! Where I live, I am more or less stuck on the treadmill or in one or two places that feature a five to seven mile loop. This turned out to be a 17.5-mile loop that took me to Ocean Beach and the laguna near it. I got back to the hotel a bit tired but energized. I haven’t felt that good after a roughly two-hour run with no food in a long time.
The next day, I gave the legs a break and headed up to Riverside to meet up with the TeamODZ crew. I ate some great food, Thai for lunch and Mexican for dinner, and set my rental bike up for the next day’s epic ride. The bike came with some standard flat pedals, and there was a bit of hilarity, as we could not get one of the pedals off. Finally, with a bit of ingenuity and the upper body strength of two climbers, we got it off, installed my pedals, and finished making a few adjustments to the saddle height. The bike was a bit big for me, but we got it close enough.
The next day turned out to be a leg-burning 56 miles with 7000 feet of climbing, including the legendary Mt. Baldy. Let me tell you, I have a lot more respect for the Tour of California riders after climbing that monster. I am proud to say that I did it within 20 minutes of the KOM holder, but there was definitely no threat to that record. The first seven kilometers weren’t all that bad, despite some steep grades and switchbacks. The last kilometer, though, was horrible, straight up and exposed to the wind. I honestly don’t know how I remained upright at one point. I was going so slow that I was sure that I was going to simply fall over. Finally, I got to the top and waited for the rest of the group (#humblebrag) to get there. We then began our white-knuckled descent back to town. Check out the video to see some the craziness >
After a quick lunch with the crew, I got my stuff packed up for the long flight back home. I got to LAX at about 8:30 PM on Saturday for a 12:30 AM flight and finally arrived at my door at about 3:30 PM on Sunday. Thankfully, I had the next day off to try to adjust. The week was not originally what I had planned, but I had to make a lot of adjustments on the fly. Despite the lower TSS numbers, it was far from an easy week. TSS planned 550; TSS completed 545
Getting Back into the Flow of Things
Arriving back home and to work, I had a grand vision of jumping right back into hard training. Boy, was I stupid. Apparently, my travels and irregular diet for two weeks took a bigger toll on my body than I expected. I started the week with a so-so MAF test, and the week just never got any better. I felt my legs dragging on every workout but not to the point of feeling overtrained. I was simply tired. The chaotic work week didn’t lead to getting my regular seven or eight hours of sleep, and I just couldn’t recover enough to have a good training day. Everything was just… meh.
Fortunately, Friday turned out to be a wash, as work commitments kept me from doing any training. I thought that the day off would give me some more pep in the legs, but it really wasn’t much of a recovery day. By Saturday, I did start to get some good sensations back, but there certainly were not fresh legs attached to my body. I served as the Director Sportif for the C group during a TeamODZ Goats & Bears Race, holding back except on the climb to the radio tower. I let the peacock fly there (pointless Other Guys reference). During the drop down the mountain to the finish, I sat up and waited for a teammate. We worked together for the remainder of the ride, and I worked to launch him to take an additional scalp along the way.
I rode for another 20 minutes after the end of the race to cool down, but I soon had to get off of the bike because I had something very important to do that day. Oh yeah, it was rib night. Thus, I had to start smoking the ribs for a dinner that night. Yeah… it was awesome. I ended up taking Sunday off to spend some time with the wife, and my legs were pretty pleased with that decision. I had planned a big week, but I just didn’t have it in the tank. Planned TSS – 1014; Completed TSS – 738
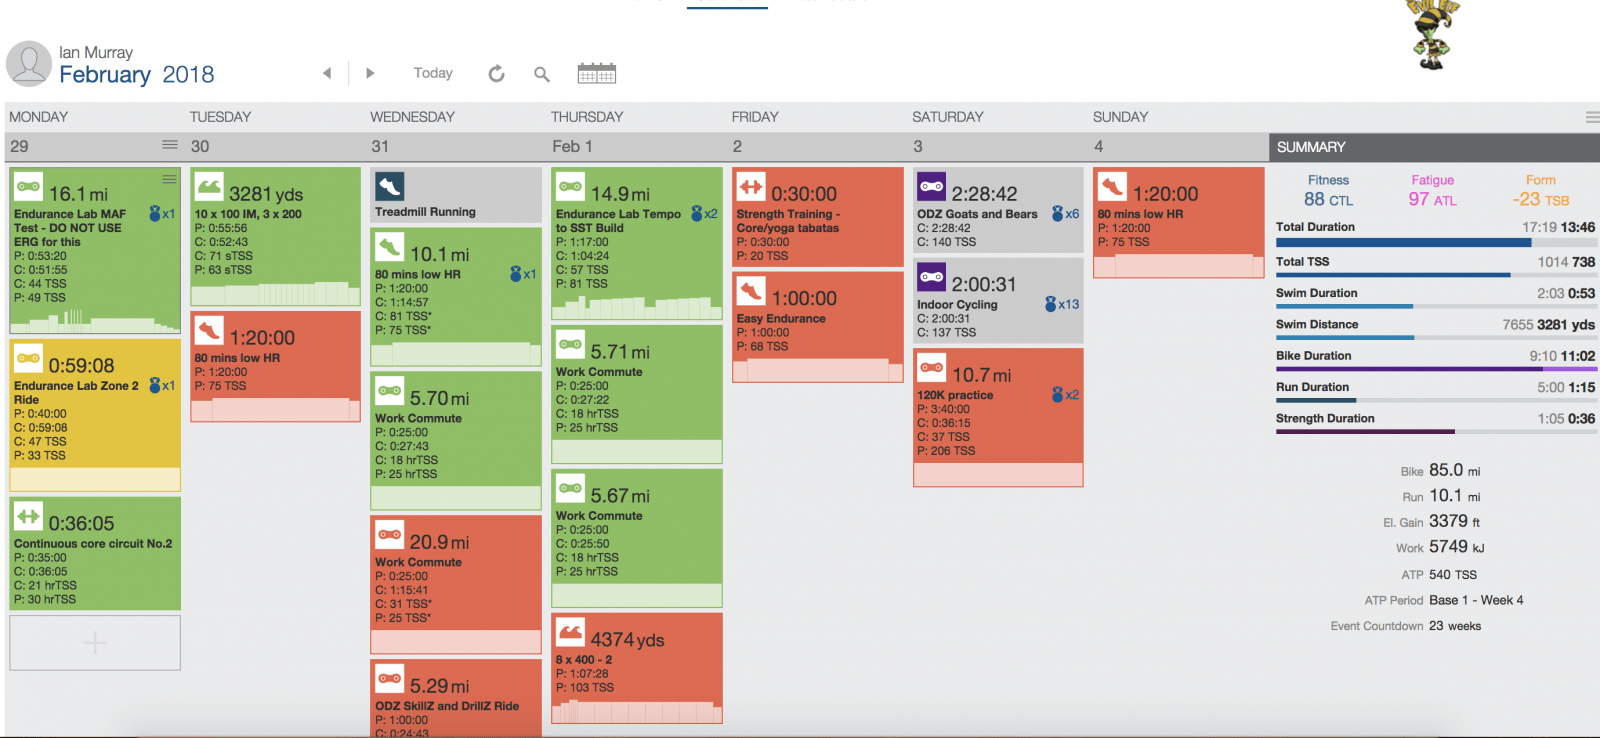
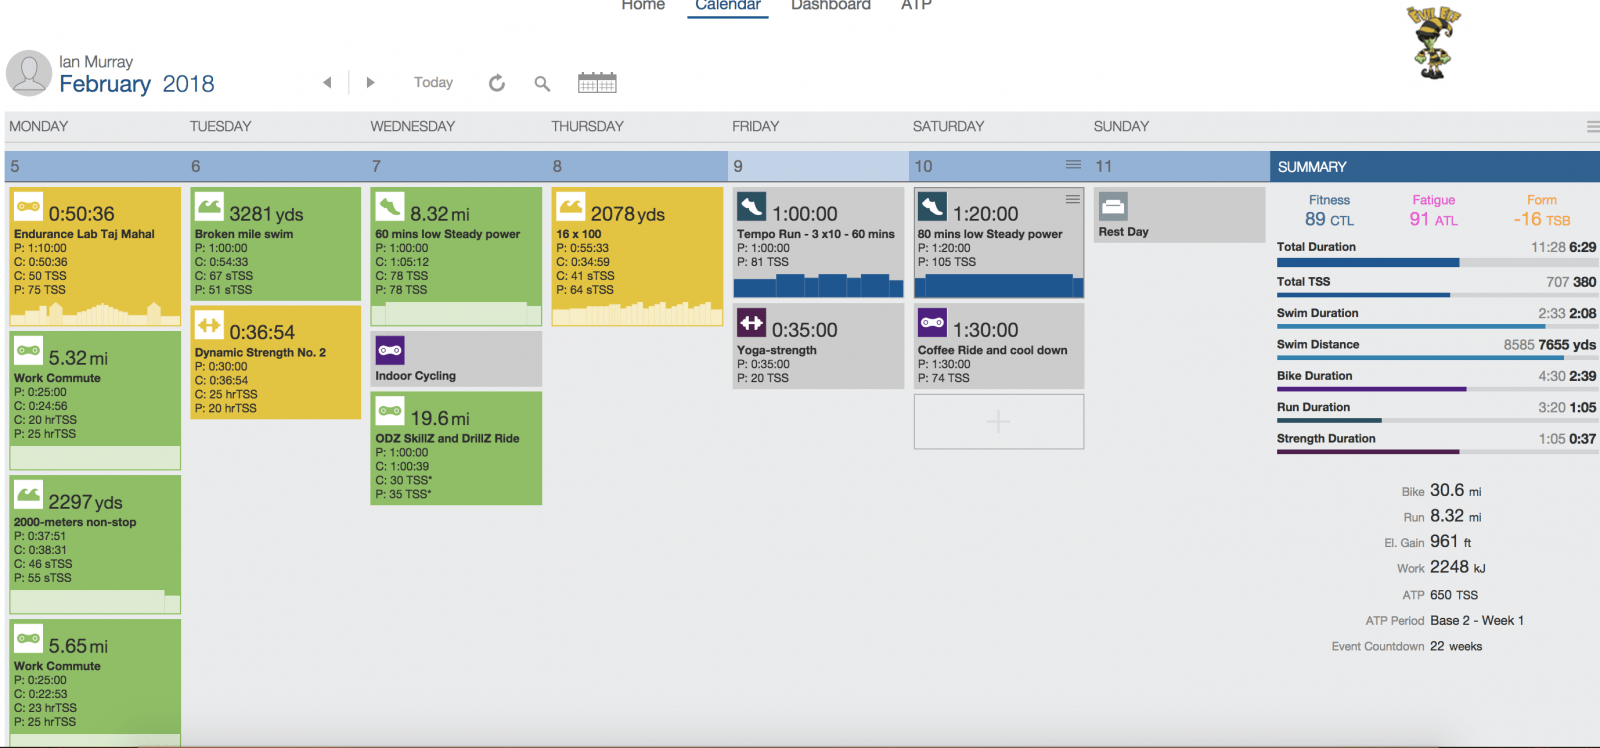
Adjusting My Own Paradigm – Planned TSS – 707
After taking a good look at what I was doing and what I had time for, I realized that I had to back off a bit. Frankly, work has been a bit hectic, and I haven’t been able to get the needed rest to maintain a 100+ CTL right now. So, I decided to take a step back and drop the TSS to more human levels. I know that I can handle 700-800 TSS with relative ease, so I figured that I would live in that zone for a little bit. Heck, that will still bring me close to a 100 CTL, and I will have time to spend time with the wife and take care of work. This week is actually an easier week, so I hope to let the body recover a good bit before a harder week the following week. As you can see, the screen shot below is up to date, so I’m trying to stay close to the plan.
That’s it for now, folks. Join me for the ODZ SkillZ and DrillZ Ride on Wednesday night at 6:30 PM Eastern or look for me during the week doing some of my workouts. Twenty-two more weeks until ITU Worlds!
Tonight Zwift announced the launch of “Zwift Run Free Access” via a launch event in New York City (event details to follow).
While still officially a beta product, the plan is for Zwift and its community to further refine the run app with new product components and an expanded schedule of events, races, and group workouts until the subscription service roll out scheduled for late 2018. Much like Zwift’s beta launch to the cycling community in 2014, Zwift Run will be free to use until the subscription service roll out.
Big Shoes to Fill
Will Zwift Run shake up the running world like Zwift has shaken up cycling? Since its beta launch for cyclists in 2014, Zwift has connected half a million cyclists in a vibrant online community. Those riders logged an average of 1 million miles per day this past January. Zwift CEO Eric Min is bullish on Zwift Run’s future:
“Zwift Run is fantastic news for the fitness industry. In 3 years we’ve transformed the indoor cycling space by making the home ‘turbo trainer’ a super desirable product to own and an essential part of a cyclists training regimen. We’re going to give the same make-over to the treadmill. Whether at home or in the gym, Zwift Run will make your indoor run workout experience more social, more motivating, more structured and more measurable.”
Zwift Run will feature a library of training plans tailored to runners of all abilities. In addition to workouts, group runs and races are already happening daily. These events are broken down by pace, so Zwifters can find a run that best suits their needs.
New Unlocks
Zwift is collaborating with a number of running industry brands like New Balance, Hoka and Under Armour to bring in-real-life footwear and apparel to its virtual world. These can be unlocked by accumulating running XP points or other achievements such as running your first 5k. Learn more about Zwift Run points, levels, and unlocks >
Compatibility
Most users are currently connecting to Zwift Run via footpods such as those made by Garmin, Milestone, and Stryd. An increasing number of Bluetooth ready treadmills can also connect directly to Zwift, and digital connected footwear is also part of the picture with Zwift collaborating with Under Armour on its smart shoe range.
The Road to Recovery – FTP Builder Part 2 and that Dreaded Test
Editor’s note: Dave Bibby’s “Road to Recovery” series documents his use of Zwift to return to full fitness after a road bike accident in June 2017.
Welcome back to my little journey along the ‘Road to Recovery’; this is my last post of four. If you have missed any of the story so far you can find it here. We are now very much into the winter training section of the year for us Zwifters in the northern hemisphere. In this update I get to complete my 6wk Beginner FTP builder, take the dreaded FTP test and get closer to the Tron.
Workouts and fun?
If you read my previous post you will know I am close to giving up on the workout program. Those that know me will tell you I don’t make a habit of giving up but this did cross my mind for a couple of reasons.
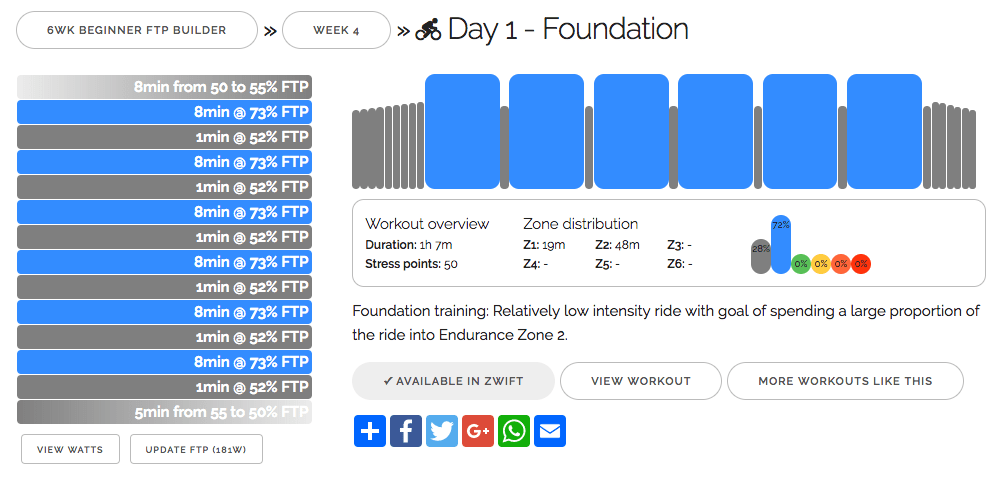
Firstly I found a lot of the workouts almost too easy. The weekly plan included a couple of Foundation sessions which to be brutal where dull and I mean dull. Approximately 70% of the ride is spent at 70% FTP. If you ask a majority of the Zwifters out there this would seem well below what they would normally ride at so it can feel like a bit of a waste of time.
Secondly I miss the interaction with others. I love Zwift, it’s a wonderful platform but the biggest attraction for me is riding with others. In this workout mode no sooner are you riding happily in a bunch when the workout informs you to slow down to Zone 1 (50% FTP) and the group you just met are off.
I thought the six weeks might never end but there were some positives. I was starting to feel better in myself both physically and mentally. Nothing in the training manual indicated I could not join other groups occasionally right? I also found some of the workouts to be great fun especially the Intermittent and Tempo. These workouts push you a bit harder and get you hitting high intensity in short bursts.
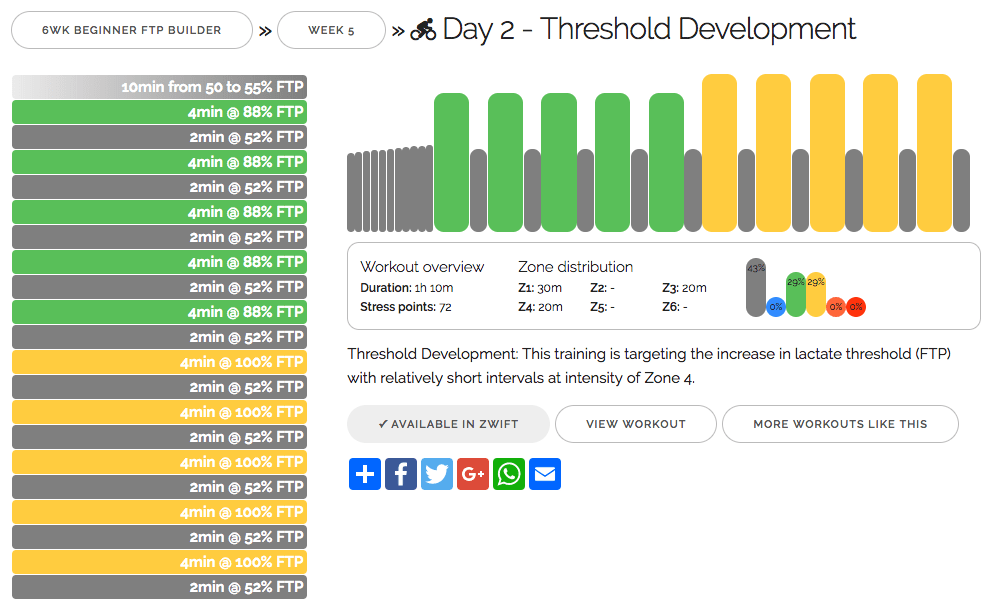
Once into week 5/6 you then hit some Threshold Development workouts which really start to test your metal. These I found got harder and harder but really gave a sense of achievement.
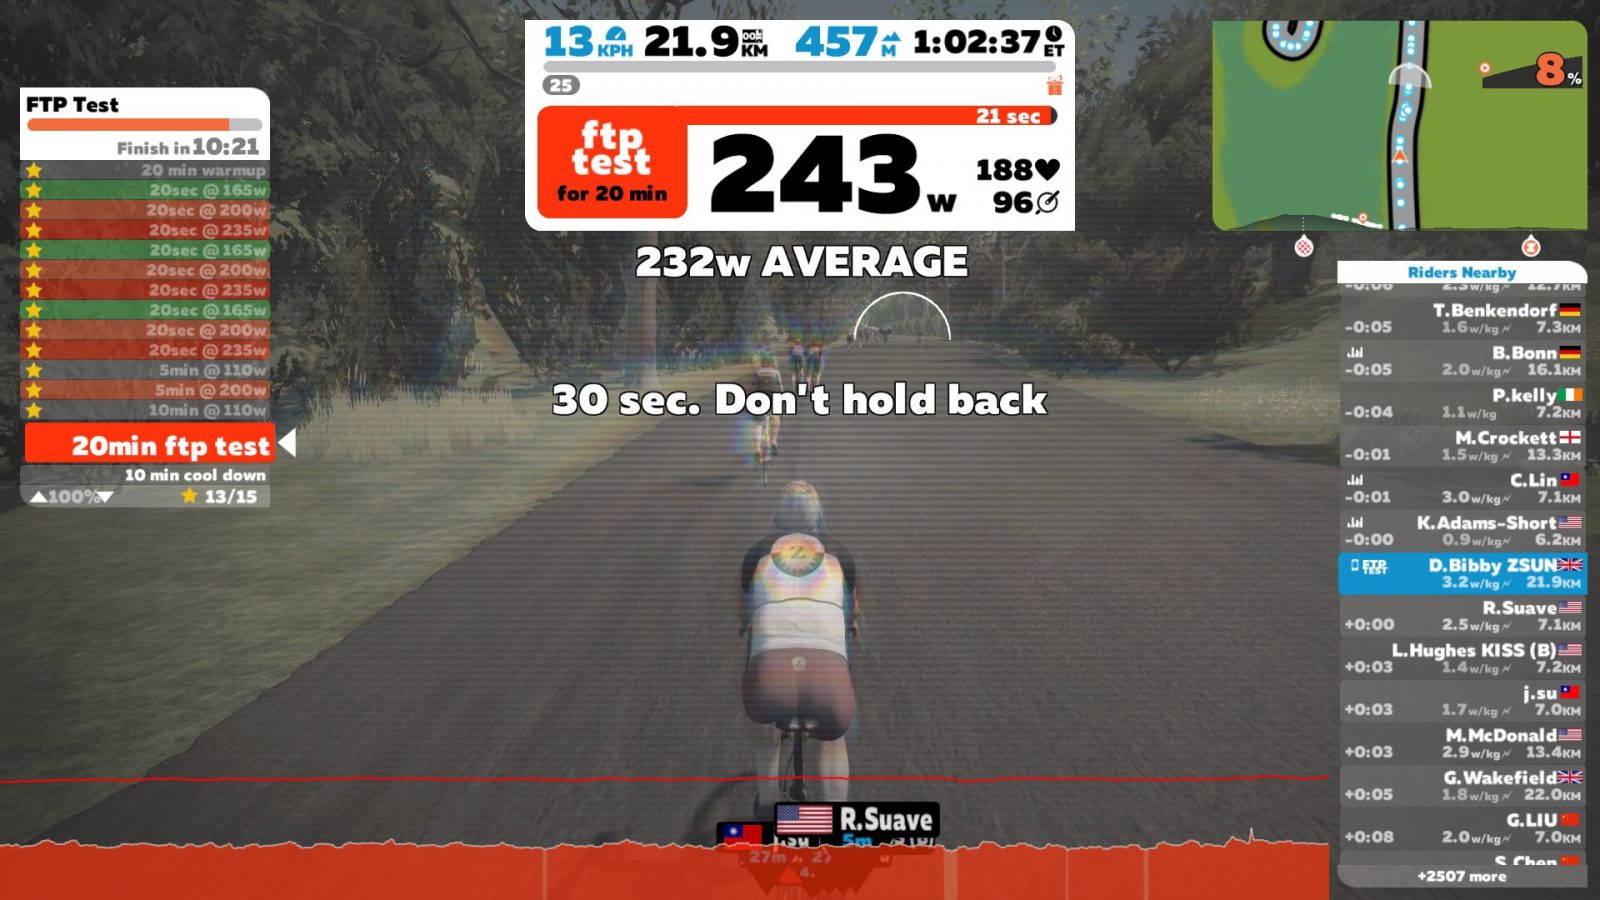
That FTP Test
Well it’s all done. The last of the 6wk workouts are complete and I have to say, even though it was sometimes frustrating it actually has improved my fitness and cycling on Zwift. I have also learnt that having the right cadence makes all the difference. I was very much used to slogging away at 70-80 rpm when I really should have been in the 90’s.
There are many theories around how to take and manage an FTP test so I did some research and decided to follow Zwift’s own supported method.
In short this follows some simple rules around the sections of the test:
0:00 to 10:00: Maintain your tempo – the section should be challenging but sustainable
10:00 to 15:00: Lift your power – add 5 to 10 watts if you can
15:00 to 20:00: Empty the tank – go all in!
I can honestly say this went out the window after the first 10 minutes. I certainly could not raise my wattage or go all in. I did try to build up slowly but once you have reached your desired wattage it’s difficult to push any harder. Just to recap, before my accident my FTP was 297; when I got back on the bike it had dropped to 181. I had in the back of my mind a target I wanted to hit and once that target was on the screen as an average it was all I could do to keep it there.
Finally it was over! After all that training I had hit a new FTP of 221 so I had gained 40 watts in 6 weeks. I can honestly say the test nearly killed me but it was so worth it!
After recovering on the sofa later, I reflected on the training program and although I found it tedious in places it was all worth it in the end. I will use some of the workouts to develop my own programs for the future to work on those areas we don’t tend to cover on group rides.
My road to recovery has not finished yet. I have yet to venture outside (which my daughter would happily never see me do again!) but need to gain more upper body strength for that. I am being told that this will be a very long process and I am only on the first step.
It’s worth reflecting on what Zwift has done for me. It’s given me the motivation and drive to better myself. Not only before the accident but now more than ever pushing myself to that next target. It’s helped my mind focus and given me purpose rather than sitting on the sofa stewing. There have been many studies supporting the theory that exercise can help mental health and I can only say for myself that it really has got my mind back in the game.
Let’s not forget the people on Zwift that have supported be through some very dark times. The community we are all part of has amazing strength to help and support others. Given our love for cycling we are sometimes at risk of injury. I have received amazing support and recommend anyone suffering an injury to reach out to your Zwift community because we have some wonderful people out there.
Back in the Day – ZSUN
This is fast becoming the reflection part of the blog where I look back at some of the groups and teams I have ridden with. Utimately we all have our favourites that we keep coming back to time after time. For me ZSUN fits that mould.
Back in October 2016 when TPF 2.5 was becoming too much for me to lead on a regular basis due to other commitments, I was fortunate enough to have a few teammates that could cover from time to time. But it was proving a little too difficult to manage.
By this time I had got to know a few fellow Zwifters on Facebook and had a look around at some of the other groups I could ride with. One such group that took my interest was ZSUN led by Stewart Lalieu. ZSUN has a culture of fun and no-one takes themselves too seriously with loads of in-jokes and plenty of banter during the ride. The Facebook group has almost 2,500 members from all over the world and is just about people that want to get into Zwift and enjoy group riding. Stewart with the help of Monica Cross Holmes and Chris Ziggy Moore host events covering most time zones.
ZSUN also has a group called ZSUN Racing. This is a little bit smaller and more personal. I first joined this group to compete in the 2016 Zwift World Championship since the group is aimed at riders that have training targets and goals to reach.
I cannot tell you how much I enjoy riding with these guys. Every member has their own nickname which can be confusing when chatting on Discord or giving ride-ons. We are all great friends on Facebook and like many of my other friends the support I got from ZSUN during my recovery has been immense. Thank you ZSUN.
Tron Update
Now on 90% complete so just around the corner!
My last note will be to say respect to all those leaders and sweepers out there. Zwift would not be the same without your tireless efforts. #RIDEON
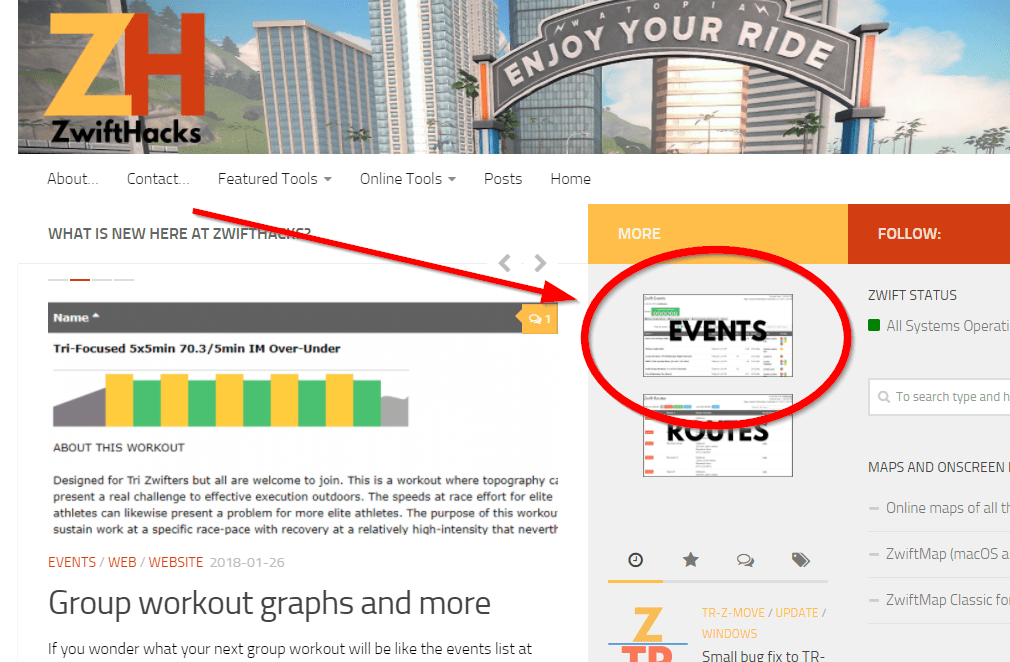
Use ZwiftHacks to Get More Info about Zwift Events
I was once in a group ride and struggled to remember exactly what the advertised route and pace was. That made me wish for a way to see the event description even after the event has started. This was the original idea that lead to the event list you find at ZwiftHacks.
By now Zwift has 500+ upcoming events in the event module. Scrolling through the list in Zwift Companion or on zwift.com is not always the easiest way to find your next event. This is where ZwiftHacks hopefully helps.
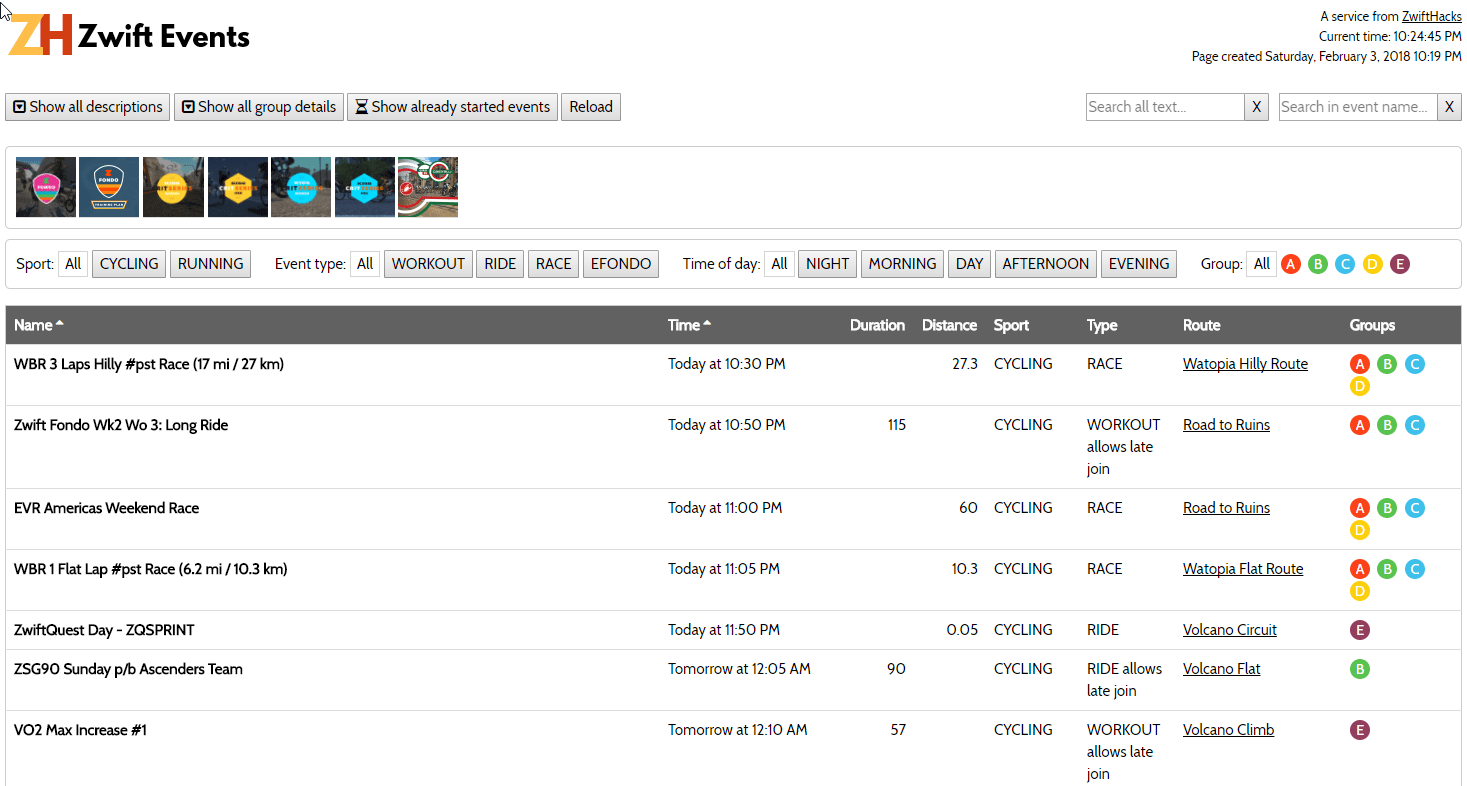
What are the features you can use?
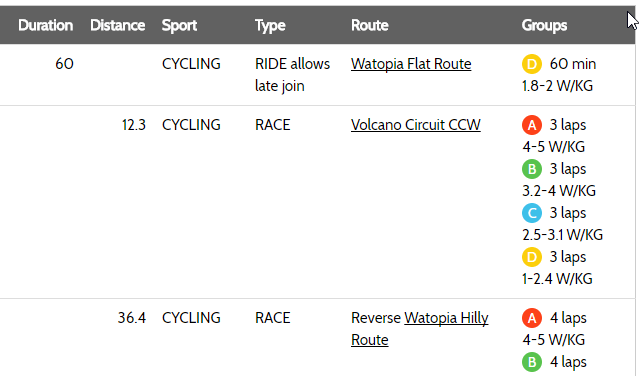
The data in the event list comes directly from Zwift. It is the same event data which Zwift presents in its own event list. The focus here has been on features that make it easy to search, filter, and generally get as much information as possible without scrolling and paging a lot.
It is compact
You can read a lot of detail for multiple events straight from the list.
Toggle descriptions either per event or all at once
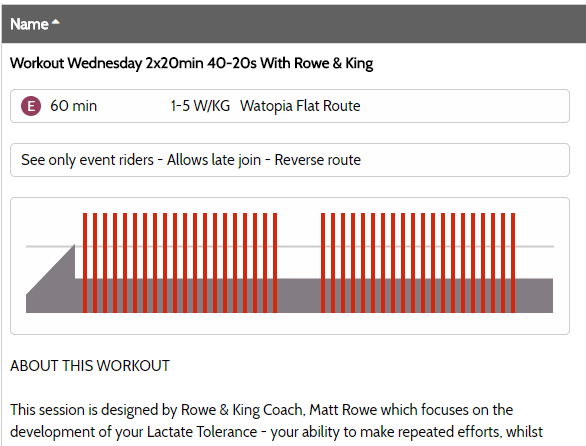
The full description of an event appears when you click the event name. You can also toggle all descriptions at once with the ‘Show all descriptions’ button.
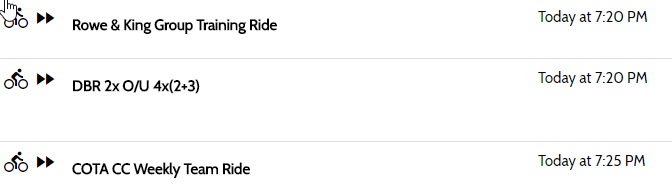
See already started events
If you click the ‘Show already started’ button the events started within the past 1.5 hours appears at the top of the list:
Filter by sport, type of event, category, and time of day
There are buttons for quickly filtering the list down according to your interests.
Filter by event name or by all text in the event descriptions
If you are looking for a specific event or perhaps an event series filter the list quickly with either ‘Search all text…’ or ‘Search in event name…’
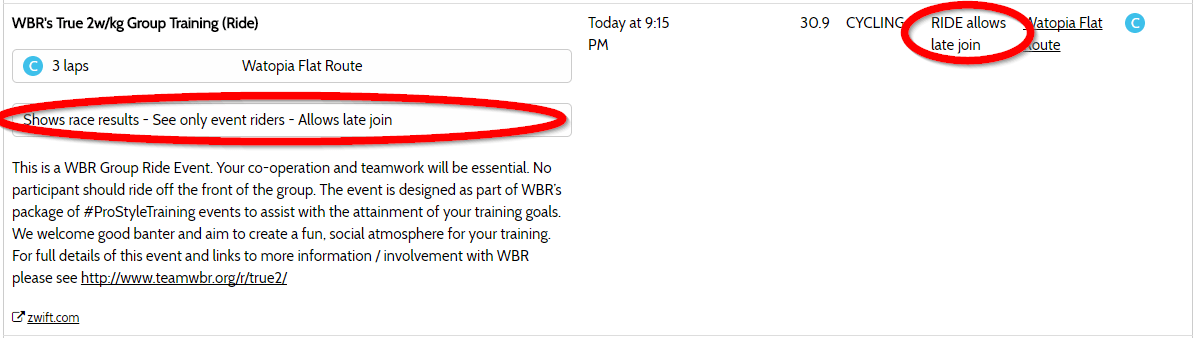
See if an event lets you join after it has started (allows late join)
Most group rides and some of the group workouts let you join after they have started. The event list tells you which ones.
See if an event is on closed or open roads
Does it matter if you can see other riders during a race or ride? The event list tells you both in the ‘Type’ column and in the event description.
Direct link to route descriptions
The route name is a link to more information about the route (the ZwiftHacks route list). In it you will also find a direct link to Zwift Insider’s description of the route.
Distance calculated for lap-based events
If the duration/distance of an event is based on a number of laps the corresponding distance in km is shown.
Overview of categories/group with pace etc. directly in the list and in the event description
Click in the Groups or the Name column to see the information. You can also just press ‘Show group detail’ to expand the entire Groups column.
Link to your own custom searches
You can link directly to a custom search by adding a filter parameter to the URL. As an example Zwift PACK has a link directly to its events in the pinned post in its Facebook group.
For the group workouts there is a graph showing the workout in the event description.
What is the next event for you?
There are plenty of events to pick from and hopefully the Zwift Hacks event list helps you find just the right one. Share how you find the best events in the comments – or pick an event and ride your bike!
Chances are that loyal Zwiftinsider readers know pretty well what Zwift is all about. And yet we recommend this well-produced vlog that might remind us of how we got to Watopia.
At the Tour Down Under, DC Rainmaker explored the look and feel of VirtuGO’s beta version. We’re curious about your opinion on this. What’s in it that Zwift should learn from?
How exactly does your fitness benefit from racing on Zwift? Hunter Allen delves deep into coach David Sellars’ Leomo Type-R data from two different event formats in Zwift. This one is really for the data geeks.
Zwift Fitness was recently featured in the Zwiftcast. If you missed it, take your chance and re-watch Simon’s interview with the Zwift Fitness founder Pete Donohue, and then get out there and join a Zwift Fitness ride yourself.
According to Simon Russel from the KISS Racing Team, your time spent with Zwift ultimately depends on you. And also not. If you found yourself struggling with this very dilemma, Simon’s vlog has the right food-for-thought for you today.


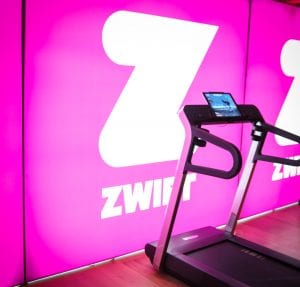 The first thing I noticed after walking through the door was the giant pink Zwift lightbox. Pink: it’s the new orange. But not really. Zwift’s marketing team is using the color to differentiate Zwift Run from Zwift Ride, though, and you’ll see this color used in all Zwift Run materials.
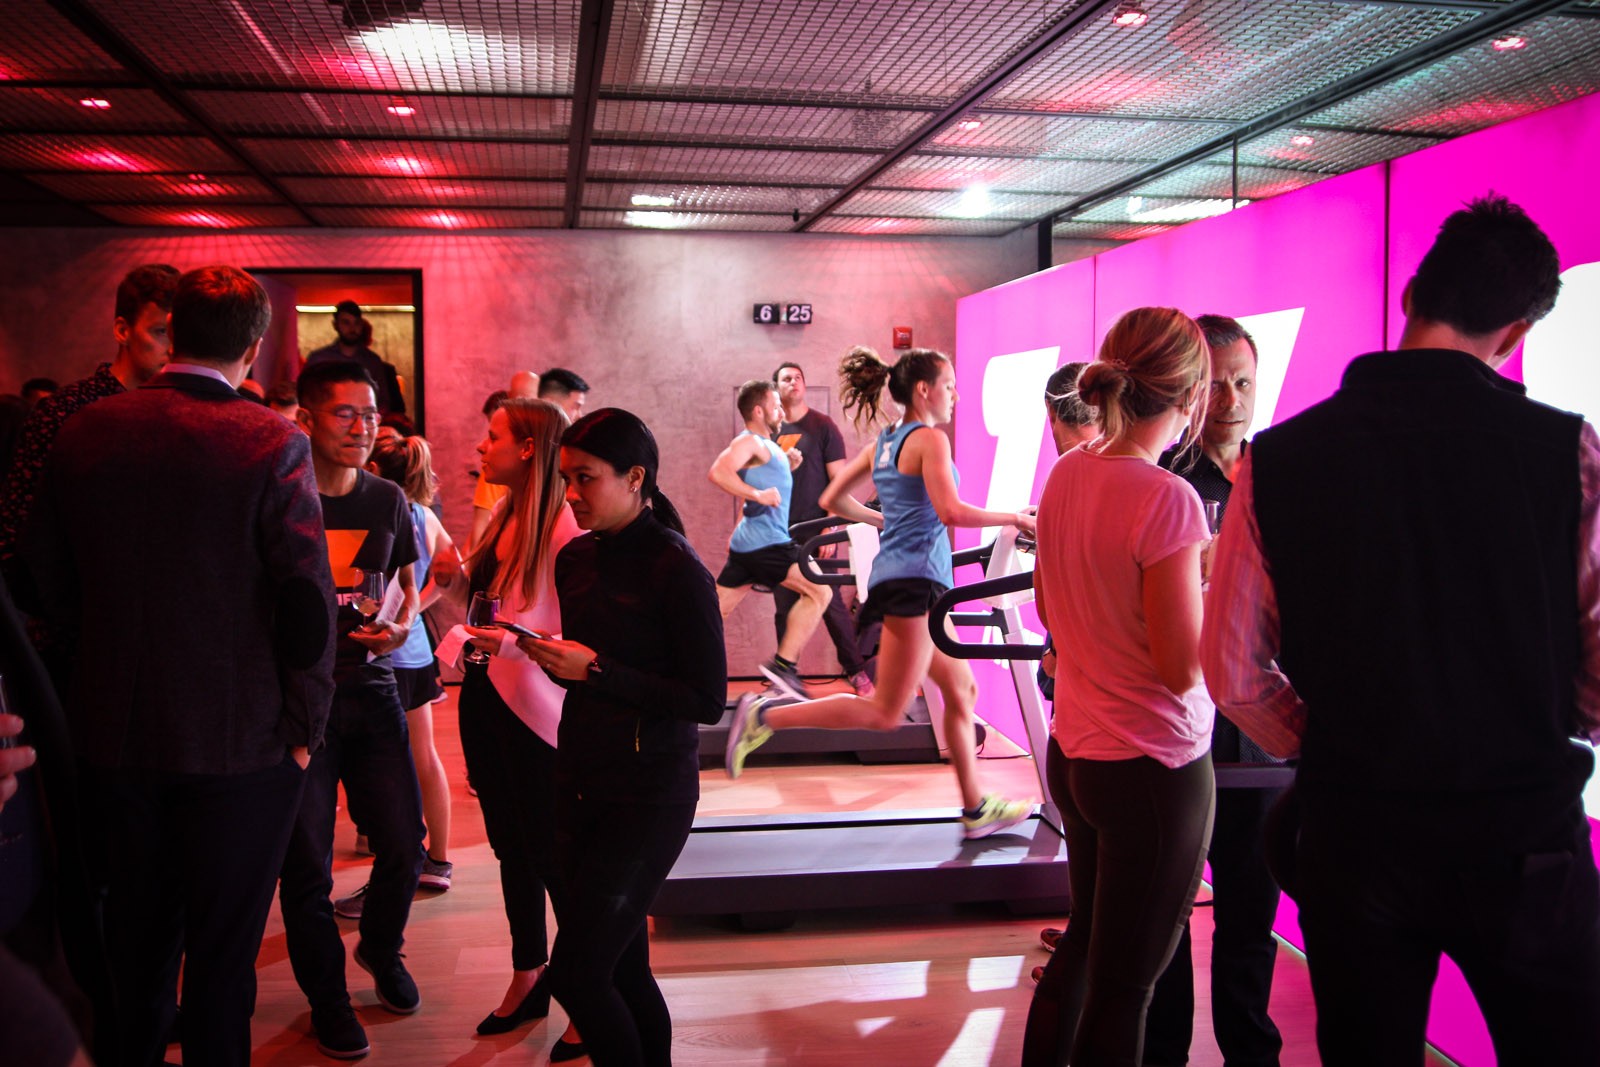


 This is fast becoming the reflection part of the blog where I look back at some of the groups and teams I have ridden with. Utimately we all have our favourites that we keep coming back to time after time. For me ZSUN fits that mould.