With Zwift, you can use your own bike on an indoor trainer to ride alongside others in a virtual world. When you pedal your bicycle, your avatar – a representation of you – does the same. This step-by-step guide will walk you through how to get cycling on Zwift, including links to help with your specific setup.
Table of Contents
What you need
- A device to run Zwift
- A Zwift account
- A bike
- One of the following
- Smart trainer/rollers
- Classic trainer/rollers AND a speed sensor
- Power meter AND any trainer/rollers
If you buy one of the new “smart bikes” that takes care of the bike and the smart trainer in the list above.
You also will need an ANT+ USB dongle if you are using a computer and connecting devices to Zwift that transmit only via an ANT+ wireless signal.
1. Find a device to run Zwift
Here is a summary of devices which can run the Zwift software and the wireless connections they allow:
Smartphones/Tablets: Bluetooth only
- iPhone
- iPad/iPod
- AppleTV
- Android
Computers
- Windows 10 64bit or higher: ANT+ supported if you plug in an ANT+ dongle, Bluetooth supported on Windows 10 with Bluetooth 4.
- macOS 10.14.4 or higher: ANT+ supported if you plug in an ANT+ dongle, Bluetooth also supported.
Note: if your smartphone/tablet/computer was made in the last few years, it should be able to run Zwift. But you may want to double-check by looking at Zwift’s current device requirements.
2. Sign up for a Zwift account
To create a Zwift account on a computer, go to zwift.com/create_account.
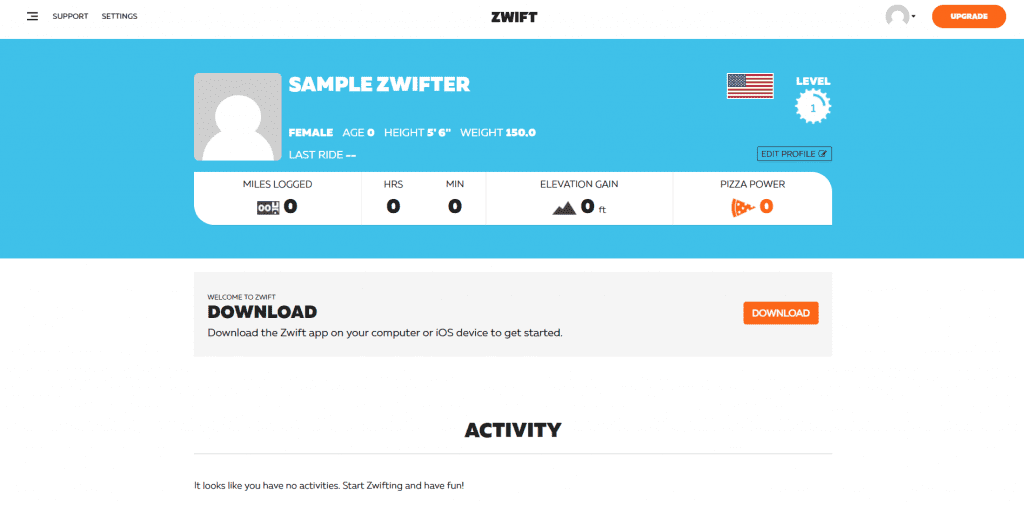
Once you have answered the required questions, you’ll be taken to your new profile at my.zwift.com. If you’re ready, you can click the “Download” button to go to the download page, then click “Download” again underneath your operating system (Mac or Windows). Open the file and follow the instructions to install Zwift. On the download page, there is also a link to install Zwift from the App Store on an iPhone, iPad, or Apple TV.

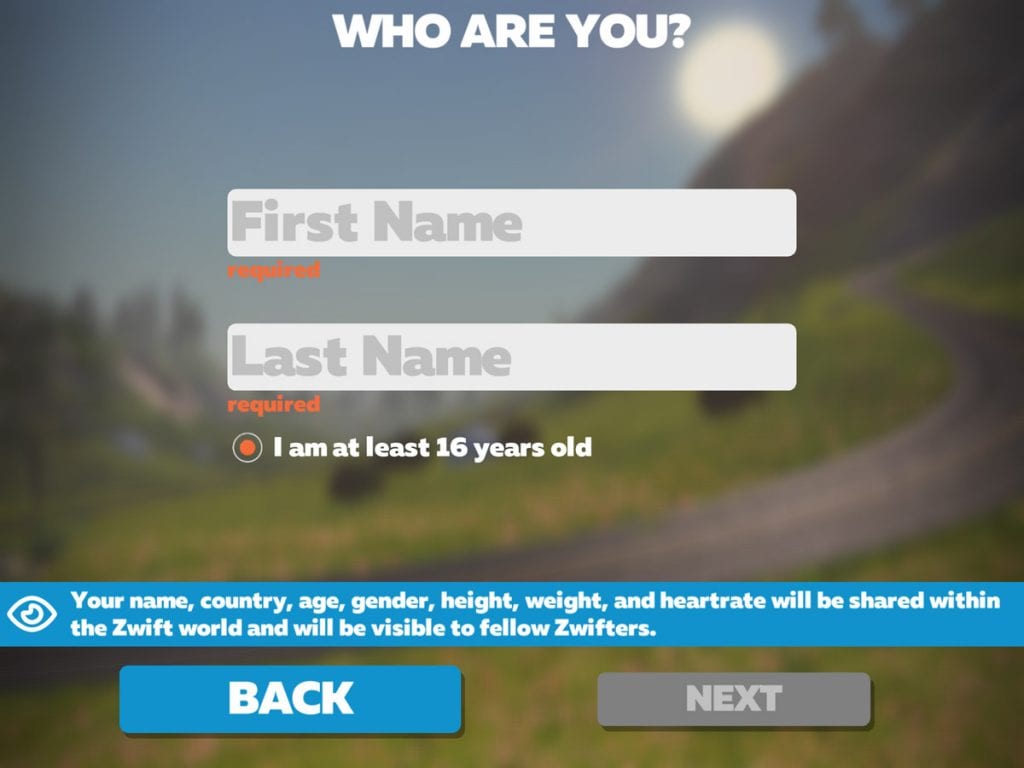
If you download Zwift before signing up for an account, Zwift will prompt you to sign up at the login screen. On a Mac or PC, click the words “Create an account.” On an iOS mobile device or Apple TV, search for the Zwift app in the App Store. After downloading and installing it, open the app and select “I’m New.” Answer the required questions and tap “Let’s Go” to get started.

An unlimited subscription to Zwift costs a monthly fee ($14.99/month in the United States). When you first sign up, you get a 7-day free trial subscription. After that, you will get another 25 kilometers (15.5 miles) of distance free every month. (If you signed up on a mobile iOS device or Apple TV, activate your 7-day free trial by selecting “Join Now” after you’ve used your first 25 km / 15.5 mi.)
You can pay for your Zwift subscription by:
- Going to the membership page of your Zwift Profile;
- Clicking “Join Now” at the bottom left of the starting screen on Zwift; OR
- Clicking “Join Now” in Zwift on an iPhone, iPad, or Apple TV and paying through your Apple/iTunes account
3. Choose a bike
Most bicycles will work with Zwift as long as they can be mounted on a trainer. When you choose a trainer, check to see which wheel sizes it supports. Very small wheel sizes may need an adapter for certain trainers. (This is most likely if you’re using a children’s bike, a BMX bike, or a recumbent bike.) To get on Zwift with a smart trainer, your safest bet is a standard 10 or 11-speed road bike, as this will work on virtually all smart trainers.
If you have a Zwift-compatible “smart bike,” you obviously won’t need a separate bicycle!
4. Choose and pair a trainer
The type of trainer you use will depend on your budget and the features that are important to you. A controllable smart trainer can transmit power to Zwift, simulate the feel of hills on the virtual roads, and help you hold your target watts in workout mode. A classic trainer doesn’t have those features, but it is cheaper. Can’t decide? This post can help you choose between a smart trainer or a classic “dumb” trainer. If you have a power meter you can use any type of trainer.
Check to make sure that your trainer and/or power meter will work with Zwift by looking at Zwift’s list of compatible hardware.
See the following guides for more tips on choosing a trainer and setup instructions:
- Classic trainer and a speed sensor: How to Get Started on Zwift with a Classic Trainer
- When setting up your bike on a classic trainer, make sure your rear tire is properly inflated and that you set the trainer tension according to the manufacturer’s instructions. Zwift uses the reading from your speed sensor and the stored power curve of your trainer to calculate virtual power or zPower.
- Smart trainer:How to Get Started on Zwift with a Smart Trainer
- If your smart trainer requires calibration, it’s a good idea to calibrate it regularly following the manufacturer’s instructions (usually after a good warm-up). If you’re using a wheel-on smart trainer instead of direct drive, also make sure your rear tire is properly inflated. With a controllable smart trainer, you can set the trainer difficulty to change how it simulates gradients on the virtual roads, or use Erg mode to help hit your targets in structured workouts.
- Power meter and any trainer: How to Get Started on Zwift with a Power Meter
- Rollers: To use Zwift with rollers, it’s best to have either a power meter or a set of smart rollers that will transmit power to Zwift. Follow the instructions for getting started with a smart trainer or power meter above. You can use Zwift with a speed sensor and a normal set of rollers, but your estimated power probably won’t be accurate. In that case, set it up as a classic trainer.
- Smart bikes: Most exercise bikes aren’t compatible with Zwift, but some are. Smart bikes broadcast power through open ANT+ or Bluetooth signals so that Zwift can communicate with them. Check here to see if yours is compatible. If it is, follow the above instructions for getting started with a smart trainer.
Once you click “OK” on the pairing screen, you’ll be greeted with the “Startup Screen.” Click the big orange “Ride” button to get going right away, “Training” for a structured workout, and “Routes” to browse the available routes. Keep in mind there are always two worlds available on a given day: Watopia and a “guest world”. Each world has its own unique set of routes, and the guest world rotates based on a monthly schedule.
Optional Steps
Pair a Cadence Sensor
A cadence sensor will sync the movement of your avatar’s legs with your own and give you cadence data. Power meters also transmit cadence. Some smart trainers estimate cadence, but it may not be accurate.
Pair a Heart Rate Monitor
A heart rate monitor gives you more information about how hard you’re working. Some races require one to place in their official results.
Connect Zwift to Other Services
If you want to connect Zwift to other fitness apps and services, go to your Zwift profile at my.zwift.com and click “Settings” at the top left. Here, you can edit your profile and change your password, but for now click “Connections.” This will allow you to connect Zwift to Strava, TrainingPeaks, MapMyFitness, Garmin, and other services.
Recommended: Zwift Companion
While it’s not required to use Zwift, Zwift Companion is a handy tool with some features that are only found in this mobile app. Find it in the Apple and Google Play stores.