Table of Contents
The fourth and final race of Zwift Racing League 2025/26 Round 1 happens Tuesday, October 7, and we’ll be in Watopia for a points race on the brand-new Jarvis Seaside Sprint route.
This course presents particular challenges as a points race, which we’ll unpack below. As always, there’s much to discuss, so let’s dive in!
Looking at the Route
Each lap of Watopia’s Jarvis Seaside Sprint route is 12.5km long with 95m of elevation gain, and we begin with a 2.8km lead-in with 36m of climbing. So for this, the final race of Round 1, the A and B categories will race 40.3km (3 laps), while the C and D categories will race 27.8km (2 laps).
Here are the key sections of the route from a points race perspective:

Aero Boost (helmet) at Downtown Watopia Start/Finish arch: makes you more aerodynamic (reduces your CdA by 25%) for 15 seconds. Use at higher speeds (flats and descents), especially when no draft is available (although it is still useful when drafting.) Use your first aero to nab sprint points on the JWB Sprint Reverse.
Lead-In (0-2.6km): the start will always be a bit spicy, but this lead-in, in particular, will tax the legs with its short climb up from downtown Watopia, then the undulating road of The Esses, and finally the kicker climb taking you into the descent that launches the JWB Sprint Reverse.
JWB Sprint Reverse @2.6km (200 meters, 0%) (FAL+FTS): our first points segment of the day may also prove to be the fastest, since the pack will be at its largest and aero powerups will be burning holes in our jersey pockets. The JWB Sprint is fast and rather technical. If you need pointers on maximizing your performance on this segment, read this post.
(The JWB Sprint Reverse arch is the start/finish banner for the Jarvis Seaside Sprint course, so A and B riders will contest this segment a total of four times: once at the end of your lead-in, then three more times at the end of each lap.)

Draft Boost (van) at JWB Sprint arch: increases the draft effect you are experiencing for 40 seconds. Use at higher speeds (flats and descents) when you are already drafting off another rider (since this powerup only helps when you are drafting.) Use this to boost your speed when contesting the Jarvis Sprint Reverse.
Jarvis Sprint Reverse @5.7km (200 meters, 0.2%) (FAL+FTS): our next points segment of the day is the same length as the JWB Sprint, but it will feel much longer since we aren’t entering it off of a descent! On top of that, the pack may be cagey, since every has to decide just how hard they’re willing to go, given that the Jarvis KOM Reverse starts just a few hundred meters up the road. (Is it worth grabbing big sprint points if you get dropped from the front group?)

Lightweight (feather) at Jarvis Sprint arch: reduces your weight by 10% for 30 seconds.
Use on climbs, when weight matters the most. Ideally you’d use it on the second, steeper section of the KOM so you’re as light as possible when weight matters most.
Jarvis KOM Reverse @7.5km (1.3km, 3.1%) (FAL+FTS): the only true climb of the race, the Jarvis KOM Reverse is really two steep, short punches, separated by flat bits at the start and in the middle. This will be the key inflection point of the race, as strong puncheurs will be pushing hard because 1) intermediate points and 2) this is their best chance of dropping other riders. Save your feather for this section!

Burrito at the Jarvis KOM arch: turns off the draft effect for riders in a cone-shaped window behind you for 20 seconds. Use when attacking off the front so opponents have to work harder to follow you, or in the peloton to make others work harder. Use this wherever you’d like, but try not to burrito your teammates.
Aero Boost (helmet) at Jarvis Lap arch: makes you more aerodynamic (reduces your CdA by 25%) for 15 seconds. Use at higher speeds (flats and descents), especially when no draft is available (although it is still useful when drafting.) Save this for use on the JWB Sprint up the road. You simply won’t be able to finish near the front without it, unless you manage to stick a breakaway off the front!
Climb into the Volcano @11.1km: riders always push hard up this short climb (200-300 meters long), so don’t get caught out. The aero boost you just picked up can be helpful for chasing back onto the wheels here as you near the Volcano Lap arch, but you’ll really want to save it for the sprint up the road.

Cloaking (ghost) at Volcano Lap arch: makes you invisible to other riders for 15 seconds. Use when you want to get away from one or more riders. Deploy then hammer, in hopes that you will create enough of a gap that your opponents can’t grab your wheel. Important: the ghost is disabled within 400m of the finish line, so don’t plan to hold this until the final sprint! Many riders will just throw this powerup away or not even get it because they’re still holding an aero powerup. But you can use it to help you get away off the front if you’re going for a long breakaway.
Finish: after completing the lead-in plus 3 full laps (2 laps for C & D categories), it will be time for the final sprint to the line. Again, the JWB Sprint is fast and rather technical. If you need pointers on maximizing your performance on this segment, read this post.
Read more about the Jarvis Seaside Sprint route >
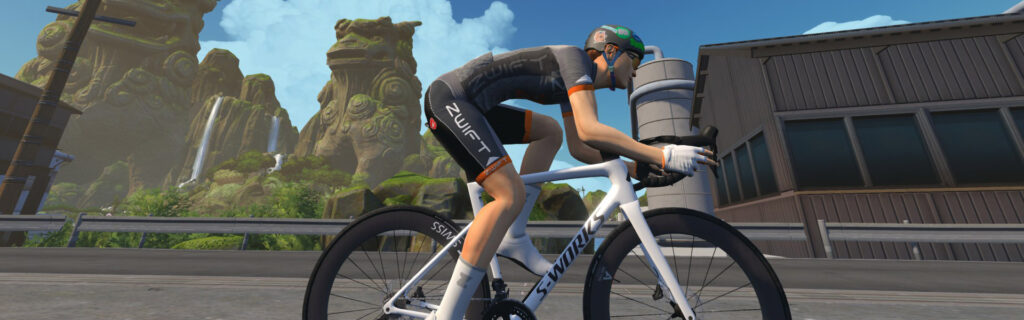
Bike Recommendations
This route features two flat sprint segments (including the finish), and one short KOM segment that is more like two short uphill sprints.
So do you optimize for climbing (lightweight) or speed (aero)? With so many points up for grabs on the sprints, you’ll want to be careful about sacrificing aero for weight. But with the KOM being the key selection point in the race, you don’t want your heavier aero setup to send you out the back of the pack when the going gets steep.
We ran tests up the Jarvis KOM Reverse at 5 w/kg using the S-Works Tarmac SL8 and a variety of top-performing wheels: the DT Swiss 85 Disc, the DT Swiss 65, ENVE 4.5 Pro, and ENVE 8.9. We ran the same test using the Tron bike. In the end, the DT Swiss 65s turned in the best time (2:25.17), but every setup was within a half-second of that time.
So if you’re confident in your ability to hang onto the pack over the KOM with disc wheels, use ’em. Because they’ll give you an advantage in the sprints. If you want to hedge your bets a bit, go with the lighter DT Swiss 65s, which will be just a bit slower on the sprints but may be the difference between hanging with the front and getting dropped.
See Speed Tests: Tron Bike vs Top Performers (Scatter Plot) for more nerd-level detail on frame and wheel performance, and check out Fastest Bike Frames and Wheels at Each Zwift Level to determine the fastest setup available to you.
More Route Recons
Lots of recon events are scheduled on upcoming ZRL routes, led by various teams. See upcoming ZRL recons for this race at zwift.com/events/tag/zrlrecon.
John Rice
Nathan Krake
The Syco-list
J Dirom
Strategic Options
Points Distributions, Jarvis Seaside Sprint
3 Laps (A/B)
2 Laps (C/D)
These charts show the maximum points a team of 6 could earn in a race with 60 participants. In the charts above, we’ve added the FAL points for the final JWB Sprint Reverse to the FIN points, since that’s effectively how they will operate. To learn how ZRL points races work, see this post.
Here are some predictions of strategies we’ll see on Tuesday:
- Sprint, Rest, Sprint, Survive, Rest, Repeat: this will be the most common strategy. With ~75% of points tied up in sprints and the finish, strong sprinters will try to contest as many sprints as possible and survive the KOM in the front pack with as little effort as possible, so they can fight hard on the finishing sprint.
- Burrito KOM Breakaway: clearly, the powerups in this race are structured to encourage riders to break away over the top of the KOM. Watch for strong climbers to go hard up the KOM, then push on the descent with a burrito powerup.
- Ghost Breakaway: we get a ghost powerup at the Volcano Circuit lap arch, and this will prove tantalizing to riders who want to go long on the final lap (there’s always someone). The 200IQ play may be using your aero powerup to attack as you ride through the Volcano lap arch, then using the ghost to disappear for a bit longer. The question for everyone else is, do you chase those wheels, or gamble and hope the pack drags them back?
Your Thoughts
Any insights or further thoughts on this race? Share below!
