Everyone loves a good photo, but moving pictures can be much more compelling, especially in the context of video gaming action.
Zwift rolled out their Video Screenshots feature in the first half of 2023, making it easy for many Zwifters to save video snippets of their activity for sharing on Strava or other platforms. Here’s an example of a video from a recent race:
Read below to learn all about Zwift’s Video Screenshots feature.
Recording a Video Screenshot
The Video Screenshots feature records 15-second video snippets of game play. These snippets are automatically recorded in certain cases, but recording can also be manually triggered.
If you have Video Screenshots enabled, most of the highlights you’ll want to capture are automatically saved. Automatically captured highlights include:
- Taking a segment jersey
- Setting a new PR
- Finishing a challenge or mission
- Gaining a level
- Unlocking an achievement
- Finishing an event
- Completing a workout or training plan
- Completing a new route
- Completing a goal
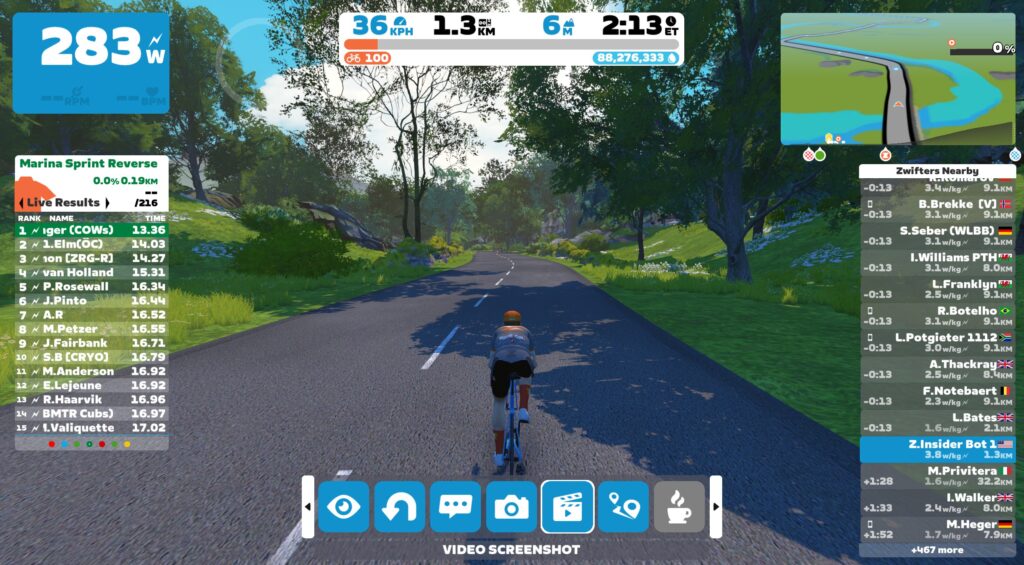
You can also manually trigger a 15-second video screenshot by clicking the button highlighted below in game or in the Companion app. This will save a recording of the previous 15 seconds of gameplay to your device.

On a PC or Mac, you can also hit F9 on your keyboard to trigger a video screenshot.
Once you click to a video screenshot, you’ll have to wait 5 seconds before clicking to record another.
Supported Devices
Due to the processing power required to record video screenshots, this feature is only supported on higher-powered Windows PC, Mac, iOS, and Apple TV devices. It is not currently supported on any Android devices.
See the “Device Compatibility for Capturing Video” section of Zwift’s support page for details on supported devices.
About the Video Files
Video Screenshots are saved as .mp4 files with H.264 encoding, and are automatically downscaled to a maximum height of 720 pixels regardless of the resolution in which you’re running the game. Audio is encoded using AAC at 48 kHz. Files are typically ~4MB in size.
Video files are saved to the following locations, where you can access or delete them whenever you’d like:
- iOS: Apple Photos app
- macOS: Movies/Zwift folder
- Windows: Videos/Zwift folder
Due to limitations on Apple TV, your video recordings aren’t saved in a location you can manually access. They’re saved to temporary memory in your Apple TV, and will be deleted eventually by the OS.
Uploading to Strava
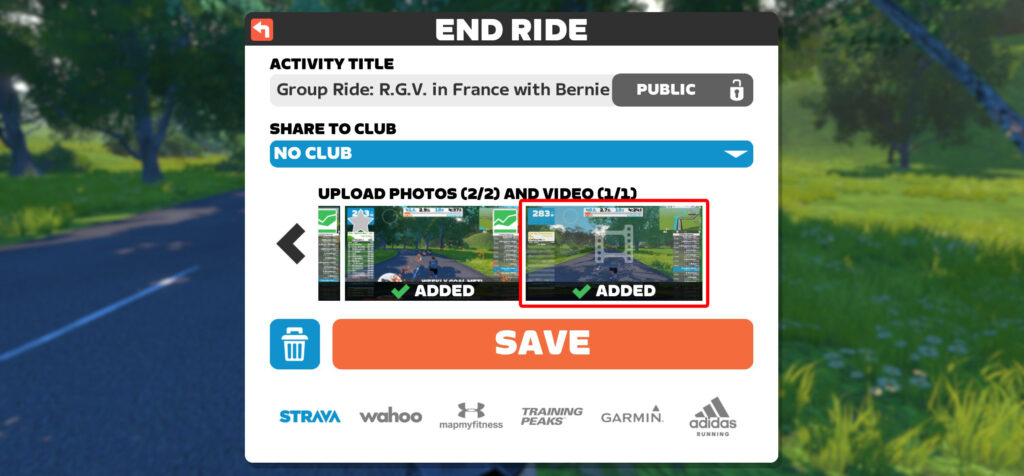
You can choose up to one video screenshot to upload to your Strava activity, along with up to five photos. This is done on the End Ride screen:

The first video screenshot recorded during your activity will be automatically selected for upload, but you can click to ignore a video and add a different video if you’d like.
Turning Video Screenshots On or Off
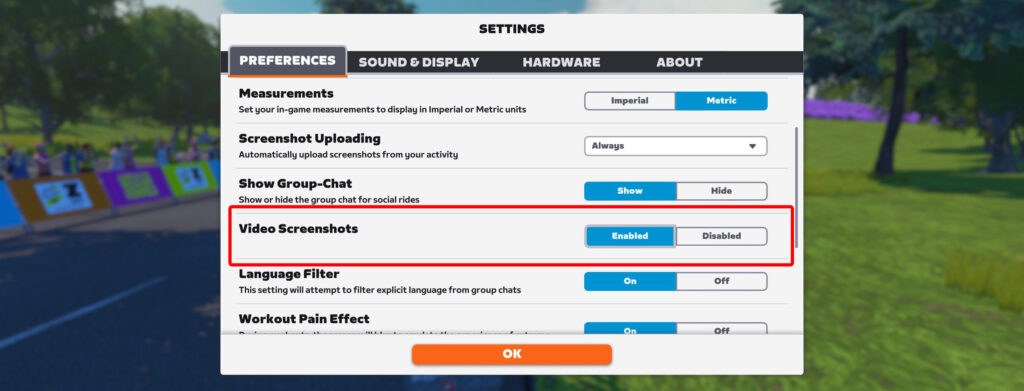
If your device supports Video Screenshots in Zwift, you’ll see an option to enable/disable the feature under Settings>Preferences:

The option is enabled by default, but you can disable it if you’d like.
A Note about CPU Usage on Windows
In tests on multiple Windows PCs, we’ve seen Zwift’s CPU usage increase by around 20% when Video Screenshots are enabled:
If you have a strong enough PC this shouldn’t impact your game experience, since the Video Screenshots feature is multi-threaded and won’t use the same CPU core that Zwift heavily uses for gameplay.
That said, riders on weak or overloaded systems may see an impact. If you notice your system performs poorly with Video Screenshots enabled, simply disable it.
Questions or Comments
Do you use Zwift’s Video Screenshots feature? Got questions or comments about how it works? Share below!