Zwift’s iOS release includes an “Easter egg” (hidden feature) granting access to Zwift’s running mode which is still in pre-beta testing phase. With a Zwift Runners group forming on Facebook and runners seen on course regularly, our guess is Zwift running will be officially released within the next few months.
Getting Started
Want to start running on Zwift? All you need is Zwift on iOS and a sensor which outputs running pace. (Of course, a treadmill is also a good idea, although I tested it with an outdoor run and it worked fine there as long as you’re willing to leave Zwift open on your phone.)
Pace Sensors
I have tested Zwift running using Stryd and Milestone footpods and both work fine (reviews coming soon). Any Bluetooth foodpod should work. Some runners are using Wahoo’s “Gym Connect” module which can plug into certain treadmills and broadcast pace metrics. There are other footpods which can also be used–anything which broadcasts pace over Bluetooth should work.
Getting into Running Mode on Zwift iOS
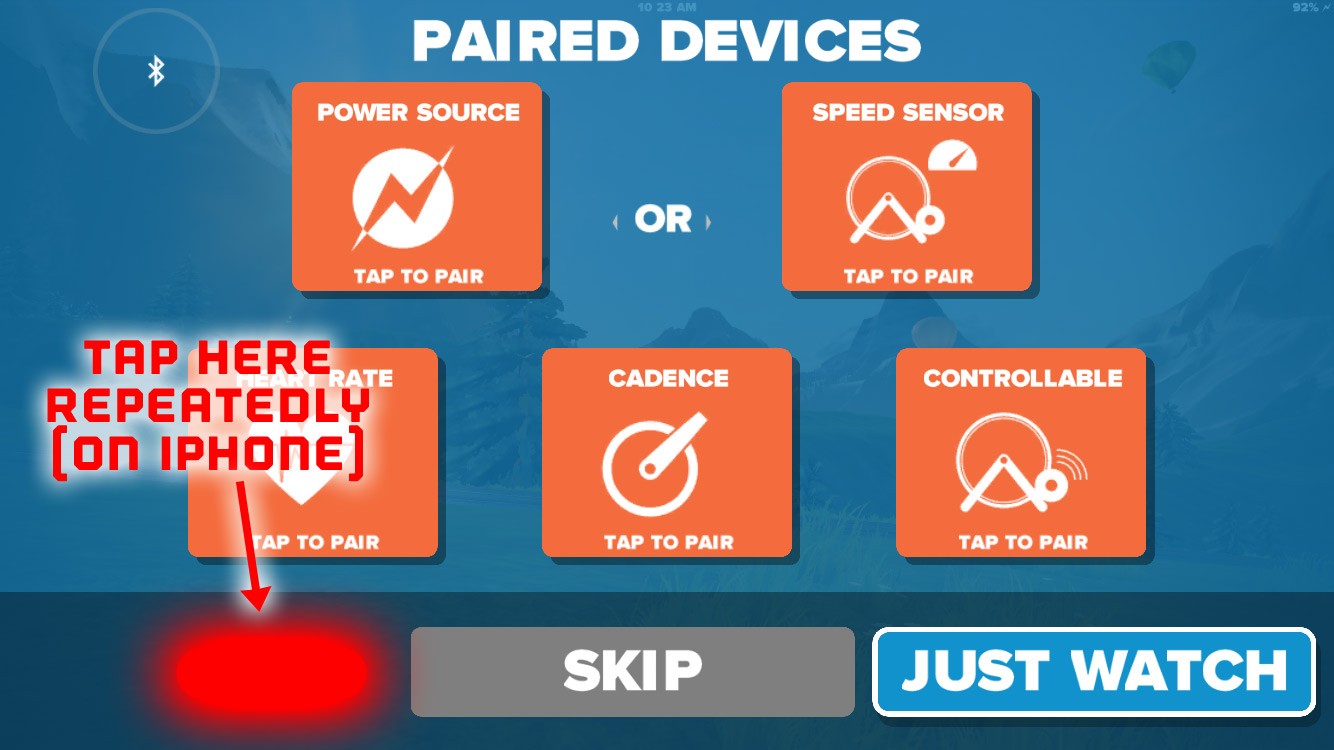
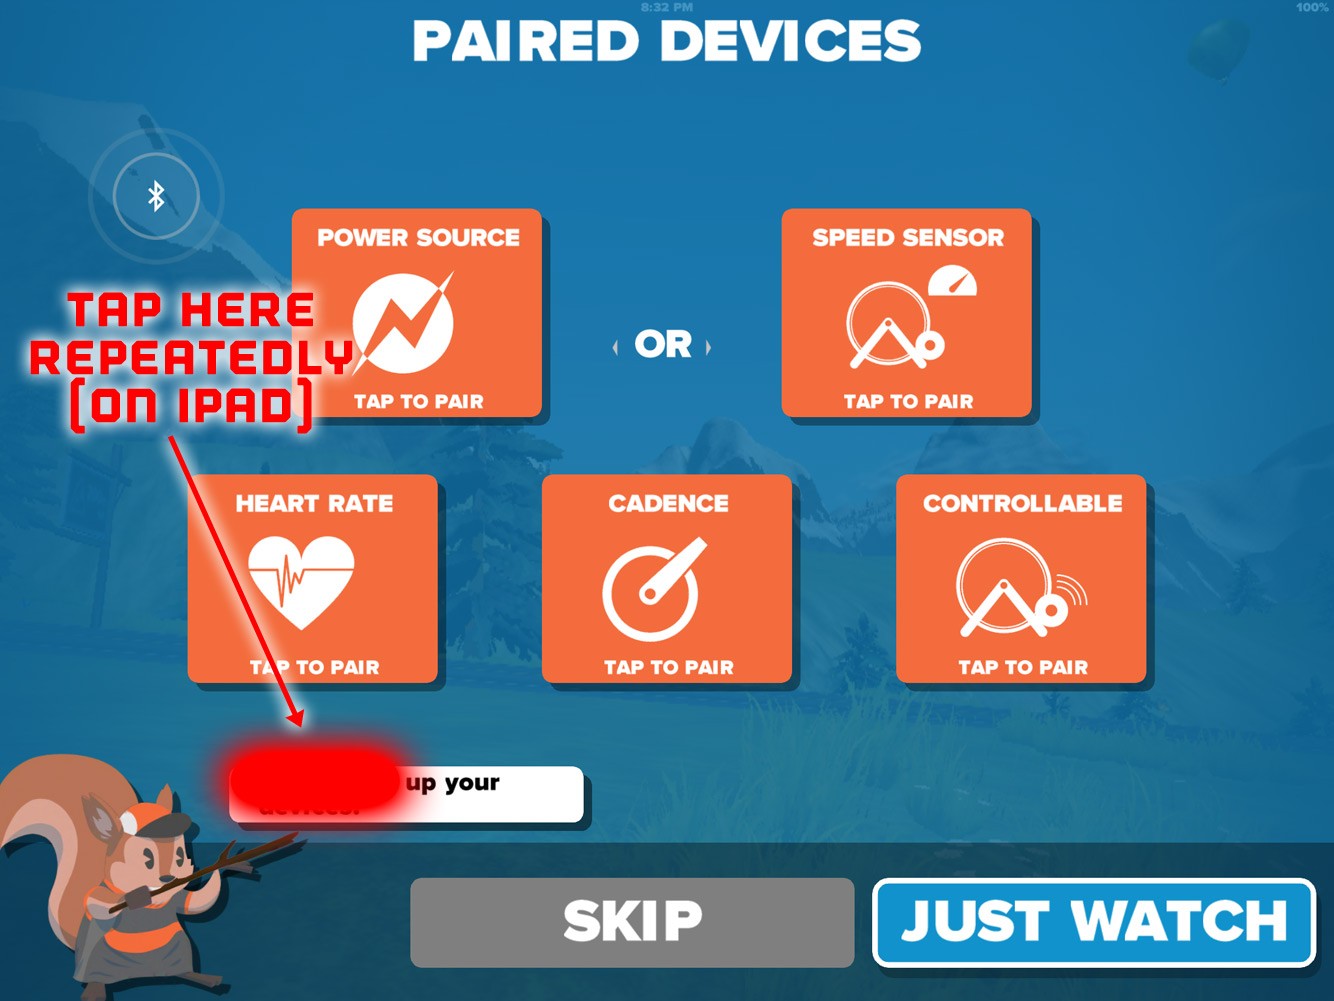
Once you’ve got your iDevice and pace sensor, the only tricky part is getting Zwift iOS into running mode. This involves tapping repeatedly on a certain area of the pairing screen, which we have highlighted below (the areas are different for different devices, but the areas below work on our iPad Air and iPhone 6s respectively.)
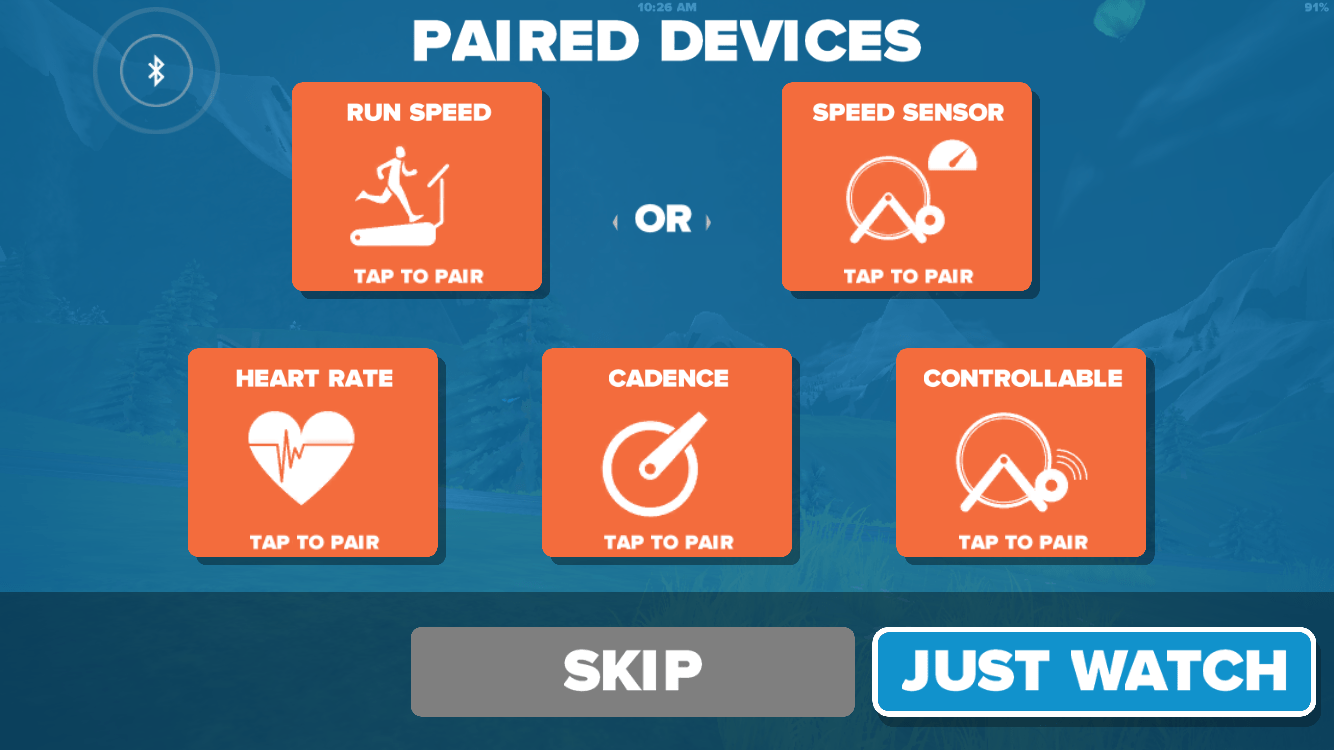
You’ll know you’ve tapped the right place when the top-left box changes to “Run Speed” with a treadmill, as shown below:
Tap the “Run Speed” box and Zwift will search for sensors putting out a pace signal via Bluetooth.
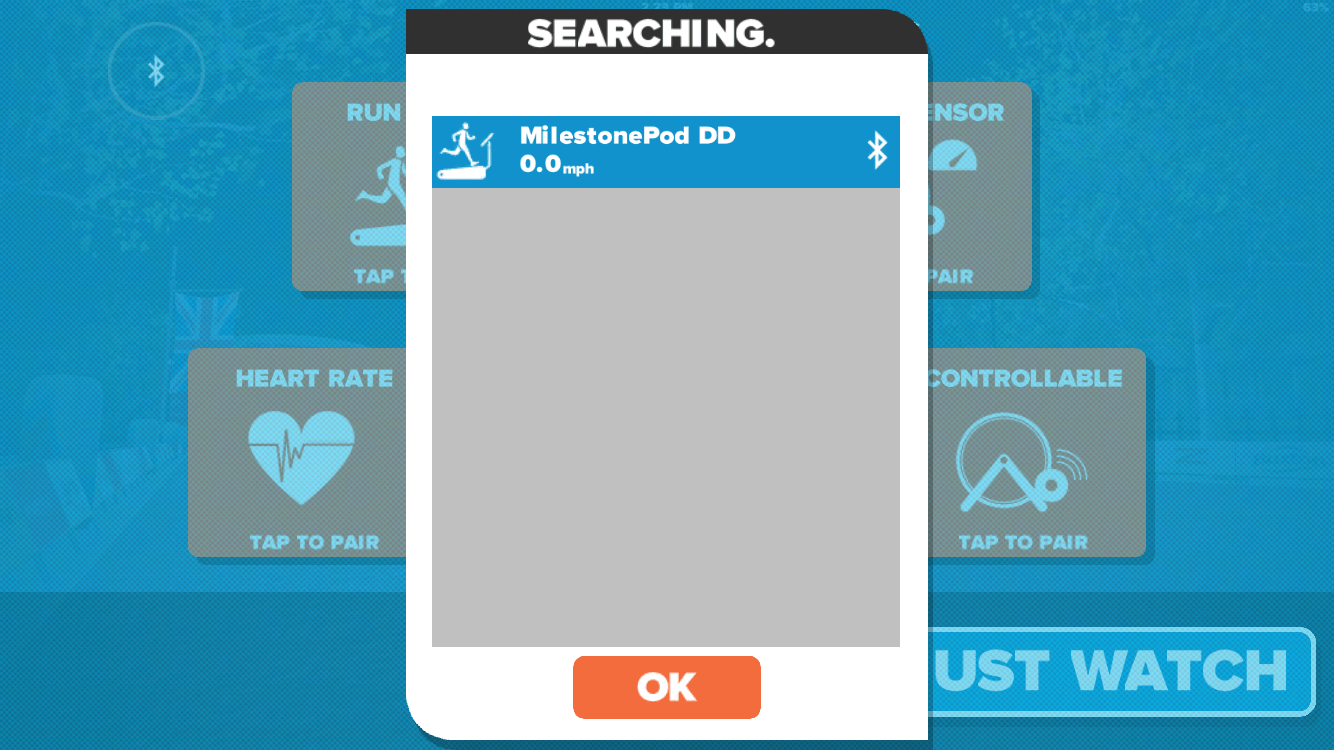
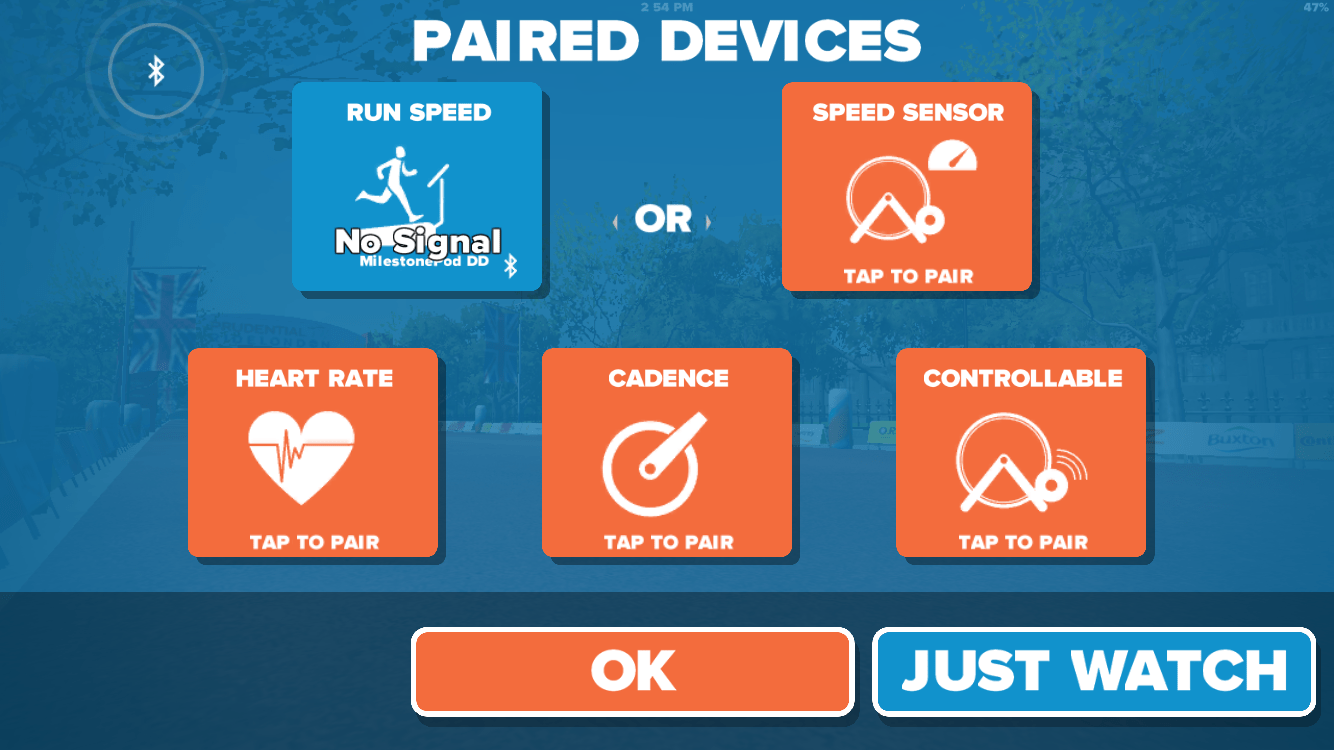
Once you are paired up you are ready to go! Just click “OK”, choose a course, and start running.
Strava Weirdness
Strava is currently labeling Zwift runs as “Virtual Rides.” The folks at Strava say they’re working on a fix, but until then you either have to live with this or hack your fit file and manually upload it to Strava. (Some folks have uploaded their fit file to Garmin Connect, set it as a run, then downloaded the file or had it sync to Strava).
Here’s a note from Strava on this issue:
From our end, we are waiting for Zwift to offset the GPS data on all run files. This would mean that all GPS data is shifted by some degree so as not to match run segments. Then Zwift data can upload as a normal run. For now, we are enforcing all Zwift data to upload as Virtual Ride.
From this comment is sounds like Strava is having Zwift “shift” the GPS coordinates of runs so they don’t match up with Zwift ride routes.
A Note About Pace
One big difference between running and riding on Zwift currently is running speed is based off of your pace (regardless of terrain in game) while riding uses your power and computes speed based on in-game terrain.
So if your running pace is 7MPH, you will be running at 7MPH up Box Hill, down steep hills, and on flats. Because of this, you may find yourself passing riders on steeper climbs!
