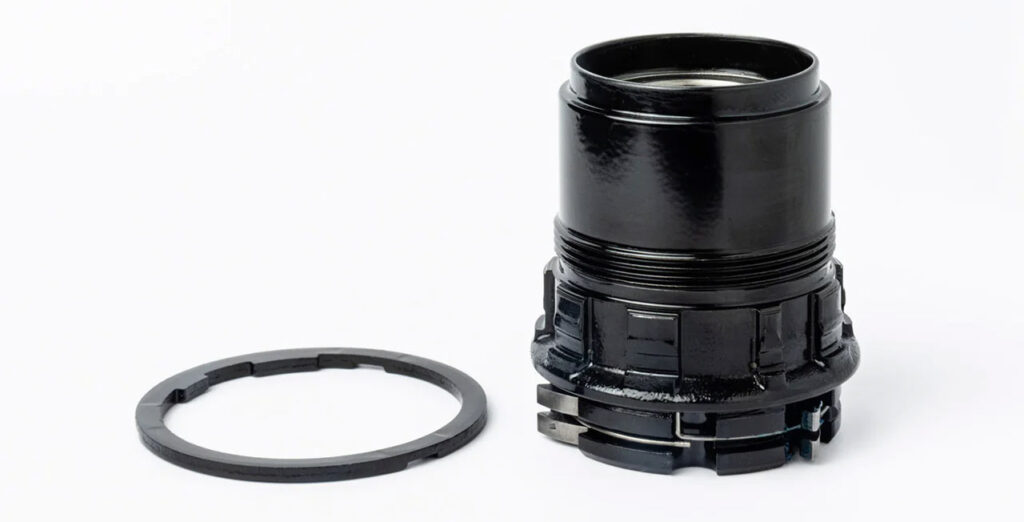
This week, Zwift announced that XDR-compatible freehub bodies (aka “drivers”) for the Zwift Hub trainer are available in the Zwift Shop for $39.99USD.

Who Needs an XDR Driver?
When ordering a Zwift Hub, Zwifters select the cassette they want: 8, 9, 10, 11, or 12-speed. In theory, this means the Hub arrives compatible with the Zwifter’s bike. Remove your back wheel, mount your bike on the Hub, and you’re ready!
But some SRAM users have requested the ability to swap out the Hub’s freehub body (which is a Shimano Hyperglide-compatible body) with an SRAM XDR-compatible one in order to mount a SRAM 12-speed cassette. Why would someone want an XDR-compatible freehub body?
- Using a SRAM-manufactured 12-speed cassette provides optimal shifting smoother performance for SRAM drivetrains.
- Selecting a Zwift Hub cassette with the same gear range as your bike’s cassette keeps your gearing “feel” consistent indoors and outdoors. (The 12-speed cassette shipped with Zwift Hubs is an 11-30, but standard SRAM Eagle 12-speed MTB cassettes are 10-50 or 10-52. That’s a difference you will feel!)
- Selecting a Zwift Hub cassette with the same gear range as your bike’s cassette minimizes the need to readjust your shifting when swapping on and off the trainer.
Note: Purchasing a SRAM cassette? Be aware that SRAM manufactures 12-speed cassettes compatible with Shimano HG drivers. Verify SRAM’s specifications to see which cassettes are for XD/XDR/HG drivers.
How To Swap Freehub Bodies
Step 1: Remove the Hyperglide-compatible gear cassette from your Hub trainer. This gives your tools easy access to remove the axle ends in the next step.
Step 2: Follow these instructions to remove the Hyperglide freehub body and install the XDR freehub body in its place.
Step 3. Determine if your SRAM 12-speed cassette is for use with road/gravel (XDR) or mountain bike (XD) drivers. XDR drivers are 1.85 mm longer than XD cassettes, and require a 1.85mm shim behind the largest cog to take up that extra space. More information about the difference on SRAM’s website.
Step 4: Only if needed – install one 1.85 mm spacer. Then slide the cassette onto the driver. The splines are shaped in a way that will allow the cassette to slide on in one position. Follow the instructions on the Support Hub.
Questions or Comments?
Post below!
