The Wahoo KICKR CORE has been a very popular trainer since its debut in 2018. As Wahoo’s first direct-drive trainer priced below the magical $1000 mark, the CORE basically had the specs of a quieter KICKR v3 (2% accuracy, 12lb flywheel) with a more basic, slightly less stable base.
The CORE’s base, it turns out, can be a bit annoying in certain situations. Its two steel legs have slip-on rubber caps for feet, meaning:
- You can’t adjust the left/right tilt of the trainer by adjusting the feet, as you can on higher-end trainers like the Wahoo KICKR
- The rubber caps can work their way off the legs in certain scenarios, tilting your setup and possibly marring your floor
The ability to adjust the trainer’s left/right tilt is underrated, in my opinion. Not only can it compensate for uneven floors, it can also compensate for a less-than-perfectly built trainer! As it turns out, welding a trainer so your bike mounts at a perfect 90 degrees isn’t as easy as it may sound. In fact, it may surprise you to learn that one thing Zwift measures for Zwift Ready certification is how close to perfectly vertical a bike mounts on each test unit!
With tens of thousands of KICKR COREs set up in training spaces around the world, I’m sure there are a fair number of Zwifters who have had to place shims under one side of their trainer, or pop the rubber foot back into place. And with the KICKR CORE shipping with the Zwift Ride smart frame, even more of these trainers are landing in homes.
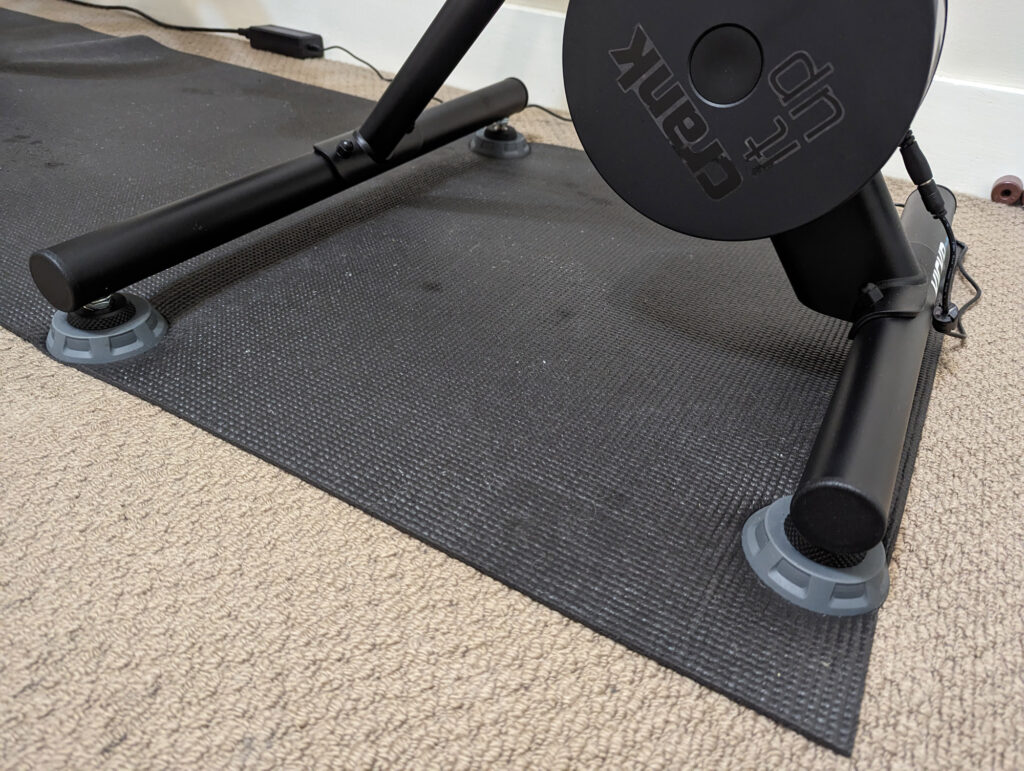
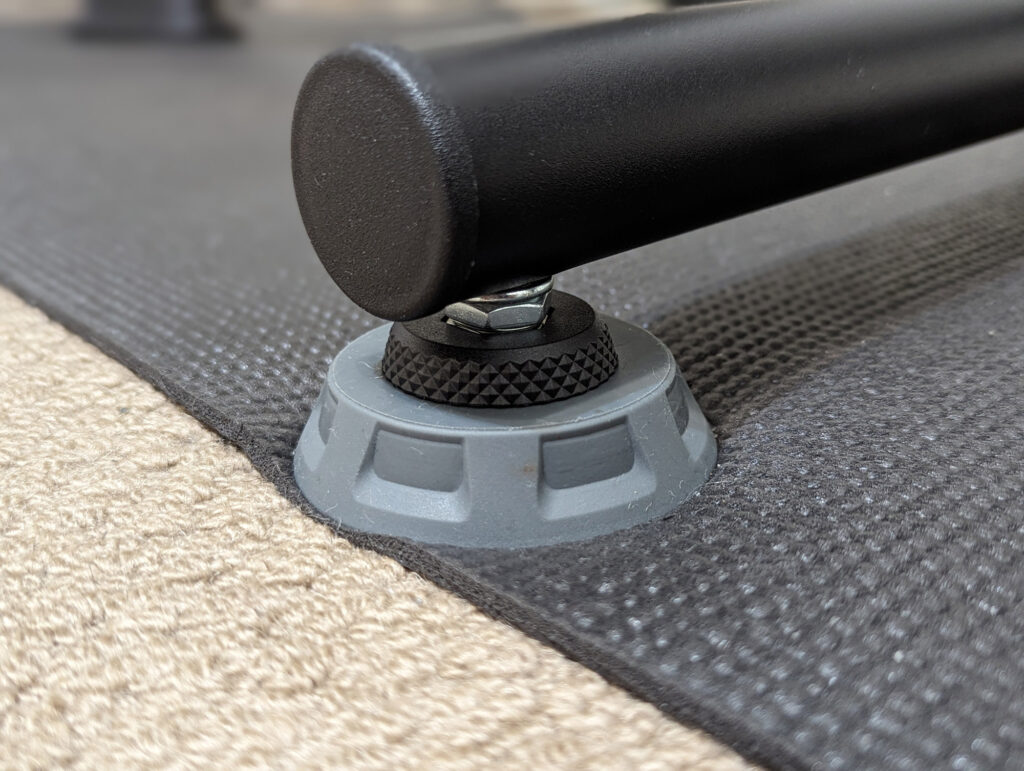
So when Zwifter Heath Brockett from New Zealand emailed me with a handy KICKR CORE hack, I knew I had to share it with the rest of you! Here are his pics:


As you can see, Heath has upgraded his KICKR CORE to effectively have the foot setup of a standard KICKR.
Parts List and Tools Required
- Steel M10 rivet nuts (4): Heath says, “not aluminum and not stainless steel as the steel ones are easier to set.” Here’s an Amazon link to a 50-pack, but you’ll save money picking these up at your local hardware store.
- Steel M10 half nuts (4): these are used to lock the threads in whatever position you want. Half nuts are used so the stack height is as low as possible. Probably best to pick these up at your local hardware store, too.
- Round Plastic Caps (4): Heath used these 42mm caps made for 3-5mm wall thickness. That’s a New Zealand-based website, though, and I wanted to source parts on Amazon. My measurements show the legs to be 40mm across with 2mm walls, meaning a 40mm cap like these from Amazon would do the job.
- Feet (4): Heath splurged and bought two sets of KICKR AXIS feet from Wahoo, as you can see from the pictures above. These are definitely the premium option, and they even add a bit of left/right sway to the setup! You could also buy a generic, heavy-duty foot like these on Amazon for a much lower price. Just make sure the foot is heavy duty enough to support the load, and the M10 bolt is short enough to fit inside the leg.
The only tool you’ll need that most folks don’t already own is a rivet nut tool. Here’s one on Amazon for $36 which also comes with the steel rivet nuts listed above.
You’ll also need a drill to bore out the hole for the rivet nut.
Wrapping It Up
With the four feet installed, you have the ability to adjust each one independently for a perfectly dialed-in setup. Of course, you’ll probably want to raise the front of your bike to compensate for the added foot height.
Hopefully this helps a Zwifter or two!
If it helped you out, or you have a question or comments, post below.