

You’ll want to grab your gravel bike for this one, because it’s all dirt. This short loop takes you up repeated partial climbs of the all-dirt Temple KOM. With approximately 1.5km of continuous climbing each lap, it’s a great route if you’re looking to do some VO2 intervals!
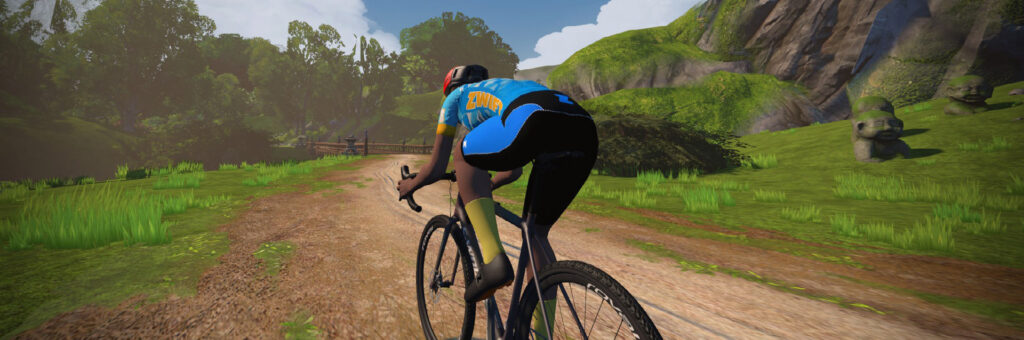
About Rebel Routes
“Rebel Routes” are Zwift rides not available on Zwift’s routes list, thus requiring manual navigation.
The reward for your rebel ride? Exploring a new route, knowing you’ve gone where few Zwifters have gone before. And a Strava segment rank in the tens or hundreds instead of the thousands! They are included as a separate category on our Veloviewer Route Hunter leaderboard.
Route Description
This route begins with a tough lead-in from your Sea to Tree spawn point to the top of the Temple KOM. Use this climb as your warmup, so you can smash out a lap of the Rebel Route!
Once you ride through the KOM banner in the giant mystical tree the Dirty Temple KOM Loop begins. Descend for 1.6km then hang a right onto the bypass trail. This 1km stretch of trail is rarely covered by official in-game routes (only Spirit Forest uses it, and that’s going in the other direction), but it’s a nice flat lead in to the upcoming climb.
Turn right to head up toward the KOM at the end of the bypass trail. Your finish line is the KOM banner where you began. Then you can decide if you want to do it all over again!
Profile
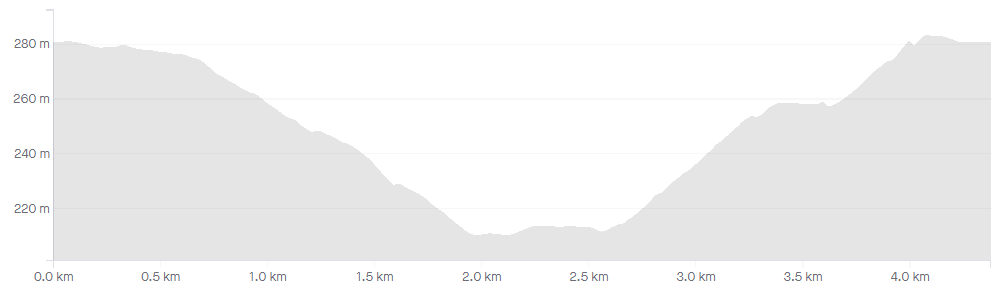
This route is essentially a short descent followed by a flat, finishing with a short climb. Repeat as many times as you’d like!
Getting Started + Lead-In
The easiest way to get onto this loop is to choose “Sea to Tree” from your Makuri Islands route options. This will properly route you up the Temple KOM in the correct direction.
Once you’ve passed through the Temple KOM banner in the giant mystical tree, the Dirt Temple KOM Loop route (and the need for manual navigation) begins!
Turn by Turn
Here are the turns you’ll need to make to successfully complete the Dirty Temple KOM Loop once you’ve begun by selecting Makuri Islands’ “Sea to Tree” and riding up to the KOM banner:
- Right to Fishing Village
- Right to Forest Climb
Route details:
Distance: 4.37km (2.7 miles)
Elevation Gain: 75m (247′)
Lead-In: 3.2km (2 miles), 106m (351′) of elevation
Strava Segment
Rebel Route Suggestions
Got an idea for a great rebel route? Share it below and maybe we’ll publish a post about it!


The railways only section of the rooftops and railways route would make a good short crit course. The little ramp on the lead in May split the pack up too.
I have a rebel route that gets to the Eadio Tower fast:
Start at Road to Sky pen
Turn left out of the pen
Turn right up Epic KOM Reverse already in progress
Turn right again up Radio Tower
Finish at Radio Tower banner
Total 6.9 k 485 m of climbing.
I don’t get these “rebel routes”, you have to steer manually at each turn right? Complete ballache, and doesn’t work on meetups or group rides, what’s the point? I *would* like to see zwift let you define custom routes though that actually automatically navigate you round once defined, that would actually be useful and make for much more variety.
Rebel Routes are for the adventurers and explorers in our midst, sir. Many Zwifters like to challenge themselves on the road less traveled. Plus, you can compete in the Veloviewer Leaderboard (https://veloviewer.com/zwift-insider/rebel-routes)!
Being able to define your own route would be fun. But I don’t see it happening any time soon.
You miss my point completely – I’m 100% for exploring more routes, more roads…. but only being able to do so by writing turn notes on a piece of paper and manually navigating… in 2022… is absolutely hopeless. It would be trivial to allow custom route definition, and is one of the most popular nad long-standing feature requests being ignored by Zwift.The current system of “rebel routes” cannot be used for meetups or events, and is clunky beyond belief even for individuals.
I’ve seen absolutely hopeless. This isn’t it.
A bit of manual navigation can make for a nice change of pace.
We still have group ride after-parties where we use manual directions. It’s not that hard and allows us to add an interesting variety to some of the group rides.
I tried this route today but I couldn’t change my Tron bike to a gravel bike. I tried like 10 times and gave up. Zwift…
I have a route I’ve made doing a figure 8 of the epic KOM, using the new(ish) KOM bypass road:
Start on the ‘mountain route’
After the suspension bridge turn onto the bypass road. Then turn left at the end of this do continue up the KOM reverse
Get to the top and descend all the way down the KOM to ocean boulevard
Turn left at the Jarvis tree, then left at the wind farm to start going up the reverse KOM
Take the bypass road again after the bridge, this time in the opposite direction, the continue up the front-side KOM
go over the top and come down the reverse side, then head back to the beginning of the KOM to do it all again (if you’re mad enough)
It basically follows the pattern of the ‘serpentine 8’ route, but on a bigger scale!
For me it’s a good challenge to do a sub-2 hour climbing ride, with 2 long climbs in there and some recovery in the middle.
We’ve actually got one like this planned as a Rebel Route release soon. Another Zwifter suggested it about a month ago!
Great minds and all that!
Hi Eric-
Long time reader first time writer, thanks so much for these great articles. Quick potential edit – both links to “Sea to Tree” instead take you to the “Mountain Route” page. Thanks!
Gah! Fixed.
There’s one other section of road that’s only used in one route: the section of connecting road in the farmland area that (afaict) is only used in the Two Village Loop route. So an idea for a rebel route might be to use these two sections of route in one rebel route. We could make a loop similar to Flatland loop but take the under-used road in the farmland area instead of the longer route that goes by the link to Neokyo, and then in the temple area use the under-used route that this rebel route uses
I think the Onsen Village loop is very under utilized as well as the three flat dirt tracks in Yumezi. My suggestion would be start ar pens near fishermen’s village, turn right towards Onsen village. Turn left when entering village, do full loop, turn right through village center, turn left at end of village and do loop counter clockwise, then turn right to exit village and descent. Turn left after sprint thenn turn right onto dirt section.
Turn left towards finish arch, and climb up passing the claw, turn right and and turn right againonto dirt path. Turn left to take KOM bypass, turn left at end then turn left when hitting the tarmac. Turn right onto final dirt section and turnleft at end to go towards Onsen and repeat the loop.
You lost me somewhere after the village, but I like it.