UPDATE: Automatic cloud sync of workouts is now active in Zwift, so the easiest way to get your custom workouts onto your iDevice (phone, tablet, AppleTV) is to create or download the workout on a Windows or Apple PC, boot up Zwift on the PC so that workout is copied to the cloud, then boot up Zwift on your iOS device to sync with the cloud.
If you don’t want to run Zwift on your PC you can still use the process below to manually modify the contents of your workouts folder on your iDevice. But you will still need to use a PC!
The process is actually pretty easy once you’ve got it set up. You only need to install a piece of software that lets you browse your iDevice’s files from your computer. Once that is done, copying your existing workout files to your iDevice is as easy as dragging and dropping them to the proper location. (Note: see “Additional notes” at the bottom of this page for alternative methods of copying workouts.)
Copying Workouts to Zwift for iOS:
- Download the file explorer software. After a bit of research, I chose to install iFunbox since it was free and well-reviewed. You can download it for Mac or Windows here >
- Connect your iDevice to your computer via USB and run iFunbox.
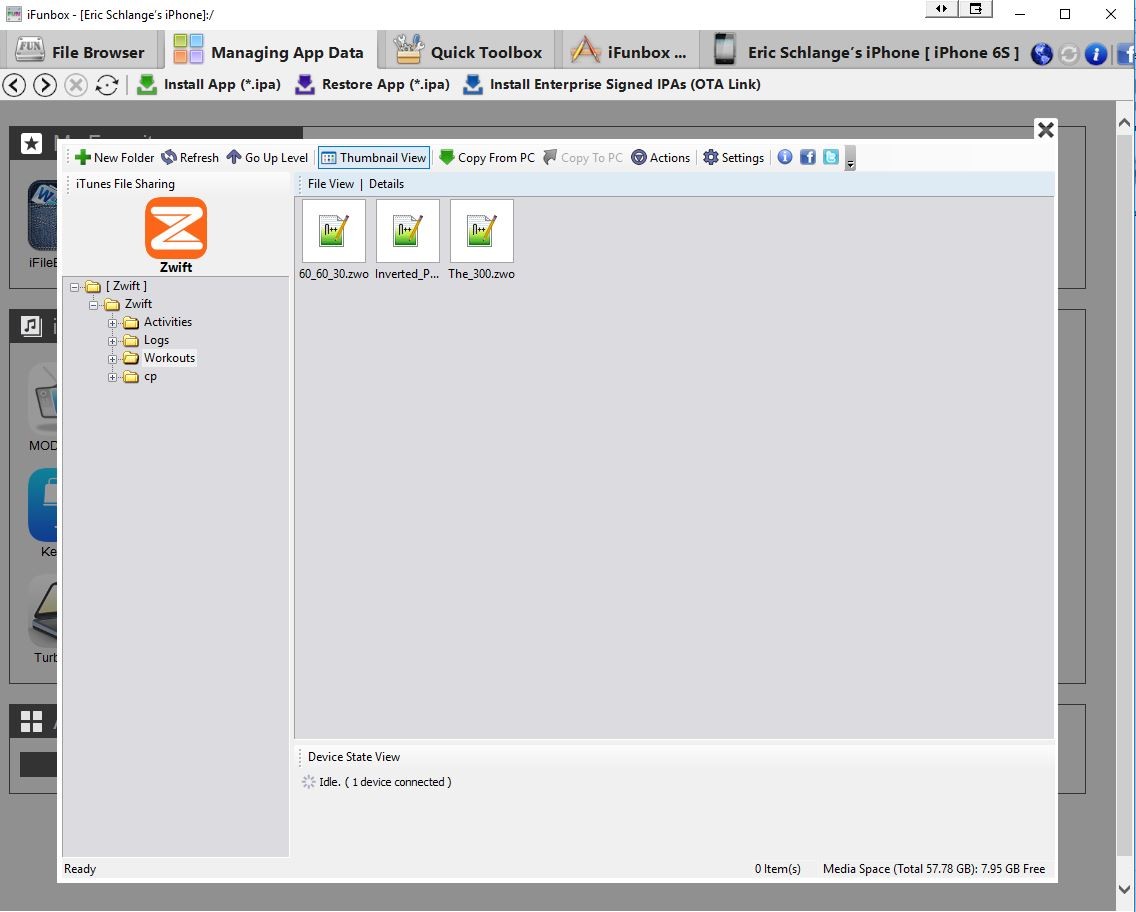
- In iFunbox click “Managing App Data” then click on the Zwift app under “iTunes File Sharing” and choose “Open Sandbox.”
- Double Click the “Zwift” folder to open, then double-click “Workouts.”
- Click the folder with your Zwift userID.
- This is the folder where you should place your custom workout files. Just drag and drop them in and you’re set–run Zwift on your iDevice, select “Choose Workout” and your workouts will show up.
Additional notes:
- iExplorer is another popular (but not free) alternative to iFunbox.
- You can also copy workouts using only iTunes, although the process is different. See instructions here >


